If you’re thinking of taking up birdwatching or birding, and are looking for a beginner’s guide to birdwatching, you’ve come to the right place. I’ve always enjoyed watching birds, and as a professional photographer I’ve enjoyed photographing birds for many years.
However, it’s only recently that I’ve started to take the time to learn more about all the different birds we encounter on our travels, and take birdwatching a bit more seriously.
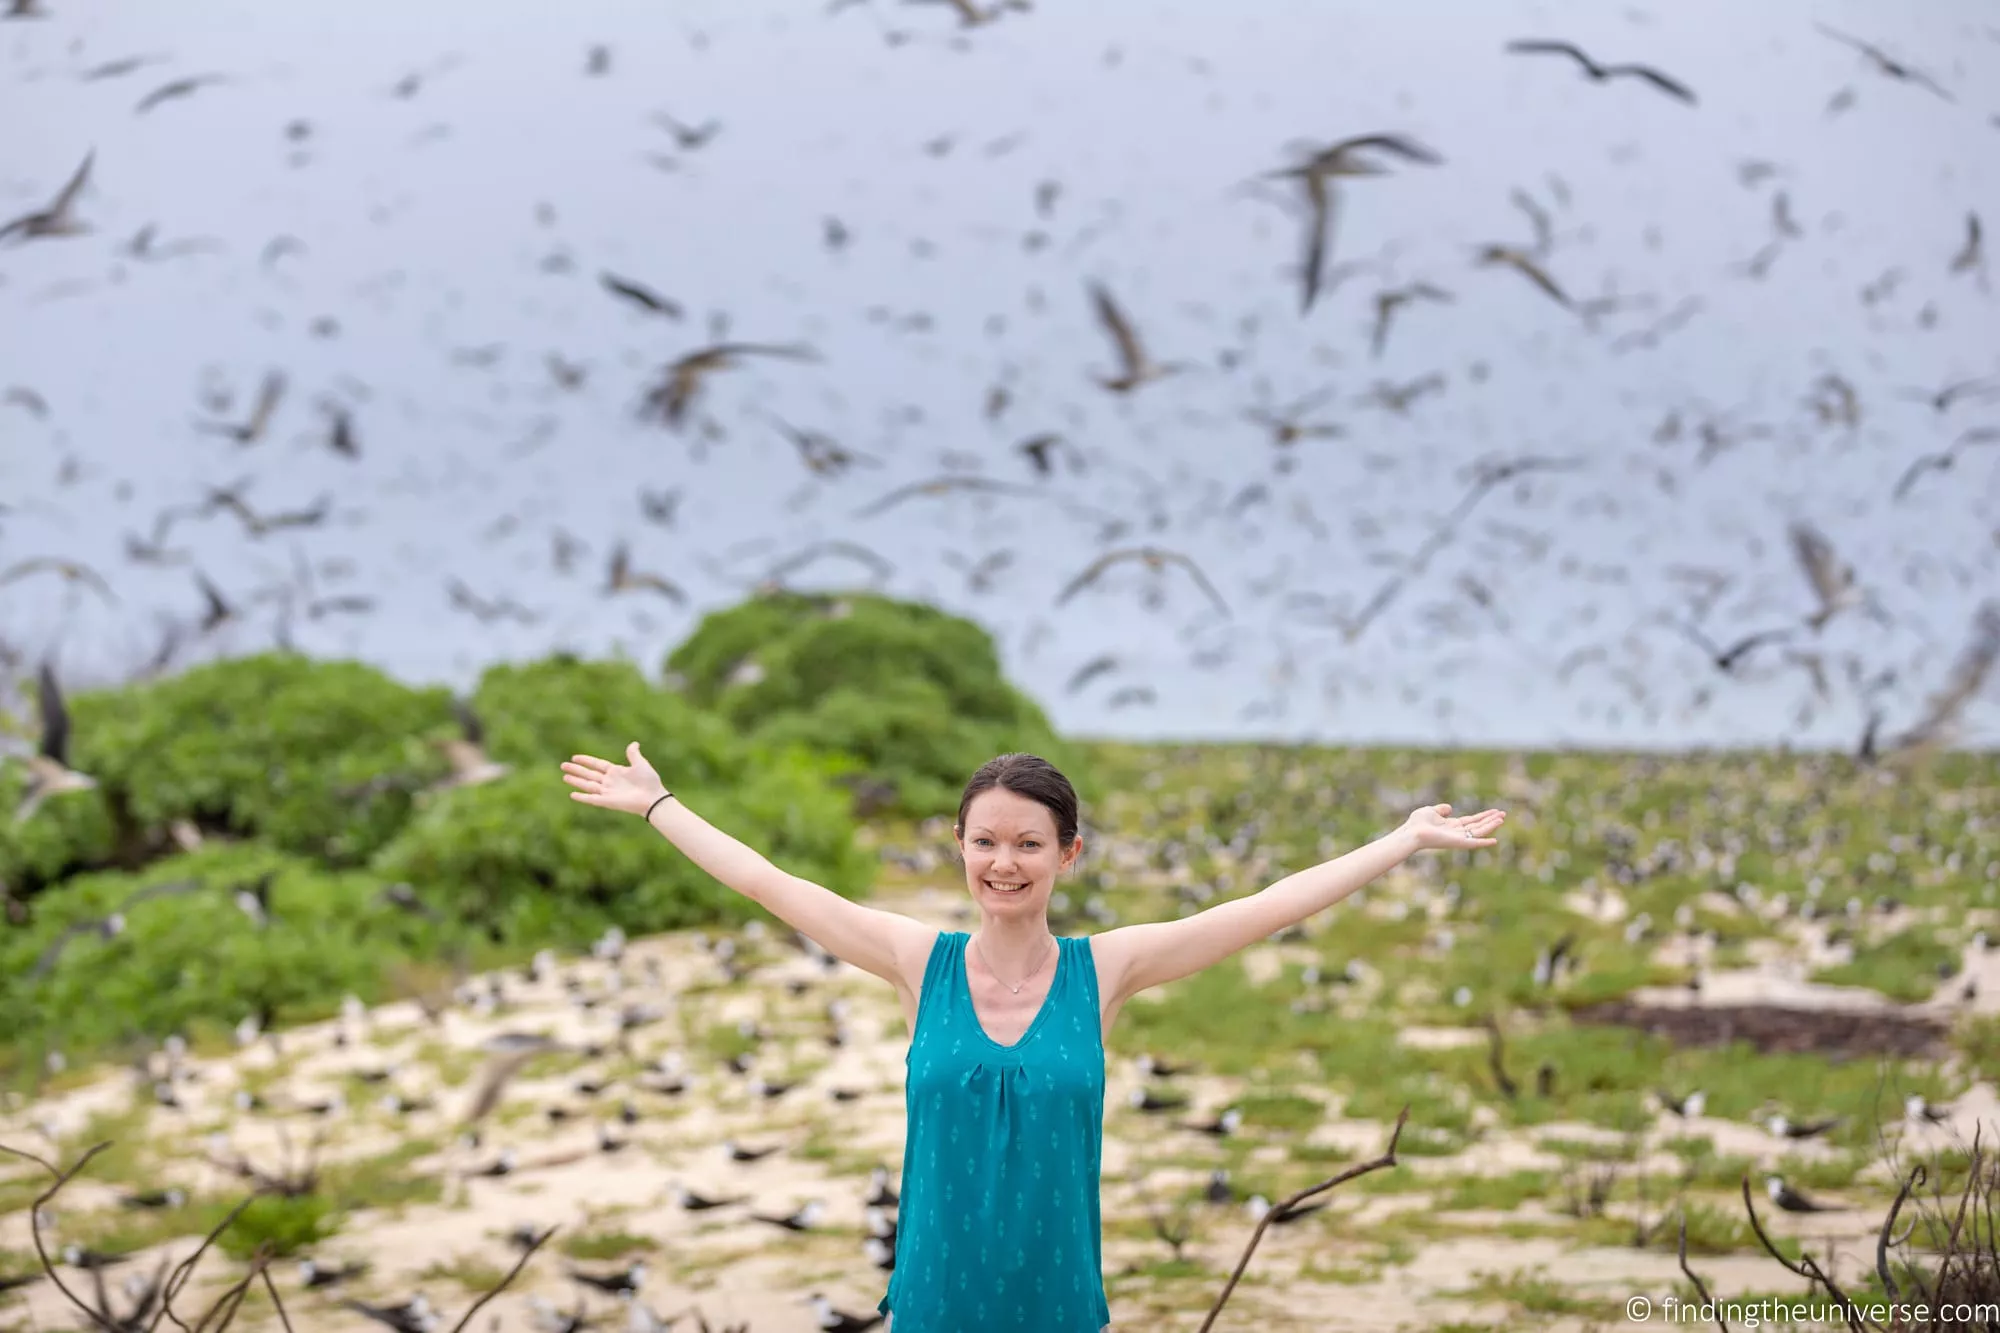
When I was young, I actually lived on a small island called Bird Island, home to literally millions of seabirds. It also had lots of migrant arrivals, meaning that I got to see and experience a lot of quite rare and unusual birds. In our travels, we’ve also seen many birds of all types and sizes.
The good news is that you don’t need to travel to see birds. Depending on where you live in the world, you’re likely going to be able to see birds just by looking out of your window! That makes birdwatching a very accessible hobby that pretty much anyone can take up.
In this post I’m going to share with you some things I’ve learnt about birdwatching that I think will help you on your journey. I’ll share a range of thoughts, from the benefits of birdwatching, through to tips on useful equipment, bird identification, and making your home more attractive to potential birds. First though, let’s answer a question.
Table of Contents:
What is birdwatching?
As the name suggests, birdwatching, or birding, is an activity where you watch birds! This is a form of general wildlife observation. It can be done either as a recreational hobby, or for scientific purposes.
Birdwatching can be done with no equipment at all, but is often done with a pair of binoculars. You can also birdwatch with some form of telescope or spotting scope, or with a camera.
Many wildlife photographers are also birdwatchers, although their end goal is often to get a great photo rather than the simple pleasure of watching birds.
You can also birdwatch virtually, by watching bird specific webcams on the internet. These are often positioned in locations that would be hard to reach, or which offer a unique perspective, such as in a nest or remote locations.

What are the benefits of birdwatching?
Birdwatching has a number of benefits.
First, if you’re looking for a new hobby, birdwatching is an easy and inexpensive option. You can start without any equipment, and you can do it almost anywhere, including in your garden, backyard, or just out of your window.
It’s also a very accessible hobby. It can be done by people of any age or level of mobility. You can birdwatch on your own or with others, and it’s an easy hobby to do as a group with social distancing measures in place.
We find birdwatching to be a wonderfully relaxing hobby as well. Spending more time outdoors has shown to have a positive effect on both our mental and physical health. A study from the University of Exeter in England found that people living in neighbourhoods with more birds, shrubs, and trees are less likely to have depression, anxiety, and stress.
It also gets us outside, and takes us to new locations for a chance to see birds we haven’t seen before. Birdwatching can also lead to other interests including learning about other wildlife, like plants, insects, and animals.
If you have kids, birdwatching can also be a fun hobby to do as a family, and it can help encourage your kids to get more connected with wildlife and the environment.

How to get Started with Birdwatching
Basically, you just need to step outside and look for birds! But there are two things I’d recommend investing in that will really take your birdwatching to a next level. These would be a decent pair of binoculars and a local bird guidebook.
I’d also recommend checking out free online local bird watching websites and resources.

Binoculars for Birdwatching
If you are not sure if birdwatching will be a long-term hobby, then you might start with a cheaper pair of binoculars to keep the costs down as you start out. For instance we had a pair of tiny travel binoculars that had been given to us that we first started with before upgrading.
However, if birdwatching becomes something you become really interested in, then investing in a better pair of birdwatching binoculars will definitely improve your experience.
Binoculars are what you will be using for the majority of your birdwatching experience. They’ll let you get a closer view of the birds you’re watching, which both helps with species identification and also allows you to observe birds from a distance without disturbing them.
In much the same way as photography gear, there is a huge range of binoculars on the market across a wide variety of price points. Binoculars are available for a variety of uses, from birdwatching, through to other uses like hunting and star gazing. As a result, there are a lot of options on the market, some of which are better for birdwatching than others.

Features to look out for and think about when choosing a pair of binoculars for birdwatching include the following:
Optical magnification for birdwatching binoculars
This refers to how much the binoculars will magnify a scene. Birdwatching binoculars usually offer a magnification of anywhere between 7x and 10x.
Most birdwatchers recommend binoculars with around an 8x magnification, which will make birds seems eight times larger than viewing them with the naked eye.
This allows for a good bright image with a nice wide field of view whilst not being as heavy as a larger magnification might be.
Whilst bigger might seem better, a larger zoom binocular like 10x can make finding your subjects harder as there’s a narrower field of view as a result of the longer zoom. They can also be heavier, and harder to hold still as a result. In addition, the larger magnification exaggerates any movement from handholding, which can result in a more shaky view.
Lens diameter for birdwatching binoculars
As well as magnification, binoculars will have a lens diameter specification which is measured in millimetres. This diameter measures the larger front lens, which is known as the objective lens.
As an example, you might see binoculars that are labelled as 8 x 32. This means the magnification is 8x, and the diameter of the larger lens is 32mm.
A larger diameter lens allows for more light to be gathered, resulting in a brighter image. However, larger lenses are often more expensive and also will usually be heavier.
General use bird watching binoculars usually have an objective lens diameter between 25mm and 42mm, with 42mm often recommended as it offers good image brightness without being too heavy.
Larger mm diameters are also available, however these are generally more aimed at those hunting or using the binoculars for other low light activities such as star gazing. Whilst they will of course work for birdwatching, the added weight can make them impractical for regular use as you walk around.

Weight
The weight of the binoculars you are thinking of buying is important. You’ll be holding them up to your eyes for prolonged periods of time, and carrying them with you the rest of the time. Because of this, you’ll want a set that you can hold comfortably without getting tired arms.
Those who are using their binoculars mainly at home may not care as much about weight as those who plan to take them hiking or traveling a lot where size and weight of are more concern.
Weight varies, from around 300 grams (10.5 oz) up to over 1.3 kg (3 lbs). I’d generally recommend that a pair of binoculars for every day birdwatching which involves you walking between locations should weigh no more than 750 grams (26.5 oz).
Of course, this weight will depend on your physical build and what you are comfortable with, but I think 750 g is a good upper limit for most birdwatchers.
Waterproofing
Birdwatching is generally a year round activity, with different birds visible at different times of year. As such, you are likely going to want a pair of binoculars that can withstand a variety of conditions.
Binoculars come with different levels of water resistance, from none at all, through to those that can withstand some water, through to fully waterproof binoculars that will handle pretty much any water condition you throw at them.
Given the weather here in the UK, we chose binoculars that are waterproof so we don’t have to worry about them when it rains.
I’d suggest some level of water resistance would be good for everyone, and full waterproofing would be ideal. Of course, the final decision will depend on you and how you plan to use your binoculars.
Glass Quality for Birdwatching Binoculars
Like a camera lens, binoculars are made up of a number of glass elements. These are what focuses and magnifies the light, ultimately giving you the larger view of whatever you are looking at.
Also, just like a camera lens, the quality of the glass and the coatings applied to it are vitally important to how well the binoculars perform. Higher quality binoculars will have higher quality glass, usually combined with one or more special coatings. These work together to improve image quality.
For the glass, you will want to be looking for binoculars which feature what is known as extra low dispersion glass (ED glass) when shopping for a higher quality pair of binoculars. This greatly improves image quality by reducing what is known as chromatic aberration. This appears as odd colored fringing around the edges of subjects.
The coating on the glass also affects the image quality. By coating the glass used in binoculars with specific materials, the transmission of light can be improved, resulting in brighter images.

Dioptre Controls
Unlike a telescope or camera, a pair of binoculars has a lens for each eye. Something to be aware of is that our eyes don’t necessarily have exactly the same focus capability. Our brain usually adjusts for this small difference so we don’t notice, or we wear glasses with different strength lenses for each eye to compensate.
With binoculars, the magnification factor exaggerates this difference. This means that you need to set up the binoculars for your eyes so you can get a sharp focus. Most binoculars have two focus controls.
The first is the main focus wheel which is what you would use most of the time to change focus on both lenses.
The second controls focus for an individual lens, and is known as the dioptre control. It’s usually found on the right hand side barrel, and needs to be properly set up for your binoculars. There’s a good video here on doing that.
Pretty much all binoculars have dioptre controls, but some feature more advanced options like the ability to lock the dioptre focus so it can’t accidentally be changed.
Other Features to look for in birdwatching binoculars
For something that looks relatively simple, binoculars have a range of features to consider when purchasing. These include things like adjustable eye cup sizes, fog proofing, type of construction material, and so on.
These features can all add to the functionality of the binoculars, but also to the price. So just consider carefully what you actually need when making a purchasing decision.
Some features will be more important to some users than others, for example adjustable eye cups will be useful to those who wear glasses. So definitely pick the binoculars that work best for you.
There’s a great video here on setting up a pair of binoculars for you, which goes through different controls and settings a pair of binoculars will have.
Price for birdwatching binoculars
There’s a huge range of binoculars on the market at a range of price points, starting from around $60 and going up into the $1000+ bracket.
There is of course a good return on your investment as you go up in price, but as with many things, these returns can diminish as you get to the more exorbitant prices. As an idea of ranges expect to pay:
- $50 – $150 for a more budget pair of binoculars
- $150 – $500 for a good mid-range pair of binoculars
- $500+ for a premium pair of binoculars
Honestly, we’d say that if you are just starting out and dipping your toe into the water, a more budget pair of binoculars might be a good starting point, such as this lightweight Vesta 8×25 pair from Vanguard (save 20% on the price by using our exclusive discount code FindingTheUniverse at checkout).
If you are thinking of taking birdwatching a bit more seriously, then we’d suggest the majority of users will be happy with a good pair of mid-range binoculars, which should suit most needs.
We currently use the wonderfully bright but still reasonably compact VEO HD2 8×42 binoculars from Vanguard (save 20% on the price by using our exclusive discount code FindingTheUniverse at checkout).
If you buy your binoculars direct from Vanguard, you can save 20% on the price by using our exclusive discount code FindingTheUniverse at checkout. This discount code works for any product on the site, and is good on the Vanguard USA, UK, Australia, Spain, and Germany stores.
Example Binoculars for Birdwatching
There are hundreds of binoculars for birdwatching, across a range of price points. Here are a few examples, ordered by price, to give you an idea of what is available on the market today.
- Vanguard Vesta 8×25. This is a great entry level option if you’re just getting into birdwatching and don’t want to spend a fortune. They a very light build which have both waterproofing and fogproofing. These are a great value option, plus you can save 20% on the price by using our exclusive discount code FindingTheUniverse at checkout on the Vanguard store.
- Celestron Nature DX 8×42. This is a well regarded and popular budget option. Fog and waterproof with a tough construction.
- Vortex Optics Diamondback HD 8×42 – often regarded as the best birdwatching binoculars under $200. Just be sure to get the HD version which features low dispersion glass for improved image quality. We own this pair of binoculars.
- Vanguard VEO HD2 8×42 binoculars – an excellent, well priced and still reasonably compact pair of binoculars featuring extra low dispersion glass carbon-composite construction, waterproofing and fogproofing. We own this pair of binoculars, but the price has gone up since we bought it. Note that Vanguard make a number of different options and have updated their models since we purchased, so take a look through their offerings to see what works for you..
- Nikon 8×42 Monarch M5 – lightweight, durable, waterproof and fogproof. Nikon make quite a few binoculars, and these are a popular mid-range option.
- Swarokvski 8.5×42 – we had a pair of Swarovski binoculars loaned to us for several months, and they are magnificent, with wonderful bright and sharp images. This pair offers excellent performance, but are definitely at the premium end of the price spectrum!
Note that if you buy your binoculars direct from Vanguard, you can save 20% on the price by using our exclusive discount code FindingTheUniverse at checkout.
This discount code works for any product on the site, and is good on the Vanguard USA, UK, Australia, Spain, and Germany stores.

Get a Local Bird Guide
The other thing you’re going to need that will help improve your birdwatching is a bird identification guide. This can be a physical book, a digital book, or even an app. The main thing is to buy something that you will have with you when you are actually out bird spotting.
There are quite a few bird guides on the market. We’d recommend one that is focused on your local region, such as a state, or your country. This will usually have all the most common species that you are likely to see, as well as popular migrants.
We’d definitely suggest buying a bird guide which has full color representations of the birds, either as color photos or illustrations, as this will make identification a lot easier.
Other features to look out for are guides which include information on where you’re likely to see a bird, and at what times of the year.
Some popular bird guides for different regions include:
- National Geographic Backyard Guide to the Birds of North America
- Peterson Field Guide to Birds of North America
- Collins Complete Guide to British Birds (the guide we use in the UK)
- RSPB Handbook of British Birds
- RSPB Pocket Birds of Britain and Europe
- The Australian Bird Guide
Of course, there are many more bird guides on the market that cover more regions, as well as more focused guides which narrow in on a specific area, like a state, island, or province.
Just bear in mind that if you are going to be out walking around, you likely don’t want something that is too heavy as you might not want to bring it with you. For this reason, a more narrowly focused guide can be a better option.
You might also prefer to have an app on your smartphone for bird identification, or to use an app in addition to a physical book.
In this case, we recommend the free Merlin Bird ID app, available for both iOS and Android. This app is developed by the Cornell Lab of Ornithology, and has over 40,000 bird images available. It asks you a few questions to help you identify unique birds, and it also have the ability to identify a bird from a photo.
In addition to learning to identify birds by sight, you’ll also over time also begin to identify birds by their sounds. Unfortunately, descriptions of birdsong and sounds in books can only help so much, so being able to listen to birds on an app or on a website is really helpful.
There are a lot of free and paid websites and apps that where you can hear the sounds of individual species. Some will even try to identify birds based on your own recording like Song Sleuth and BirdGenie although both are paid apps and only work with common North American bird species.
If you know the species, you can also just type in the bird species into a search engine (e.g., “green woodpecker sound”) and you’ll likely find a number of free audio and video recordings.
A free resource we recommend is the previously mentioned Merlin Bird ID smartphone app which includes more than 29,000 curated audio recordings from species from all over the world.

Check out Online Resources
There are some great online resources for learning about birds and getting into birdwatching in general. These are general global sites like Birdlife International, but we’d suggest that more localised sites are likely to be of more interest.
Local websites dedicated to birds will let you learn more about the local birds you might see in your area, ask questions in groups, get information about recent sightings, find like-minded people in your area, get ideas for places to visit, learn about local resources, etc.
There are a variety of options for finding online resources relevant to you, depending on where you are in the world. You might have a local or national society which runs a forum you can join, or maybe there’s a social media group for birdwatchers in your area.
There are also general national websites dedicated to birds and birding information, such as the RSPB in the UK, and the Audubon Society and the American Bird Association in the USA.

Ways to Attract more Birds to Your Property
If you have access to some outdoor space, you might be interested in what can you do to attract more birds to your garden, balcony, or yard. This is a great way to improve the variety of birds you can see from your home.
In addition, you can really help your local birds out by providing them with a regular food supply, something that is particularly important over the colder winter months for example. It’s a win-win situation!
Of course, you’ll want to be sure you don’t do anything that could potentially cause harm to the birds or other local wildlife. For example, you won’t want to feed them unhealthy foods that they wouldn’t normally eat, or put nesting boxes within reach of your pet cat! So it is good to do some research first!
Here are some easy ways you can attract more birds to your property:
- Install nest boxes, which you can either buy or make yourself. Be sure to get a nest box that is the right size for your local birds, and install them somewhere safe from predators
- Install a bird feeder, and ensure you keep it topped up with feed as your local birds may come to rely on it
- Put a bird bath in which birds can use to bathe and drink from.
- Provide shelter of some sort that birds can use to keep warm and safe overnight
- Provide natural food sources, by planting shrubs, vegetables, and plants that birds eat
- Hedges, wildflowers, trees, etc. can also attract insects which will in turn attract more birds
You can read some more ideas for attracting birds to your garden here.

Ideas for Where to go Birdwatching
Even if you are lucky to have plenty of birds in your own backyard, chances are you will also want to see birds elsewhere. If you are limited in your local area, perhaps because you live in a city, you will definitely want to head elsewhere
The great thing is that birds live just about everywhere from Alaska to Antarctica and in just about every type of setting from city parks to wetlands to forests to the Arctic tundra.
Some bird species like to live near humans and others tend to be very secluded and try to live far apart from people. Since many bird species tend to prefer a very specific type of habitat (e.g., moorland, forest, freshwater lakes, river banks, hedgerows), even relatively close places can yield very different bird species.
Here are some ideas for places you are likely to have a good chance to see a variety of bird species.
- City parks
- Forests and any type of wooded area
- Bird preserves
- Hiking trails
- Wetlands and estuaries
- Along rivers and lakes
- Cliffs and coastlines
- Regional and national parks
- Bird reserves and nature reserves
- Online! You can also check out webcams of birds from around the world without living your house.
As you can see, there’s no shortage of options for when it comes to find somewhere to see birds in the wild!

How to Join the Birdwatching Community
If you find that you want to chat with other people about birds, find others who share your passion, and have some company on some of your outings, then you might consider taking part in the birdwatching community.
Millions of people around the world enjoy birdwatching, and there are groups you can join all around the world to share your birdwatching experience with.
These groups vary in scope and size, and are often available both online and offline. We’d definitely recommend trying to find a local birding group where you’ll be able to meet up with and chat to other local members who share your interest in birdwatching.
If you search for local birdwatching groups on the Internet or on your favorite social media platforms you will hopefully be able to find a local community of birdwatchers. Facebook, for instance, has hundreds of bird related groups.
The activities available through local birdwatching groups will of course vary. They can involve anything from online discussions, through to local birdwatching meetups, through to bigger trips and birdwatching holidays.
Another option that might be open to you is to volunteer for a local bird preserve or conservation group. This can be a great way to meet other bird watching enthusiasts, watch birds, and give some of your time to the community at the same time.
Finally, you might consider joining a local or national bird organization, such as Audubon in the USA, or the RSPB in the UK. These societies normally send out birdwatching magazines, and membership often comes with benefits such as free access to nature reserves and sometimes discounts on equipment.

Online Birding Resources
There are a myriad of websites and resources available to help you learn about birdwatching. You’ll find everything from websites that can help you identify birds, through to sites that can guide you through building your own bird boxes, through to online communities, birdwatching webcams, and much much more! Here are a few to check out and get you started.
- eBird.org – this is a great website for keeping tracking of your bird sightings, and also discovering species around you. Over 100 million bird sightings are contributed annually to the platform, and this can be a great way to find a spot for a sighting of a bird you want to see
- All About Birds – with tips on bird identification, ideas on feeding birds, and lots of tips and tricks on bird watching in general, this is a great resource for learning about bird watching
- The UK’s RSPB website has some excellent information and lots of tips on birdwatching. There’s also a wildlife forum. In the US, check out the Audubon website.
- Bird Forum – billed as the largest online forum for bird watchers, this site has hundreds of thousands of users from around the world who come together to chat about all kinds of birding

Beyond Beginner Birdwatching
Once birdwatching has become a true hobby, and not just a passing interest, you might want to start investing in some additional equipment to make it easier, more enjoyable, and to allow you to better see the birds.
We wanted to share some equipment that you might find worthwhile investing in to enhance your birdwatching experience.
Outdoor Clothing & Gear
Birdwatching is an activity which is often done outdoors, and so investing in some good outdoor clothing and equipment is a great idea. The majority of this type of clothing is general outdoor clothing; however, you will likely want to consider investing in items which are specifically suited to birdwatching.
This means clothes with colors that blend into a natural background, like greens and browns. There’s a lot of overlap between clothing that works for birdwatching and clothing that works for hunting, as the idea is not to stand out.
Luridly colored wet weather gear is good for helping you get found if you’re lost on a mountain, but not so suitable for birdwatching! Some items of clothing and other gear to consider investing in are as follows.
Waterproof boots
A good pair of waterproof hiking boots is a great investment for all kinds of outdoor activities, including birdwatching, as you will likely find yourself in muddy and wet environments.
Outdoor clothing
We’d recommend waterproof outdoor clothing to include a waterproof rainjacket and waterproof pants, although of course this will depend on where you are in the world and the conditions you are happy birdwatching in. You’ll also want to consider other layers and factors including temperature.
Hat
Depending on where you are, you will want either a wide-brimmed hat to keep the sun off your head, or a warm hat to keep your head warm in cooler temperatures
Daypack
Most birdwatching trips last a few hours, so a daypack is a good investment. You’ll want something large enough to carry your bird guide, binoculars, snacks and water, an extra clothing layer, etc.
We’d recommend a comfortable hiking style backpack around 20L – 30L in size, and ideally one that has a waterproof cover.
More Advanced Birdwatching Equipment
As well as clothing and gear, there is some more specific birdwatching equipment you might consider investing in to improve your birdwatching experience.
A better pair of binoculars
If you started your bird watching journey with a more budget oriented pair of binoculars, upgrading to a mid-range or high end pair of birdwatching binoculars will let you get a clearer, brighter, and sharper view of birds.
There are a great many binocular options to choose from across a range of budgets. See the section in this guide on birdwatching binoculars for more ideas.
A birdwatching telescope / scope
Whilst binoculars can magnify up to around 12x, if you want greater magnification of birds you’ll need to invest in a telescope, or spotting scope. These will let you get much closer, we’d recommend at least a 40x magnification.
We have this one from Vanguard. There’s a great selection of spotting scopes on the Vanguard store and on Amazon. Don’t forget to use our code “FindingTheUniverse” on the Vanguard store for a 20% discount on all their products.
Monopod/Tripod
If you do invest in a higher magnification scope, you are going to need a tripod or monopod to stabilise it. The greater magnification of a scope compared to binoculars means you can’t hand hold it, as your hand movements will make it impossible to make anything out.
A good travel tripod would work well as a spotting scope support, see our guide to the best travel tripods for some ideas.
Monopods and tripods have advantages and disadvantages. A monopod is usually smaller and lighter to carry, as it only has one leg. It’s also a lot faster to move around for tracking subjects. However, they can’t generally be left to stand on their own.
A tripod will usually be heavier as it has more legs, but it will provide more stability. However, for moving subjects it can be more challenging to quickly reposition.
You can also get tripods which convert into monopods by twisting the legs off. These offer great flexibility. Examples include Vanguards VEO 3 Go range, as well as a number of options from other manufacturers on Amazon.
A portable blind
A blind is essentially a portable hide, which enables you to conceal yourself in the field. They’re popular with bird watchers, wildlife photographers and hunters, as they can allow you to get much closer to animals without them noticing you, although of course you will need to be patient for the best results!

Bird Photography Gear
As a photographer, I love the opportunity to photograph them. Getting a great shot of a bird can be very rewarding, and it can also help with bird identification.
Obviously, to take photos of birds you are going to need some photography gear. Of course, you can take a picture of birds with any camera. However, for the best results I would recommend a camera with a lens that has an equivalent focal length of around 400mm. This offers the magnification equivalent to an 8x pair of binoculars.
You can achieve this focal length by investing in a DSLR or mirrorless camera with a dedicated telephoto lens, or you can invest in a bridge camera which offers a long zoom. I have a full guide to bridge cameras here, which has a lot of options to consider across a range of budgets.
Either option has pros and cons. A bridge camera tends to be lighter, more cost effective, and offer a much great magnification, but image quality can suffer. A dedicated DSLR or mirrorless camera setup can yield better image results, but a high-end setup that beats a bridge camera will be expensive and heavy.
You can also use a compact camera with a long zoom. These will certainly let you capture images of birds, but there is definitely a quality trade-off due to the smaller lenses and sensors. Finally, a smartphone is a bit limited due to the lack of optical zoom and tiny sensors on most models.
If you don’t already have any photography gear and are not sure where to start, I’d probably recommend starting out with a bridge camera. My parents are avid birders who love to travel to see birds as well as take photos of them in their backyard. A bridge camera is easy to use and they have gotten some great photos.
Once you have suitable camera equipment, I’d also recommend investing in a tripod or monopod for bird photography. Bird photography can involve prolonged periods of waiting in a single location, with bursts of frantic activity when something happens.
It’s usually impractical to hold a camera up by hand for a lengthy period of time, and a monopod or tripod can solve this problem, whilst also allowing you to use slower shutter speeds if the birds aren’t moving too much.

Tips for Bird Photography
As a photographer, whilst I love watching birds in general, I also love taking photos of them. So I wanted to share some tips for getting great photos of birds.
Obviously you’ll want to have some photography equipment to get bird photos. Whilst higher end equipment will widen the range of what you can shoot, you can get nice bird photos with all sorts of camera equipment if you follow some simple tips.
Be Patient
Probably the most important skill in the arsenal of the budding bird photographer is patience. Patience is definitely a virtue when it comes to bird photography, and wildlife photography in general.
Birds, like all animals, live to their own timetable and behaviors. And whilst you can partially predict where they might be based on previous sightings and the time of year, bird photography can be very much a waiting game. This is especially the case if you have a particular species in mind that you want to photograph.

Go to a Bird Watching Location with Hides
Whilst birds can be observed in all sorts of locations around the world, you can definitely improve your chances of getting a great photograph by visiting a bird watching location with a hide.
Hides are normally located in a spot where you have a higher than average chance of observing a number of bird species. In addition, as you are largely concealed inside the hide, you can normally get closer to the birds, meaning you can get better images.
Hides can be found in bird watching locations all around the world, check out a local birding organization to find your nearest hides.
More serious birdwatchers and bird photographers will likely want to invest in a blind, or portable hide, to allow them to get closer to birds in a range of locations.
Recognize the Capabilities of your Camera Equipment
Bird photography can definitely be frustrating, something I have personally experienced. The main challenge is that birds can be fast moving, and the majority of species give humans a wide berth. Birds will also often be seen in low light environments, such as the shade of a tree, or at dusk and dawn.
When you combine all these factors together, you can end up with challenging photography conditions. Fast moving, distant subjects are a challenge for any photographer and camera. Add low light into the mix and you can have a real challenge.
Rather than becoming frustrated with the results and giving up, my advice is to learn what your camera equipment can and can’t do. If you don’t have a mighty zoom, you might want to focus on photographing birds that are closer. If your camera doesn’t have a speedy autofocus system, concentrate on more static subjects. If your camera doesn’t perform well in low light, stick to photographing well lit birds.
Once you know what your camera equipment can and can’t do, you will be able to work around any limitations by shooting subjects you know your camera can handle. For other situations, you can just enjoy watching the birds through your binoculars or scope.
Alternatively, if you are really limited by your camera and have shots you want to get, you might consider an equipment upgrade.
Remember the Composition
In all the excitement over getting the bird you want into your shot, don’t forget the importance of good composition in photography.
Think about where the bird appears in your shot, as well as other elements that might be visible and which contribute to the composition. The focus of the shot should be the bird, but you can often tell more of a story and engage your viewer by composing your image properly.
Obviously, this can be challenging as you can’t control the bird, and sometimes you have to make do with what’s available. But if you are able to move yourself or wait until the bird moves to a more ideal location to improve the composition of your shot, definitely consider it.

Camera Settings for Bird Photography
There are two main types of bird photography. The first is when the bird is more stationary, so perhaps on the ground or perched on a tree branch. The second is bird in flight (often abbreviated online as BIF photography), where the bird is in motion flying through the air.
These two types of photography are obviously of the same subject, but the camera settings are going to be a bit different.
Photographing Stationary Birds
Stationary birds are generally easier to photograph. They probably aren’t moving very much, so it’s easier to acquire them in your viewfinder and focus on them. Once you have the shot composed, you can use a relatively slow shutter speed as long as the bird isn’t moving too quickly.
For this kind of photography, I’d suggest starting with a shutter speed of around 1/250th of a second, f/8 and an appropriate ISO based on the light. You can then adjust depending on available light.

Photographing Birds in Flight
If you are shooting birds in flight or birds that are moving a lot, the settings will be different. You’ll want a much faster shutter speed so as to freeze the action, I’d recommend starting at around 1/1000th of a second of even faster.
Open the aperture as wide as it goes on your lens to let as much light in as possible, and then set an appropriate ISO based on the available light.
Don’t be afraid to push the ISO up—bird in flight photography often involves ISO ranges from 1600 up to 6400, and sometimes even higher.
A slightly noisy image is something you can fix in post processing, whilst a blurry image from subject motion can be a lot harder to fix through editing.


Be Aware of the Light
Photography is all about light. When shooting birds, you generally want them to be fairly well illuminated. In the case of some birds, such as the common kingfisher, they are far more vibrantly colored when seen in bright conditions, due to the way their feathers interact with the light. So well lit subjects tend to result in better images.
In addition, the direction of the light is important. If you’re shooting into the light, your images will be strongly backlit and harder to capture successfully. Ideally you want the sun to be somewhere behind you, so it’s illuminating your subject fully.

Tips for Planning a Birdwatching Trip
Once you have seen most of the bird species in your own area, you may now be interested in planning a trip to see species in other parts of the world. You might therefore consider planning a birdwatching holiday.
The first thing you’ll want to think about is where to go. My recommendation would be to travel to an area which has totally different birds to those you would find at home, which will give you the most variety. Obviously, you’ll want to factor in considerations like budget and how long you want to travel for.
In addition, you’ll want to consider any travel companions. If you are travelling with someone like a partner who perhaps isn’t as enthusiastic about birdwatching as you, you might consider a destination which offers more than birdwatching. So booking a trip to an isolated island full of seabirds for a week might not be much fun for your non birding companions.
Most destinations, however, will allow you to a mix of travel attractions and things to do. Just be aware that on trips like this there might be compromises to make everyone happy, and the focus might not be as bird oriented as you want!
On a trip that is not primarily focused on birding, you might do day tours to see birds, such as puffin watching in Iceland or a private birdwatching tour in Cancun for example.
But if you are wanting to plan a birdwatching specific trip, there are often multi-day tours of a destination which is known for it’s birdlife. For example, see:
Of course, there are lots more bird watching tours available. You can see a selection of ideas here and here to give you an overview of some of the options.
If you are visiting a destination which has a lot of unfamiliar bird species, we can highly recommend hiring a private guide that specializes in birdwatching. These guides will know where to find and how to identify local bird species, and will be able to help you find and see birds more effectively.
You can see some example birdwatching tours here, which you can filter by duration to find an option that suits you.
Further Reading
And that’s it for our beginner’s guide to birdwatching! We hope you enjoyed it, and are able to use some of our tips and ideas to get into this lovely hobby.
We also wanted to share some other content we’ve written that we think you’ll find interesting.
- If you are planning on taking photos of birds, you might want a camera. A bridge camera is a popular choice for bird photographers as they offer a good zoom in a relatively compact and affordable package. See our guide to the best bridge cameras across all budgets for some options.
- A tripod can be useful for birdwatching, especially if you have a scope or heavier lens. See our guide to the best travel tripods for some ideas
- If you have a camera that supports RAW, you should definitely consider using it. Read our guide to RAW in photography for the reasons why.
And we’re done. As always, if you have any questions or feedback on this post, just pop them in the comments section below and we’ll come back to you as soon as we can!
Cheryl Jones says
Hi Laurence,
First I wanted to say that I thought your post was really great. I enjoy watching birds but am no real birder myself. But wanted to ask your thoughts on buying a few things to help my mother who is moving to a retirement condo in southern Florida, USA. She loves to travel and wildlife but sadly a disability has really made it difficult for her to travel much anymore and we lost my father to Covid last year.
She will have a little private garden area and she really does enjoy birds. I’d like to get her a little welcome package with a pair of lightweight binoculars, good local bird ID book (large text would be helpful), and a sturdy feeder that would be easy for her to use. Healthy budget. Would love some suggestions that would work well.
Thanks for any help you can provide!!
Cheryl
Laurence Norah says
Hi Cheryl!
Thank you very much, and what a wonderful gift for your mother 🙂 Florida has lots of birds and I’m sure she will enjoy watching them!
To answer your question, here are some ideas.
This field guide to the birds of Florida is easy to use as it’s color coded by bird color with nice big pictures. However it’s not a “large print” book. I’m not aware of a large print bird book for the birds of Florida, although that’s not to say they don’t exist. It’s a smaller book which your mother might find easier, but if you think she would prefer a larger book, then I’d suggest this one, which is bigger and wider.
In terms of feeders, there are obviously a lot to choose from. For Florida, as with many parts of the world, the main issue is feeding the birds without feeding the squirrels. Of course, your mother might enjoy feeding the squirrels, but they tend to go through food quickly, so it’s best to get a feeder that deters squirrels. I’d recommend the Squirrel Buster range which get excellent reviews, and particularly the squirrel buster plus model.
For binoculars, there are a lot out there as well. I would probably recommend an 8×32 pair. These will be lighter than an 8×42 pair, so will be easier for your mother to hold for periods of time. Some good options include the Endeavor ED II by Vanguard (you can save 20% on the price by using our exclusive discount code FindingTheUniverse at checkout). Another option would be these Vortex Optics Diamondback binoculars.
I hope these suggestions help, but if you’d like some more ideas at other price points, or just any general input at all, do let me know. I’m happy to help! Otherwise, wishing your mother all the best in the next chapter of her adventure.
Laurence