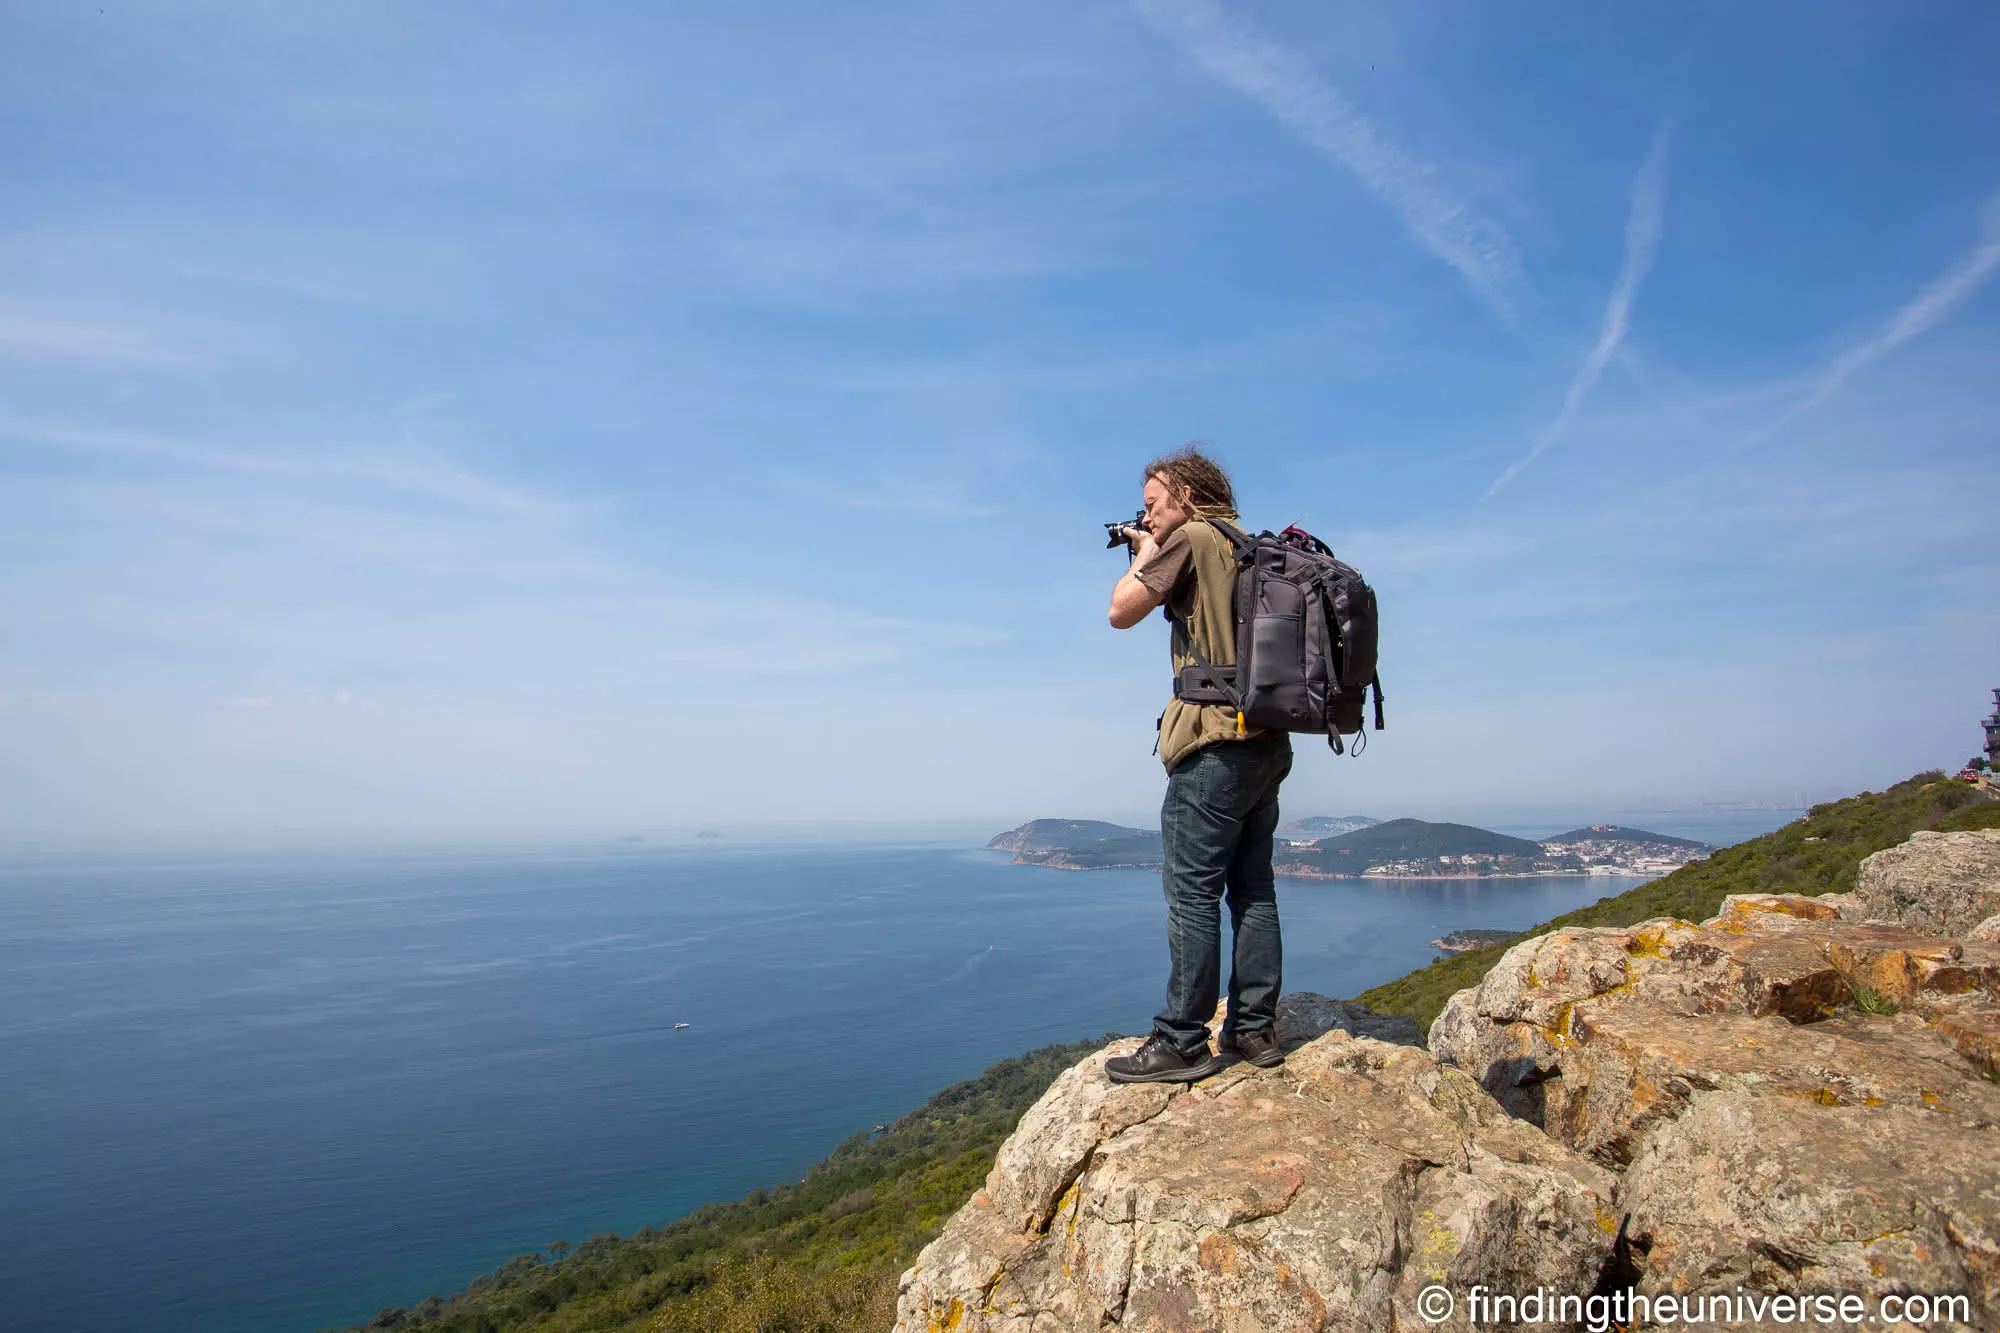
I’ve been carrying cameras up hills for over fifteen years as a professional travel photographer, on moorland in Cornwall, on waterfall hikes in Iceland where it rained more or less continuously, and on day hikes across the US. For most of that time I’ve done it with two very different setups: a dedicated camera backpack (a Vanguard Alta Sky), and an ordinary hiking daypack with a camera cube dropped into it.
So the question this guide answers is the one I’ve wrestled with myself about on more than one trail: do you need a camera backpack for hiking at all, or will a hiking pack with a padded insert do?
The answer changes with the hike, so here it is by case. For a day hike with a body and two lenses, the pack I’d point most people at is a hiking-first camera pack with side access, and the Lowepro PhotoSport BP 24L AW III above all.
For a long day or an overnight where the camera comes out constantly, the Think Tank Rotation 34L is the one design that solves the access problem outright. For long lenses and multi-day carries, it’s the f-stop Tilopa 50L, or my own Vanguard Alta Sky if protection matters more to you than weight.
And if you already own a hiking daypack you like, a Peak Design Camera Cube inside it is a perfectly good answer for the first case, and a poor one for the other two.
Everything in this guide is built around hiking, which is what makes it different from my guide to the best camera bags for travel. That guide covers slings, rollers, carry-on sizing and city bags. This one cares about whether the load reaches your hips, whether you can get to the camera without taking the pack off, and whether it’ll keep the rain out for four hours rather than four minutes. A couple of bags appear in both, and I’ve only repeated myself where the hiking verdict is different.
One more thing before the packs. Two of these are mine. I’ve hiked for years with the Vanguard Alta Sky, and with the Peak Design cube that goes in my hiking daypack. The rest I haven’t carried on a trail, and I say so again in the entries where it matters most. That’s a deliberate choice rather than an apology, because the things that matter on a hiking pack are unusually easy to judge without owning one: the hip belt either has padding and takes the weight or it’s a strip of webbing, the torso either adjusts or it doesn’t, the rain cover is either in the box or it’s a separate purchase, and the warranty terms are published. Where a maker doesn’t publish something, I’ve said so rather than guessed.
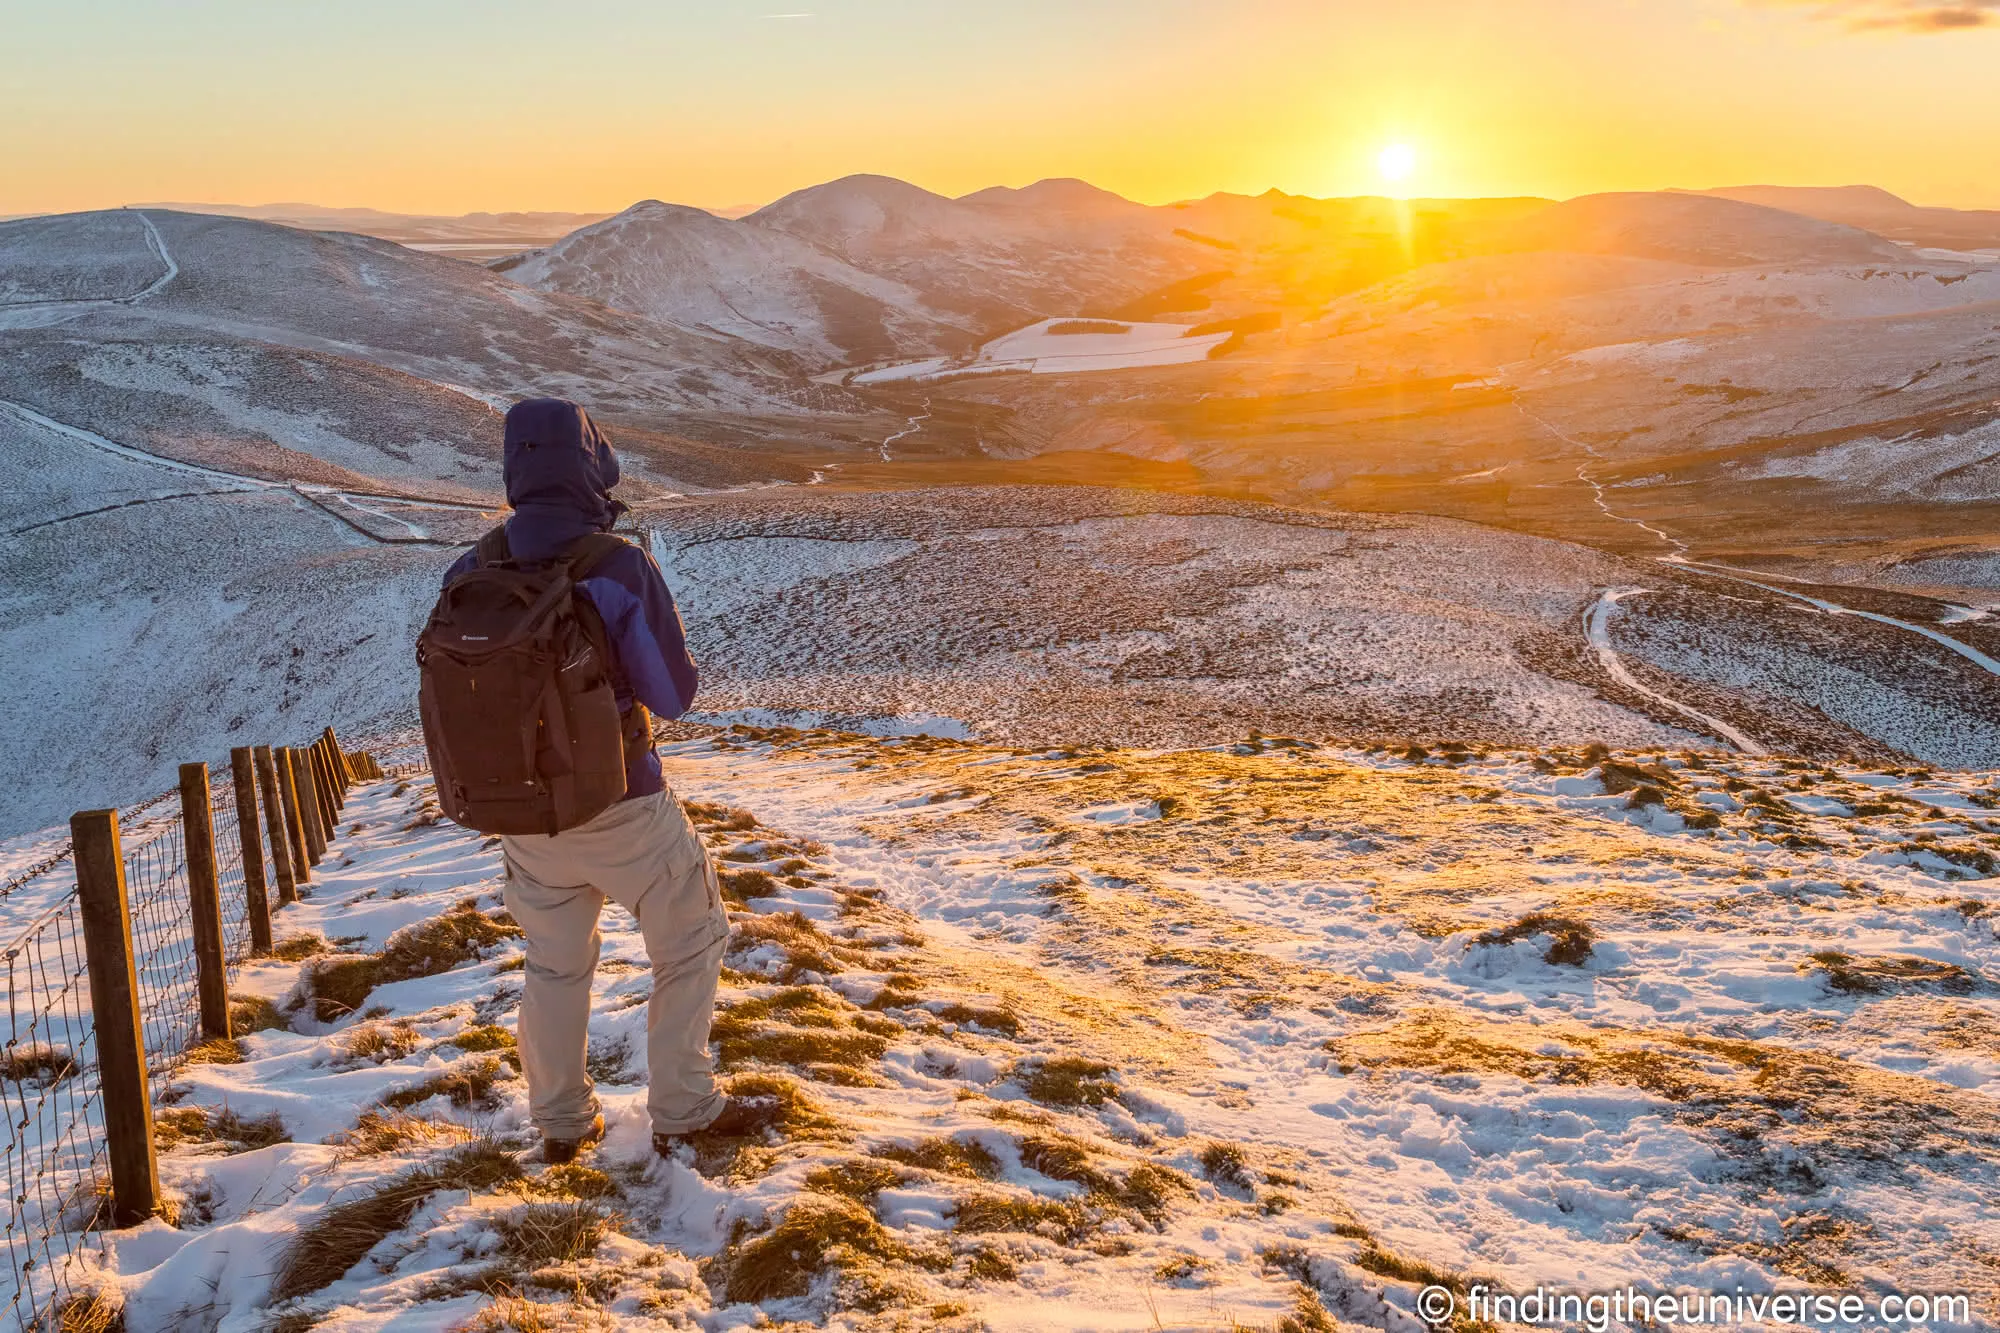
Table of Contents:
Camera Backpack vs Hiking Pack With a Camera Cube
I carry both, so here’s the case for each.
A dedicated camera backpack puts the camera compartment where the pack’s designer wanted it, with a door built for the job. On a good one you swing the pack round on one shoulder, unzip a side panel, and the body is in your hand in a few seconds. The padding is shaped to the gear.
The downside, of course, is that the camera compartment is fixed, so on a bag sized for your kit there’s often not much room left for anything else, and the pack itself tends to weigh more than a hiking pack of the same volume, because you’re carrying that padding and structure whether you need it that day or not.
A hiking daypack with a camera cube is the reverse. The pack is light, the harness was designed by people who only think about carrying, and the cube adds a fixed 500 g (with dividers, per Peak Design’s own figure for the Smedium) to whatever the pack weighs. You get all the pack’s own room for water, layers and food.
Access is the problem. The cube lives in the main compartment, so getting the camera out means stopping, taking the pack off, opening the top and digging. In dry weather on a gentle path that’s a bit of a nuisance. In sideways rain on a wet slope it’s the reason the camera stays in the bag and you get home without the photo.
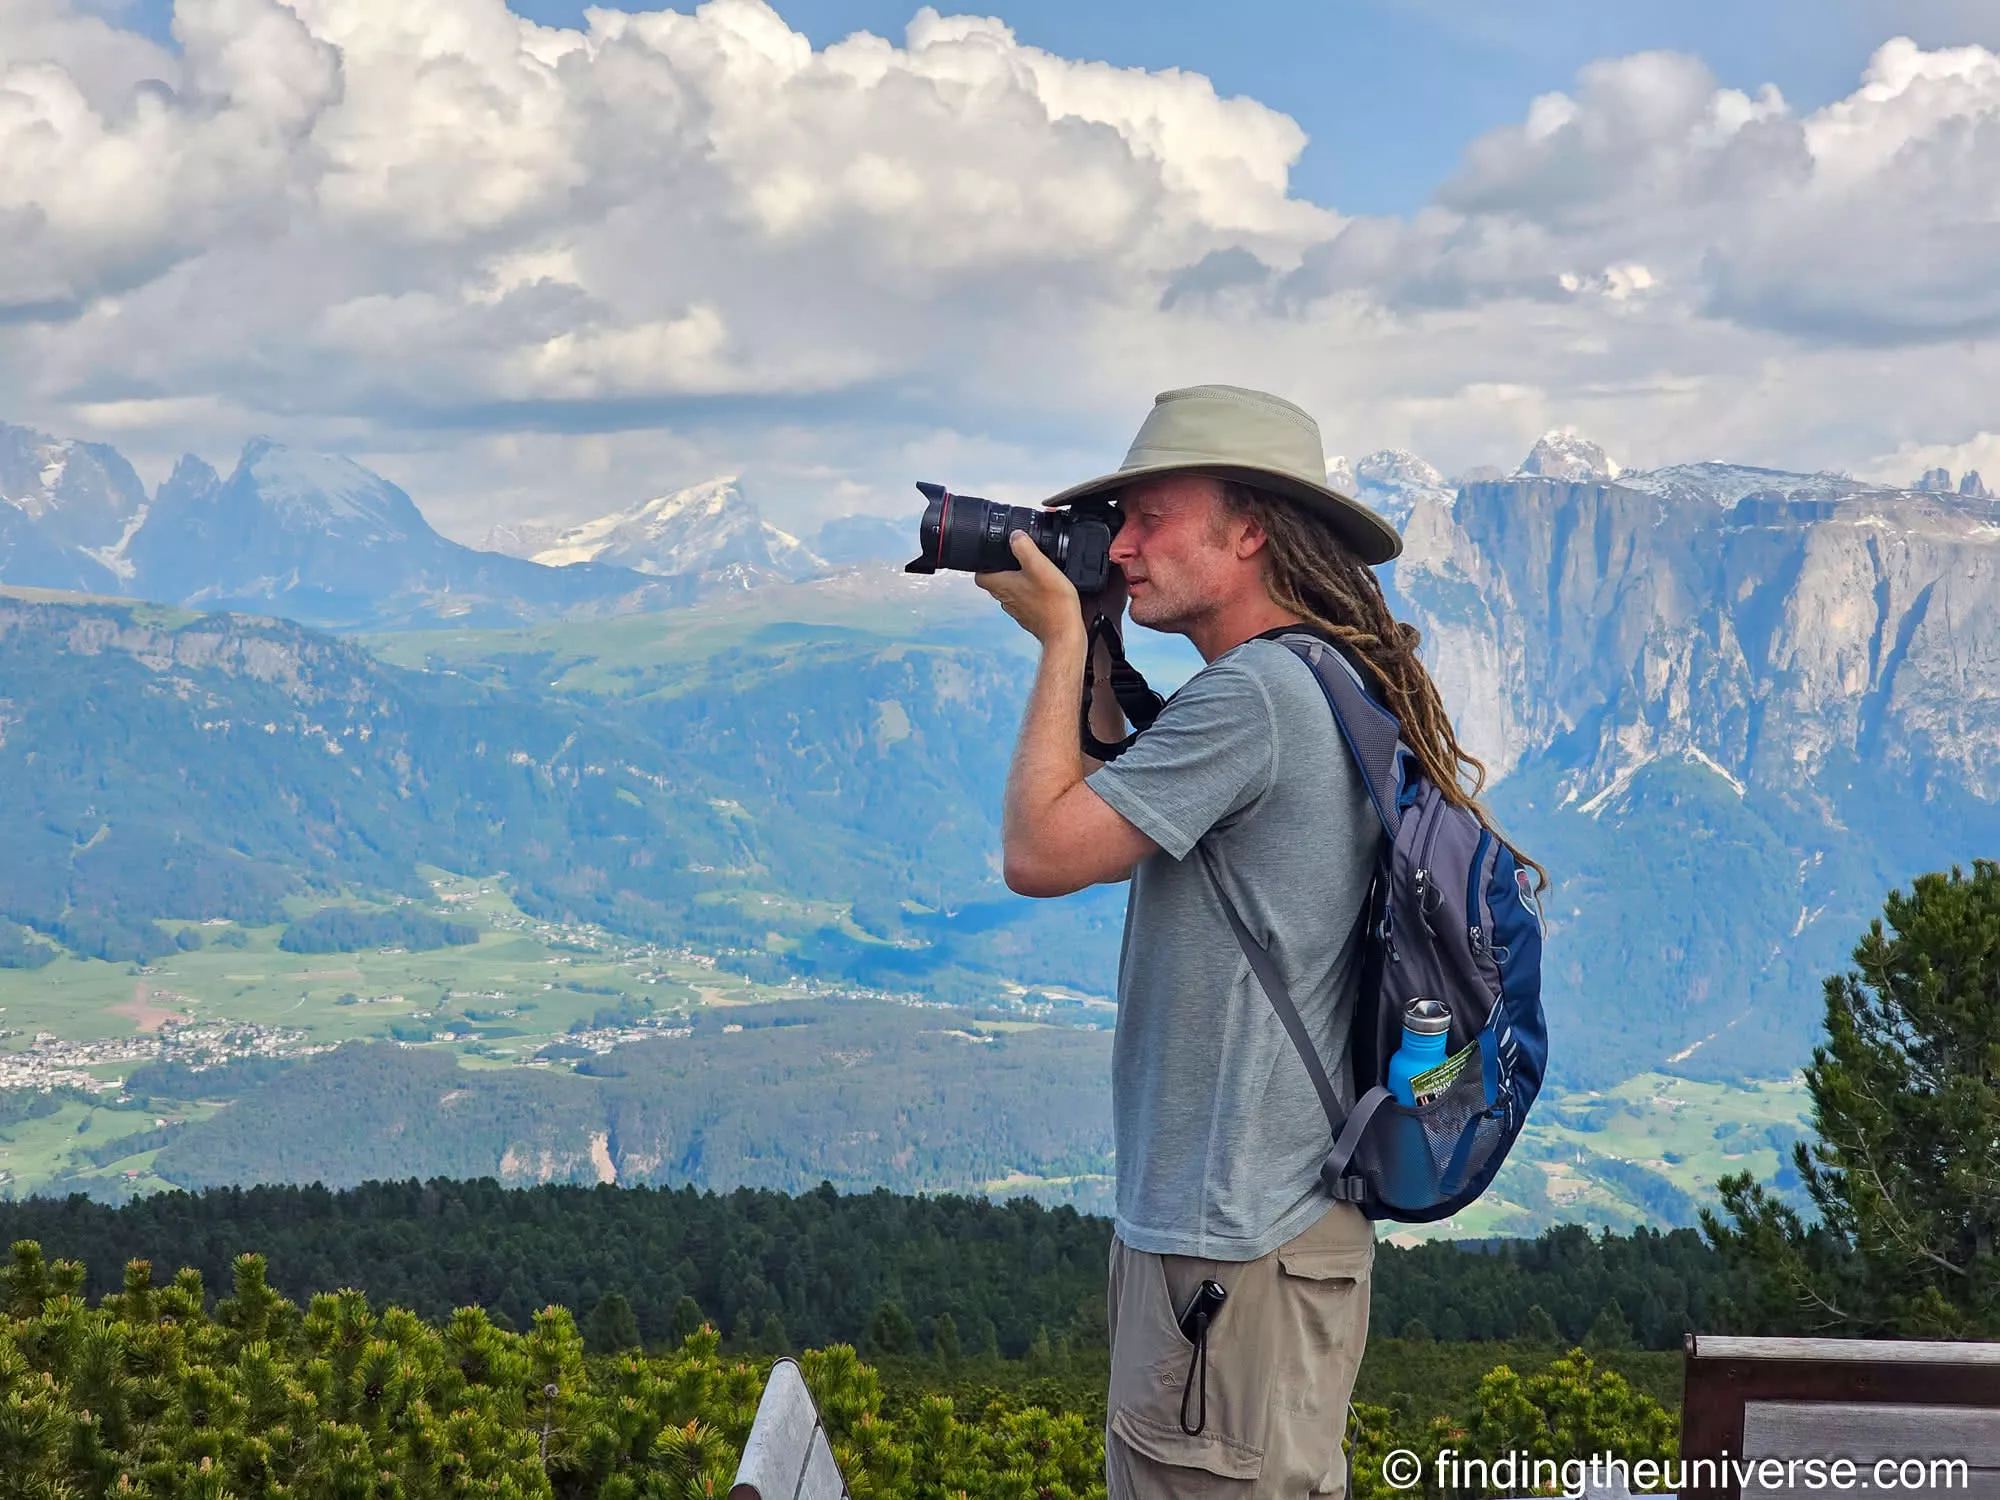
My own split works like this. For a day out where I’m walking more than shooting, and the camera comes out at a viewpoint or two, the daypack and cube route is fine and my shoulders thank me for it. My daypack is an old Osprey that’s no longer made, which I’ve had since at least 2008 and which is still going, and a Peak Design Camera Cube sits in the bottom of it.
For a day where the photography is the point, where I’ll be shooting every few minutes and the weather is doing what weather does in Scotland or Iceland, I carry the Alta Sky and accept the weight.
The rule of thumb I’d give you is this. If the camera comes out a handful of times in a day, use the pack you already own with a cube in it. If it’s coming out every few minutes, or you’re shooting in rain, buy a pack with a camera door you can reach without putting the bag down.
Whatever you choose, make sure there’s room left for the things that keep you on the trail: a water bottle, a raincoat, and something to eat. I learnt that one the hard way, and it’s the first of the two mistakes I cover further down.
Camera Backpacks for Hiking Compared
The two tables below compare every pack in this guide on the things that matter on a trail, and only those things. There’s no laptop column and no carry-on column. Every cell comes from the maker’s own product page. Where the maker doesn’t publish a figure, the cell says “not published”, because a gap is more use to you than a number I made up. A blank cell means I couldn’t read that part of the maker’s page, so nothing is asserted either way.
The first table is about carrying: how much the empty pack weighs, and whether the load actually reaches your hips.
| Pack | Empty weight | Hip belt | Torso fit | Back panel | Hydration |
|---|---|---|---|---|---|
| Lowepro PhotoSport BP 24L AW III | 1.5 kg / 3.31 lb | Padded waist belt | Not published | Not published | Dedicated sleeve, up to 3 L |
| Lowepro PhotoSport BP 15L AW III | 1.1 kg / 2.43 lb | Padded waist belt | Not published | Not published | Dedicated sleeve, up to 2 L |
| Think Tank BackLight 26L | 1.8 kg / 3.9 lb | Padded waist belt with accessory rail | Not published | No bladder sleeve stated; two bottle pockets fit a 32 oz Nalgene | |
| f-stop Kashmir 30L Ultra Light | 1.1 kg / 2.5 lb | Hip belt with zip pocket (padding not stated) | Fixed, shorter torso than the Loka; no range published | Not published | |
| Shimoda Action X30 v2 | 1.9 kg / 4.2 lb (shell only, no Core Unit) | Removable belt (padding not stated) | Adjustable, three settings, about 7 cm of range | Not published | No bladder sleeve stated; two removable bottle pouches |
| Peak Design Outdoor Backpack 25L | 1.15 kg / 2.54 lb | Sold separately | Adjustable, fits 17 to 20 in (43 to 50 cm) | Internal sleeve (shared with laptop) plus an external sleeve | |
| Think Tank Rotation 34L | 2.2 kg / 4.8 lb | Rotating belt pack, carries the load | Adjustable, no range published | Channelled foam | Front pocket fits a 3 L reservoir (shared with a 13 in laptop) |
| f-stop Ajna 37L | 1.47 kg / 3.2 lb | Padded hip belt | Not published | Not published | Dedicated bladder compartment, size not given |
| Atlas Athlete (GEN2) | 2.0 kg (4.4 lb Medium, 4.5 lb Large); a second spec table on the same page says 4.95 lb | Fitted hip belt | Two sizes: Medium to 5 ft 9 in, Large from 5 ft 10 in | Bladder pocket (size not published for GEN2) | |
| Vanguard Alta Sky 51D | 2.92 kg / 6.44 lb | Waist belt (padding not stated) | Not published | Not published | Not published |
| f-stop Tilopa 50L | 1.9 kg / 4.2 lb | Padded hip belt, rated to 35 kg loads | Not published | Foam padded | Unpadded compartment for a 3 L bladder (shared with a 17 in laptop) |
| Lowepro Pro Trekker BP 450 AW II | 2.7 kg / 5.95 lb | ||||
| Peak Design Camera Cube V2 Smedium (cube route) | 500 g with dividers, 300 g without, plus your own pack | Whatever your pack has | Whatever your pack has | Whatever your pack has | Whatever your pack has |
The second table is about using the camera and staying dry: how you get to it, what you can strap to the outside, and what’s actually in the box.
| Pack | Camera access | External carry | Camera unit | Rain cover | Price band |
|---|---|---|---|---|---|
| Lowepro PhotoSport BP 24L AW III | Side | Tripod and pole attachment points | GearUp insert included (full-frame body with 24-70 f/2.8 plus one lens) | Included | $200 to $300 |
| Lowepro PhotoSport BP 15L AW III | Side | Tripod and pole attachment points | GearUp insert included (crop-sensor body plus one or two small lenses) | Included | Under $200 |
| Think Tank BackLight 26L | Back panel | Tripod mount front or side, ice axe loops, daisy chain | Built-in dividers | Included, seam-sealed | $200 to $300 |
| f-stop Kashmir 30L Ultra Light | Via ICU (type not stated) | Compression straps only | Sold separately (Amazon bundle includes an insert) | Sold separately (Elite bundle only) | $300 to $400 |
| Shimoda Action X30 v2 | Side, plus roll-top | Removable tripod or bottle pouches, movable to the belt | Core Unit sold separately | Included | $200 to $300 |
| Peak Design Outdoor Backpack 25L | Depends on the cube fitted | Peak Design strap mounts; no axe or pole loop named | Sold separately (fits one Smedium cube) | Sold separately | $200 to $300 (about $400 with belt, cube and rain fly) |
| Think Tank Rotation 34L | Rotating belt pack | Tripod front or side, axe and pole loop, daisy chain | Belt pack is the camera compartment | Included, seam-sealed | $300 to $400 |
| f-stop Ajna 37L | Not described on Ajna’s page | MOLLE webbing, tripod and pole points | Sold separately (Amazon bundle includes an insert) | Sold separately (Essentials and Elite bundles only) | $400 to $500 |
| Atlas Athlete (GEN2) | Origami Camera Core | Ice axe and sleeping bag loops | Built into the pack, no cube | Included, tethered | $400 to $500 |
| Vanguard Alta Sky 51D | Rear, top and side | Tripod carrying system | Built-in dividers | Not published | $200 to $300 |
| f-stop Tilopa 50L | Back panel, plus top | Eight GateKeeper points, MOLLE on the hip belt | Sold separately (Amazon bundle includes a Pro Large ICU) | Sold separately | $400 to $500 |
| Lowepro Pro Trekker BP 450 AW II | Built-in dividers, 28 L camera volume | Included | $300 to $400 | ||
| Peak Design Camera Cube V2 Smedium (cube route) | Top of your pack, pack off | Whatever your pack has | This is the camera unit | Whatever your pack has | Under $100, plus your pack |
There’s a column missing from both tables. The number that matters most on a trail is how much room is left for layers, food and water once the camera kit is in, and not one of the fourteen makers whose pages I read publishes it.
Think Tank comes closest, with a stated 9 L of front-pocket space on the BackLight 26L. Lowepro publishes a 32 L total and a 28 L camera volume for the Pro Trekker 450, which works out to about 4 L of other space, but that’s my subtraction, not their claim. For everything else you’re on your own, which is why the per-pack notes below say what I could work out about it.
Day Hikes: A Body and Two Lenses
This is most people’s hiking most of the time: out in the morning, back by dinner, one body, a wide zoom and something longer, plus a jacket and lunch. You want a light pack with side access, a real waist belt, and somewhere for water. Every pack here weighs under 2 kg empty.
Lowepro PhotoSport BP 24L AW III

If I were buying a dedicated day-hike camera pack today, this is where I’d start. Lowepro’s third-generation PhotoSport is the pack in this guide that was designed for exactly the hike I described above, and it shows in the details, with side access to a removable GearUp insert, a padded waist belt, a dedicated hydration pocket for up to a 3 L reservoir, attachment points for a tripod or poles, and a rain cover in the box. At 1.5 kg empty it’s on the light side for a pack with a camera compartment.
The insert is sized for a full-frame mirrorless body with a 24-70 f/2.8 attached plus one more lens, which is the two-lens day-hike kit precisely. The rest of the 24 litres is yours, and the insert comes out if you want the whole thing as a plain daypack. Lowepro calls the pack weather-resistant, and the AW in the name is its All Weather cover, which is the rain-cover approach to keeping water out (more on that further down).
Lowepro also sells a PhotoSport X (35 L and 45 L) for mountaineering and ski touring, and a PhotoSport PRO 55 L and 70 L for multi-day trekking. Those are different packs for different jobs, and this one is the day-hike version. And Lowepro’s warranty is two years as standard on latent defects; the registration-only lifetime cover is for eligible products, to the original owner, granted in ten-year blocks you renew yourself, and Lowepro doesn’t publish which packs qualify.
Weight: 1.5 kg / 3.31 lb
Capacity: 24 L
Hip belt: padded waist belt
Access: side
In the box: GearUp insert and All Weather cover
Warranty: two years standard (Videndum); registration-only lifetime for eligible products
Best for the standard day hike with one body and two lenses. Buy this one if you want a pack that’s ready to walk out of the box, with nothing else to add. Check price on Amazon
Lowepro PhotoSport BP 15L AW III

The smaller PhotoSport is the same idea scaled to a crop-sensor kit: the included insert fits a crop-sensor mirrorless body with a lens attached plus one or two small lenses, the hydration pocket takes a 2 L reservoir, and there’s the same padded waist belt, side access and All Weather cover. At 1.1 kg empty it’s the lightest dedicated camera pack in this guide, tied with the Kashmir.
Fifteen litres really isn’t much once the insert is in, so this is a pack for a short hike, a light kit and a light jacket. If you regularly carry a full-frame body with a 70-200, it’s too small. If you shoot a compact mirrorless kit and mostly want the camera protected and reachable on a half-day walk, it’s the cheapest way in this guide to get a proper camera door on a pack with a hip belt.
Weight: 1.1 kg / 2.43 lb
Capacity: 15 L
Hip belt: padded waist belt
Access: side
In the box: GearUp insert and All Weather cover
Warranty: two years standard (Videndum); registration-only lifetime for eligible products
Best for crop-sensor kits and half-day hikes, and for anyone who wants to spend as little as possible on a pack that still has side access and a rain cover. Check price on Amazon
Think Tank BackLight 26L
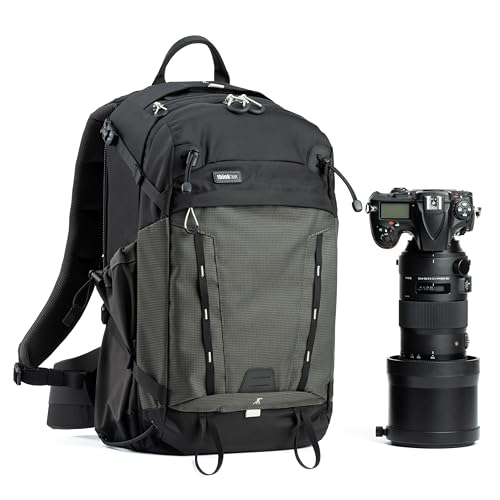
The BackLight is a back-panel-access pack, which means the camera compartment opens from the side that sits against your back. You swing the pack round to the front, still clipped to your waist belt, and open it in your lap.
That’s slower than a side door for a single grab, but it’s much better for working out of the bag: you can see all the gear at once, and the padded side of the pack stays clean and dry because it never touches the ground. It also means nobody can open the compartment while it’s on your back, which I care about less on a hill than in a city, but it’s there.
Think Tank publishes the number nobody else does: the front pockets total 9 L, for layers, a jacket and food. There’s a padded waist belt with a webbing rail for pouches, two large bottle pockets sized for a 32 oz Nalgene, a tripod mount on the front or side, ice axe loops, a daisy chain, and a seam-sealed rain cover in the box. The exterior fabric has a durable water-repellent coating with a polyurethane coating underneath. Think Tank doesn’t call the pack waterproof, and it’s right not to.
At 1.8 kg it’s a bit heavier than the PhotoSport 24L, and torso adjustment isn’t published. Think Tank’s warranty is a limited lifetime one, covering defects for the life of the product but not wear and tear or the natural breakdown of materials.
Weight: 1.8 kg / 3.9 lb
Capacity: 26 L, of which 9 L is front-pocket space for non-camera gear
Hip belt: padded waist belt with accessory rail
Access: back panel
In the box: dividers and a seam-sealed rain cover
Warranty: limited lifetime, excludes wear
Best for photographers who work out of the bag rather than grabbing one body, and for anyone hiking somewhere the ground is always wet. Check price on Amazon
f-stop Kashmir 30L Ultra Light

f-stop’s Kashmir is the pack that gets recommended to smaller-framed hikers, and for a reason: f-stop describes it as keeping the features of the larger Loka 37L but with a shorter torso and harness, which they aim at more petite photographers. At 1.1 kg empty it matches the PhotoSport 15L for weight while carrying twice the volume, and it has a hip belt with a zip pocket and built-in compression straps.
It’s also the pack in this guide where you most need to read what’s in the box. The “Pack Only” configuration on f-stop’s site ships with no camera insert (f-stop calls them ICUs, and the Kashmir takes the Micro Tiny, Shallow Small, Shallow Medium and Slope Medium sizes) and no rain cover, which is only bundled into the Elite package. The Amazon listing I’ve linked is a bundle with an insert included, so check which one you’re buying. The on-trail access depends on which ICU you fit.
The warranty is the other trap. f-stop’s Mountain Series packs (the Tilopa and Ajna below) carry a 20-year warranty. The Kashmir is in the Ultra Light series, which carries three years, and the ICUs are three years too. Don’t read “f-stop, 20 years” across the whole brand. No tier covers wear, or damage from sand or debris in the zips, which is the failure you’d expect on a trail.
Weight: 1.1 kg / 2.5 lb
Capacity: 30 L
Hip belt: hip belt with zip pocket
Access: through the ICU fitted
In the box: pack only from f-stop; the Amazon bundle adds an insert
Warranty: three years (Ultra Light series)
Best for smaller hikers who find most camera packs too long in the back, and for anyone who wants 30 litres at the weight of a 15. Check price on Amazon
Shimoda Action X30 v2

Shimoda’s Action X range is the one every f-stop comparison ends up measuring against, and the X30 v2 is the size that makes sense for a hike. It has side camera access plus an expandable roll-top that Shimoda says adds up to 7 L, a removable belt, two removable pouches for a tripod or bottles that can be moved onto the belt, and an adjustable torso with three height settings covering about 7 cm of range. Shimoda’s own line is that it’s built for action in foul weather, and the rain cover is included.
The thing to understand before you buy is that the 1.9 kg figure is the shell, helmet holder and rain cover only. The Core Unit that holds the camera is sold separately, and once you add one you’re past the weight of the PhotoSport 24L with its insert included. That’s the trade, of course. Shimoda’s system lets you pick a Core Unit for the kit you actually carry, and the pack works as a plain hiking pack with none fitted, but the headline weight leaves the camera unit out.
Shimoda doesn’t publish a back-panel or ventilation description for this pack, or a total volume the way the others do.
The warranty is five years, excluding normal wear. I haven’t carried this one, and the Shimoda I know from my travel guide is the Explore V2, which is the travel-shaped sibling. This is the one to look at for a trail.
Weight: 1.9 kg / 4.2 lb, shell only
Capacity: roll-top adds up to 7 L; total volume not published
Hip belt: removable belt
Access: side, plus roll-top
In the box: shell, helmet holder and rain cover; Core Unit sold separately
Warranty: five years
Best for hikers who want a modular system they can strip down to a plain pack, and who don’t mind buying the camera unit separately. Check price on Amazon
Peak Design Outdoor Backpack 25L

I’ve used Peak Design gear since 2015, starting with their strap, and the Outdoor Backpack is their attempt to build the cube route and a hiking pack into one design. It’s a frameless roll-top daypack, 20 L with the top rolled and 25 L extended, at 1.15 kg.
It has an adjustable torso for 17 to 20 in backs, an internal hydration sleeve (shared with a laptop) plus an external one, and a Terra Shell fabric of 210D ripstop nylon with a PFAS-free TPU coating. Peak Design’s word for it is weatherproof. It takes one Smedium Camera Cube, with room for an X-Small above it.
It’s the most interesting price in the table rather than the cheapest, because the pack ships with no hip belt, no camera cube and no rain cover. The hip belt is $49.95, the rain fly is $29.95, and the Smedium cube is another purchase on top. The pack alone looks like the best-value serious option here. The complete kit, belt and cube and fly, lands at about $400, which is more than a PhotoSport 24L that needs nothing added. Neither version of that sum is wrong, but you should really do it before you click.
On the plus side, that means you only pay for what you’ll use. If you already own a Peak Design cube, or you’ll never hike in rain (I’d like to live where you live), the maths changes. And the Peak Design warranty is the strongest wording in this guide: lifetime, covering failures and breakages in normal use, with wear and cosmetic damage excluded, though a replacement may be refurbished stock.
Weight: 1.15 kg / 2.54 lb
Capacity: 20 L rolled, 25 L extended
Hip belt: sold separately
Access: through the cube fitted
In the box: the pack; hip belt, cube and rain fly are all separate
Warranty: lifetime, excludes wear
Best for people already in the Peak Design ecosystem, and for anyone happy to build a pack up piece by piece. Price the whole kit before you buy. Check price on Amazon
Long Days and Overnights: Packs That Reach Your Hips
Past six or seven hours, or with a tent on the outside, the hip belt stops being a feature and becomes the whole point. Every pack here has a belt that’s meant to carry load, and most have somewhere to put the things a day pack doesn’t.
Think Tank Rotation 34L

The Rotation is the only pack in this guide whose design is the answer to the access question rather than a compromise with it. The camera lives in an 8.5 L belt pack that rotates round from the back of the pack to your front, while the pack stays on your shoulders. You don’t stop, you don’t unclip, you don’t put anything down. The 25.5 L main compartment above it is general-purpose space for everything else, and Think Tank says the pack weight transfers to the belt and moves with your hips.
It comes from Think Tank’s MindShift line (MindShift Gear merged into Think Tank in 2018, which is why you’ll see both names on the box), and it’s built for a long day out: adjustable torso, a channelled foam back panel for airflow, a front pocket that takes a 3 L reservoir, tripod carry on the front or side, an axe and pole loop, a daisy chain, and a seam-sealed rain cover included. The exterior fabric is coated both sides with a durable water-repellent finish.
At 2.2 kg it’s not light, and the belt pack holds one body with three to five lenses rather than a big telephoto. Those are the two reasons it’s here rather than in the long-lens section. The warranty is Think Tank’s limited lifetime one.
Weight: 2.2 kg / 4.8 lb
Capacity: 34 L (25.5 L main plus 8.5 L belt pack)
Hip belt: the rotating belt pack, which carries the load
Access: rotation, pack stays on
In the box: belt pack and a seam-sealed rain cover
Warranty: limited lifetime, excludes wear
Best for a long day where the camera comes out constantly and you never want to take the pack off to do it. If that’s your hiking, this is the pack. Check price on Amazon
f-stop Ajna 37L

The Ajna is f-stop’s mid-size Mountain Series pack, and it’s pretty light for 37 litres at 1.47 kg empty, with a padded hip belt, an adjustable sternum strap, a dedicated hydration compartment, and MOLLE webbing plus attachment points for a tripod and poles. f-stop describes the exterior as weather-resistant DuraDiamond fabric, and this is the current DuraDiamond generation (f-stop no longer sells a non-DuraDiamond Ajna or Tilopa).
As with the Kashmir, read the bundle. “Pack Only” means no ICU and no rain cover; the Large Rain Cover appears only in the Essentials and Elite packages. The Amazon listing is a bundle with an insert, so again, check. f-stop doesn’t publish a torso range or a back-panel description for the Ajna, and the camera access depends on the ICU you fit.
The Mountain Series warranty is 20 years, though the ICU inside any bundle is three.
Weight: 1.47 kg / 3.2 lb
Capacity: 37 L
Hip belt: padded
Access: through the ICU fitted
In the box: pack only from f-stop; the Amazon bundle adds an insert
Warranty: 20 years on the pack (Mountain Series), three on the ICU
Best for a long day with a bigger kit, where you want 37 litres without the weight that usually comes with it. Check price on Amazon
Atlas Athlete (GEN2)
Atlas Packs is a small maker started by a mountaineer who came back from a month-long Everest trek annoyed that his expedition pack had no room for camera gear. The Athlete is the pack minimalists keep recommending. The camera compartment is what Atlas calls an Origami Camera Core, built into the structure of the pack with no separate cube or ICU, so your gear is attached to the frame rather than sitting in a box inside it.
Capacity runs from 20 to 40 L depending on how you configure it, it has a fitted hip belt, ice axe and sleeping bag loops, a bladder pocket, and a tethered rain cover is included. The warranty is lifetime.
It’s also the one pack here sold in two torso sizes rather than adjusted with a strap: Medium for people up to 5 ft 9 in, Large for 5 ft 10 in and taller. That’s the hiking-pack approach to fit, and it’s the right one.
The pack that ships now is the GEN2, at 2.0 kg (Atlas gives 4.4 lb for the Medium and 4.5 lb for the Large, while a second spec table on the same page says 4.95 lb, and I can’t tell you which is right). A GEN2a revision is on pre-order for December 2026 delivery, about half a pound lighter, in a Challenge Sailcloth fabric; Atlas doesn’t publish its absolute weight yet.
Atlas isn’t on Amazon, so the link goes to their own site, and I have no affiliate relationship with them. I haven’t carried one.
Weight: 2.0 kg (4.4 lb Medium, 4.5 lb Large)
Capacity: 20 to 40 L
Hip belt: fitted
Access: Origami Camera Core, no cube
In the box: pack and a tethered rain cover
Warranty: lifetime
Best for hikers who want a camera pack sized like a hiking pack, bought from a small specialist instead of a big brand. See the Atlas Athlete at atlaspacks.com.
Long Glass and Multi-Day Carries
Three packs for the trips where the kit is big, the walk is long, and there might be a sleeping bag involved. All three are heavy, all three are built to carry that weight properly, and all three are more pack than most people need.
f-stop Tilopa 50L

The Tilopa is the big Mountain Series f-stop, and it’s the pack I’d point at for a multi-day carry with a long lens. It has a removable aluminium internal frame, a foam padded back panel, a padded hip belt and load lifters, and f-stop rates the whole system for loads up to 35 kg (77 lb), which is more than you should ever put in it.
Access is through the zipped back panel, with a top opening for quick grabs, and there are eight GateKeeper attachment points plus MOLLE on the hip belt for a tripod and whatever else. An unpadded compartment takes a 3 L bladder or a 17 in laptop. At 1.9 kg empty for 50 litres, it’s quite a bit lighter than you’d expect.
f-stop’s spec sheet says the exterior fabric is 20,000 mm waterproof DuraDiamond with waterproof welded zips, and then calls the pack weatherproof, which is the right distinction and I explain why in the waterproofing section below. The rain cover is sold separately. So, in the Pack Only configuration, is the ICU; the Amazon bundle I’ve linked includes a Pro Large ICU, which is the size you’d want for a body with a 100-400 attached.
The Mountain Series warranty is 20 years. I haven’t carried a Tilopa, and I mention it in my travel guide only in passing; on a trail it’s a different proposition, and the pack in this category I’d buy if I weren’t already carrying the Vanguard.
Weight: 1.9 kg / 4.2 lb
Capacity: 50 L
Hip belt: padded, with load lifters and internal frame
Access: back panel, plus top
In the box: pack only from f-stop; the Amazon bundle adds a Pro Large ICU; rain cover separate
Warranty: 20 years on the pack (Mountain Series), three on the ICU
Best for multi-day carries with a long lens, and for anyone who wants a real internal frame under a camera compartment. Check price on Amazon
Vanguard Alta Sky 51D

I should say first that I’ve been a Vanguard ambassador for a number of years, which is part of why the brand turns up on this site, and that what follows comes from carrying the bag rather than from the relationship. My own pack is the Alta Sky 49D, which Vanguard has since discontinued; the 51D is the current model closest to it, and it’s the one I’ve linked.
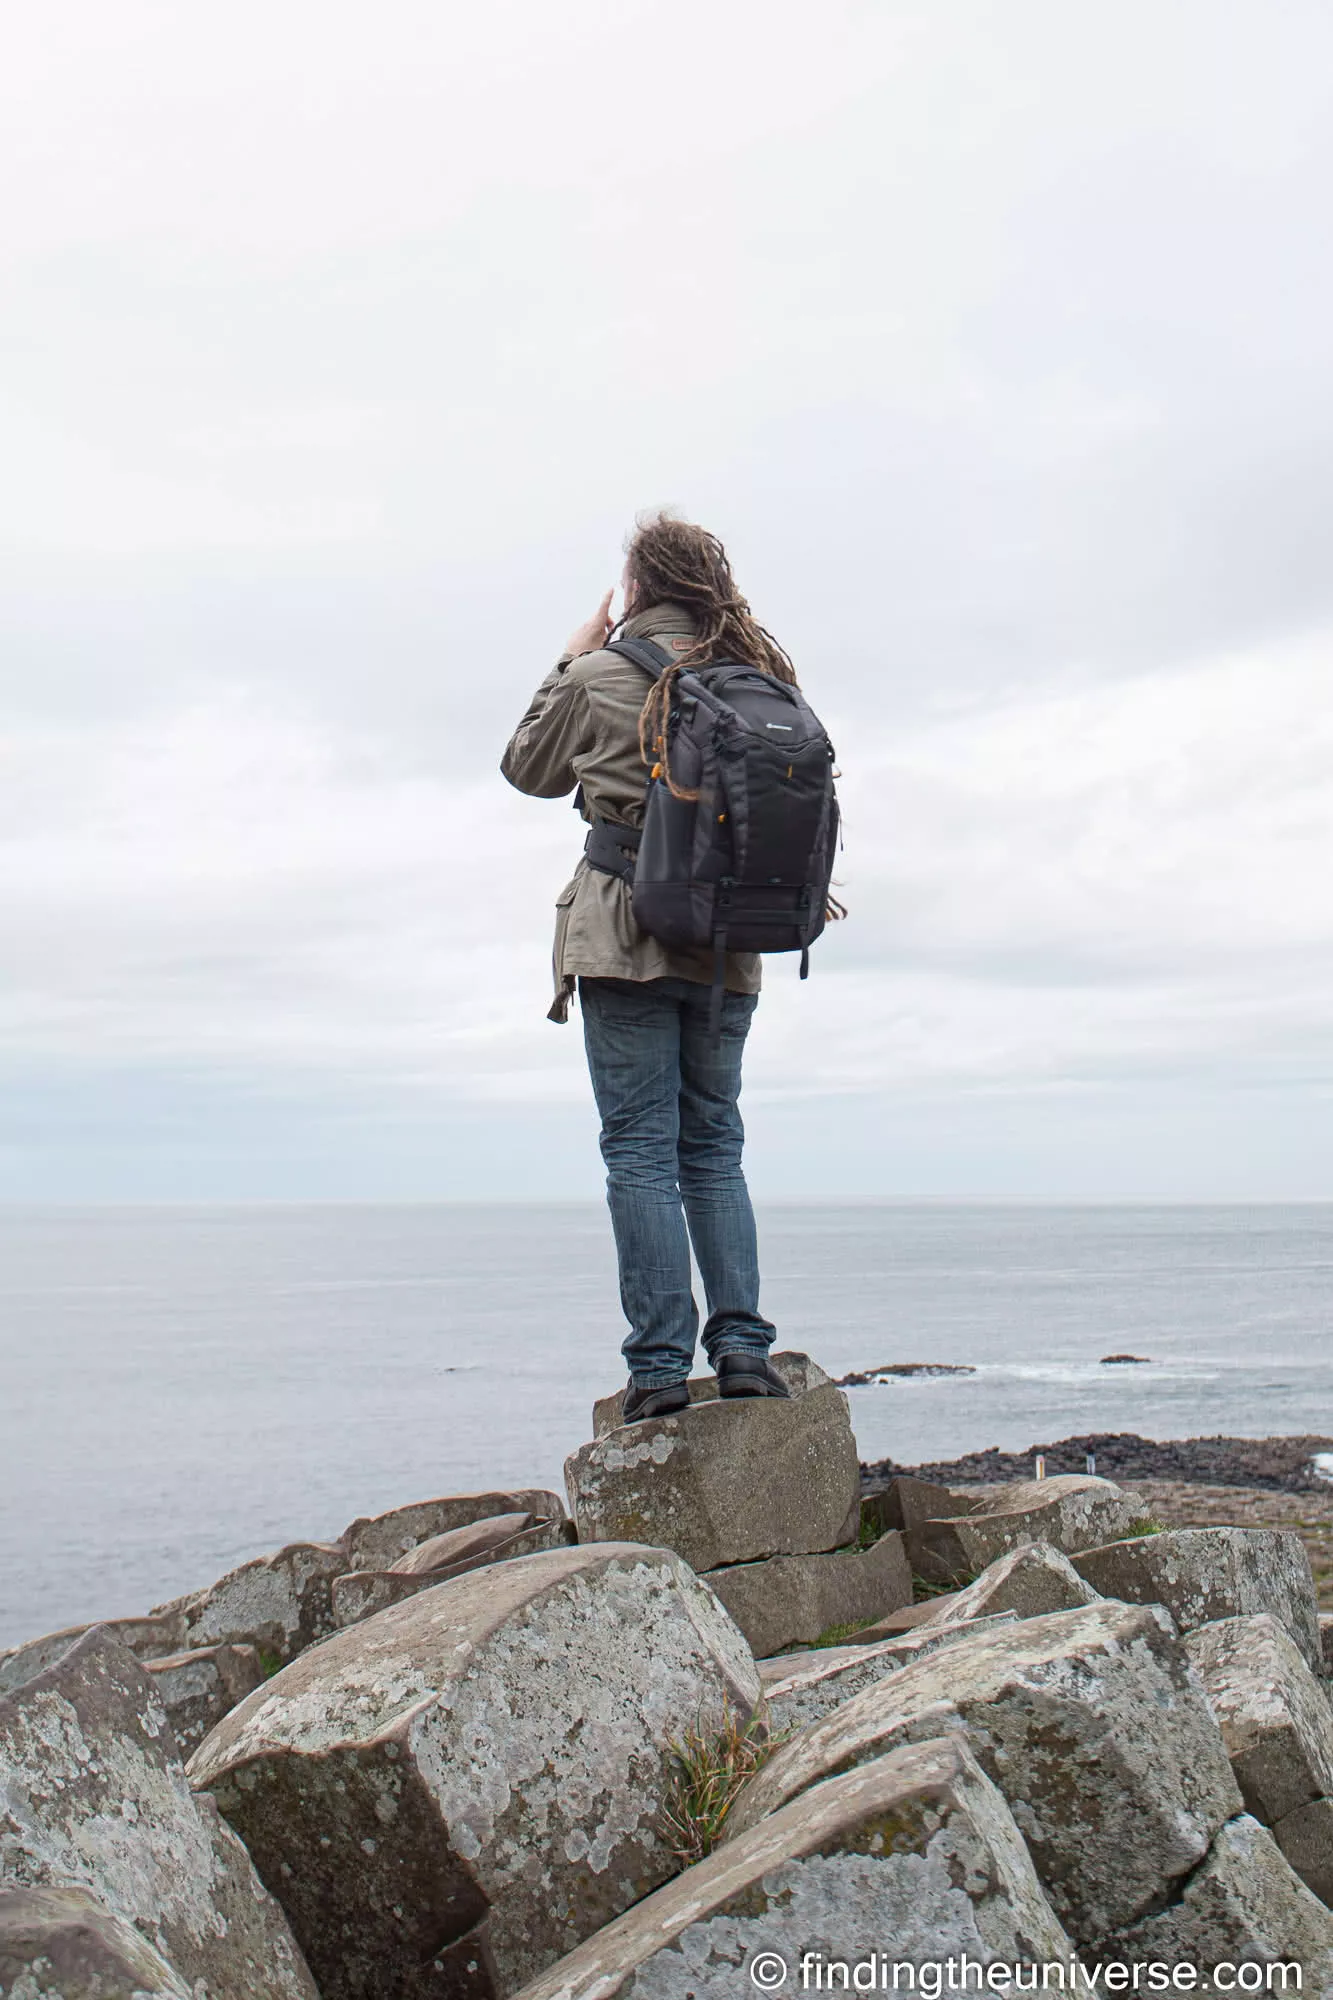
I love this bag for hiking. It’s very comfortable over a long day, the waist belt does its job, and it’s the bag on my back in the Giant’s Causeway photo below, the one I reach for whenever there’s a long lens in the kit and the weather is uncertain.
It’s also quite a bit heavier than I’d like. The 51D is 2.92 kg empty, the heaviest pack in this guide by a margin, and that’s the trade. You’re carrying a lot of protection and structure, which is exactly what I want when there’s a 100-400 in the bag and the path is rock. If you’re carrying a small mirrorless kit, you don’t need that, and you’ll feel the weight for nothing.
The access is where it earns the weight for me. There are rear, top and side openings, so a body comes out of the side without the pack coming off, and the whole kit is reachable from the back panel when you’re set up somewhere.
There’s a tripod carrying system on the outside. Vanguard publishes a load capacity of 29.75 lb, which no other maker here does. It doesn’t publish a litre figure, a torso range, a back-panel description, a hydration figure or whether a rain cover is included, so the table has gaps in this row, and I’ve left them.
On the warranty, Vanguard gives one year as standard, extended to a limited lifetime warranty for the original owner if you register. For what the extension covers and excludes, Vanguard’s site points you to the warranty card in the box.
Weight: 2.92 kg / 6.44 lb
Capacity: not published in litres; load capacity 29.75 lb
Hip belt: waist belt
Access: rear, top and side
In the box: dividers; rain cover not stated
Warranty: one year, limited lifetime on registration
Best for photographers hiking with heavy glass who’d rather carry the weight than worry about the gear. It’s my pack, and it’s the one I’d still choose for that job. Check price on Amazon You can also buy it direct from Vanguard and use code FindingTheUniverse for 20% off.
Lowepro Pro Trekker BP 450 AW II

The Pro Trekker is the pack for a working photographer who carries a lot of camera and not much else: Lowepro says it fits up to two pro DSLRs with lenses attached and five or six extra lenses, in a 28 L camera compartment inside a 32 L pack. That leaves about 4 L for everything else, by my subtraction. It weighs 2.7 kg empty and it’s built from 1680D ballistic polyester with 420D ripstop and 500D panels. The AW in the name means Lowepro’s All Weather cover is included.
There are gaps in this row. Lowepro’s page for this pack gave up far less than its PhotoSport pages did when I read it: I couldn’t read anything about the hip belt, torso fit, back panel, hydration or external carry, and I’m not going to fill those cells in from what a 32 L pro pack “probably” has. Treat the blanks as blanks, and check the harness in person or on Lowepro’s site before buying it for a long walk.
Weight: 2.7 kg / 5.95 lb
Capacity: 32 L total, 28 L camera volume
Hip belt: not stated on the page I could read
Access: not stated on the page I could read
In the box: dividers and All Weather cover
Warranty: two years standard (Videndum); registration-only lifetime for eligible products
Best for a big two-body kit on a short approach, where protecting the gear matters more than carrying a tent. Check price on Amazon
One more pack belongs in this tier by reputation, though I haven’t carried it and it’s not on Amazon: the Nya-Evo Fjord 36 ECONYL Gen 4, a 36 L pack at 2 kg built on an aluminium tubular frame, with a two-setting torso adjustment, rear and top access, a seam-taped rain cover included and a five-year warranty on manufacturing defects, to the original end user. Its removable camera insert is sold separately, and the previous-generation Fjord 36 is still sold alongside it, so make sure you’re looking at the Gen 4.
The Cube Route: A Hiking Daypack Plus a Camera Cube
This is the other half of the fork, and the one I use most often for a walking day. You take a hiking daypack you already own or would buy anyway, and drop a padded camera cube into the main compartment.
Peak Design Camera Cube V2 Smedium
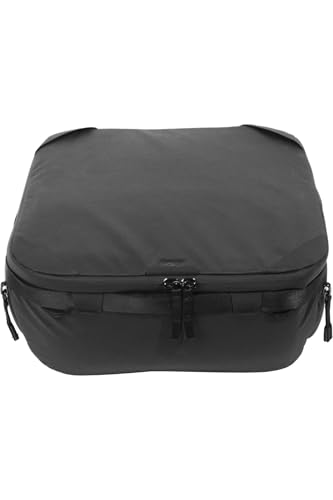
The Smedium is the size that fits a hiking daypack. It’s 22.5 by 31 by 15 cm on the outside, 22 by 29 by 13.5 cm inside, and weighs 300 g without dividers or 500 g with them, in a weatherproof 400D shell. That’s the entire weight penalty of the cube route, half a kilo on top of whatever your pack weighs. The dividers are the good kind, which is to say they stay where you put them, and there’s a handle on top so you can lift the whole kit out in one go.
Mine lives in an old Osprey daypack that has outlasted more than one camera!
If you’re buying the pack half of the bundle new, what you want is a 20 to 25 litre hiking daypack with a padded hip belt and side compression straps, which is what the Osprey Talon 22 (men’s) and Tempest 22 (women’s) are.
Whichever you pick, it’ll be covered by Osprey’s All Mighty Guarantee, under which Osprey repairs any damage or defect on any of its packs from any era, with no registration step and no wear clause. That’s the US wording, and it’s the most generous in this guide. Osprey Europe publishes narrower terms: material and workmanship faults under normal use, and a proof of purchase. The cube itself carries Peak Design’s lifetime warranty.
The limits are the ones I set out at the top. The cube sits in the top of the main compartment, so the camera comes out with the pack off and the lid open. In rain, that’s the moment water gets onto everything. And the cube doesn’t add a hip belt, a rain cover or a tripod strap; it inherits whatever the pack has. That’s fine for a walking day with a couple of camera stops. It’s the wrong tool for a photography day.
Weight: 500 g with dividers, 300 g without
External size: 22.5 x 31 x 15 cm
Internal size: 22 x 29 x 13.5 cm
Fits: a 20 to 25 L hiking daypack, and Peak Design’s own Outdoor Backpack 25L
Warranty: lifetime, excludes wear
Best for anyone who already owns a hiking daypack they like, and who hikes more than they shoot. Check price on Amazon
Getting to Your Camera on the Trail
Access is the thing that separates a camera pack you’ll use from one you’ll resent, and there are four ways the packs above do it. In order from fastest to slowest, in my experience:
- A rotating belt pack, which is the Think Tank Rotation’s trick. The pack never leaves your back and your hands are free in seconds. Nothing else here is as fast, and nothing else here costs you the same weight and bulk to get it.
- Side access, which the PhotoSports and the Shimoda use. Loosen one shoulder strap, swing the pack round, unzip the side door, and the body with its attached lens comes out. Good for one body and a quick grab; not good for changing lenses, which needs the pack on the ground.
- Back-panel access, on the BackLight, the Tilopa and the Alta Sky (which also has side and top doors). Slower for a single grab, but you can open the whole kit in your lap with the waist belt still done up, and the side that touches the ground is the front of the pack, which was dirty anyway.
- Top access on a cube, which is the cube route. Pack off, lid open, cube out. Slowest of the lot, and the one where rain gets in.
There’s a fifth option that sidesteps the ranking altogether, which is not putting the camera in the pack at all. That’s the Peak Design Capture clip. It bolts a quick-release plate mount onto a shoulder strap or a hip belt, and the camera hangs there, outside the pack, ready to lift off with one hand. It solves access completely for a body with a small lens, and it turns any pack in this guide, including a plain daypack with a cube, into a fast-access one.
What it doesn’t do is protect the camera from anything, so it’s a dry-weather tool, and with a big lens the weight pulling on one strap gets pretty tiresome over a long day. I know a lot of hikers who use one with a small mirrorless body and keep the long glass in the pack, and that’s a sensible way to do it.
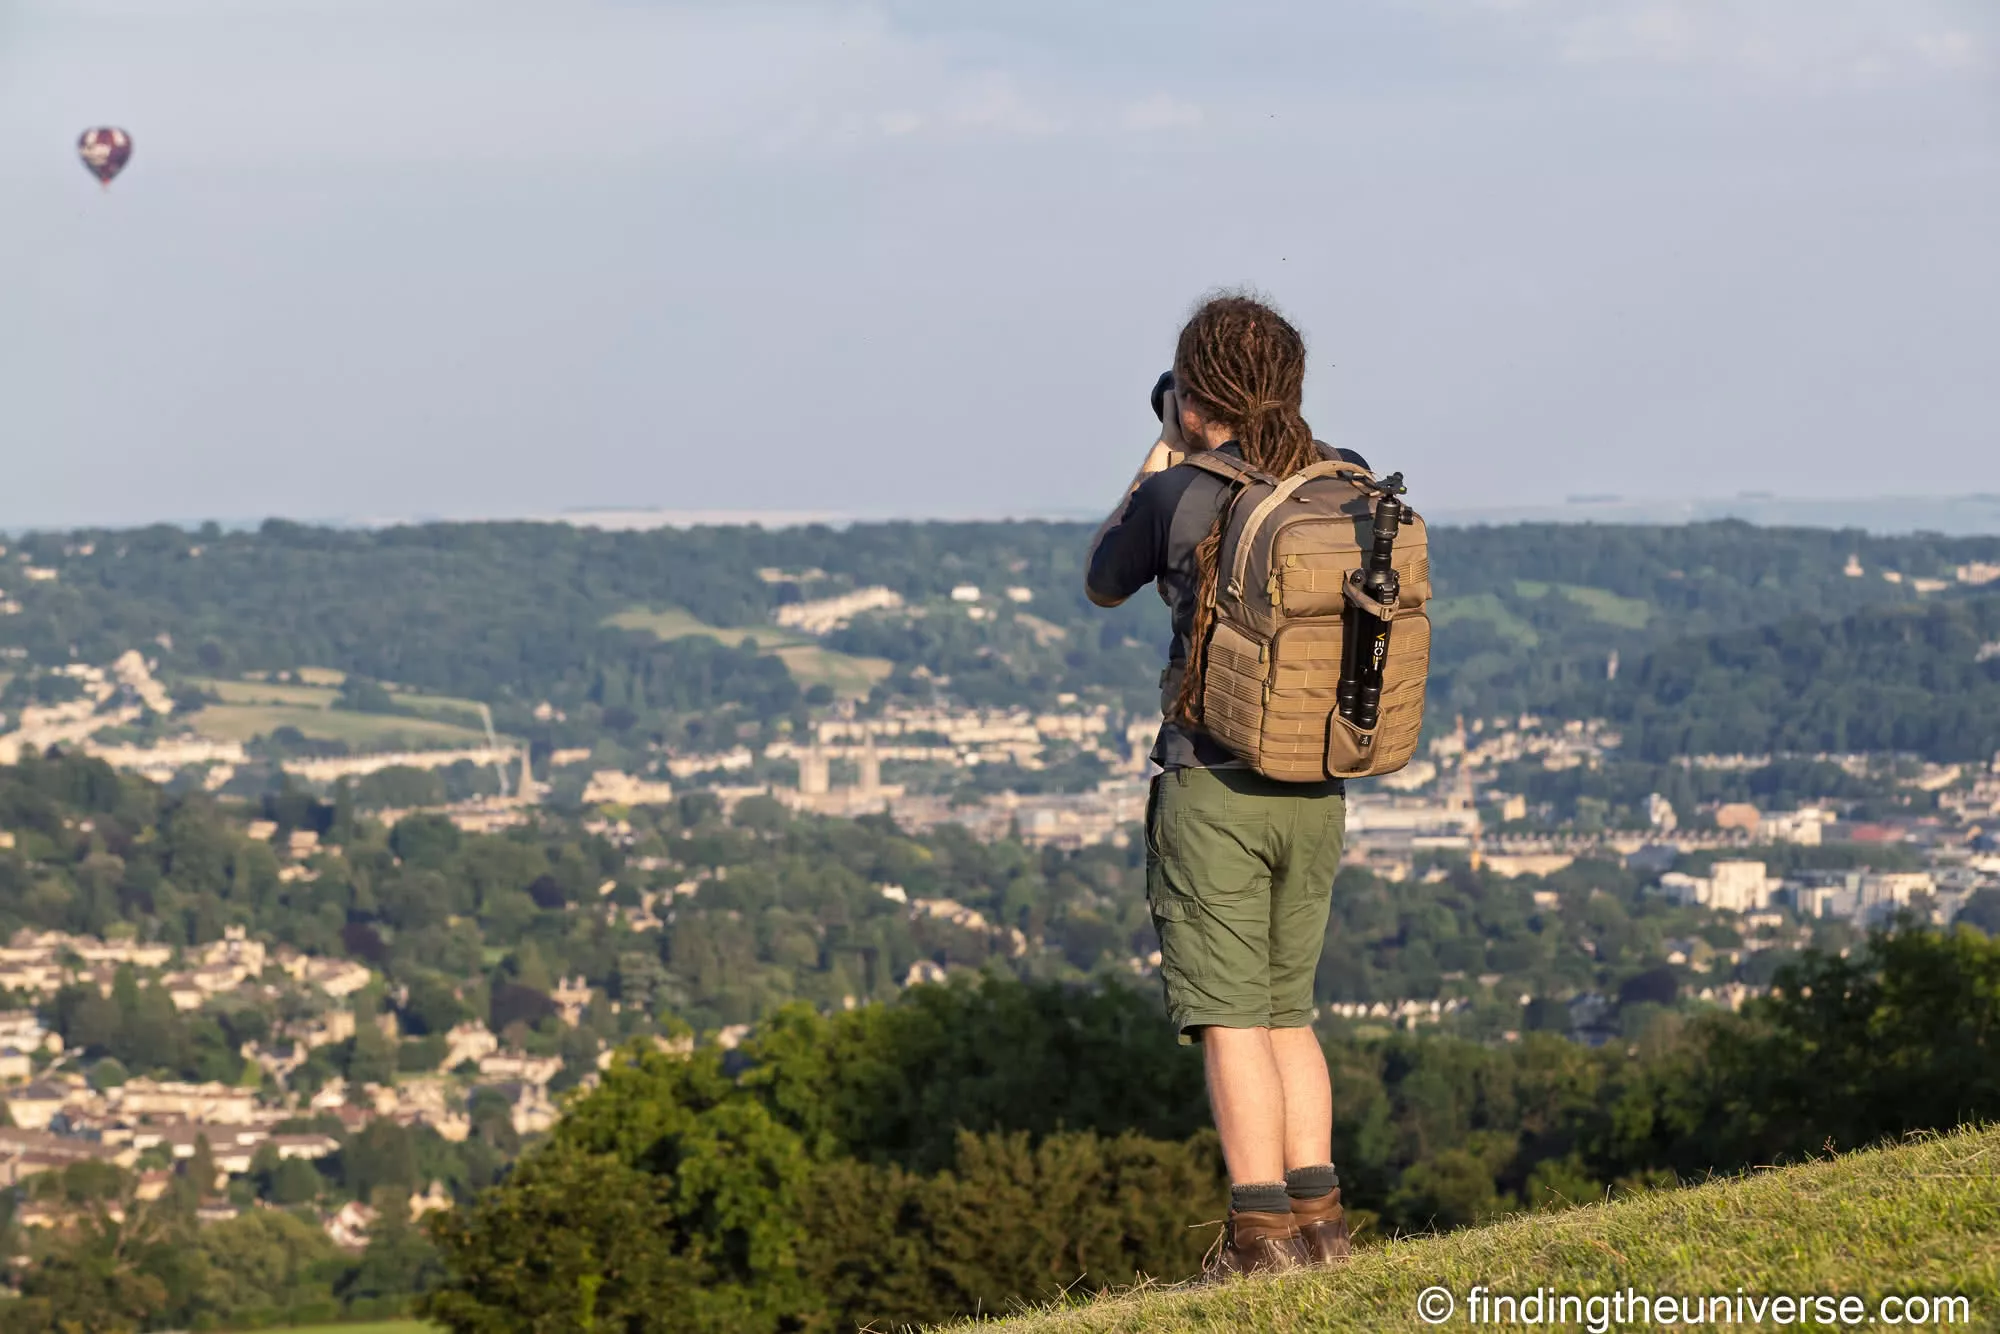
Put simply, if you’re shooting every few minutes, you want rotation, side access or a Capture clip. If you’re shooting at viewpoints, back-panel access or the cube route is fine and you’ll enjoy the lighter pack in between.
Waterproof, Weatherproof, or Just a Rain Cover?
Nobody in this guide sells a waterproof camera backpack, and the words matter here, because the makers use them carefully.
A rain cover is a separate waterproof sheet that you pull over the outside of the pack when it starts raining. Lowepro’s AW cover, Think Tank’s seam-sealed cover, Shimoda’s and Atlas’s included covers and Peak Design’s $29.95 rain fly are all this. It works well as long as it’s on, and it takes a minute to put on, which is a minute you spend getting wet. It also does nothing for the side you open the pack from.
A weatherproof or weather-resistant pack has fabric with a water-repellent coating, and usually covered or coated zips, so rain beads off it for a while. That’s what Lowepro means by weather-resistant, what Think Tank’s durable water-repellent coating does, and what Peak Design means by weatherproof. Every one of those makers still ships or sells a cover, of course, which tells you how long “a while” is.
Waterproof means water can’t get in, and no maker here claims it for a pack, even the one that comes closest.
f-stop rates its DuraDiamond exterior fabric at 20,000 mm waterproof and uses welded waterproof zips, and Nya-Evo calls the Hypalon base of the Fjord waterproof. Both then call the pack as a whole weatherproof or weather-resistant, and both sell or include a rain cover, because a waterproof fabric doesn’t make a waterproof bag. Water gets in at the seams, the zip ends and the opening you use to get your camera out.
So none of these is waterproof, and the useful question is which one keeps a camera dry through four hours of rain. From my own wet days in Iceland and Scotland, that’s a pack with a coated fabric and a cover you’ve actually put on, with the camera in a compartment that doesn’t open upwards.
Fitting and Loading a Camera Backpack for Hiking
Camera bag makers, with a few exceptions above, don’t publish torso ranges, and most of them don’t sell packs in sizes. Hiking pack makers do both, because they know that a pack whose hip belt sits on your waist instead of your hips puts the whole load on your shoulders.
So before you buy any pack here, measure your torso: from the bony bump at the base of your neck to the top of your hip bones, down your spine. If a pack publishes a range (the Peak Design Outdoor covers 17 to 20 in, the Atlas comes in Medium and Large), check you’re in it. If it doesn’t, try it on loaded, or buy from somewhere you can send it back.
Don’t count on a warranty to fix a belt, either. A hip belt that goes soft after three seasons is wear, and wear is excluded by almost every maker here. A buckle that snaps is a defect, and every one of them covers that.
Loading matters as much as fitting. Camera gear is dense, so put it close to your back and just above the hip belt, which on most packs here is where the camera compartment already is. Keep the lightest things (jacket, food) at the top and the outside. A pack loaded with the heavy stuff high and far from your back will pull you backwards on a climb, and you’ll blame the pack.
Then there’s the rule you’ll have read, that a loaded pack shouldn’t weigh more than 20% of your body weight.
It’s a rule of thumb rather than a standard from any mountaineering body; the most authoritative published statement of it I found is REI’s Expert Advice, which calls it one of its “very general guidelines” and pairs it with a second figure that matters more here: a loaded day-hiking pack shouldn’t exceed about 10% of your body weight. For a 160 lb hiker that’s 16 lb, or about 7 kg, for pack, water, food, jacket and camera kit together. Put a 2.9 kg camera pack in that budget and you can see why I called the weight a trade-off.
There’s also a 2014 physics model, cited by Advnture, arguing that the safe percentage falls as body size rises, which is one more reason to treat the figure as a guide rather than a target.
Two Mistakes I Made Carrying Cameras on Hikes
The first was buying for the camera kit and forgetting the walk. Early on I sized a camera pack to the gear, filled the camera compartment, and set off up a hill with nowhere to put a water bottle, a raincoat or lunch. It’s not an ideal way to spend a day, and it’s also unsafe on anything longer than a stroll.
The fix is the column no maker publishes: work out how much room is left once the camera kit is in, and make sure there’s space for the essentials. Now, whichever pack I’m carrying, the bottle, the jacket and the food go in before the camera gets its space, not after.
The second was expecting a heavy pack to feel light because it was comfortable. The Alta Sky is very comfortable; it’s also nearly 3 kg before anything goes in it. For a long time I told myself the comfort cancelled the weight, and on a short walk it really does. On a long one it doesn’t, and by the last hour I’m feeling every gram of padding I didn’t need that day.
What I do now is match the pack to the day rather than carrying the same bag everywhere: the heavy, protective pack when the glass is long and the path is rough, and the daypack with a cube when it isn’t. It took me longer than I’d like to admit to start doing that.
Frequently Asked Questions
What is the best camera backpack for hiking?
There isn’t one, because the answer changes with the hike. For a day hike with one body and two lenses, the Lowepro PhotoSport BP 24L AW III is the pack I’d buy: side access, a padded waist belt, a hydration sleeve and a rain cover, all in the box at 1.5 kg.
For a long day where the camera comes out constantly, the Think Tank Rotation 34L is the only pack whose design solves access without taking the pack off. For long lenses and multi-day carries, the f-stop Tilopa 50L, or the Vanguard Alta Sky if you’d rather have more protection than less weight.
What is the best way to carry a camera while hiking?
In a pack with a camera door you can reach without taking the pack off, which means side access, back-panel access or a rotating belt pack, with the camera compartment low and close to your back. If you’re shooting every few minutes with a small body, a Peak Design Capture clip on a shoulder strap is faster than any pack door, but it leaves the camera exposed to weather.
If you’re mostly walking and shoot at a few viewpoints, a padded camera cube in the hiking daypack you already own is fine, and lighter.
What is the 20% rule for backpacking?
It’s the widely repeated guideline that a loaded backpacking pack shouldn’t weigh more than about 20% of your body weight. It’s a rule of thumb rather than a standard from any mountaineering body; REI’s Expert Advice publishes it as one of its “very general guidelines”, alongside a 10% figure for a loaded day-hiking pack.
The 10% figure is the one that applies to most camera hiking. For a 160 lb hiker that’s about 16 lb, or 7 kg, for everything including the camera kit, which is why the empty weight of the pack matters so much.
Can I use a hiking backpack as a camera bag?
Yes, with a padded camera cube in the main compartment, and for a walking day with a few camera stops it’s what I do. A Peak Design Camera Cube V2 Smedium adds 500 g to any 20 to 25 litre daypack and keeps the pack’s own hip belt, ventilation and room for water and layers.
The cost is access. The camera comes out with the pack off and the lid open, which is slow and lets rain in. If you’ll be shooting constantly, or in bad weather, buy a pack with a real camera door.
How do I carry a tripod or trekking poles on a camera backpack?
On the outside, strapped to the attachment points, and every dedicated camera pack in this guide has some. The Think Tank BackLight and Rotation carry a tripod on the front or side and have an axe or pole loop; the f-stop packs use GateKeeper straps and MOLLE webbing; the Lowepro PhotoSports have tripod and pole attachment points; the Shimoda has removable tripod pouches.
Keep the tripod centred and low if it goes on the front, or in a side pocket with the compression strap over it, and it shouldn’t swing. My standing tripod recommendation for hiking is the Peak Design Travel Tripod, which packs down small enough to fit inside most of these packs if you’d rather not carry it outside; I compare the options in my guide to the best travel tripods.
Do I need a waterproof camera backpack for hiking?
No, and you can’t buy one from anyone in this guide anyway. No maker here sells a pack it calls waterproof; the closest is f-stop, whose DuraDiamond fabric is rated 20,000 mm waterproof, but even f-stop calls the pack weatherproof and sells a rain cover, because seams, zips and the opening you use are where water gets in.
What you need for hiking in rain is a pack with a coated fabric, a rain cover that’s included or that you’ve bought, and a camera compartment that doesn’t open from the top. The Lowepro PhotoSport, Think Tank BackLight and Rotation, and Shimoda Action X30 v2 all ship with a cover; the f-stop packs and the Peak Design Outdoor don’t.
If you’re still choosing the camera itself for the trail rather than the bag, my guide to the best cameras for hiking and backpacking covers that side, and the broader picks are in my best travel camera guide.
Further Reading
If you’re choosing a bag for travel rather than the trail, with slings, rollers and carry-on sizing, that’s my guide to the best camera bags for travel. For a daypack without any camera compartment at all, which is the other half of the cube route, see my best travel daypack picks. And once the kit is in the bag and you’re heading for an airport, my guide to travelling with camera gear covers flying with it.
If you’d like to get more out of the camera once it’s out of the pack, that’s what my online travel photography course is for. It covers everything from the basics through to composition, editing and getting your photos seen, and it comes with feedback from me on your own work.
And that’s my guide to the best camera backpacks for hiking. If you’ve got a question about any of these packs, or a pack you think I should have included, let me know in the comments below.

Leave a Reply