As a photographer who is also a blogger, I am often asked how to reduce image sizes. This can be useful for a variety of reasons, from sending an image by e-mail, through to optimizing images to improve website loading times. I thought a post explaining exactly how to reduce image sizes in general, and also how to optimize images for a website specifically would help answer that question.
In this post I’m going to cover a few things. I’ll explain how to reduce image sizes for any purpose you want to use them. This may be for sending in an email, uploading to social media or an online photo gallery, or because you want to host them on a website or blog.
If you are uploading your images to a website, I’ll explain why it’s important to optimize your images for your website. Then I’ll cover the various different options you have for doing so, from software tools on your computer through to Internet hosted options and plugins for WordPress.
Finally, for the website owners amongst you, I’ll give some more general tips for improving your site load time that relate to how images appear on your site.
This post covers a lot, so feel free to use the table of contents to find the specific section that applies to you!
Table of Contents:
Why Do You Need to Optimize Your Images?
If you have a large library of images, you will notice that they take up a lot of space. So the main reason to optimize your images is so that they take up less space. This may be to free up your own hard drive space, or it may be because you want to share them with friends and family, and the files are too big to share.
It’s common for example if you are uploading an image to an app or website that it will have a maximum file size restriction, often something like 5MB. So you will need to reduce that size of the image so you can upload it.
If you are hosting a website, then there’s another good reason to optimise your images, and that reason is site speed.
If you visit a website like this one, you will notice that it has a lot of images. Images are important for conveying information and illustrating our content – the Internet without images would be quite dull!
However, images files are large files, taking up quite a lot of space. An average image file in the standard JPG format, as taken directly from your camera or phone, will usually be around 4 – 7 megabytes in size.
If you have an article on the web with ten pictures, that would equal 40 – 70 megabytes of data that your web browser would have to download so you could read it. And that’s not even counting anything else that might be on the page, which also contain text, scripts, etc.
Trying to load a webpage with 40 megabytes of images would take time, even on a fast internet connection! On a slow mobile connection, it would take what might feel like forever.
And speed matters to users. In fact, studies have shown that over 50% of mobile users will leave a site if it takes more than 3 seconds to load. The BBC learnt that for every extra second a site takes to load, another 10% of users will leave.
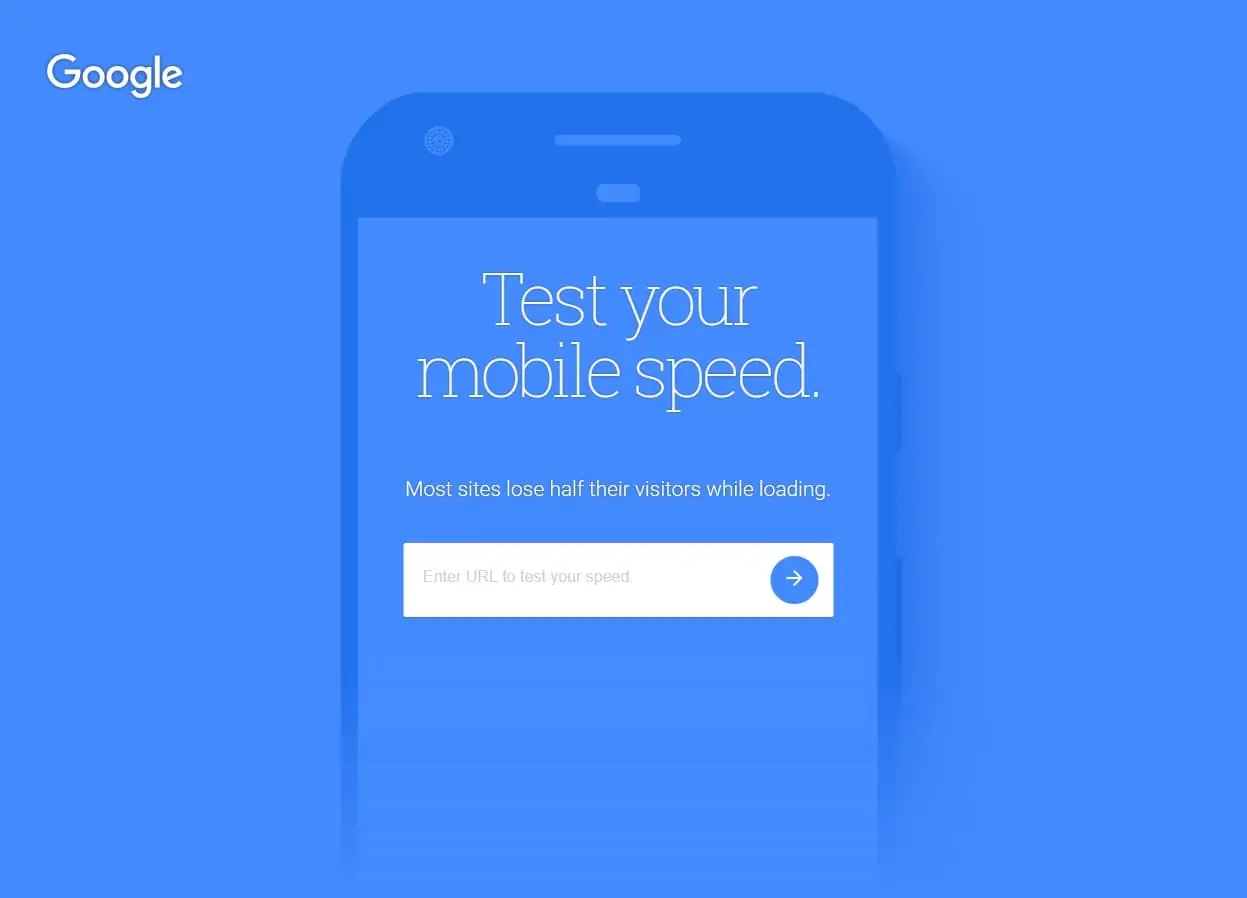
If you have a website, I can recommend running it through Google’s “Test my site” tool, which will give you an indicator of how fast your site loads. The target is under 3 seconds. Pages on this site average around 2 seconds on that tool.
It’s not just users who like fast sites though. When deciding where to rank pages in its search results, Google uses site speed as one of its many ranking factors. That means that if you have a website that you want to rank well in Google, you need to be thinking about how fast it loads. And optimizing your images can go a long way to a faster site.
Google provides another tool to test site page speed and provide detailed tips for improving your site speed: Google PageSpeed Insights (PSI). We highly recommend running your website through this tool to see what results it comes up with.
On this website, we score around 85 – 92 on the mobile version of PSI, and 97 – 100 on the desktop version. Much of that score comes from having well optimised images.
Now let’s look at the next point, which is also often a point of confusion when it comes to images – the difference between the size of an image, and the compression of an image.
Image Size vs Image Compression, an Explanation
In my example above, I suggested that if you grab your photos directly from your camera or smartphone, and uploaded them to the web or emailed them to friends, they would be around 4 megabytes to 7 megabytes in size.
Size in this case is a measure of how big the image file is. This file size is the result of two things, the dimensions of the image (also, often confusingly called size), and how compressed the image is.
These are two distinctly different things, and it’s important to understand and tackle both of them, especially for website optimization.
Image Size
When we talk about the size of an image, we can either be referring to the file size, measured in bytes, or the dimensions of the image, measured in pixels. I will explain both of these and how they relate to each other.
When you take a picture on your camera or phone, the camera will have a “megapixel” rating. This refers to how many pixels make up the image the camera takes.
For example, a 12 Megapixel camera, such as those found on many smartphones, will take an image that consists of twelve million pixels. This image will be 4000 pixels wide and 3000 pixels high, and you multiply one by the other to get the total number of pixels.
If the file is uncompressed, it will one take one byte of data to represent each pixel. So a twelve-megapixel image will consist of twelve million bytes.
On the web, as well as in popular messaging applications, very few people are using screens big enough to display an image 4000 pixels wide. In fact, the average screen resolution as of December 2018 is only 320 pixels wide by 640 pixels high, largely due to the fact that so many people are browsing the internet on mobile devices.

Showing a 4000 pixel wide image on a 320 pixel wide screen is going to be a huge waste of bandwidth, as the browser is just going to shrink it down to 320 pixels wide anyway.
Obviously, an easy win here is to resize the image first before it is sent to the web browser. Unless you have a really good reason for a larger image, such as a really wide header image that you think will appear on wide monitors, we would not recommend using images larger than around 1000px wide on your website. Most people use ones that are even smaller and 640px, 800px and 1024px are common image sizes.
For example on our travel blogs, we use 800px images on Independent Travel Cats and 2000px on Finding the Universe.
If we take the 4000 x 3000 image, and size it down to a more reasonable 1000 x 750 pixels, we will take it from being 4 megapixels to a more reasonable 750 kilopixel size. Assuming one byte per pixel, that’s a 750kb image.
Of course, 750kb is still a bit much for each image on your site, where you are likely aiming for images between 50kb and 300kb in size.
The next bit of good news is that this is also achievable, using what is known as image compression.
Image Compression
If you have been paying attention, you’ll have noticed that I initially said that a 4000 x 3000 pixel image will be 12 megabytes in size, but that an average image taken from a camera or smartphone with a 12 megapixel camera is likely going to be between 4 and 7 megabytes.
Clearly, something is happening here. And that something is what we call image compression.
JPG, or JPEG, is a compressed image file format. Unlike a RAW image file, which is just the RAW data that your camera saves (see more on RAW here), a JPG file is a processed and, most importantly, compressed file format.
Image compression is a clever technique where the file size of an image is reduced using various algorithms. It’s pretty smart stuff, and can be done using either “lossless” compression, or “lossy” compression.
Don’t worry, we’re nearly at the bottom of the rabbit hole.
Lossless compression is a means of compressing images so they don’t change visually at all, but still reduce in file size. It’s great for image quality, but doesn’t make a lot of difference to the actual file size as not much information can be removed without affecting image quality in some way, however minor.
Lossy compression is more aggressive, and reduces the file size by reducing the quality of the image. With JPG compression, this is often measured on a sliding scale from 1 – 100, where 100 is no image quality reduction, and 1 is maximum image quality reduction. Note that this is not a linear scale, and decreasing from 100 to 80 will usually give much greater savings than going from say 60 to 40.
In my experience, you can compress a file with JPG compression at around a 76 – 80 compression size without noticeable changes in image quality that most users will be able to detect.
So what difference does this actually make to the file size of an image?
Well, let me take an example image file, which is 4000 x 3000 pixels.
At full size, so 4000 x 3000 pixels, the following lossy compression settings when exporting the image from Adobe Lightroom CC yield the following results:
JPG at 100% – 10.3 MB
JPG at 80% – 4.5 MB
JPG at 75% – 3.4 MB
If we then reduce the image dimensions to 1000 x 750 pixels, and do the compression again from Adobe Lightroom CC:
JPG at 100% – 764 kb
JPG at 80% – 411 kb
JPG at 75% – 332 kb
As you can see, we are making progress! However, we are not done yet.
Free Tools to Reduce Image Size
There are a number of third-party tools which are specifically designed for image optimization for the web, which can produce much more impressive results.
Remember, you’re going to need to do two things. First, you’re going to need to resize your images. Some tools that let you do that are as follows. These are all free.
- Microsoft Powertoys for Windows (adds a handy resize option to the right click context menu)
- iResize for Apple devices
- Snapseed for Android / iOS (as well as being an amazing photo editor, it also lets you set an export size in pixels for your edited images
- Adobe Creative Cloud Express – a free online tool for resizing images
Once the image is resized, you will want to compress it. The tools I suggest trying are:
- FileOptimizer (free, Windows)
- ImageOptim (free, Mac and online)
- Compress JPEG (online tool)
- Image Size (Android / iOS). Free up to 100 images a month.
If you’re just looking to resize images quickly and easily, then an online tool is probably going to be the fastest option. If you find yourself resizing images a lot, then a dedicated tool is a good option.
I’m going to compare the results of image compression using Romeolight JPEGmicro (no longer available), FileOptimizer and Compress JPEG against Lightroom, so you can see the difference they make in file size. You’ll also see how different pixel sizes affect file size.
Setting these to compress to JPG at 75%, the following results are had from our files. Compare them to the Lightroom version.
Lightroom at 75%:
4000×3000 pixels: 3.4MB
1000×750 pixels: 332 KB
Romeolight JPEGmicro at 75%
4000×3000 pixels: 1.7MB
1000×750 pixels: 163 KB
FileOptimizer at 75%
4000×3000 pixels: 3.3 MB
1000×750 pixels: 156 KB
CompressJPEG at 75%
4000×3000 pixels: 1.8 MB
1000×750 pixels: 123 KB
As you can see, theses dedicated image compression tools produces much smaller file sizes, especially of the smaller images which is what we are particularly interested in.
If you are just looking to optimize your images for sending in e-mails or to send to friends, I’d suggest using one of the above tools, or something similar.
If you are looking to optimize your images for your website and you host your site on the free version of WordPress (wordpress.com) or on a site like Blogger, Wix, Druple or Joomla your best option is to optimize using the above tools.
If you are looking to optimize your images for use on a self-hosted WordPress site, read on for some better options.
WordPress Image Optimization Plugins
I know what you’re thinking. This all sounds like a lot of work. First you have to edit your photos, then you have to resize them, then you have to compress them before you even upload them.
Wouldn’t it all be a lot easier if there was an automated process to do all this?
I have good news – there is! If you’re hosted on WordPress, then you can install plugins that will handle these tasks for you, and produce great results doing so. I’ve taken a look at some of the most popular options to give you an idea of what’s available.

For each of the services on the list I took my 1000px x 750px test image as exported from Adobe Lightroom, and tested the compression available if they offered a free service.
Please note that this is by no means a definitive test, the goal is just to demonstrate how these online services compare to doing it using a desktop-based solution like those listed above. A detailed test would require using a wide range of images of different subjects to define a clear winner. This comparison is just to show that each service offers a roughly comparable result.
Also, it’s hard to compare some of these services directly as each service has slightly different settings that you can adjust. In an ideal world, I’d be able to set each one to 75% quality for a more precise test, but many of these services don’t offer that level of control.
However, as a general overview of what is available, I believe this list will help you decide what might work for you.
Without further ado, here are some of the best WordPress Image Optimization Plugins to consider, along with details of pricing and features they offer.
1. ReSmush.It
Resmush.it is the service we use on our sites for image optimization. It offers fine grained control over the quality settings, and it creates a backup of your original image file on your server so you can always change the settings if you want, and you won’t lose your original file.
You can optimise images on upload, plus there’s a bulk optimization tool to allow you to optimize your whole library. The WordPress plugin is easy to use, and the results, in our experience, are excellent. Also, it’s entirely free!
Resmush.it at 75%
1000×750 pixels: 143 KB
Pricing: Free, maximum image size 5MB.
2. ShortPixel
ShortPixel offers compression for JPG, PNG, GIF and WebP files, as well as conversion from JPG, PNG and GIF to WebP. WebP is a newer image file format that offers improved compression, but is not universally supported by browsers yet, so requires some effort on your part to implement on your website.
Other features include bulk image optimization of your media library, no file size limit, and excellent support. You can also run it on multiple websites with one license.
In terms of image compression, ShortPixel has three settings, Lossy, Glossy and Lossless. Lossy is the most aggressive, Glossy tries to produce good results but with higher image quality, and lossless is the highest image quality, which won’t make too much difference. Currently you can’t adjust the specific compression amount though.
ShortPixel with Lossy Compression
1000×750 pixels: 91.1 KB
Personally, I have to admit that I find the lossy compression on ShortPpixel produces images that are a little bit too soft, but if they work for you that’s great, as the file sizes are definitely the smallest of all the plugins I’ve tried. They have another option for picky people like me though: Glossy.
ShortPixel with Glossy Compression
1000×750 pixels: 182 KB
Still a good result, although the lossy results are definitely more impressive in terms of file size reduction, if you are happy with the image compression results.
Pricing: First 100 compressions a month free, then various pricing models. Most will be fine with the USD $5 /mo 5,000 image plan or the USD $10/mo 12,000 image a month plan. One-time bulk image optimization plans are also available.
3. Kraken.io
Kraken.io offers JPEG, PNG and GIF compression, with support for files up to 32MB in size. Images can be automatically resized on upload, and you have fine grained control over the resize options, including a lossy, lossless, and expert setting. The latter lets you pick the exact image quality you want the algorithm to use.
Kraken.io at 75% (expert setting)
1000 x 750 pixels: 155 KB
Pricing: Different tiers available, from USD $50 / year for 500MB of images a month up to USD $790 / year for 60 GB of images a month
4. TinyPNG
Despite the name, TinyPNG offers both JPG and PNG file compression. It offers bulk optimization of your image library, optimization on upload, and the option to resize images on upload. You can use your plan across multiple websites, and there are no file size limits.
However, you cannot currently choose the compression level as the service does this per image. However, results are certainly in line with the other tools in this list.
TinyPNG at default setting
1000×750 pixels: 141 KB
Pricing: First 500 compressions a month free, then USD $0.009 / image up to 10,000, then USD $0.002/image.
5. Imagify
Imagify offer optimization of JPG, PNG and GIF files, and you can use your allowance across multiple sites. It also offers the option of image resizing, which is a handy feature.
Three tiers of image compression are available, Normal, Aggressive and Ultra. In my testing using the web interface, these all ended up producing the same result across a variety of files I tested, which I can only assume to be an error, as the resulting file was much larger than with the other services.
As with the other services, a WordPress plugin is available.
Pricing is based on the gigabytes of images you send across, with Imagify estimating that 1GB is equivalent to 10,000 images. Plans are available on a monthly, annual, or one-time basis.
Imagify at Ultra setting
1000×750 pixels: 271 KB
Pricing: USD $49.90 / year for 1GB of images a month, USD $200 / year for 5GB of images a month. Other tiers available.
6. EWWW.IO
EWWW.IO offers compression of JPG, PNG, GIF image files, and as a bonus, you can also compress PDF files. It also offers WebP conversion of images, bulk optimization of your entire media library or specific folders, and it will resize your images on upload as well.
Quality settings are fine out of the box for most users, but advanced users can adjust this quality setting if desired.
EWWW.IO with lossy setting
1000×750 pixels: 158 KB
Pricing: USD $0.99 for API access, then USD $0.003/image (first 500 images are free)
6. More options
There are a number of other options that offer similar performance with different pricing models. These include Optimus.io ($29 / year, unlimited use) and WP Smush Pro ($49/mo for WPMU subscription).
I did not include them in the round-up as they don’t allow for a free test, but as the underlying technology is pretty much the same, I would suspect they would offer similar results.
Optimus.io in particular has a very attractive pricing model, and also includes WebP conversion, a 10MB maximum file size, bulk conversion, and the option to adjust the quality setting if required.
Summary of WordPress Image Optimization Plugins
As you can see, these image optimization plugins offer equivalent compression to a desktop-based solution, with a number of advantages.
First, the images are compressed as you upload the file, so you don’t have to worry about performing extra steps before you upload.
Second, they compress all the versions of the image that WordPress generates, as well as the original image file. Every time you upload an image, WordPress creates a number of versions of it, which are used for different things like blog post thumbnails, featured images or header images.
By default, these are not well compressed, and these plugins handle the compressing of these files, which saves you server space as well.
However, when comparing pricing, remember that each of these images counts as a conversion. On average WordPress will have five versions of each image, so if you use a service which charges per image compression, each image you upload to WordPress will use up five of your credits.
So, which one to choose?
Well, I use resmush.it on our sites. It’s free, which is a huge bonus, the compression is excellent, and when I’ve had issues the team has been very responsive.
My second pick would be Optimus.io. Whilst I didn’t test it, the pricing is great and user reviews are positive.
Finally, I can also recommend ShortPixel. They have an easy-to-understand interface, and produce great results – especially with the lossy setting. With support for WebP conversion of images, and unlimited file sizes, plus great support, this is one of the better premium paid options.
Finally, it’s worth pointing out that in my experience there is is no one “best” option when it comes to image optimization, and as I’ve only tested one image on each service, this is obviously not a definitive comparison.
My advice is to pick the plugin or tool that fits best into your workflow, has a price model that works for you, and use that.
Other WordPress Image Plugins to Consider
Whilst the above plugins do a great job of compressing the images, they aren’t the only option out there for improving your image workflow, and I wanted to include a couple more options for you to be aware of on WordPress.
Imsanity
Imsanity is a tool that saves you the effort of having to remember to manually resize your images. Whilst many of the plugins on this list also do this for you, not all of them do, and Imsanity is a free plugin from the creators of EWWW.io which will resize your images automatically on upload.
So if you accidentally upload an image at 4000 pixels wide, Imsanity will scale this down for you to a more manageable size. You set up the size yourself.
JetPack
Jetpack is a multi-purpose plugin that can do all sorts of handy things for a website. It has two really useful features when it comes to images – it supports lazy loading of images (more on this shortly), and it also has a really nifty image compression feature built in called Photon.
Photon is a service which basically takes the images from your posts, compresses them (you can configure how much), and then returns the optimized images from the Jetpack CDN. This reduces the bandwidth load on your server. Even better, this service supports WebP conversion too, so if a user visits your site with a browser that supports WebP images, they will automatically be served a WebP image with no effort required on your part.
If you have JetPack, I can highly recommend enabling this feature, along with the lazy load feature, and then you won’t have to install any of the other plugins on this page at all. It’s a part of the free Jetpack plugin on WordPress.
More Tips for Loading Images on WordPress
Now that you have optimized images, there are a few more tweaks you can implement when it comes to image loading on your site for maximum performance.
Serve the right sized images for the user’s device
People browse the web on a wide variety of devices these days, from smartphones, through to tablet devices, laptops, and desktops.
Each of these devices has a different screen size, and displaying the same image on each device can be a huge waste of bandwidth – even if the image is compressed.
Let’s look at an example, a mobile user visiting your site on a 320 pixel wide screen, and a desktop user visiting your site on a 1366px wide screen (these are the most common mobile / desktop image screen width as of December 2018).
The 1366px wide image is 230 KB after compression at 75%.
The 320px wide image is 30KB after compression at 75%.
This is a massive difference. Clearly, in an ideal world, you want to display images to the user that most closely match the screen size of the device that they are browsing your site with. There’s no need to send them an image that is wider than the screen they are viewing it on, as it’s a waste of bandwidth.
Unfortunately, implementing this is not as easy as installing a plugin. It will be specific to your site design and theme, and will require some coding, as well as deciding what sizes of image you want to produce. There’s a good guide here to doing it, but we would recommend getting a web developer to help if you as it requires code changes.
Lazy load images
An easy and really quick win to improving your sites load times is to lazy load the images on your site.
What does lazy loading mean? Essentially, this is a technique which is widely used across the web, which means that only the images that are actually on the screen are loaded. Images further down the page do not load until the user scrolls their browser window, meaning that these images do not have an impact on the initial site load time.
Lazy loading is easy to implement on WordPress, with multiple plugins available that offer this functionality. Our current favourite is Lazy Loader, but we have also used BJ Lazy Load and a3 Lazy Load with good results.
In Summary
I appreciate that this was a lot of information, so I wanted to provide a brief summary of all the above, with some actionable steps you can take to improve image load times on your own website.
5 Steps you can take to improve image load times on your website
Step 1: Resize your images to an appropriate maximum size for your site.
Usually this will be between 1000px and 2000px wide. You can do this prior to upload, or using an image resizing plugin like Imsanity.
Step 2: Compress your images as much as you are comfortable with.
The easiest way is with a plugin like those mentioned above, including Resmush.it, Optimus.io or ShortPixel.
Step 3: Use a lazy loading plugin to load images
This will increase your site load speed, as images will only load as they are needed, rather than up front all at once.
Step 4: Serve images to users based on the width of their device
Having highly compressed images is only part of the solution – there’s no point displaying images that are far wider than their browser. You can save a lot of bandwidth and increase site load speeds by loading the right size of image, based on the width of the user’s browser window.
Step 5: Test!
Use services like Google’s Testmysite and Pagespeed Insights to ensure your site images are as optimized as possible.
Final Tip
It’s worth pointing out that image sizes are only one part of optimizing your website for speed. Whilst images can make a significant difference in site speed, there are a number of other factors to consider. Good hosting is an important first start. If you don’t have a fast website host, then you’ll always have an uphill battle when it comes to site speed.
We host all our WordPress sites on Cloudways, and have done for a number of years. We’ve tried a variety of other hosts, and in our experience Cloudways is the best balance of price and performance. You can read our full Cloudways review here.
We have an exclusive discount code for Cloudways, which will give you 10% off your hosting for the first three months. Just use the code TRAVELCATS when you sign up.
Further Reading
Hopefully this guide to image optimization for the web and WordPress sites in particular has helped you get some ideas for how to improve your site load times.
We have a number of other articles and resources that we think you will find useful, covering both blogging and photography. Here are some to get you started.
- Our guide to how to be a travel blogger, which is a good starting point if you are thinking of starting your own blog.
- Speaking of which, we also have a step by step guide to the process of how to start a travel blog from scratch, which covers everything from picking a domain name to choosing a WordPress host.
- I started this blog on the Blogger platform. This turned out to be too restrictive for my needs after several years, so I migrated to WordPress. You can see my guide to moving from Blogger to WordPress here.
- Photography is a key element of a travel blog, and I have a whole series of photography guides to help you out. These cover topics from composition and depth of field, to improving Lightroom performance and an overview of what RAW is.
And that’s it. As always, we’re happy to take your questions and hear your feedback about any of the above. Just pop them in the comments below, and we’ll get back to you!

Marina T. says
To tell the truth, the complexity of reducing image sizes is an eternal problem for me because I really often need to do it, but I’m not really aware of effective and convenient ways to implement it. I’m so glad that I came across your article and clarified a lot of nuances regarding work with images in general. Frankly, before this moment I hadn’t known about such an importance of image optimization and all the advantages that it can give you. I think that it is essential for any person because optimizing has a different sphere of application and it can be applied for different tasks. I am so grateful to you for sharing such useful free tools to reduce image size because they are truly irreplaceable and now reducing images will not be a problem for me.
Laurence Norah says
My pleasure, thanks for your comment!
Rhona Watson says
Thanks Laurence. I was hoping there was an easy solution to avoid me chandiging each image individually or upgrading to a paid business account. It is very useful to know that there isn;t an obvious solution I have missed. – Thanks also for the quick responses.
Laurence Norah says
No worries, it’s good for me to know these things as well for future requests!
Rhona Watson says
I have run out of space on my free wordpress blog – I have used a lot of pictures. Is there anything that you can recommend to rize all my pictures already up on the blog, rather than resizing the new images as I upload them?
Laurence Norah says
Hi Rhona,
Sure thing. Are you able to install plugins on your blog?
If so I’d recommend the following two plugins:
– Imsanity (https://wordpress.org/plugins/imsanity/) which will allow you to resize already existing images in bulk
– resmush.it (https://wordpress.org/plugins/resmushit-image-optimizer/) which will compress all your images.
I’d recommend running Imsanity first to resize, and then resmush to compress. I’d also suggest taking a full site backup before doing anything.
If you can’t install plugins for any reason, let me know, and I’ll come up with another option for you 🙂
Laurence
Rhona Watson says
Sorry, WordPress has changed recently and i have to upgrade to install any plugins.
Laurence Norah says
Hi Rhona,
Ah ok, I see that. My next suggestion was going to involve FTP access to get at your images, but that’s also a paid feature it seems.
The only thing I can think of is to go to the media library, choose “edit”, and then scale the image to a new size. Unfortunately this would have to be done image by image.
Another option might be to upgrade to the business plan, install and use the two plugins I suggested as plugins are allowed on the business plan, and then cancel your subscription. According to the documentation for WordPress (https://wordpress.com/support/manage-purchases/#refund-policy), most subscriptions can be canceled for a refund within 14 days of purchase or renewal. To be honest I have no idea if this would actually work and keep your resized images, but I can’t see another easy way to do this in bulk on the free WordPress.com product.
Sorry to not be of more help!
Laurence
Mayra says
Thanks, Laurence.
Very useful post.
You mention JetPackwith the Lazy Load option AND the Lazy Loader plugin.
Do you use both or just one of them?
Laurence Norah says
Hi Mayra,
We just use the Lazy Loader plugin, you don’t want to use two plugins for the same functionality. I just mention Jetpack because a lot of folks use Jetpack, in which case, you might as well use the built-in Jetpack lazy loading functionality rather than adding another plugin, if that makes sense.
Let me know if you have any more questions 🙂
Laurence
Gemma Rapkins says
This has helped me so much! Thank you
Laurence Norah says
My pleasure Gemma – thanks for letting me know!
Ansgar says
Thanks for your post. Much appreciated! Greetings from Switzerland
Laurence Norah says
My pleasure Ansgar, I’m pleased you found it useful 🙂