
Do you sometimes find yourself somewhere you want to take a good picture of yourself but can’t quite figure out how to go about getting it?
Well, I’m here to help!
In today’s guide, I want to give you some tips and advice for how to take better pictures of yourself. This will apply whether you’re travelling solo and want photos of yourself traveling or just want to improve your selfies in general.
I’m going to split this post up into two main sections. First, I’m going to share some tips on taking selfies so that whatever camera you are using, from a smartphone to a DSLR, the end results look as good as they can.
Then I’m going to cover a number of options that you have for taking pictures of yourself, so you know what your options are. This will include ideas like different gear you can use through to tips for enlisting strangers to help out.
Let’s get started!
Table of Contents:
Tips and Tricks for Taking Good Selfies
1. Hold the camera as far away as possible
If you are going down the road of holding the camera yourself, you want to hold it as far away from yourself as possible. This is where a selfie-stick on a smartphone comes in so handy.
The reason for this is that most camera lenses on smartphones, and the lenses you would use on a normal camera to take a hand held selfie, are going to be wide angle. This means that they can get a lot of the shot in, but they also distort the image slightly.
This distortion is usually not noticeable, but when you hold these lenses too close to your face, it can result in a weird caricature like effect, where parts of your face suddenly seem larger than other parts. This is a pretty standard effect, and we notice it a lot more on faces simply because our brains are very good at facial recognition, and any change from the normal patterns jumps out at us.
So if you are going down the route of hand holding your camera, extend your arm as far away from you as possible to minimise this fisheye effect.
When you do this though, don’t make the mistake of pushing your head unnaturally back behind your shoulders – this can be a natural reaction to pushing our arm out and trying to get further away from the camera, but this will make your head look weird. So after you’ve held the camera out, make sure your head is in a natural position.
2. Position the camera slightly above you
Ok, lets move beyond the hardware and start to talk about how to make sure that the pictures you are taking of yourself look as good as possible.
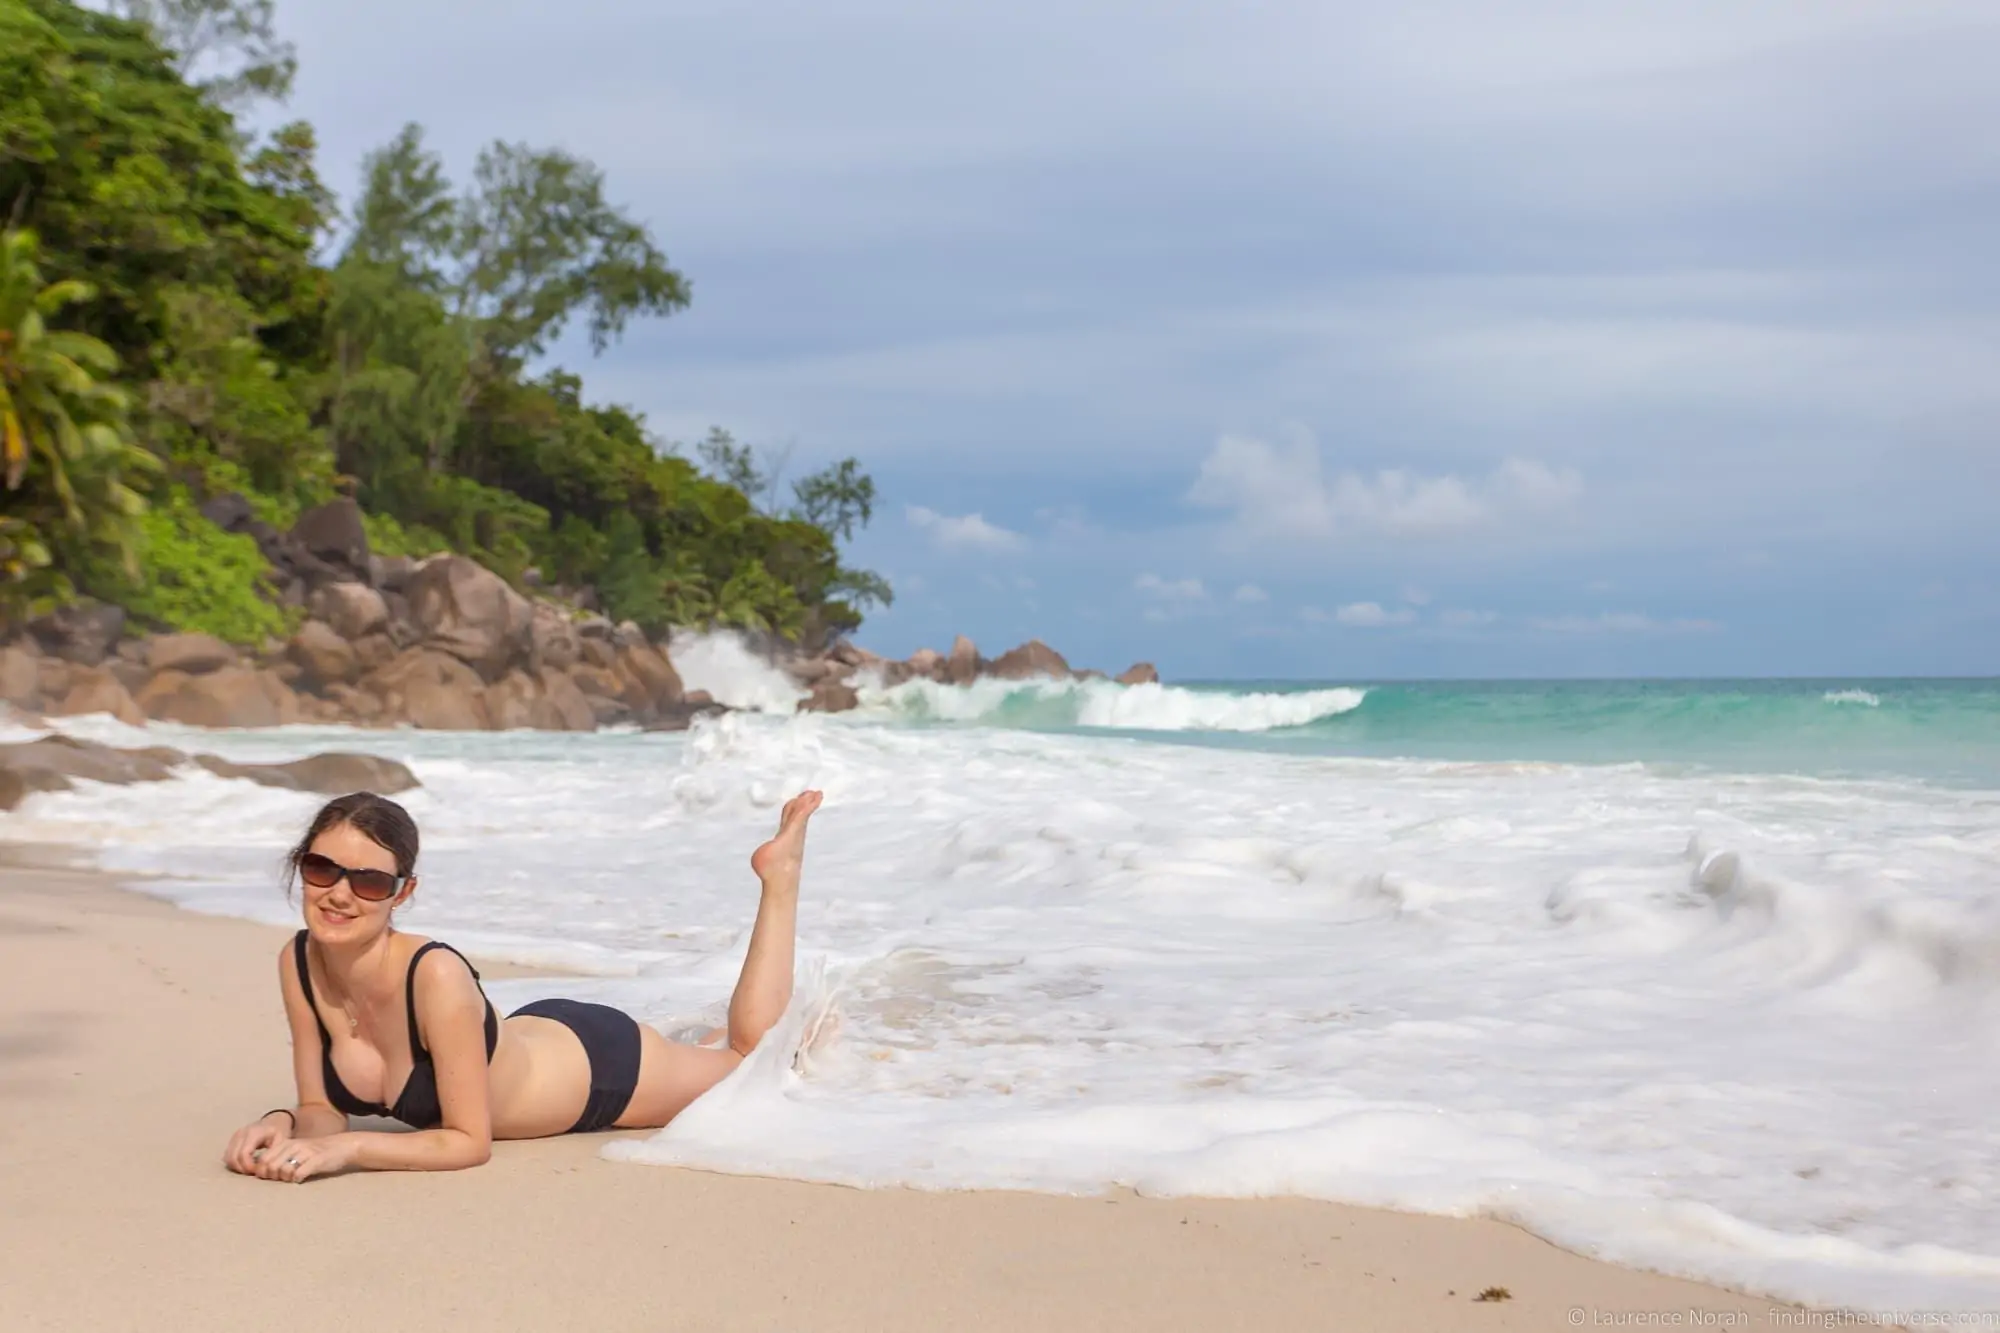
My first tip, regardless of which method you are using, is to have the camera slightly above you. Photos naturally look better when taken from slightly above (no-one wants a chin first image), so if you can get the camera slightly above you, this will give you better results.
The exception to this guidance is if you are shooting into a mirror – holding the camera below yourself might make it easier to edit the camera out. Just remember to tilt your chin and ensure your posture isn’t unflattering.
3. Ensure the light is right
Light is critically important when it comes to photography, and this is no less true when it comes to taking pictures of yourself. First, you need to make sure there is enough light available to illuminate your features, so you don’t end up with a blurry, noisy image that won’t impress anyone.
This is definitely going to be easier if you are outside in the daytime as there will generally be more light available (even if it’s overcast).
Next, you need to consider the angle and direction of the light. A lower light source, such as when the sun is lower on the horizon, will more evenly illuminate your features. A high light source, such as when the sun is directly overhead, will cause harsher shadows that will create dark contrast areas and less flattering results.
You also want to try to be looking towards the light source if possible, although not to the point it’s making you squint of course! Having the light so it is behind the camera as you look into the camera will more evenly illuminate your face.
Finally, the quality of the light is really important. The best light comes from a nice low sun, near sunrise or sunset, when it has that yellow glow. This warm glow will give you softer skin tones, and the lower angle of the sun will properly illuminate your face.
Be wary of point light sources like flashes, which can wash out your features, give you terrifying red-eyes, and generally ruin an otherwise good shot. Natural light will nearly always result in better results unless you invest in a serious flash kit and the knowledge to use it.
If you are shooting indoors, try to stay as still as possible to minimise any motion blur, and take advantage of any light you can find – perhaps stand near a window so the light from outside illuminates you. Otherwise, just try to use the brightest light source you can!
4. Think about the composition
Whatever you’re taking a photo of, be it a selfie or a landscape shot, you need to think about the composition. What do I mean by that? Well, a number of things. You need to think about the whole image, and what you want in it.

You need to think about placement of the main subject (that’s likely you!), as well as the other subjects in the shot – maybe the landscape in the background, the museum exhibit, the bagel you are holding, or the attraction you are visiting. Make sure everything will be clear to the viewer.
Don’t forget that the image doesn’t even have to include every part of you – you can just include a part of you like your hand or feet. It’s still a picture of you!
You’ll also want to consider various composition techniques like the rule of thirds, framing and color, which can all be used to help you create image that stand out from the crowd. For more on composition tips, check out my guide to composing better photos here.
5. Smile!
So you’ve considered all the above, and the time has finally come to actually take a picture of yourself. It’s time to shine!
The reality is that many of us don’t like having our picture taken, even if we’re the ones taking our picture. So it’s key to try to relax, to enjoy yourself, and to have a bit of fun with it. If you smile, you will definitely find that your pictures will look more pleasing, both to you, and to anyone who looks at them. A happy, smiling photo is always nice, and when you smile you will likely find yourself naturally relaxing too.
Take a few photos, and the more you practice, the more natural and relaxed you will look, and the better the results. Don’t worry if it takes time – learning how to look good in pictures is definitely something that can take time.
6. Use a timer or intervalometer
If you are able to set your camera up on a tripod, or somewhere else where you don’t have to physically hold it, you are going to get better results if the camera is set to take a few photos over a period of time. This will let you experiment with different poses, be sure your eyes are open, and basically get into it a bit more.
If you’re having to run back and forward to your camera between shots, the results definitely won’t be as good. The majority of mirrorless and DSLR camera support either wireless remotes, which let you trigger the camera yourself, or more advanced intervalometers, which you can set up to take a sequence of photos over time.
Some cameras these days even come with WiFi, so you can control them remotely, and thus use your smartphone as the remote. If you do this, we still recommend using the timer function, so you have time between pressing the button and the photo being taken – time in which you can hide your smartphone and pose properly!
7. Use a special shooting mode
One of our cameras, the Panasonic Lumix GX8, has a special shooting mode called 4K Photo mode. This lets you record a video of a scene, and then you can pull high resolution images from the video. This is like a really advanced intervalometer – instead of getting a shot every few seconds, you actually get 30 shots every second.

This means you get a huge amount of choice, and you don’t need any complicated equipment either – you just set the camera up and press the record button. This feature is available in most of Panasonic’s newer Lumix models like this. Other camera brands might have other special shooting modes like this, so do check your own camera to see what you can do!
8. Learn how to edit your photos
Like a few of the tips in this post, this one definitely doesn’t only apply to taking photos of yourself. Learning how to edit your photos is a key photography skill, and will help you get the best out of your photos, whatever they are of.
Even simple tweaks to contrast, brightness and saturation can often improve an image, whilst cropping a shot can help if the composition wasn’t quite right at the moment you pressed the shutter button.
You can also go further of course – removing skin blemishes, whitening teeth and so on. It’s really up to you.
There are a number of options when it comes to photography editing. On mobiles, I love and use Snapseed, which has some nice modes for portraits in particular. On a computer, I use and recommend Adobe Lightroom if you want to get more serious. See my full guide to the best photo editing software for more recommendations, including free and paid products.
9. Learn all the Features on your Camera
Whatever camera you have, be it a smartphone or professional DSLR, it’s likely to have a lot of features and options. It’s important to understand what these features and options are and what they do, so you can always be sure to have the camera correctly set up for whatever shot you want to take.
When taking pictures of yourself, some cameras for example may have a selfie or portrait mode, which will help ensure the camera knows it’s supposed to look for a person to focus on.
For more information, I have written guides to a number of common camera types. You can read my guide to using a compact camera, guide to using a mirrorless camera and guide to using a DSLR camera for more hints and tips on getting the most out of your camera.
How to Take Good Pictures of Yourself
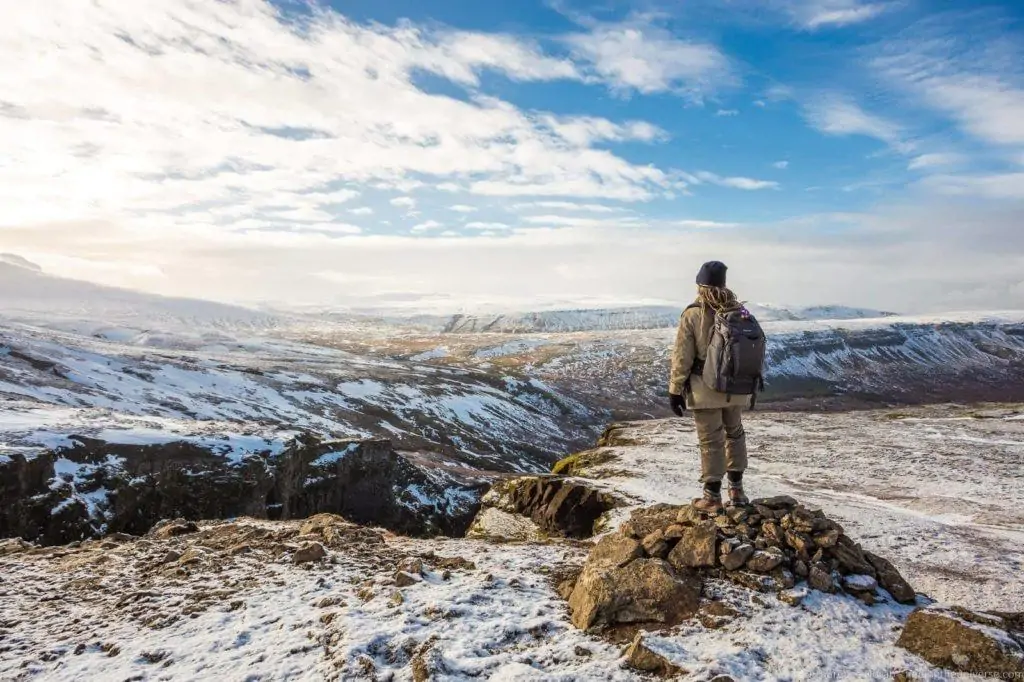
1. Use A Tripod
For the best results when taking a picture of yourself, we suggest using a tripod. This will let you position the camera properly, frame the shot so you have everything that you want in your photo, use whatever type of camera you have (smartphone mounts are available for tripods), and generally get the results you want.
For the best results when using a tripod, you’ll want either a way to trigger the camera remotely such as a wireless remote release shutter, or an intervalometer. This will let you set up the camera to take a number of photos on a timer, so you can take a few shots and then keep the best ones.
Obviously there are some disadvantages to the tripod approach. They can be heavy to carry around (although don’t discount travel tripods and mini tripods like this), take time to set up, and you can’t put them everywhere. In addition, there is always the worry that someone might try and run off with it, or bump into it, so not a great fit for all situations.
Still, the myriad benefits that a tripod brings to your photography make it our number one option for taking better photos of yourself.
2. Balance your camera somewhere
Ok, so I didn’t manage to convince you on the tripod idea. No worries, there are plenty more options to choose from, which when combined with my tips below for getting better photos of yourself, will hopefully result in some great selfies.
My next suggestion is similar to using a tripod, but instead of using an actual tripod, find somewhere that you can put your camera that will hold it steady. I’ve found fence posts, boulders, and shelves can work well.

Obviously, this approach isn’t perfect as you are restricted by the availability of the objects around you, and issues like getting the camera level can be a challenge. One tip is to travel with a small bean bag like this that you can use to balance the camera and level it.
Otherwise, the process is similar to shooting with a tripod, so in an ideal world you’ll use a remote shutter release or a timer.
3. Use a camera with a flip screen
If you want to keep a hold of your camera, then the best option for getting photos of yourself is to use a camera with a front facing screen. Obviously, most smartphones will fall into this category as they nearly all have front facing cameras, which means you can compose your shot more easily.
However, a lot of bigger camera options, including many on our recommended travel camera list, also include screens that flip out so you can have the screen facing you even with the camera pointing at you. This will make it easier to compose the shot, although I have to say that getting great photos when you’re holding the camera at arms length is still a challenge.
Don’t forget to look into the camera lens when you do this. It is always very tempting to look into your own eyes on the screen when shooting with a smartphone or a camera with a flip screen, but this will result in an odd image where you aren’t looking at the viewer. So make sure you are looking directly into the lens before you actually take the picture.
4. Use a selfie stick
If you want to get better pictures of yourself and you are shooting with a smartphone, then we definitely recommend you invest in a selfie-stick to do so. This will let you hold the camera at a more reasonable distance from your body, giving you much more control over how you frame and compose your shot.
It will also help reduce the weird wide-angle caricature like effect that often occurs when holding a camera too close to your face.
There are a great many selfie-sticks on the market. We recommend you invest in a reasonable one that will securely hold your camera, and offers a remote button so you can take pictures by pressing a button on the selfie-stick rather than having to use a timer.
We have been using and recommending this selfie-stick from Anker for a while now, and think it’s one of the best options on the market right now. Just make sure that whichever one you choose works with your specific size and phone or camera model.
5. Ask a stranger to take a picture of you
If you want a better quality image than you are able to achieve holding your camera out, but don’t have a tripod handy, you could consider asking a stranger to take a photo of you.
This can be a hit and miss strategy. Sometimes I’ve got great results asking other people to get photos of me, and other times, not so much. Of course, whatever the final result, it pays to be courteous and thankful to whoever takes my picture, and always offer to reciprocate.
For better results, I suggest you look for someone who looks like they know what they are doing when taking pictures (I get approached a lot when I travel as I usually have a pair of large DSLR cameras on me!) and give them a little instruction as to what you are looking for – something along the lines of “if you could get the whole Eiffel Tower in, and just the top half of my body”. Preferably, I’ll have already figured out the framing so I can just hand the camera over with instructions.
That said, don’t be annoying. I have no problem taking pictures of strangers, but after they’ve asked for the fourth reshoot and a slightly different angle I will start to get a bit vexed. Don’t forget that you are asking a stranger for a favour and that they likely have other things to be doing. So just get one or two shots and thank them. If the shots don’t work out – you always try asking someone else!
6. Use a drone
This is currently a slightly more niche option, but as the prices of drones like this one becomes more affordable, and they become ever smaller, using a drone to take a good selfie of yourself is actually becoming more of a viable alternative to all the above options.
A drone can go places a tripod can’t, they have reasonable cameras on board, you can create a composition exactly to your liking, and you don’t need to rely on strangers.

Of course, there are drawbacks. The image quality won’t be as high as if you use a professional camera, and there are many places in the world where drones aren’t allowed. They are also still a little bit expensive to make this a standard option. But if you have one, using it to get better photos of yourself is definitely a great idea!
7. Use a mirror or other reflective surface
This is more to be filed under “getting creative with photos of yourself”, but using a mirror is definitely still an option for taking selfies. I mean, if it’s good enough for celebrities on Instagram, it’s got to be good enough for you too, right?
The principle is quite simple, and you can use any camera for this one. Just find a reflection of yourself and take a picture! Easy. Of course, this might not result in the best photos, and in most cases the end result will have you obviously holding a camera, which will shatter the illusion that you’re doing anything other than taking a picture of yourself in a mirror.
Still, with a bit of practice, careful cropping in post-processing, and cunning positioning of the camera, you might be able to get results that are up there with the best celebrity Instagrammers!
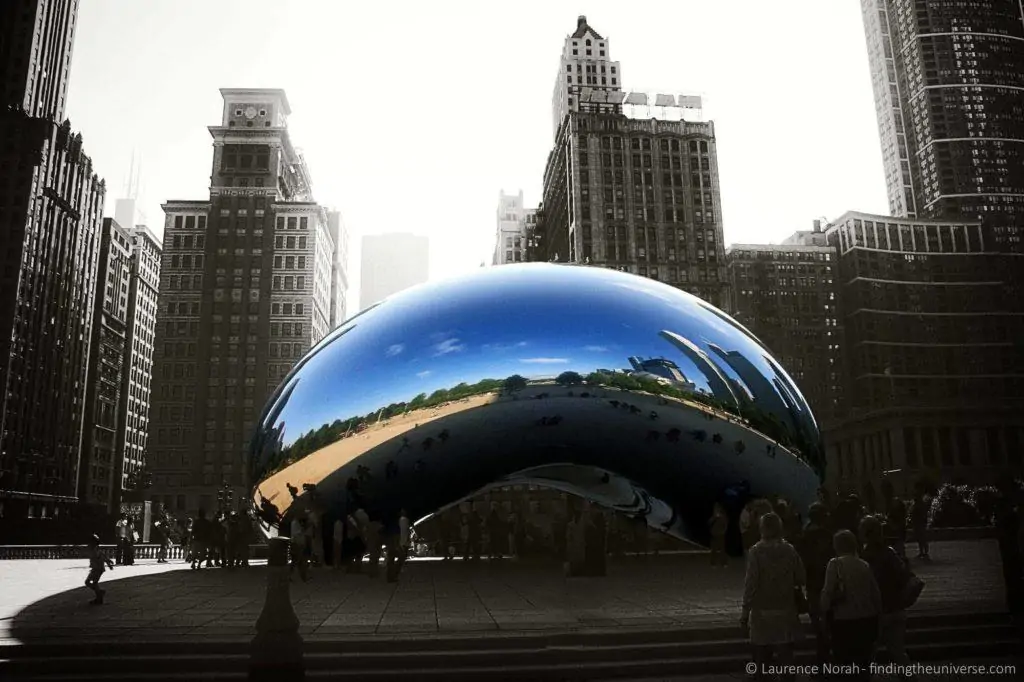
Another way that reflective surfaces can be used to good effect is if the reflective object you’re shooting is interesting – something like the Bean in Chicago for example is a great example of the perfect selfie surface. This will let you incorporate yourself into a shot of a well known object, and will give you something a bit different from all the other options on this list for getting photos of yourself.
8. Hire someone to take pictures of you
For the absolute best, least hassle photos of yourself, I’d suggest hiring someone to take pictures of you. A professional photographer will be able to get far better results than you would likely be able to manage yourself.
Of course, this approach is going to be fairly expensive, and you’re only going to have use of the photographer for a short amount of time. But if quality is the most important factor, perhaps of a special location you really want to get shots of, then this is the way to go.
There are lots of photographers out there who you can hire, just check through their portfolios before you do so to be sure that their style matches what you’re going for. If you’re travelling, there are a number of services like Flytographer ($25 off your first shoot with this link) which will connect you with a local photographer wherever you happen to be located or going. You might also check with a local camera shop for photographer recommendations.
Further Reading
Well, that sums up my tips for getting better pictures of yourself when travelling (and when not!). Before you go, I just want to share with you a few more tips to help you get better photos, based on my years as a professional travel photographer.
- We have a detailed gift guide for photographers, to give you inspiration for gifts for lovers of photography
- This post forms a part of my series of photography tips, so definitely check that out if you’re interested in getting better photos in general!
- Whilst this post covers situations beyond just taking photos of yourself, including couple and family photos, we’ve also put together a post for taking better photos as a couple which you can check out.
- If you’re travelling soon, check out my series of photography location guides, which has handy tips for getting the best photos in locations in around the world
- In the market for a new camera? Check out our guide to the best travel camera, which is always kept up to date with the latest recommendations. If you have a drone, we have a post on some of the top basic drone accessories you may want to check out.
Looking to Improve Your Photography?
If you found this post helpful, and you want to improve your photography overall, you might want to check out my online travel photography course.
Since launching the course in 2016, I’ve already helped over 2,000+ students learn how to take better photos. The course covers pretty much everything you need to know, from the basics of how a camera works, through to composition, light, and photo editing.
It also covers more advanced topics, including astrophotography, long exposure photography, flash photography and HDR photography.
You get feedback from me as you progress, access to webinars, interviews and videos, as well as exclusive membership of a facebook group where you can get feedback on your work and take part in regular challenges.
It’s available for an amazing one-off price for lifetime access, and I think you should check it out. Which you can do by clicking here.
And that’s it for my guide to taking better pictures of yourself when travelling! Do you struggle to get better selfies when you’re on the go? Have any tips you’d like to share, or feedback on this post? Let me know in the comments below!
Sai kumar says
Good visuals. Best photography
Laurence Norah says
Thanks Sai 🙂
Elina Gomez says
These is much effective tips and tricks to improve selfie photography
Laurence Norah says
Thanks Elina 🙂
Ankita says
It’s so nice of you to patiently answer everyone’s questions! And what an exhaustive post – how to get good photos of ourselves is something that has always bothered us. We usually ask strangers but as you say, it doesn’t always yield good results. I’m unsure about juggling so much gear but definitely going to start with a selfie stick and see how that goes. Thanks for writing this one-stop guide for self photography. 🙂
Laurence Norah says
Hey Ankita! Thanks very much – my theory is that if someone takes the time to comment, I should take the time to reply 😉 You guys reading the site is what makes it all worth it after all! I hope you get some great shots, and do stop by anytime if you have any questions 🙂
Laurence
Zam says
hi lawrence i found a used once vanguard VO2 for 99$ but the guy says i need an adapter to hold a iphone. Doesn’t a vanguard come with an adapter already , do t they sell it like this ? is it hard to install it every time ?
zam says
i also forgot to ask … in order to take photos solo .. i will need a shutter remote that i can press to take pics without having to run in front of camera.. any VANGUARD. tripod that come with a shutter ?
Laurence Norah says
Hi Zam!
So, for your first question, most tripods don’t include an adaptor for a smartphone unless you are buying a very small tripod. They come for an adaptor for a camera, which has a hole in the base. However, you get get a smartphone tripod adaptor for a few dollars on ebay or Amazon 🙂
For your second question – you have a few options. If your camera has wifi or bluetooth, you might be able to remote control it with an app. Or, you can use the timer function on your camera, most have a ten second timer for taking photos of yourself.
However, you can also get a remote. This isn’t a feature of any Vanguard tripod, or any other tripod. However, again, you can get a simple shutter release on Amazon for not too expensive a price normally 🙂
Best
Laurence
zam says
Hi lawrence, thanks. Yes, i will have to buy an adapter and a remote shutter so additional cost for me. I am taking my Iphone SX MAX …to use to take pics… of myself.. so the phone has a timer.. but isnt it more practical where i can just stand there in front of the scenery and press the button and it takes the pic of myself? Can you show me a link to a cheap adapter and remote that could work with the Vanguagard?
Laurence Norah says
Hi Zam,
So you will need an adaptor like this: https://amzn.to/2IAJ8vV
For a remote, it has nothing to do with the tripod – you just need something to remote trigger your iphone. So something like this: https://amzn.to/2IyKZBr
I hope this helps 🙂
Laurence
zamin fazal says
tripod.. i m travelling solo.. to claifornia doing LA and pacific coast one day.. then maybe the carribean… for the California part…. i m alone with a car drive.. for the coast.. i need to be able to carry my carry one from Canada to USA.. and that too trying to keep it light and practical… i heard you have to carry a tripod everywhre you go… i will be taking my pics with my Iphone XS MAX.
read about mini tripod small in size and foldable.. vs full size travel tripod foldable but high in height… first time travelling solo like this and i want bring back good pictures of landscape and myself and never done this before..so what cmaera or tripod do people usually take with them as ”SOLO” traveller to take pics of themselve? what works out…i cant make it bulky though as i dont want to make it a chore and keep it a vacation … thanks
Laurence Norah says
Hi Zamin,
I think traveling on your own a mini tripod won’t be ideal as you might not be able to get it high enough for self-portraits in many situations. I’d advise a lightweight travel tripod like the Vanguard VEO range, which will let you have the phone at the same sort of height that you would hold it yourself and get more natural looking images as a result
Best
Laurence
zamin fazal says
Thanks Laurence, thats what i tough.t… i will look in to Vanguard or a more similar affordable alternative.. do they sell something that could fit in a school back pack? or a airplane carry on?
Laurence Norah says
Hi Zamin,
I’d suggest checking out the recently launched VEO2Go range, which is specifically designed to be small and portable. For example, this VEO2Go 204AB folds down to less than 13 inches in size, and weighs around 2lbs, which is pretty small!
zamin fazal says
thanks for your help
zamin fazal says
any recommendations for something similar to this portable and small Vanguard but in a different brand that is more affordable, in 30-80$? range ?
Laurence Norah says
Hi Zamin!
I would suggest trying the Amazon Basics line, they are more affordable but you would have to search to see if they are as small. Other options include Joby’s Gorllapods, Manfrotto or BeFree 🙂
Good luck!
Laurence
zamin fazal says
Hi Lawrence, if i buy the Vanguard VEO , At 2 Lbs is that very heavy to carry along on my trip to California? And in what type of luggage would i be able to carry with me, a carry on enough or do i need a suitcase?
Laurence Norah says
Hi Zamin,
2lbs is definitely considered light as a travel tripod, so you shouldn’t notice it too much. For luggage, it really depends on the airport and airline. Most airports will let you take a small tripod as carry on luggage, however I have had airports, especially in France, tell me is has to be checked. So it will depend on the policy of the airline and the security at the airport!
Sorry I can’t be definitive!
Laurence
Zamin Fazal says
hi lawrence thanks .. what i meant is not the airport policies but practically how do i carry the vanguard to california and on my road trip .. like would it fit in my carry on? or would i need to take it with me in my hands everywhere i go ?
thanks
Laurence Norah says
Hi Zamin,
Ah, ok. The VEO tripod folds down pretty small. Mine fits in my backpack and shoulder bag, but of course it depends on how big your bag is 🙂 If it’s a normal carry on size it should fit just fine.
Laurence
zami says
Hey Laurence no worries, i have ordered a ULANZI ST O2S and a CamCLIX remote shutter from amazon for my tripod and iphone X..i will be getting a used vanguard tomorrow from a user… i m just thinking now if it is worth buying a clip on wide angle lense for my iphone .. will ponder on this for a while…Thanks for all the tips and help..let me know about any quick short tutorials yu know on how to best take pics with a Iphone like a free crash course 🙂
Laurence Norah says
Awesome! Sorry about the slow response, I’ve been travelling, but I’m glad you found what you needed 🙂
zam says
do you know about any quick short tutorials on how to best take pics with a Iphone like a free quick crash course online?
Laurence Norah says
Hi Zamin,
I’d say it’s a question of good composition (I have guides to that on this blog) and then some editing techniques. I’d suggest downloading Snapseed and trying that. Other that than, just searching for basic photo tips should work 🙂
Best
Laurence
Paul says
I’ve tried all the suggestions you give, including hiring professional photographers a few times, but have never liked even one photo of myself and so don’t have a single one from any period of my life. Are there other people like me who simply cannot look even ‘OK’ in any picture no matter what?
Laurence Norah says
Hi Paul,
I’m sorry to hear that 🙁 I have to be honest, I’m not sure I’m qualified to answer this question. I know some people certainly don’t like having their photo taken as they are unhappy with how the camera makes them look. I think this is likely because we are used to seeing ourselves from a fairly limited viewpoint, that of a reflection in a mirror most commonly, and so from other perspectives we do look different. I guess my suggestion would be not to skip taking photos of yourself as I think that if you are able to start to appreciate how you look, you may regret not having any photos from other parts of your life.
Good luck!
Laurence
easton says
I like the tip that you gave to use an object to balance your camera. My wife and I have been talking about getting into photography, and it would be important for us to know that we are doing it right. If we choose to start taking more photos, I will be sure to use something to balance our camera.
Laurence Norah says
Thanks 🙂 Good luck!
Kavleen Kaur says
good tips of photography…
nice blog..
Laurence Norah says
Thanks!
Lawrence says
Great, refreshing tips here! Thanks namesake!
Laurence Norah says
My pleasure 😀
Amanda says
Some great tips here – I need to take some of your advice! When I travel with Elliot, I can generally get some good photos of myself because he’s an excellent Instagram (and real) husband. But I’ll admit that I’m pretty terrible at getting photos of myself when I’m traveling solo!
Laurence Norah says
Thanks Amanda! Tripod all the way 😀