
We love to travel, and we love good coffee. Those two things often go together, but not always. You might be staying somewhere that only offers instant, out camping or hiking miles from the nearest café, or in a city where a flat white costs more than you’d like to pay twice a day.
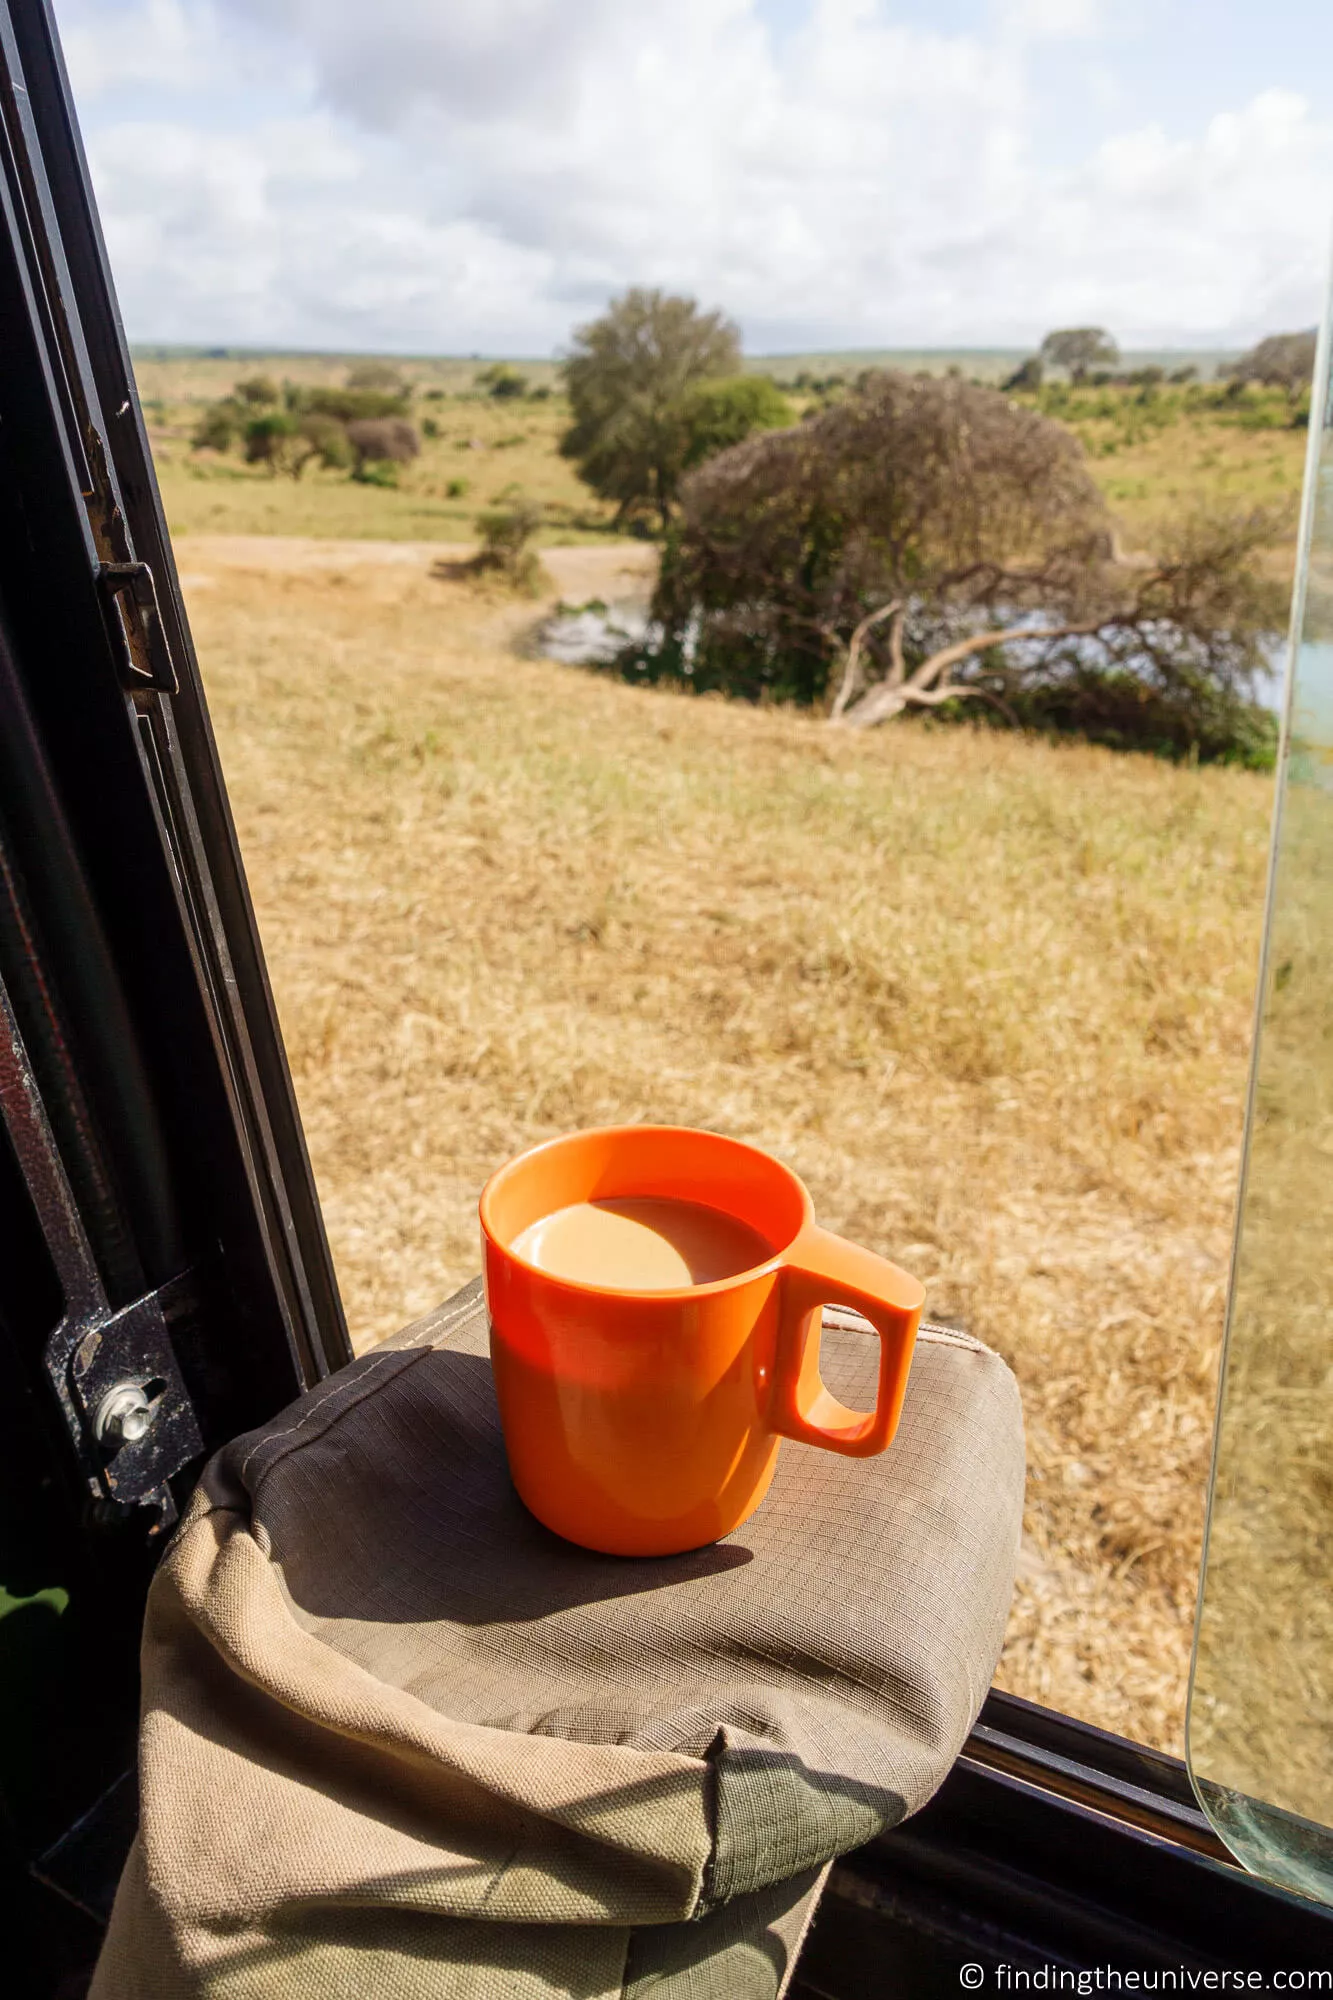
I’ve been brewing my own coffee on the road with an AeroPress for over six years now. I’ve made it on safari, on day hikes with nothing but a flask of hot water, and in plenty of hotel rooms where the only kit on offer was a kettle and a sachet of something beige. Over that time Jess and I have owned and travelled with both the original AeroPress and the AeroPress Go, and we’ve watched the range grow from two products into the better part of a dozen.
This review is the result of all of that. I’ll tell you which AeroPress is actually best for travel, how the models really differ, and which of the shiny new ones are worth your money. I’ll also be straight about the models I haven’t brewed with myself, because the range now includes several I can describe but wouldn’t pretend to have lived with.
The two I keep coming back to are the original AeroPress and the AeroPress Go. If you want to weigh the AeroPress against completely different travel brewers, from battery espresso makers to collapsible drip filters, we have a separate guide to the best portable coffee makers that covers the wider field.
Quick take: for most people the AeroPress Go is the one to buy for travel. It makes exactly the same coffee as the Original but packs everything away inside its own mug, so it’s the tidiest thing to throw in a bag. Buy the Original or the Original XL instead if you already travel with a mug you love, or you regularly brew for two or more people. The newer Steel, Premium and Clear models are nice, but they’re aimed at your kitchen counter more than your backpack. Whichever you choose, the coffee tastes the same, because every AeroPress brews the same way.
Table of Contents:
Which AeroPress Is Best for Travel? At a Glance
There are now eight AeroPress brewers, plus a grinder. For travel, the AeroPress Go is the one I recommend to most people, with the Original a close second if you already carry a mug. Here’s the whole current range side by side so you can see where each one fits.
| Model | Brews | Packed size and weight | Price (USD) | Best for |
|---|---|---|---|---|
| AeroPress Go | 8 oz / 1 cup | 4.5″ tall, 11.4 oz (323 g) packed inside its mug | $49.95 | The default travel pick. Everything packs into its own mug. |
| AeroPress Original | 10 oz / 1-2 cups | 5.25″ tall, about 8 oz (225 g) packed light | $39.95 | Cheapest. Best if you already travel with a mug you like. |
| AeroPress Go Plus | 10 oz / 1-2 cups | 7.3″ tall, 1 lb 4 oz (0.56 kg) | $89.95 | The Go with an insulated stainless tumbler. Pricier and heavier. |
| AeroPress Clear | 10 oz / 1-2 cups | Same as the Original | $49.95 | The Original in see-through Tritan. Looks, not function. |
| AeroPress Original XL | 20 oz / 2-4 cups | 7.6″ tall, includes a carafe | $79.95 | A double batch for home, an RV or a group. Bulkier. |
| AeroPress Clear XL | 20 oz / 2-4 cups | 7.6″ tall | $89.95 | XL capacity in clear Tritan. Home or RV. |
| AeroPress Steel | 12 oz / 1-2 cups | 6¾” tall, vacuum-insulated metal | $169.95 | Rugged, keeps water hot. Heavy and dear for a brewer. |
| AeroPress Premium | 10 oz / 1-2 cups | 7⅛” tall, glass and metal | $199.95 | A handsome home or gift piece. Hand-wash only, not travel-rated. |
Those are AeroPress’s own 2026 recommended prices. In practice you’ll often find the Original and Go a little cheaper on Amazon. There’s also a new AeroPress Manual Grinder at $199.95, which I’ll come to later, though it’s an accessory rather than a brewer.
So how do you actually choose? Here’s how I’d think it through by trip type.
If you’re flying carry-on only and brewing just for yourself, get the Go. It’s the neatest all-in-one package and the mug doubles as your cup and your storage box.
If you’re backpacking or heading properly off-grid, the Go again, paired with a reusable metal filter so you never run out of paper ones. The whole brewer weighs about the same as a couple of energy bars.
If you’ve got a campervan or RV, or you’re car camping, look at the Original or the Original XL. Space and weight matter less, and the XL lets you brew for the whole vehicle in one go.
If you’re staying in hotels with a kettle in the room, either the Go or the Original works. This is the easiest scenario, because hot water is sorted for you.
And if you’re brewing for two, which is our situation, we travel with the Go and simply brew each cup separately, or brew one strong batch and top it up with hot water. You’ll still need a second mug for the other person, since the Go only comes with one.

What Is an AeroPress?
AeroPress is a US company that makes coffee brewers. It was founded by Alan Adler, an American inventor who also created the Aerobie flying ring.
Adler invented the AeroPress in 2004 because he wanted a single-serve coffee maker that gave him more control over the brew. He was also after a cup with less acidity and bitterness than drip coffee or espresso. The AeroPress launched in 2005 and has had a cult following among coffee drinkers ever since.
What Products Does AeroPress Make?
AeroPress now makes a fairly wide range of brewers. The current line-up is:
- The original AeroPress, launched in 2005, which brews a 10 oz cup.
- The AeroPress Go, launched in 2019, aimed at travel, which brews an 8 oz cup.
- The AeroPress Clear, launched in 2023, which is the same design as the Original but made from clear Tritan plastic.
- The AeroPress Original XL, also launched in 2023, a larger version of the Original that brews twice as much (20 oz / 591 ml).
- The AeroPress Go Plus, launched in 2024, a larger version of the Go with a 10 oz brew and an insulated stainless tumbler.
- The AeroPress Clear XL, the XL capacity in see-through Tritan.
- The AeroPress Steel, launched in 2026, a stainless steel, vacuum-insulated version of the brewer.
- The AeroPress Premium, a glass-and-metal 20th-anniversary model launched in 2025.
- The AeroPress Manual Grinder, launched in late 2025, the company’s first hand grinder.
They all brew coffee the same way. The main differences are the materials, the size, how much coffee each one makes, and what comes in the box. The Go is the only one designed first and foremost as a travel solution, but every one of them can be used at home and on the road.
Where Are AeroPress Products Made?
AeroPress designs and manufactures all of its products in the USA. So if a coffee maker made in the USA matters to you, AeroPress is one of the few in this category that qualifies.
AeroPress products are sold worldwide, and you can buy them via Amazon in most countries.
What Kind of Coffee Does an AeroPress Make?
An AeroPress makes a strong, espresso-style coffee. It’s usually described as a hybrid between espresso and drip coffee: more concentrated and fuller in flavour than filter coffee, but without the crema or the intensity of a true 9-bar espresso.
You can use it to brew several styles, including drip-style, American-style, espresso-style and cold brew. Because the espresso-style concentrate works as a base, you can build milk drinks on top of it too, such as Americanos (add hot water) and lattes (add steamed or frothed milk).
It is not, to be clear, a true espresso machine. You don’t get the pressure or the crema of a proper espresso. If true espresso on the go is what you’re after, something like the Wacaco Nanopresso is a better fit.
What you do get is a cup with lower acidity than espresso, which a lot of people find easier on the stomach. It suits drinkers who like drip coffee, French press and espresso alike.
You can also make cold brew in an AeroPress in a couple of minutes rather than the usual overnight steep. That cold brew method is set out on the AeroPress site here. For travel that’s especially useful, because there are days when you simply won’t have hot water, and a quick cold brew gets you a decent cup anyway.
How Does the AeroPress Work?
The AeroPress works by pushing water through a filter under gentle pressure, so it’s a pressurised extraction like espresso, just at a much lower pressure. An espresso machine produces around 9 bars of pressure; an AeroPress is around 0.5 bars. That’s still more than a drip filter, which relies on gravity alone and extracts less flavour from the grounds.
Brewing with an AeroPress is quick. A cup takes around thirty seconds once you have hot water. It’s designed as a single-serve brewer, so it isn’t as convenient as a drip machine if you need a full pot for a crowd.
People have invented all sorts of methods and tweaks over the years: the inverted brewing technique, blooming the grounds, wetting the filter, pre-heating the chamber, and so on. Most of them add time and, according to coffee experts like James Hoffmann, who made an excellent video series on the AeroPress, make little difference to the final cup. I’d start with the instructions AeroPress provides, get comfortable, then experiment if you fancy it.
To brew hot coffee with the Original, Clear, XL or Go, you need finely ground coffee (an espresso or fine drip grind is ideal), water at around 175°F / 80°C, and a sturdy mug the AeroPress fits onto (or the supplied mug, with the Go). The supplied instructions run as follows:
- Remove the plunger from the chamber.
- Put a filter into the filter cap. You can use the paper filters supplied, or a reusable metal filter.
- Twist the filter cap securely onto the chamber. You can use the standard cap, or for more control the flow control filter cap.
- Place the chamber onto your mug and add coffee grounds. AeroPress suggests one scoop per serving for espresso-style coffee. Adjust to taste.
- Shake the chamber gently to level the coffee.
- Add water up to the relevant mark on the chamber for the number of servings you’re brewing.
- For hot coffee, stir for about 10 seconds. For cold brew, stir for a minute.
- Insert the plunger silicone side down and push gently until it reaches the grounds. Take care here, as you’re dealing with very hot water and some parts can get hot.
- Your coffee is brewed. Lift the chamber off your mug.
- Remove the filter cap (it may be hot) and push the plunger all the way through over a bin or compost. The grounds pop out in a neat disc. Rinse the seal.
- If you’re drinking it black, you’re done. Otherwise, use the concentrate as the base for your milk drink.
One of the real pleasures of the AeroPress is how easily you can tweak it. The grind, the steep time, the water temperature and the coffee-to-water ratio are all yours to play with. Personally, I’ve landed on one well-ground scoop, water just off the boil (the sort that’s been sitting in a Thermos a while), and a two-minute steep with a gentle swirl before I press. That gives me one good cup per person.
How Much Coffee Does an AeroPress Make?
The Original, Clear, Premium and Go Plus all make up to 10 oz (around 295 ml) in a single press, give or take a little by model. The Go makes up to 8 oz (236 ml). The Steel stretches to 12 oz (360 ml), and the Original XL and Clear XL brew up to 20 oz (591 ml) in one go.
The AeroPress was designed as a single-serve brewer, so one cup is its natural unit. That said, it’s flexible. You can use two or three scoops, steep a stronger concentrate, then dilute it with hot water to make two or three cups. AeroPress reckons this is still faster than drip coffee even for several people, and in my experience that’s about right. It’s not as hands-off as a drip machine, but the coffee is better.
If you regularly need more than a cup or two, the Original XL is the sensible answer. It’s less suited to packing light, but it makes an excellent home, RV or car-camping brewer.

AeroPress Versions Overview
All the AeroPress brewers make coffee the same way, so the cup is the same whichever you choose. The differences are in the accessories, the portability and how much coffee each one brews. They’re all portable, even the XL.
I’ve travelled with both the Original and the Go for years, so those two get full hands-on reviews further down. For the rest, I’ll tell you what’s in the box, who each one suits, and where I have and haven’t used them myself. Here’s the detail, model by model.
AeroPress Original
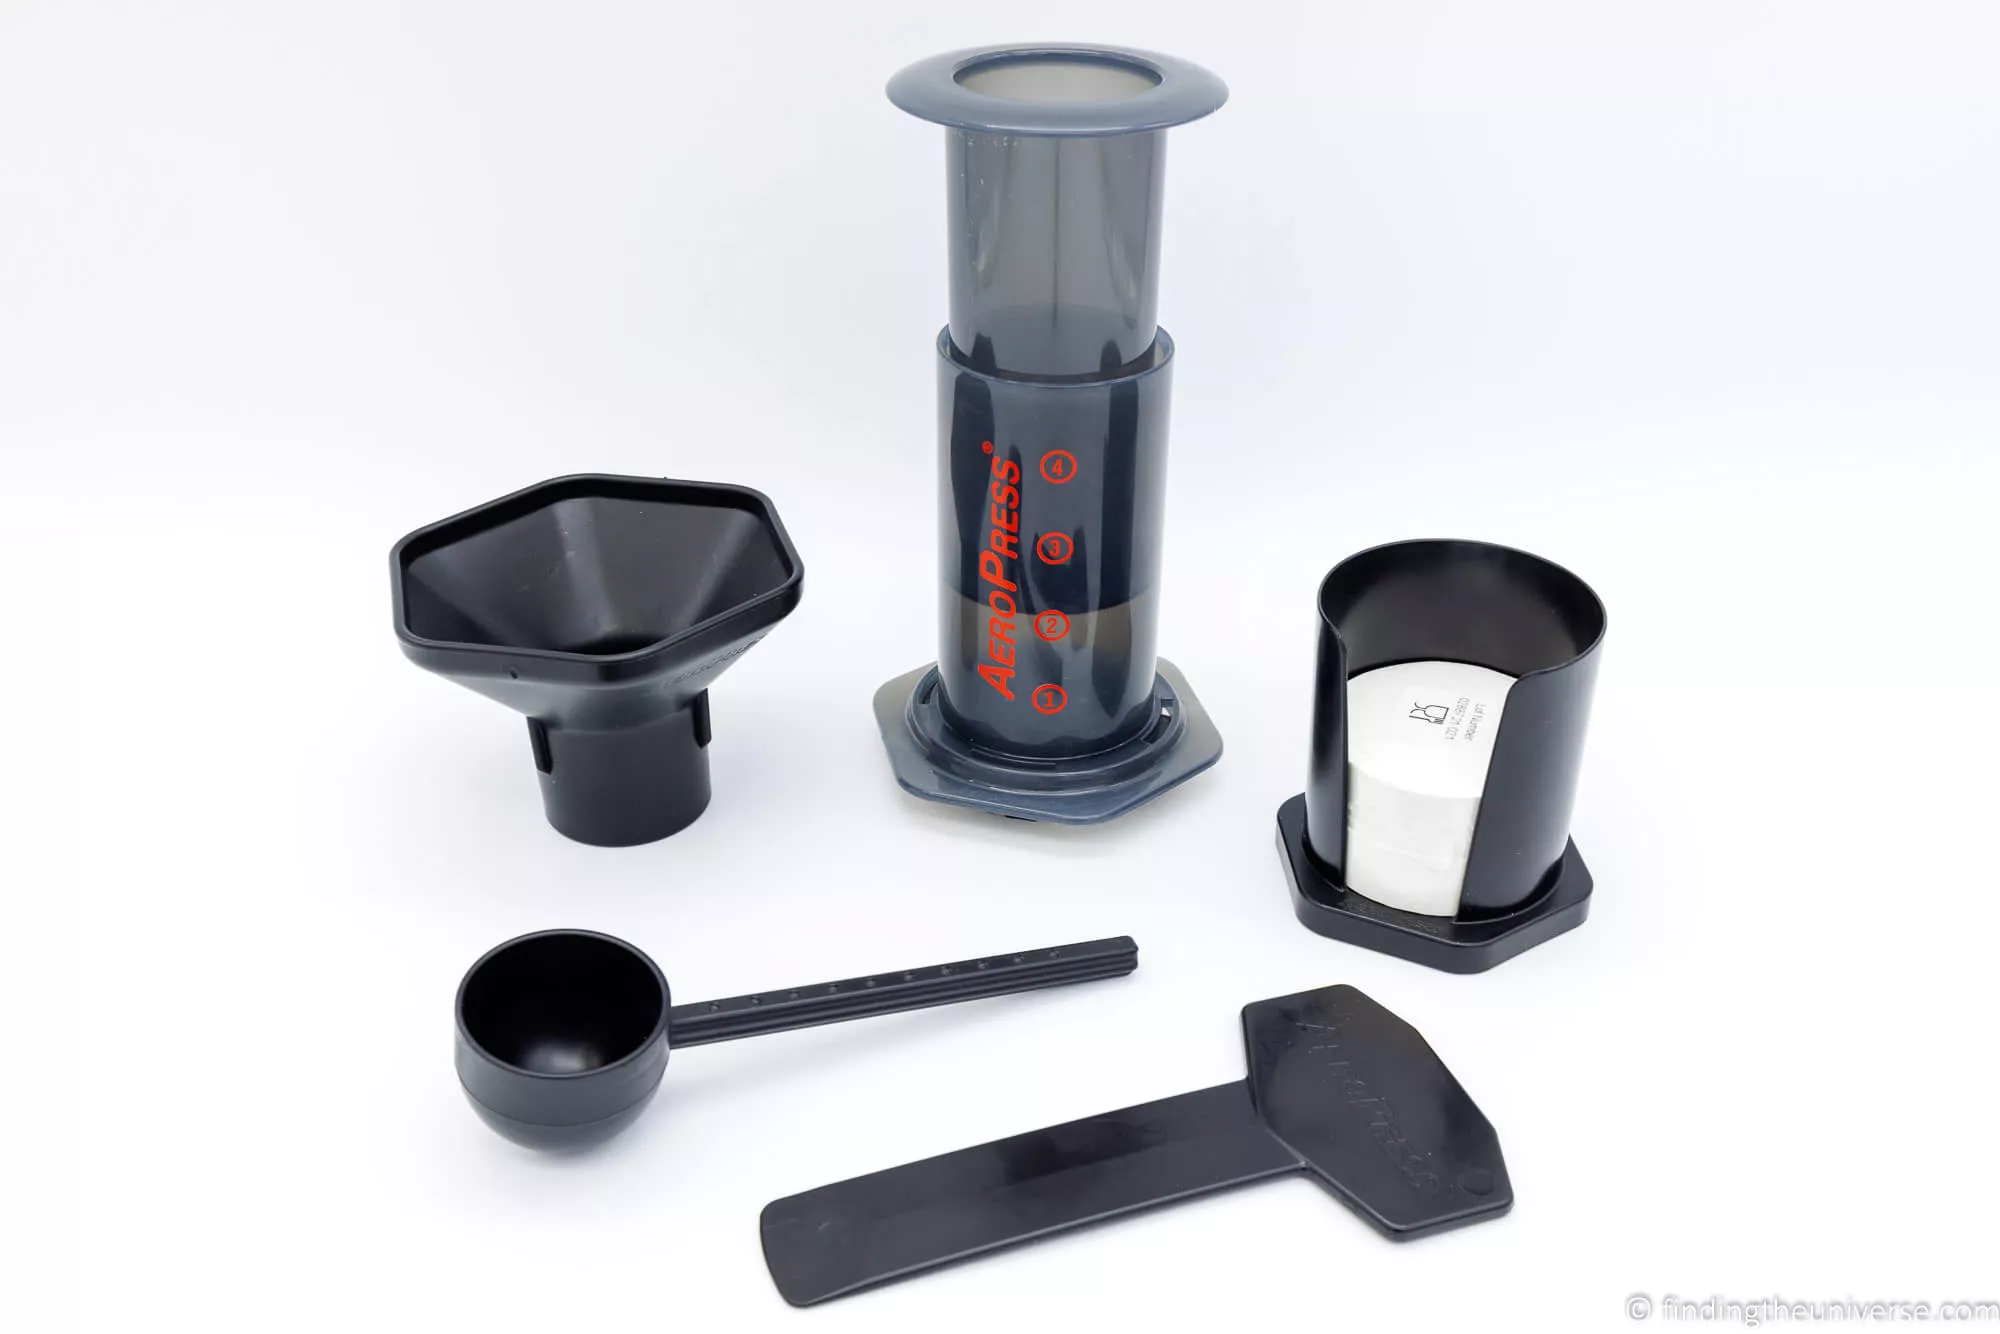
The original AeroPress comes with the chamber and plunger, 350 paper microfilters, a filter holder, a filter cap, a funnel, a stirrer and a scoop. An optional tote bag is sold separately for travel.
Packed into the tote with everything, it weighs about 13 oz (368 g). Packed light with just the bits you actually travel with, it’s nearer 8 oz (225 g). One brew makes 10 oz of coffee, straight into your mug.
It works with mugs that have a top inner diameter between 2.75 and 3.75 inches (67 to 95 mm). The funnel also slots into the base of the plunger so you can brew into a smaller cup, which is a handy trick, though AeroPress doesn’t officially support it, so use a sturdy mug and keep everything steady.
Pros: the cheapest way in, makes excellent coffee, and you can pair it with a mug you already own so nothing is wasted.
Cons: no mug or case in the box, and the tote that makes it travel-friendly is an extra purchase.
AeroPress Go
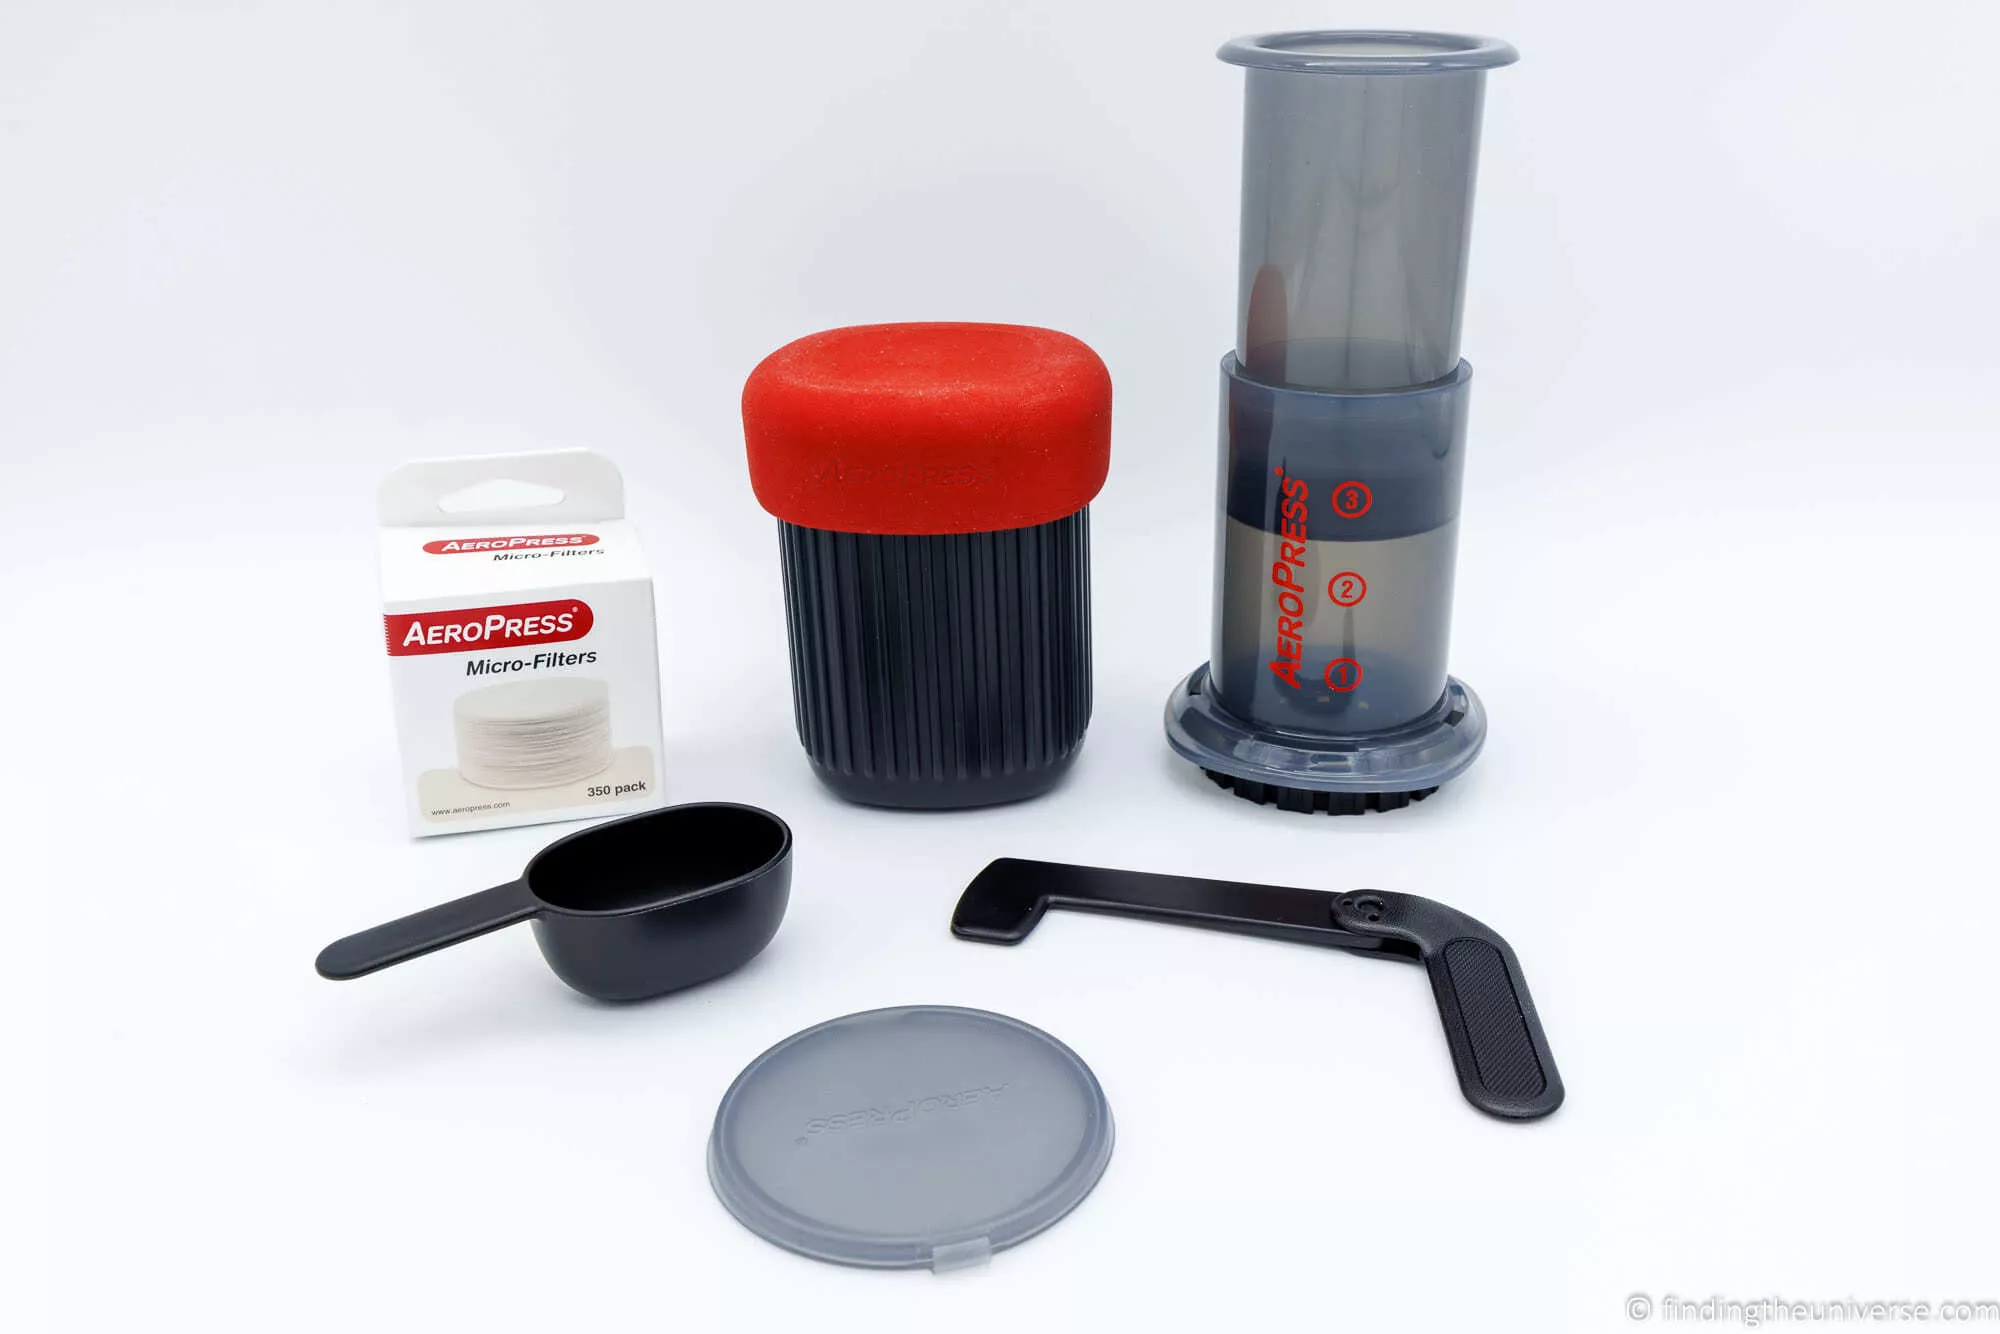
The AeroPress Go comes with the chamber and plunger, a 15 oz mug with a lid that stores everything for travel, 350 paper microfilters, a filter holder for 20 filters, a filter cap, a folding stirrer and a redesigned scoop.
Packed inside the mug, the whole thing weighs 11.4 oz (323 g). You lose the funnel compared with the Original, but you gain a mug that doubles as your storage container. One brew makes 8 oz, 2 oz less than the Original. It works with mugs between 2.75 and 3.25 inches (67 to 82 mm) top inner diameter, a slightly smaller maximum than the Original.
Pros: the tidiest travel package by a distance. Everything nests inside the mug, the stirrer folds, and you’ve got a cup built in.
Cons: brews a little less, only one mug in the box, and the lid doesn’t seal for drinking on the move.
AeroPress Go Plus
The Go Plus arrived in 2024 as a larger Go. It looks more like the Clear, with a clear plastic chamber and plunger. In the box you get the chamber, plunger and filter cap, an insulated stainless steel tumbler with a built-in holder for 25 filters, plus a stirrer and scoop. It brews 10 oz rather than the Go’s 8 oz, and packs into the insulated tumbler with a drinkable lid.
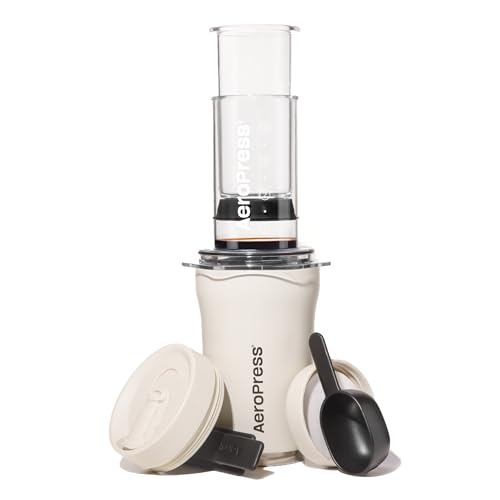
It’s a more polished experience than the Go, but it’s roughly double the price (around $89.95 against the Go’s $49.95) and noticeably heavier at 1 lb 4 oz packed.
AeroPress Go Plus vs Original: this is the comparison a lot of people are weighing up, so here’s the short version. Both brew 10 oz. The Original is cheaper, lighter and pairs with any mug you like. The Go Plus is the self-contained option, with an insulated tumbler that keeps your coffee hot and stores the kit. If you want one neat package that travels as its own cup and don’t mind paying for it, the Go Plus makes sense. If you already have a travel mug, or you want the lightest, cheapest route to the same coffee, the Original wins. For pure packing tidiness at a lower price, the standard Go still beats both.
AeroPress Clear
The Clear is essentially the Original made from clear Tritan plastic, so it looks different but works the same. The kit includes the chamber, plunger, filter cap and seal, 100 paper microfilters (250 fewer than the Original), and a stirrer and scoop. There’s no funnel.

The Clear uses the Go-style filter cap rather than the Original’s. The difference is minimal, just a slightly different hole layout, and I can’t taste any change in the brew, though purists might raise an eyebrow.
Pros: the see-through look is lovely if that appeals.
Cons: it costs more than the Original, comes with far fewer filters, and offers nothing extra in the cup. For most people I’d take the cheaper Original and spend the difference on coffee.
AeroPress Original XL
The Original XL came out in 2023 for people who want to brew more in one press. The kit includes the chamber, plunger, filter cap and seal, a Tritan carafe to brew into, 100 large paper microfilters and a stirrer and scoop. No funnel.

The included carafe is the right size to hold a full brew and has a pour spout, so you don’t have to work out what to decant into. It’s hexagonal to match the brewer, which is a nice touch.
Pros: brews up to 20 oz, enough for two to four cups in one go, and the carafe is a sensible inclusion. A good home, RV or group brewer.
Cons: bigger overall and, because it holds more water, a little less stable when you press, so take some care. Less suited to packing light.
AeroPress Clear XL
The Clear XL is the XL capacity in the see-through Tritan of the Clear: a 20 oz brew, two to four cups, in a brewer you can watch work. It runs around $89.95.

I haven’t brewed with the Clear XL myself, so I won’t pretend to a verdict on the cup. On paper it’s for the same person as the Original XL, a home or RV brewer for two or more, who happens to prefer the clear look. If that’s you, and you like seeing the coffee as it brews, it’s a reasonable choice. If you don’t care about the aesthetic, the Original XL does the same job for a little less.
AeroPress Steel
The Steel is the newest brewer, launched in 2026. It’s made almost entirely from professional-grade 304 stainless steel (every part except the silicone seal), with a double-wall, vacuum-insulated chamber that holds the heat. It brews 12 oz, about 20% more than the Original, and runs $169.95.
I haven’t used the Steel, so treat this as a description rather than a review. On its specs it’s the most travel-relevant of the new releases: stainless steel is close to unbreakable, and the insulation means the chamber holds temperature better than plastic, which could matter when you’re brewing somewhere cold. The catch is the price and the weight. At $169.95 it costs more than three times the Go, and metal is heavier than plastic, so you’re paying a premium for durability you may not need unless you’re really hard on your kit.
AeroPress Premium
The Premium launched in 2025 as a 20th-anniversary model. It’s hand-made from double-wall borosilicate glass, stainless steel and anodised aluminium, and comes in black and white editions. It brews 10 oz and costs $199.95.

I haven’t brewed with the Premium either, but I can tell you it’s not built for travel. The glass body, the hand-wash-only cleaning (it’s the one model in the range that isn’t dishwasher safe) and the $199.95 price all point at your kitchen counter rather than your backpack. If you love the AeroPress and want a beautiful version for the counter at home, it’s clearly the one. For a trip, look anywhere else in the range.
AeroPress Manual Grinder
In late 2025 AeroPress launched its first-ever hand grinder, its first product that isn’t a brewer. It has conical burrs, more than 60 grind settings, a magnetic handle that stores inside the body, and it’s compact enough to tuck inside an AeroPress plunger. It costs $199.95.

I haven’t used it, so I can’t tell you how it grinds. What I can say is that grinding fresh does noticeably improve the cup, and a grinder that nests inside the brewer is a smart idea for travel. At $199.95 it’s a committed purchase, though, and for most travellers a cheaper manual grinder (more on that below) will do the job for a fraction of the money.
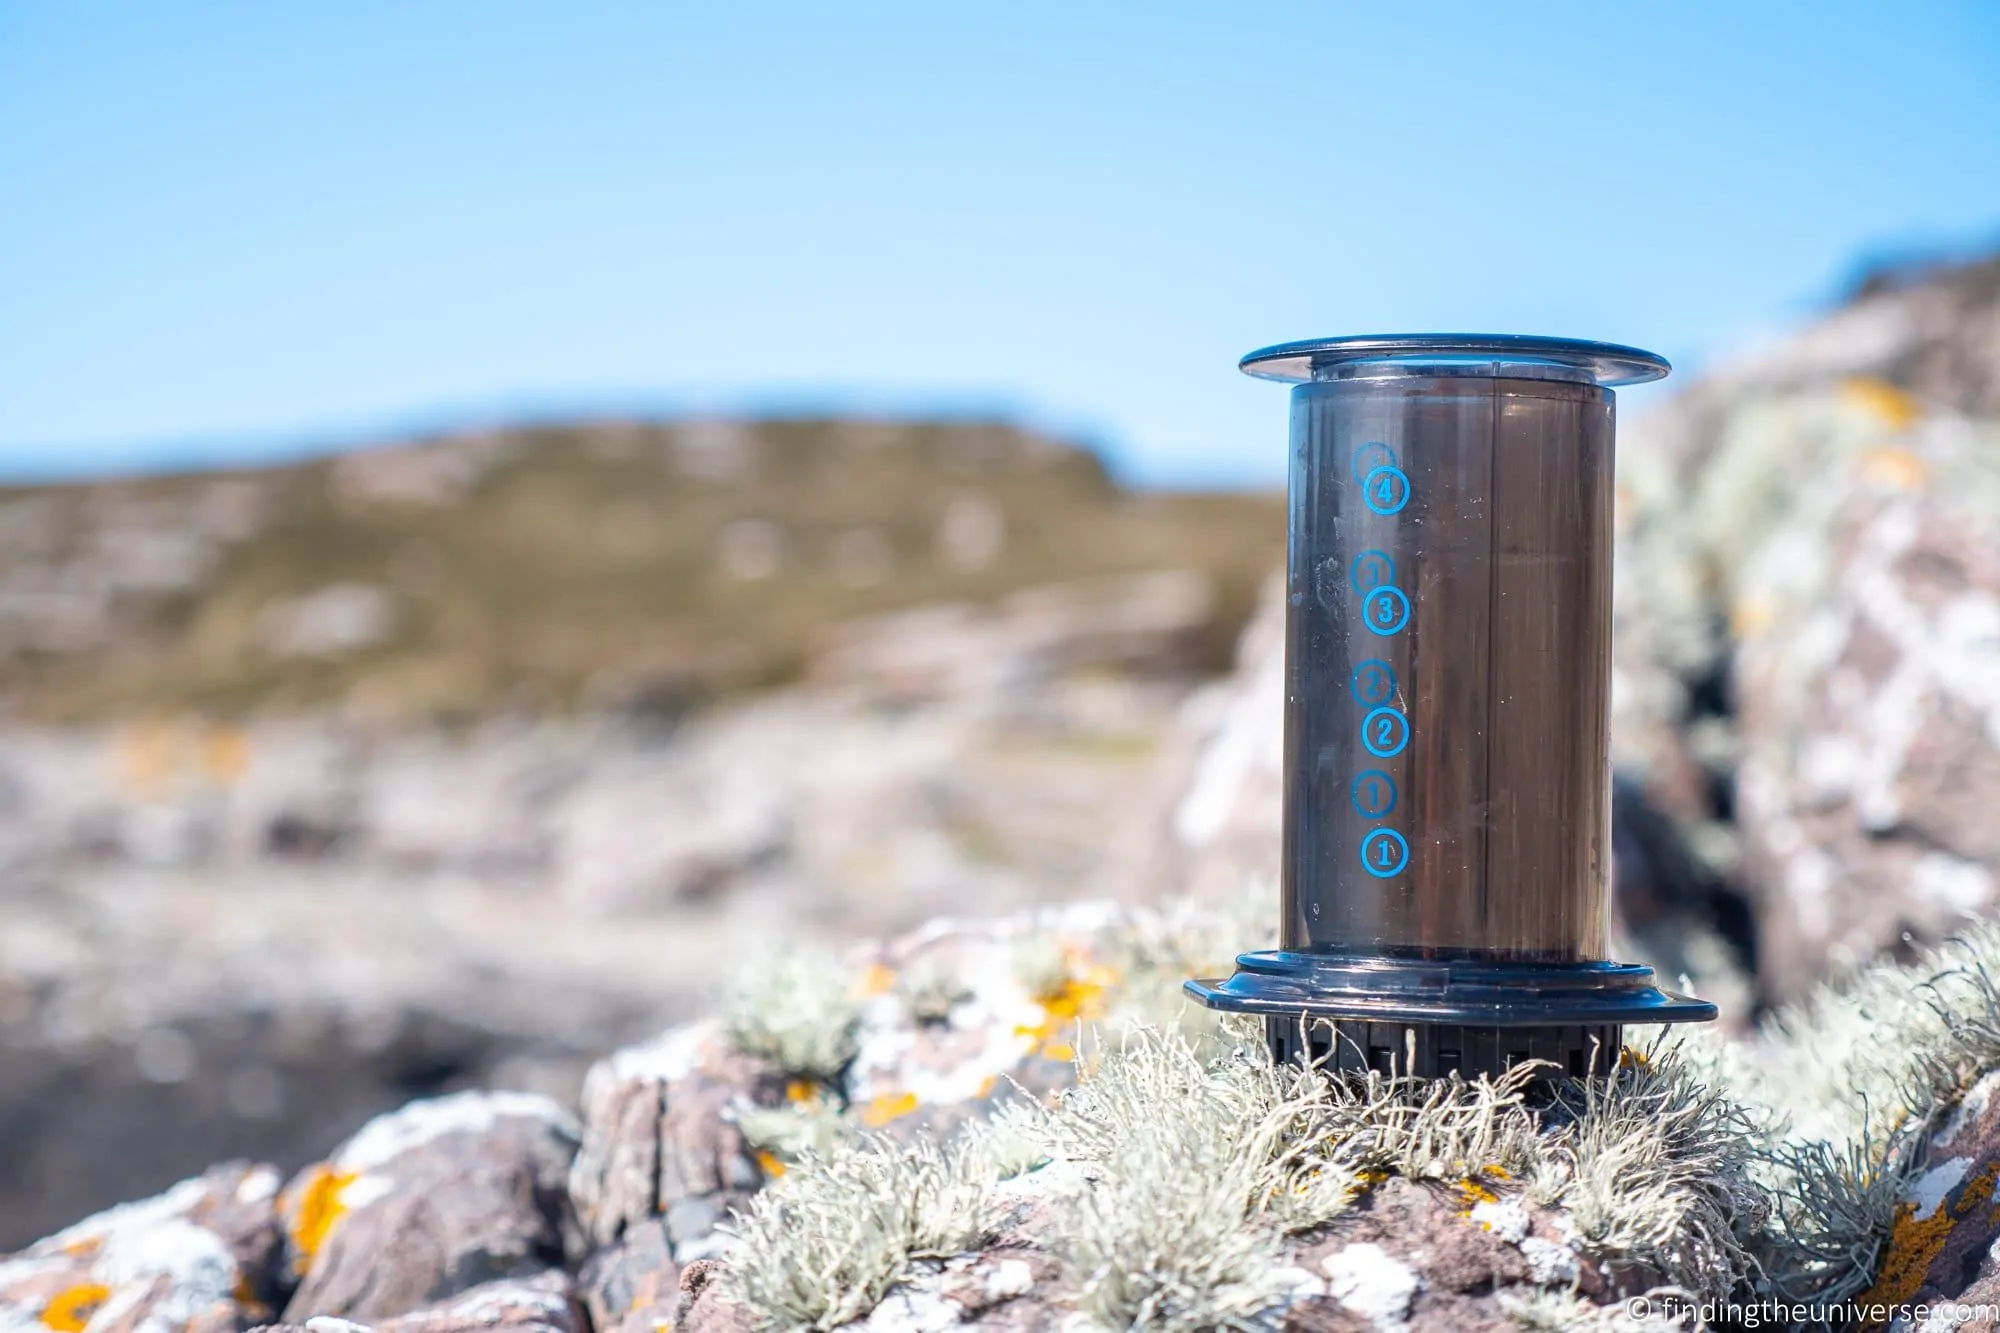
AeroPress Original Review
The Original is the one that started it all, and it’s still the model I’d point most people to if they don’t want the Go’s built-in mug. It has gone through cosmetic changes since 2005 (the switch from BPA to BPA-free plastic in 2009 was the most meaningful), but the concept hasn’t changed. Mine is the 2019 version with the red lettering. I’ve also used the older 2010 model with blue lettering and a different seal material; these days every model uses a silicone seal.
The real question is whether the coffee is any good, and in my opinion it’s very good, comfortably better than drip or instant. We’ve brewed with both the Original and the Go in all sorts of places, with different beans, grinds and water temperatures, and the ease of experimenting is half the fun. I like an easy-drinking cup that isn’t too bitter, and a single well-ground scoop with water just off the boil and a two-minute steep gets me there every time.
If I’m brewing for more than one, I either add a scoop and dilute the stronger brew with hot water, or just brew twice. Neither takes long. If you find yourself doing that constantly, the AeroPress XL is worth a look.
The Original’s strengths, for me, are how easy it is to use, how good the coffee is, and how little mess it makes. That last one is underrated. Coffee brewing can be a faff to clean up, and the AeroPress is remarkably tidy, the spent grounds popping out as a neat disc. It’s portable, and it gives you real control over the cup.
The main downside, especially at home, is that it makes a small amount of coffee. That’s by design, it’s a single-cup brewer, so if you’re used to a drip machine churning out 6 to 12 cups, the Original won’t replace it. It’s for the times you want a cup, not a pot.
It also doesn’t heat water, so you’ll need a hot water source or a flask, unless you’re making cold brew.
Pros: excellent coffee, dead easy to use, almost no cleanup, very portable, fully adjustable.
Cons: single-serve by nature, and you supply the hot water.
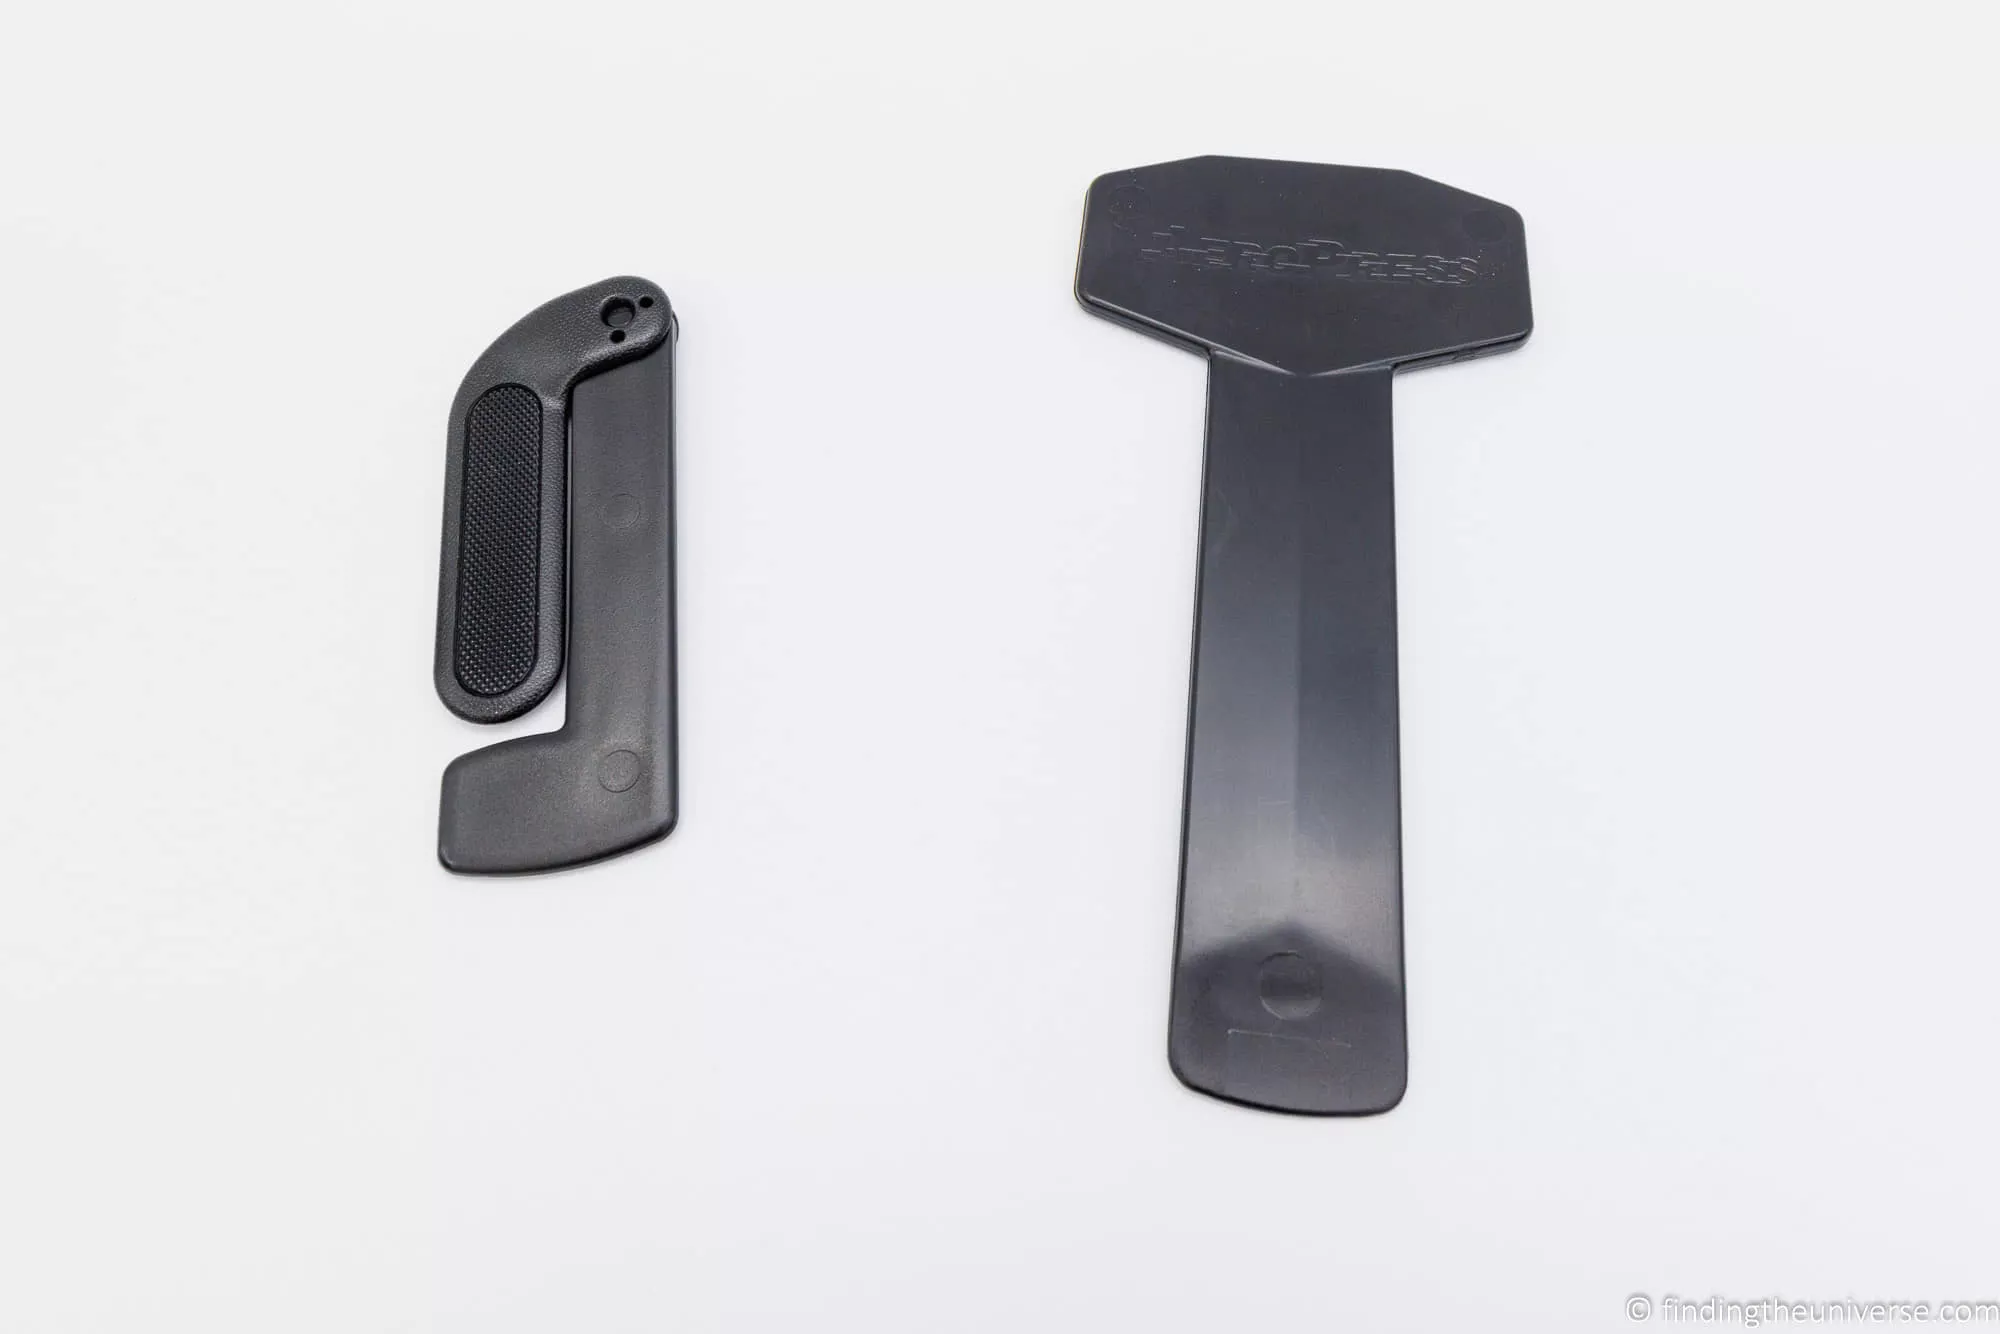
One thing years of travel has taught us: you don’t need most of the accessories. The funnel, scoop, stirrer and filter holder all stay home. A spoon measures the grounds just fine. All we actually pack is the chamber, plunger and filter cap, enough filters (or a metal mesh filter), and the right-sized cup to plunge into.
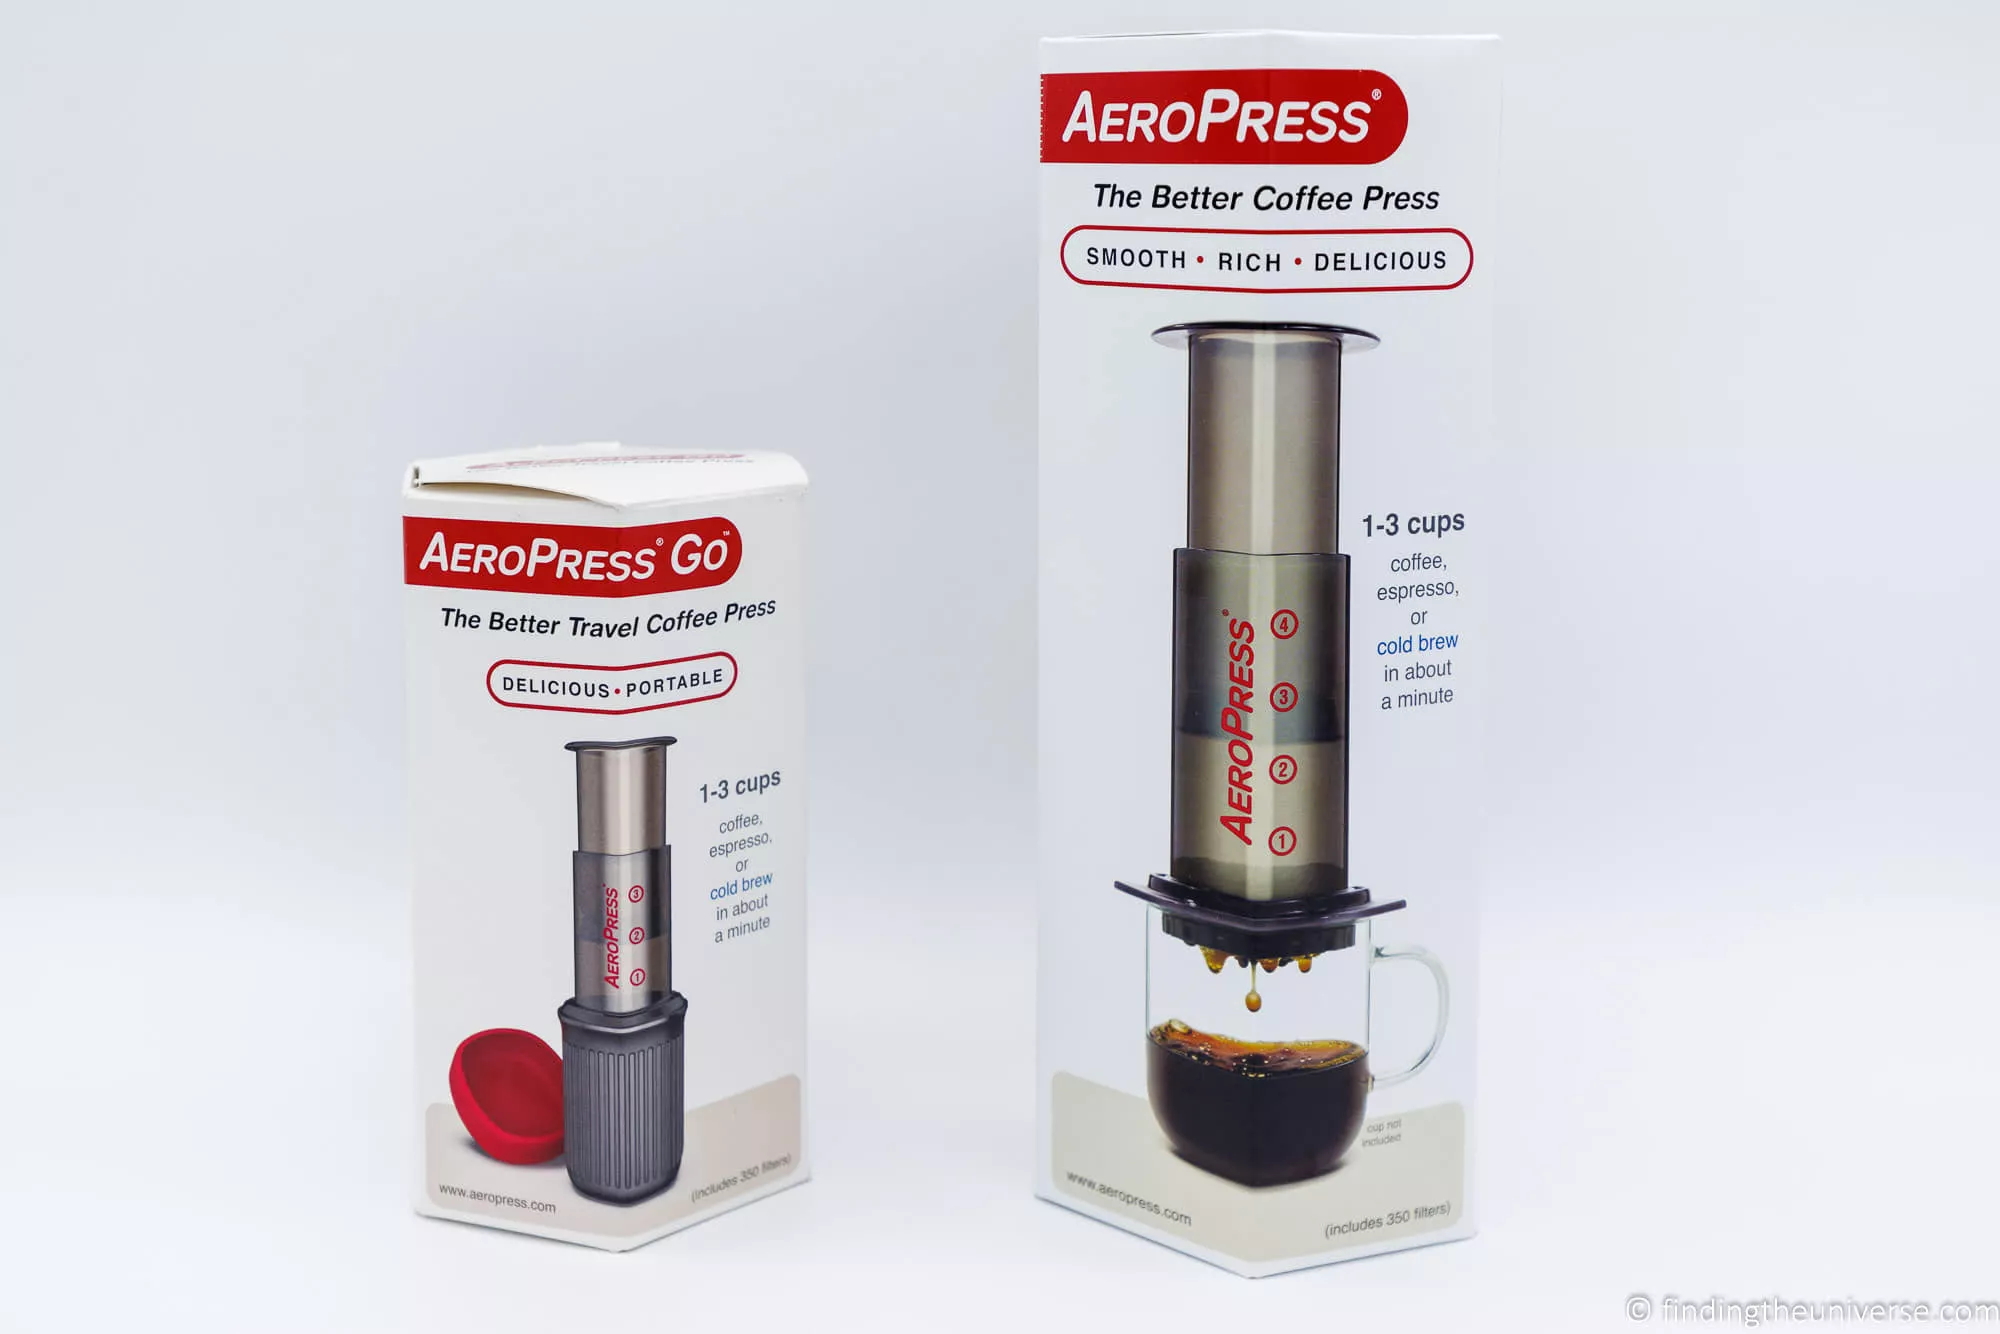
AeroPress Go Review
The Go launched in 2019 as the more portable kit, and the size difference is obvious from the box, which is about two-thirds the size of the Original’s. Everything except the pack of 350 microfilters lives inside the 15 oz travel mug, and you can carry up to 20 filters in the small holder, which also fits inside the mug. It all packs in snugly and doesn’t rattle.
The mug is a slightly odd shape, part square with rounded corners, which maximises volume over a round mug. I’ve never had coffee spill out, but you might prefer to drink from a corner. The lid isn’t the drink-through kind you find on travel mugs. It’s there to keep the parts together in transit, and it doesn’t seal. I tend to use it as a coaster while I brew and drink, since it’s grippy and won’t slide off a surface like the mug can.
The biggest difference from the Original is the smaller chamber, which has to be small enough to nest in the mug. The scoop is smaller too (though it holds the same amount), and the stirrer folds in half, which is much more practical for travel. The brewing process is identical, with the bonus that your mug is already there. The mug is the right size for the chamber to sit on, though it doesn’t clip in.
When I first got the Go I was a bit disappointed that the mug didn’t lock more firmly onto the chamber. In practice it’s been a non-issue. It’s stable and easy to use, and I’ve never worried about it tipping, even in a bit of wind on a hillside.
I can’t taste a difference between coffee from the Go and the Original, which is exactly what you’d expect, since they brew the same way. The only real difference is that the smaller chamber brews a bit less.
For brewing on the move, the Go is a great option. It packs down small, it’s quick and easy (just find a stable, level surface), and there’s barely any mess. The coffee is just as good as the Original’s.
Two things we’ve learned travelling with it: the filter holder only takes 20 filters, so on a longer trip a reusable metal filter saves you rationing paper ones. And there’s only one mug, so if you’re not travelling solo you’ll still need to pack extra cups or a flask.
Pros: the neatest travel package, folding stirrer, built-in mug, brews the same coffee as the Original, very stable in use.
Cons: brews 8 oz rather than 10, only one mug, and the lid doesn’t seal for drinking.

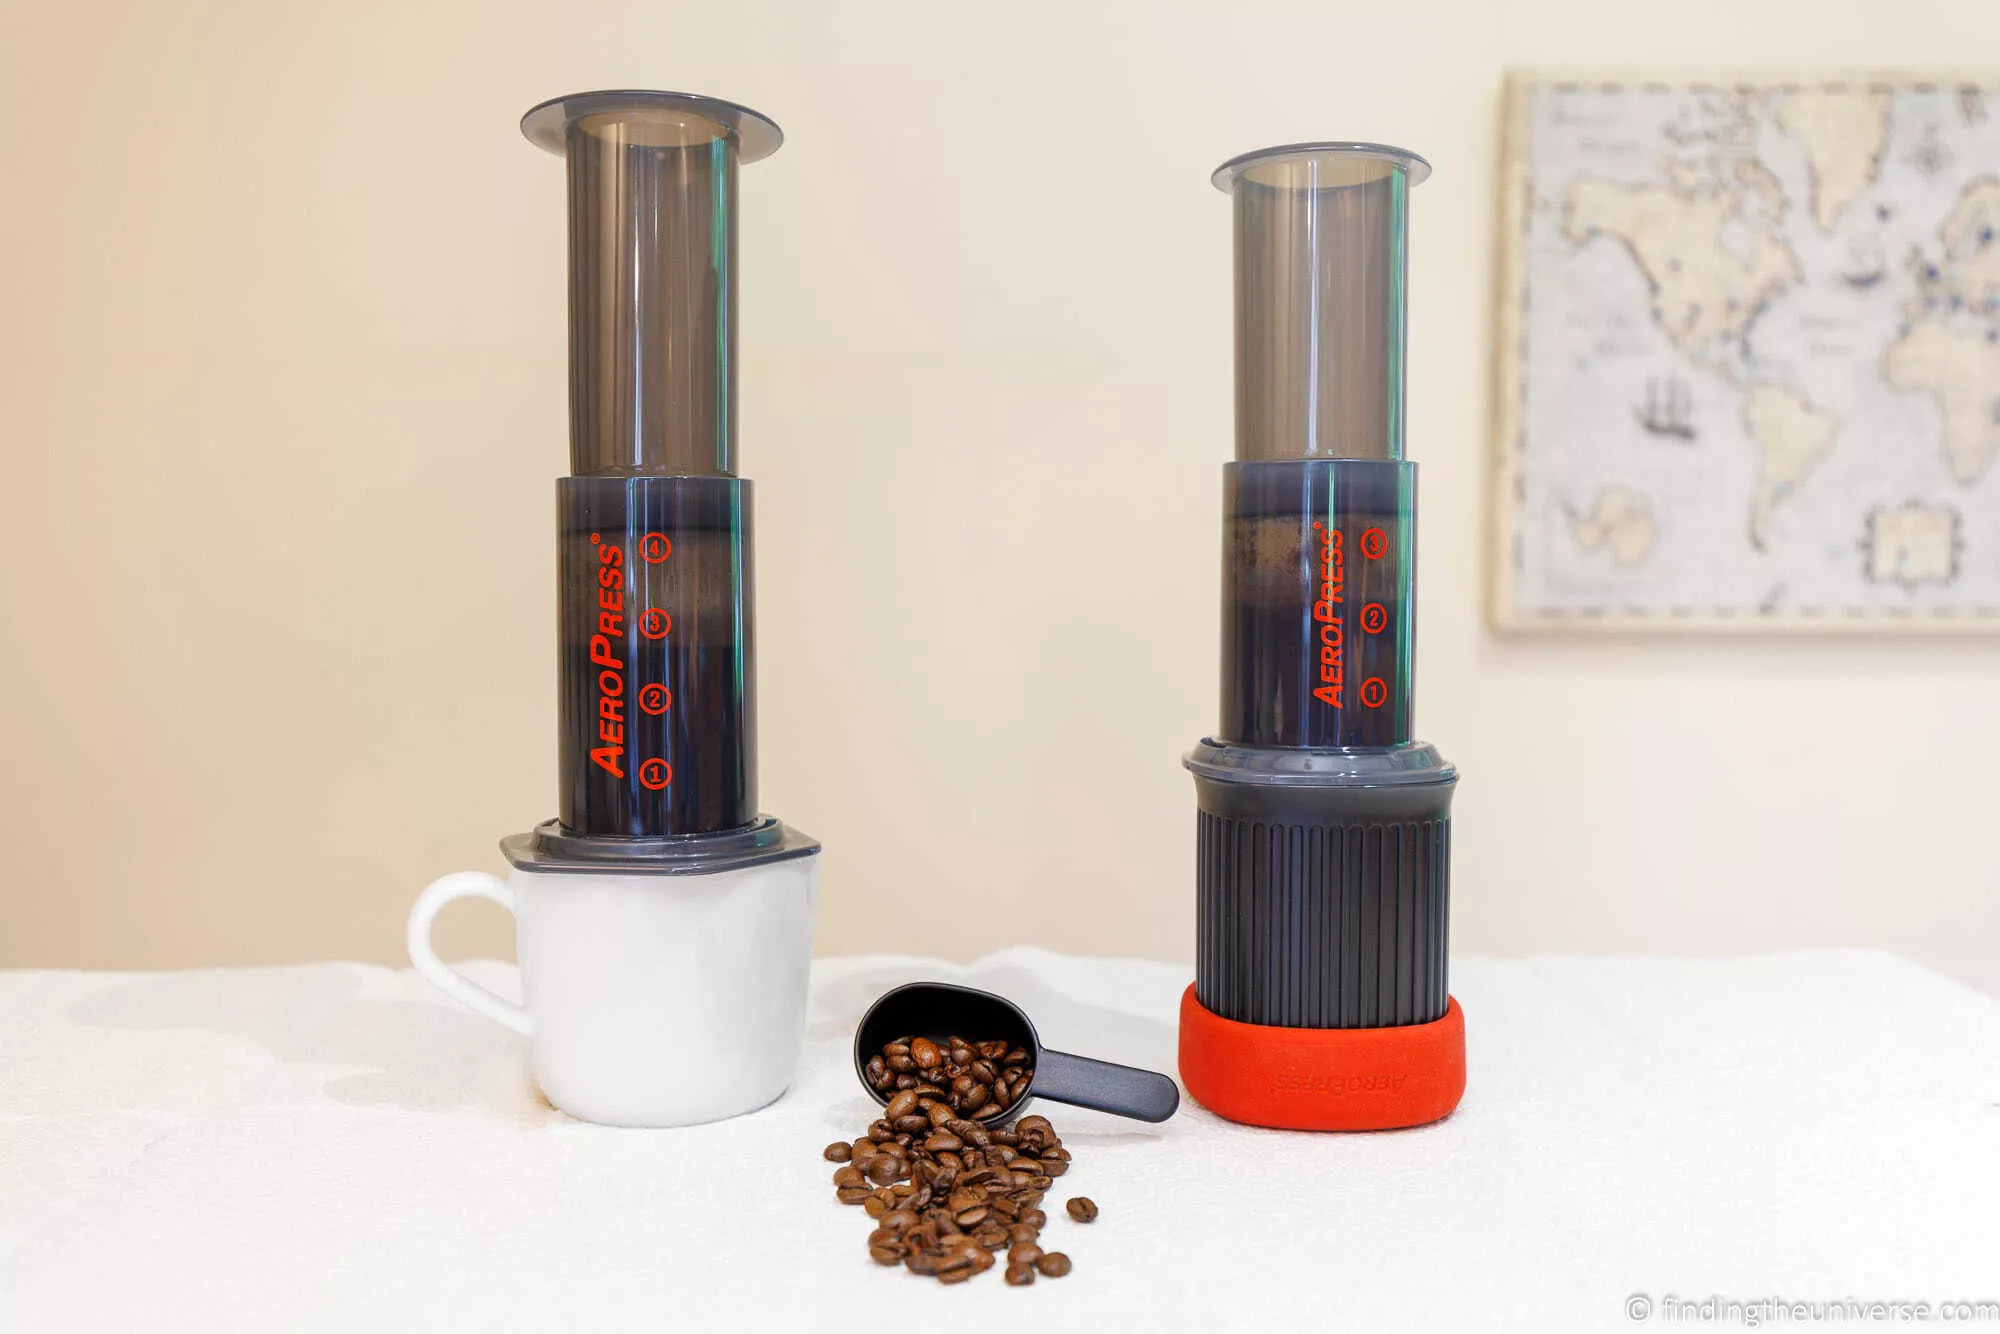
AeroPress Original vs AeroPress Go for Travel
These are the two I’ve actually lived with, so here’s how they stack up for travel. The key specification differences are:
- Weight: the Go weighs 11.4 oz (323 g) packed in its mug. The Original weighs 13 oz (368 g) with the tote and everything, or about 8 oz (225 g) packed with just the travel essentials.
- Packed dimensions: the Go (in its mug) is 4.6 x 3.6 x 3.6 inches (11.7 x 7.6 x 7.6 cm). The Original is 5.4 x 4.2 x 3.8 inches (13.7 x 10.7 x 9.7 cm).
- Coffee per brew: the Go makes up to 8 oz (236 ml). The Original makes up to 10 oz (295 ml).
On paper the Go is the obvious travel choice, an all-in-one that packs into a tidy package. But think a few things through before you decide:
- If you already travel with a mug you like, and it fits the Original, the Go’s mug becomes redundant for solo travel.
- The Original is heavier with every component, but you’d never bring all 350 filters, and you can leave the scoop, stirrer and funnel at home. Packed with the parts most people actually carry, it’s around 8 oz, which matches our experience.
- If you’re travelling with other people, you’ll need extra mugs anyway, and the Original’s larger brew is an advantage when you’re making coffee for more than one.
So my rule of thumb is to think about the mug and the number of people. If you don’t already have a travel mug you love and you’re brewing for one or two, the Go is a brilliant solution that packs away beautifully. If you already carry a mug, or a camping mug for everyone in your group, the Original with the tote is my pick, because you avoid a redundant mug. Just check your mug’s diameter fits the Original.
The 2 oz (60 ml) difference in brew size sounds trivial, but it can be the gap between two decent cups and two slightly weak ones from a single press. You can compensate by adding a scoop or topping up with hot water, so it’s not decisive, just good to know.
The accessories don’t sway me either way. A scoop is nice; the stirrer and funnel aren’t essential. Below are some side-by-side photos of the two.

AeroPress vs Other Ways to Make Coffee When You Travel
The AeroPress isn’t the only way to brew on the road, and before you buy one it’s fair to ask how it compares with the alternatives. Here’s how I weigh up each, after years of trying most of them. For a fuller rundown of the field, see our guide to the best travel coffee makers.
A travel French press is simple and makes a good cup, but it gives you a heavier, more sediment-heavy brew and is fiddlier to clean on the road. The AeroPress is cleaner in both senses, the cup and the washing up, so I’d take it over a French press for travel.
A collapsible pour-over dripper is the lightest and cheapest option of all, and if minimal weight is your only goal it’s hard to beat. But it’s slower, more weather-dependent (a breeze ruins your pour), and the coffee comes out lighter-bodied. The AeroPress is more forgiving and makes a stronger cup, at the cost of a bit more bulk.
A moka pot makes a rich, intense brew and is seriously tough. I travelled all around Australia with one, and the thing was indestructible. The trade-off is that it needs a stove or heat source, it’s heavier, and it’s slower to clean. If you’ve got a campervan, or you’re car camping with a hob, a moka pot is a treat. For lightweight or stove-free travel, the AeroPress is the more practical pick.
Instant coffee has come a long way, and the good specialty sachets are fine in a pinch, with no kit and no cleanup. But it’s still instant. If coffee matters to you, the AeroPress is a big step up for very little extra effort.
A battery espresso maker like the Wacaco Nanopresso gets you closer to true espresso with crema, which the AeroPress can’t do. But it’s pricier, more fiddly, and makes a tiny amount. If you specifically want espresso, it’s worth it. If you want an easy, versatile cup, the AeroPress is the better all-rounder.
The short version: for most travellers most of the time, the AeroPress is the best balance of cup quality, weight, speed and cleanup. The exceptions are if you want true espresso, where a battery espresso maker wins, or you’re car-based and love an intense brew, where a moka pot is hard to beat.
AeroPress Travel Tips
Once you’ve picked your AeroPress, here are the things we’ve learned that make travelling with one easier.
- Pack something to drink from. Make sure you have enough cups for everyone you’re brewing for. The Go comes with one mug, so remember cups for anyone else in your party.
- Bring your coffee. An AeroPress only works if you’ve got coffee with you. Pack ground coffee for simplicity, or beans and a portable grinder if you want to grind fresh. Bring enough for the trip, or have a plan for restocking.
- Plan your hot water. For hot coffee you need boiling water, from a travel kettle, a hotel kettle, a stovetop pan or a campfire. If there’s a gap between hot water sources during the day, a flask or Thermos keeps water hot for hours. Our portable coffee makers guide covers options with built-in heating, too.
- No hot water? Make cold brew instead, using cold or room-temperature water. The cold brew instructions come with the product.
- Think about cleaning. The AeroPress is easy to clean: rinse it between uses, especially the seal, and give it a proper wash with warm soapy water now and then. Travelling, you’ll need to think about disposing of the spent grounds and paper filter.
- Pack it safely. It’s sturdy but not unbreakable, so pack it carefully, and dry it thoroughly before longer-term storage.
- Mind your water source. If you’ll be using untreated water, or you’re somewhere the tap water isn’t safe to drink, filter or treat it before brewing.
- Sorting out milk is the one that catches people out, and it’s a real challenge for us, because Jess much prefers her coffee with milk and milk is hard to travel with. We do one of two things. We travel with powdered milk, which is fine if you mix it properly with a little water first rather than tipping it straight into the coffee. Or, since Jess prefers the real thing, we use single-serve UHT milk sachets, the kind hotels leave by the kettle. You can also pack Nido instant milk powder or long-life liquid creamers, which keep without refrigeration until opened. For frothed milk, a battery-powered milk frother does the job.
- Sweeteners are easy. Sugar travels well in single-serve packets, cubes, or just a Ziploc bag from home.
What We’ve Learned Brewing Coffee on the Road
A few hard-won lessons from years of AeroPress travel, the kind of thing you only really learn by doing it.
The biggest one: you need far less than comes in the box. We’ve stopped packing the funnel, the scoop, the stirrer, the filter holder and the stack of 350 filters. A spoon measures the grounds, and a reusable metal filter means we never count paper ones again. What actually travels is the chamber, plunger, filter cap, a filter, and the right cup. That’s it.
Your hot water plan matters more than the brewer itself. The AeroPress takes thirty seconds; sorting boiling water somewhere remote takes the thought. A good flask has saved more of our mornings than any accessory.
Dialling in your cup takes a few goes, and that’s normal. One of our readers got their Original and said it took a couple of tries before the coffee came out how they liked it, which matches our experience exactly. Start with the AeroPress instructions, then nudge the grind, dose and steep until it’s yours.
Don’t underestimate cold brew. The days we couldn’t get hot water used to be a write-off; now a two-minute cold brew gets us a decent cup anywhere.
And the small stuff adds up. On the Go, we use the lid as a grippy coaster while we brew. With the Original, we leave the tote at home unless we specifically need to carry everything together. Little habits, but they’re why the AeroPress has stayed in our bag for years when other gear hasn’t.
AeroPress Accessories
The AeroPress kits come with almost everything you need to brew, at home or away, and AeroPress sells replacements for every part if something breaks or goes missing. A few extras are still worth considering, depending on how you travel.
One note: with the launch of the larger XL, not every accessory fits every model. The metal mesh filter that works with the Original, Go and Clear, for example, won’t fit the XL.
A Mesh Filter
A reusable metal mesh filter replaces the paper filters that ship with the product. The advantage is that it’s reusable, so you’re not carrying and discarding paper filters, which is more sustainable and more travel-friendly.
AeroPress long preferred its own paper filters, reckoning paper gives you the cleanest cup. In 2022, clearly having noticed how many people wanted one, it launched its first official stainless steel reusable filter. So you can now buy an AeroPress mesh filter, and third-party ones are also available.

For us the metal filter is worth it. Not having to pack or remember paper filters outweighs any difference in the cup, and we’ve not noticed a meaningful taste change. You might feel differently, so it’s a personal call.
AeroPress Flow Control Filter Cap
When you brew with an AeroPress, a little coffee drips through into the cup before you press, because the paper filter lets gravity do its thing. I don’t mind it, but some people would rather no coffee dripped through until they’re ready.

The old fix was the inverted brewing technique, invented by AeroPress aficionados. It works, but it risks tipping hot water and grounds everywhere if it goes wrong. In 2023 AeroPress launched the Flow Control Filter Cap as a cleaner solution. It replaces the standard cap and has a valve that holds back the drips until you press. You get more consistent control over brew time, you don’t lose water as it brews, and the extra pressure can pull a touch more crema. It’s a smart add-on for any AeroPress kit.
Replacement Paper Filters
The Original and Go come with 350 paper filters, plenty for a lot of coffee. The Clear comes with 100. You can reuse the filters a few times, but eventually they run out, and replacements are cheap.
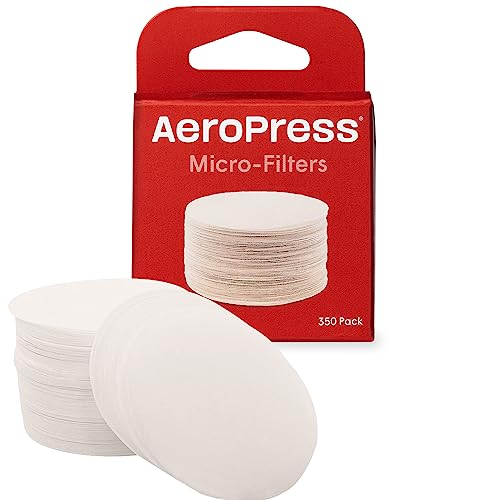
AeroPress filters are widely available, and all versions of the brewer use the same size and type, so you can buy them online here.
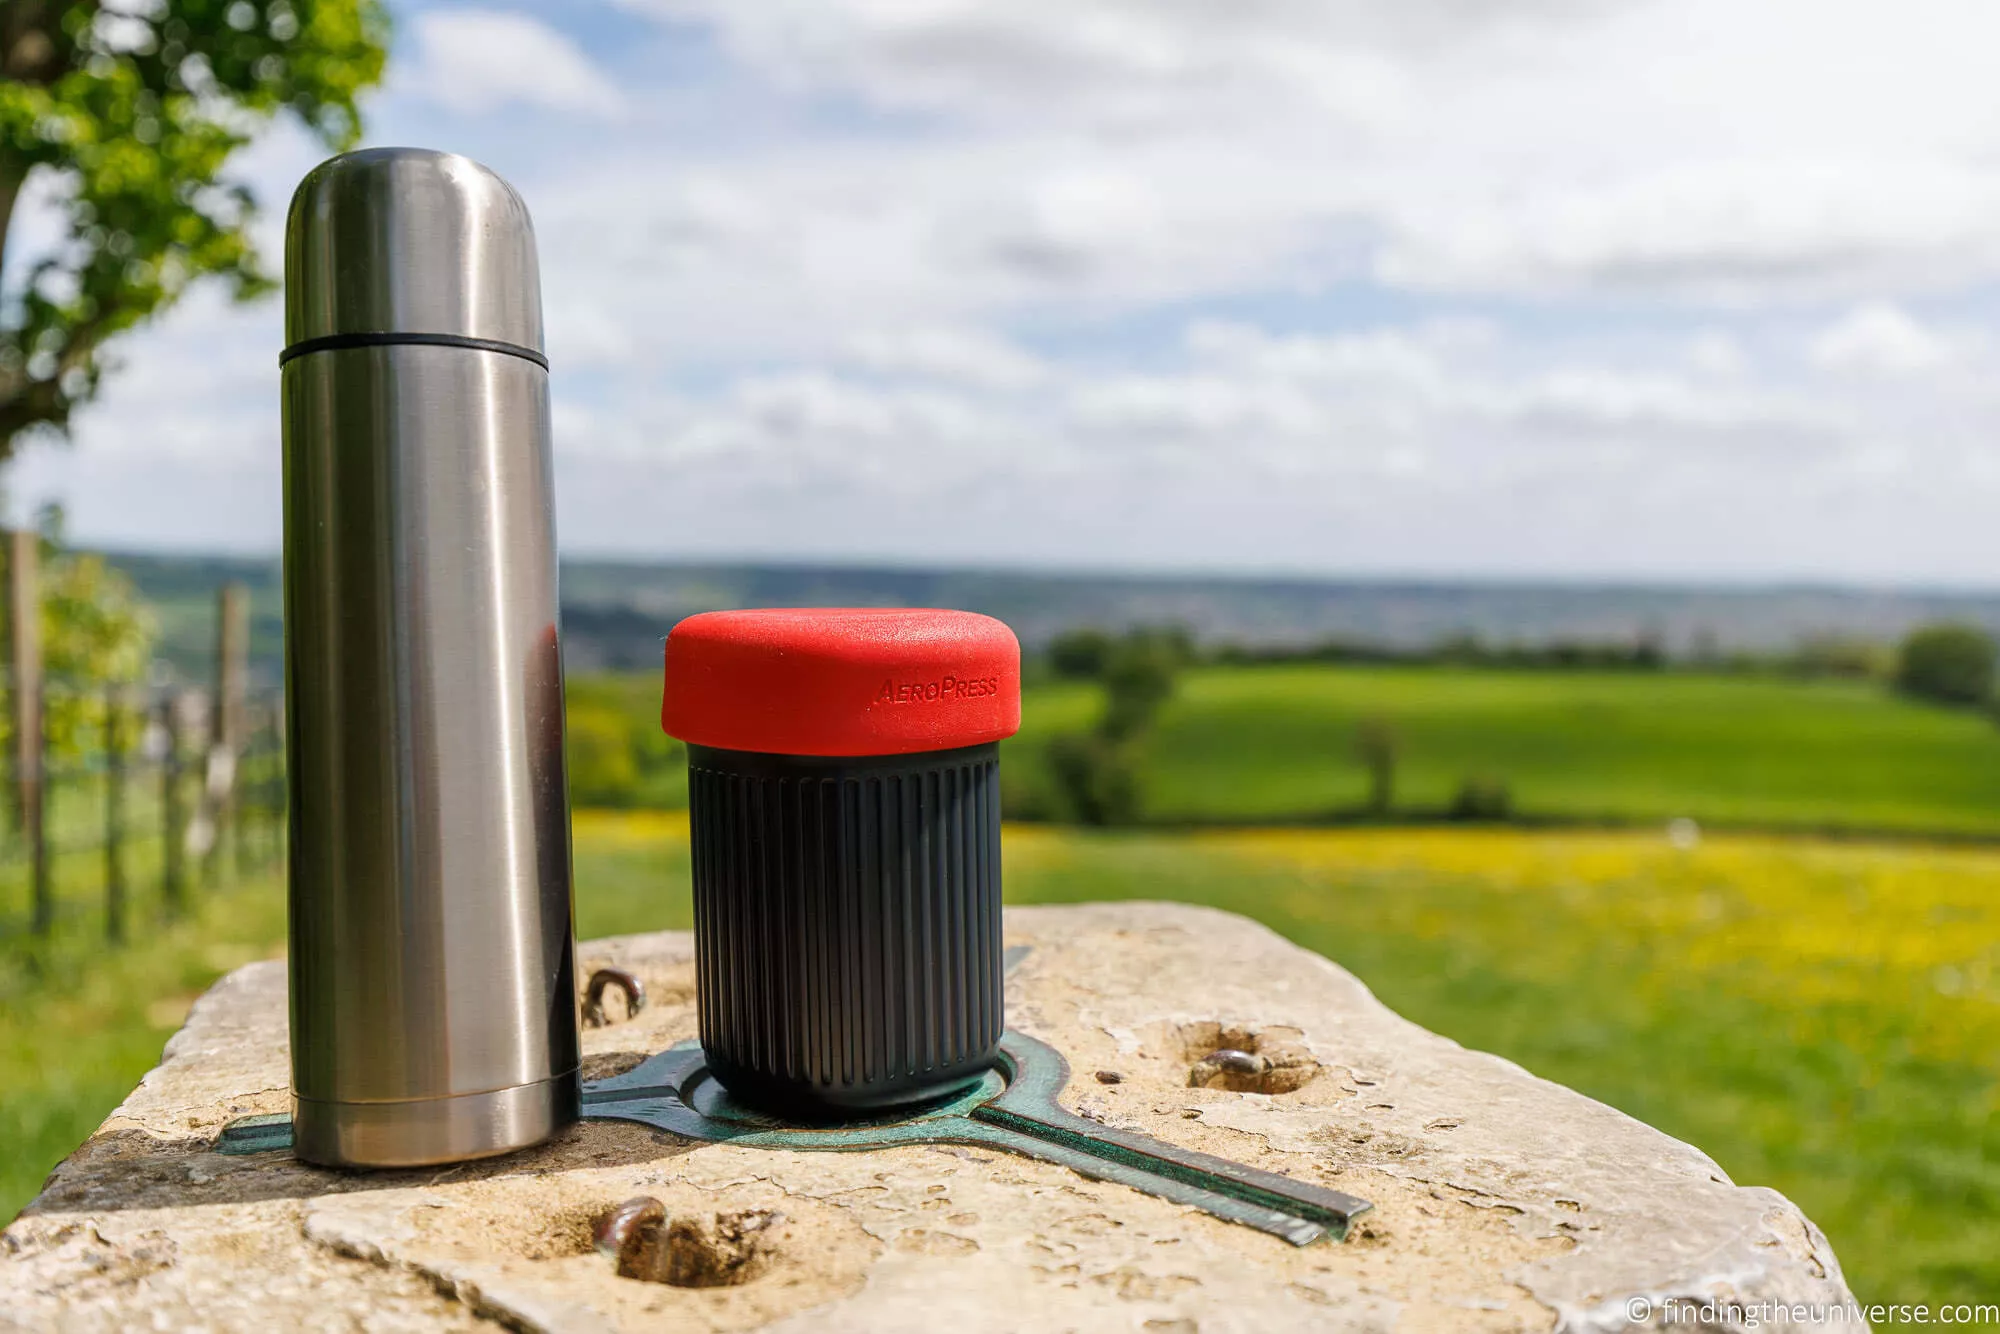
Flask for Hot Water
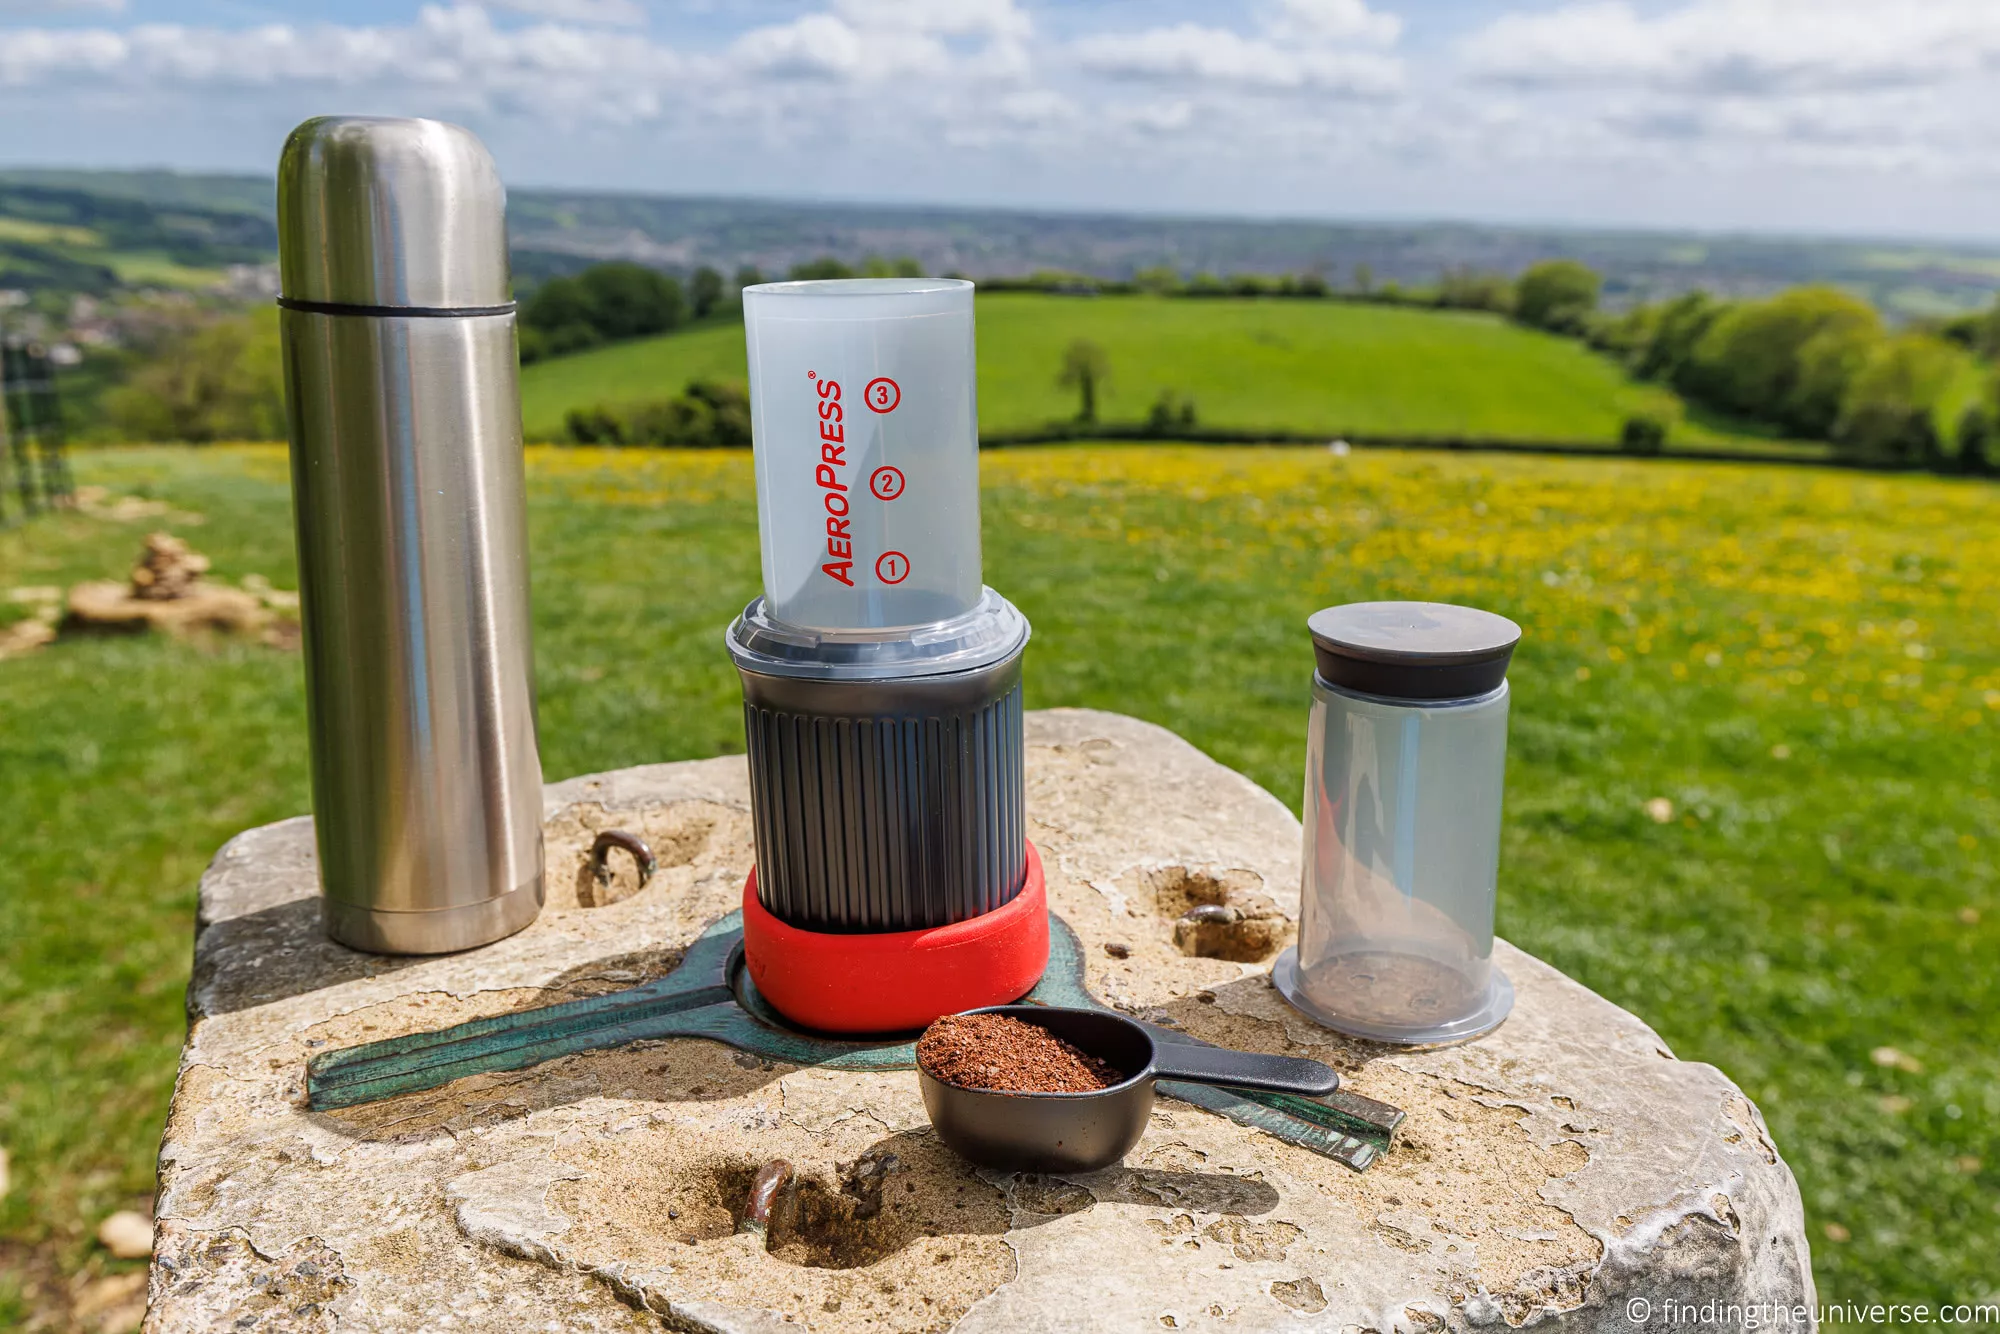
If you’re heading out for a day hike or a road trip, an insulated flask is the easiest way to carry hot water. A good flask keeps water hot for hours, so you don’t need to carry a heater.

Just pour the hot water onto the grounds and brew as normal. It won’t suit longer trips with no access to boiling water, but even on a road trip you’ll usually overnight somewhere with a kettle to fill up for the day ahead. We use a flask like this on day-hike days. If you’re in a group, a flask with a lid that doubles as a cup saves you carrying at least one mug.
A Travel Coffee Mug
If you’re travelling solo with the Go, you probably don’t need a separate mug. But if you’d rather not use the built-in one, or you’re using the Original, you’ll want a mug.
A travel-focused, insulated mug is ideal, because it can double as a flask to hold hot water for brewing.

There are plenty on the market. Look for a leakproof seal and good insulation, and make sure it’s the right size for your AeroPress. One that fits is this insulated mug, and we also like Contigo and Stanley travel mugs.
Camping Coffee Cups
For a camping trip where weight matters, consider lightweight stackable camping mugs or collapsible cups.
Get enough for everyone, and make sure they’re sturdy and the right size for your AeroPress (with the Original you can use the funnel for smaller cups).

Pick something that can handle hot water, has a handle, and is easy to clean and store. There are lots to choose from, and you can see some options here.
Coffee Grinder
Grinding your own beans makes a real difference to the cup. There are countless grinders out there across a wide range of prices.
For travel, we recommend a compact manual grinder. It’s more effort, but it means you can grind fresh even off-grid. We’ve long recommended the JavaPresse Manual Coffee Grinder, which is built to last, with a stainless steel body, a durable ceramic burr and an adjustable grind selector so you can dial in the coarseness you want. It works anywhere, on a hike, at a campsite or on the road.

If you want to stay in the AeroPress family and don’t mind spending, the new AeroPress Manual Grinder ($199.95) is the premium option, with conical burrs, more than 60 settings and a body compact enough to nest inside the plunger. For most travellers, though, the JavaPresse does the job for a fraction of the price.
Travel Milk Frother
If you like a milk-based coffee with foam, like a latte or cappuccino, a portable milk frother is worth packing. These are usually battery-powered and let you froth your own milk to add to your AeroPress coffee.

A small hand-held, battery-operated frother produces frothy milk in around fifteen seconds, and works with most milks, dairy or otherwise, including soya, almond, oat, UHT and powdered. You can use it for hot or cold drinks, from cappuccinos to hot chocolate. Look for one with a stainless steel head and shaft, which is easy to clean. You can find a battery-powered milk frother like this one online.
Travel Kettle
A travel kettle, or some way to heat water, is another option.
We wouldn’t normally recommend travelling with a kettle, given the space it takes and the voltage compatibility issues, but it makes sense if you’re in a campervan or RV, or you camp regularly.
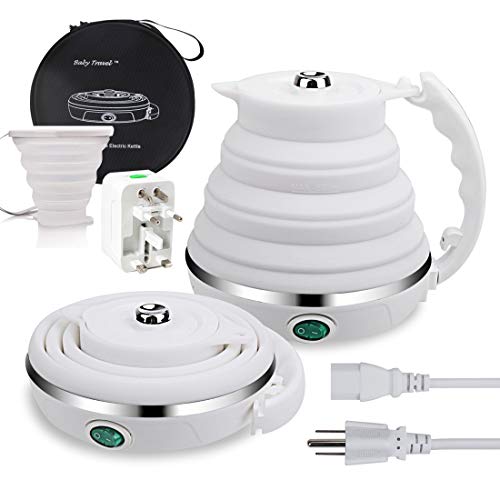
This collapsible travel kettle is dual voltage and boils up to 500 ml (17.5 oz) of water, more than enough for an AeroPress. Just remember you’ll need a power outlet for any electric kettle.

AeroPress Travel Coffee: FAQ
Is an AeroPress good for travel?
Yes. It’s light, compact, near-unbreakable in its plastic forms, makes excellent coffee in about thirty seconds, and cleans up with a quick rinse. The AeroPress Go is the most travel-focused model, because everything packs inside its own mug.
The main thing to plan around is hot water, which the AeroPress doesn’t provide. A flask or a hotel kettle usually sorts that out, and you can make cold brew when no hot water is available.
Can you take an AeroPress in your hand luggage?
Yes. An AeroPress is just a brewer with no liquid, so it travels fine in carry-on luggage. Pack the coffee separately, and remember that liquids like milk are subject to the usual hand-luggage limits.
If you carry a metal mesh filter, that’s fine too. There’s nothing about an AeroPress that causes problems at security.
How much does an AeroPress cost?
Prices run from $39.95 for the Original up to $199.95 for the Premium glass model. The travel-focused Go is $49.95, the Go Plus is $89.95, and the Original XL is $79.95.
You’ll often find the Original and Go discounted on Amazon, so it’s worth comparing prices before you buy.
Do you need a grinder to use an AeroPress?
No. Pre-ground coffee works perfectly well, and it’s the simplest option for travel. Buy a fine, espresso-style grind for the best results.
If you want the freshest cup, a compact manual grinder lets you grind beans on the go. It’s more effort, but the improvement in flavour is real.
Paper or metal filter, which is better for an AeroPress?
Paper filters give a slightly cleaner cup and are what AeroPress recommends. Metal mesh filters let a little more oil through for a fuller body, and they’re reusable.
For travel I lean towards a metal filter, because you never have to pack or ration paper ones. The taste difference is small enough that convenience wins for me.
Can you make AeroPress coffee without hot water?
Yes. You can make cold brew in an AeroPress using cold or room-temperature water, stirring for about a minute rather than ten seconds. It takes a couple of minutes start to finish, far quicker than the usual overnight cold brew.
This is especially handy for travel, since there are days you won’t have a way to boil water.
How do you clean an AeroPress while travelling?
It’s easy. Push the plunger all the way through to eject the grounds and filter as a neat disc, then rinse the chamber and seal. Give it a proper wash with warm soapy water when you can.
On the road, the main thing to plan is somewhere to dispose of the used grounds and paper filter. A metal filter and a small bag for waste makes this simple.
Does AeroPress coffee taste better than a French press?
It’s different rather than strictly better, but I prefer it. The AeroPress gives a cleaner, less sediment-heavy cup and a stronger, more espresso-like concentrate, where a French press is heavier-bodied with more grit.
For travel the AeroPress also wins on cleanup, which a French press makes more of a chore.
How long does an AeroPress last?
Years. The plastic brewers are tough, and the only part that wears out is the silicone seal, which is cheap and easy to replace. Mine have lasted through years of travel.
If a seal starts to feel loose or leaks, replacing it makes the brewer feel new again, so there’s no need to buy a whole new unit.
Which AeroPress accessories are actually worth buying?
For travel, a reusable metal filter and a good insulated flask are the two that earn their place. The metal filter saves you carrying paper ones, and the flask sorts your hot water for the day.
Beyond that, most of the bundled accessories (the funnel, stirrer and filter holder) can stay home. A spoon and the right mug cover the basics.
Further Reading
That’s our review of the AeroPress Original, Go and the wider range. We’ve also got plenty of other guides that should help with your travel planning:
- A detailed rundown of our favourite portable coffee makers, if you want to compare the AeroPress with other travel brewers.
- Our guides to the best travel shoes for men and the best travel shoes for women.
- Packing tips in our guides to what to pack for a ski trip, what to pack for Iceland, what to pack for London, and what to pack for winter in Finland.
- For gift ideas, see our guides to what to buy for photographers, travel-themed home decor, and our ultimate gift guide for travellers.
- A travel coffee maker doesn’t mean skipping the cafés. See our guide to the best cafés in Rome for a start.
- And for trip inspiration, our guides to the world’s best road trips, getting online when travelling, the best travel routers, the best travel cameras and the best travel wraps.
And that’s it! As always, we’re happy to hear your feedback and questions. Just pop them in the comments below, and we’ll get back to you as soon as we can.

Nichael Hopkins says
NIce balanced review and some good ideas. I am still not convinced it will make a coffee as good as a 3 cup moka pot but it will certainly be lighter and possibly more versatile.
M
Laurence Norah says
Thank you Nichael! I traveled all around Australia with a Moka pot, that thing was indestructible, with the benefit of also making decent coffee. I have to agree, it’s hard to beat 🙂
Ashlee M. says
This is such a helpful post. I am fairly new to traveling and love my coffee. I decided to get the original Aeropress and love it so far!!! Took a couple tries to get coffee how I like it but now I think I have it down. Have used it at home and at the office and hope that it will be great for vacation too. Thanks!
Laurence Norah says
My pleasure Ashlee, thanks for taking the time to leave a comment! It does take a bit of practice to get the AeroPress to produce coffee how you like it, but once you do it definitely makes delicious coffee. Enjoy!
Laurence
Hans says
Great review of the Aeropress, did not realize there was a newer travel version of the original. I tried one once on camping trip with freinds and liked the coffee but not sure on buying one for myself and wife for travel to make coffee. The main reason is procuring milk. So we generally just buy and accept what is available.
I thought your travel tips were great, but I feel that you were missing tips for those who enjoy milk in their coffee, dairy or dairy alternatives, and for making milk based drinks that required frothed milk like lattes. My wife won’t drink a cup of coffee without milk so wondering your thoughts/tips on this if you have any.
Also for 2 persons, any preference for original vs. Go?
Thank you
Laurence Norah says
Hi Hans,
Thanks very much, I’m glad I was able to inform you about the AeroPress Go. Also, thanks very much for your query about milk. This is actually a challenge we have faced because Jess much prefers her coffee with milk, and milk is hard to travel with. We currently tend to do one of two things, we either travel with powdered milk, which can be ok if mixed properly rather than directly added to the coffee. Alternatively, because Jess prefers real milk, we find single serve sachets of UHT milk. These are the sort of thing you find in hotels that have coffee making facilities in the rooms. I have updated the tips section of the post to add something about milk, so thanks again for bringing this to my attention.
For two people, personally we are going to be travelling with the Go (we now own both). That’s mainly because it just packs up so neatly and the cup acts as good protection for the whole set when it’s packed up. I also like that it has a cup. Brewing wise, I will likely just brew each cup individually as I find that gives me the most control, but it’s also possible to double up on strength and then dilute afterwards.
Let me know if you have any more questions, and thanks again for your time to leave a comment and help improve the article 🙂
Laurence
Hans says
Thanks Laurence, very helpful additions and responses. I think I am going to try seeing if my wife ok with powdered milk or the little Coffeemate creamers with her coffee. If so, then I think i’ll go ahead with Aeropress Go. At hotels we should be able to get fresh milk, but those would be good ideas for camping trips.
btw, had a very hard time replying to your reply comment for some reason….when clicked nothing happened, had to reload.
Laurence Norah says
My pleasure Hans! Sorry to hear about your comment reply issue. I am hoping that is a one-off but will do some testing as well!