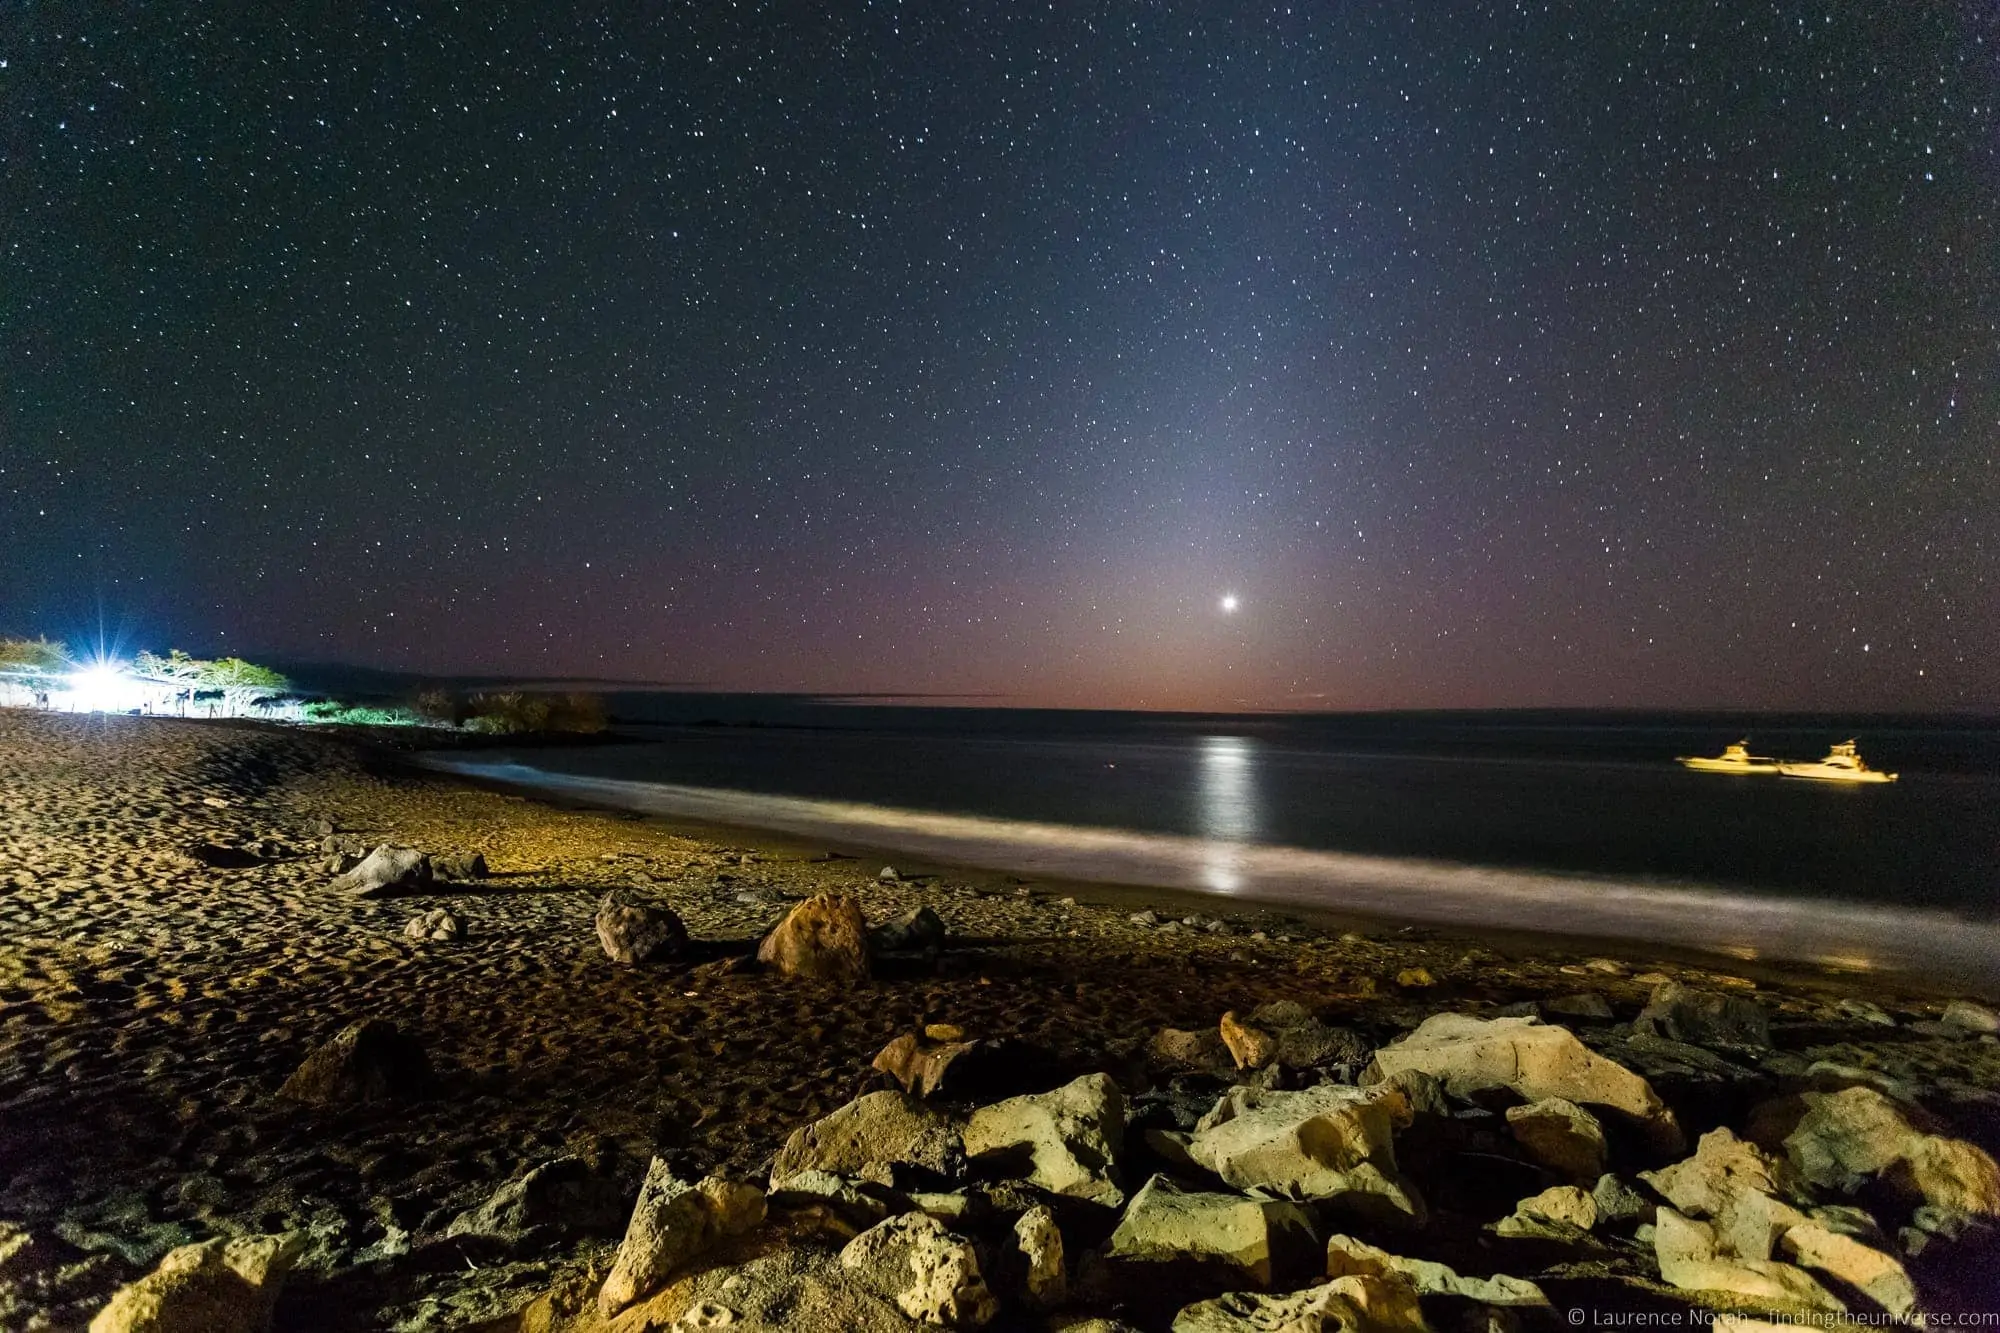
I’ve photographed the night sky from the deserts of Morocco, above waterfalls in Arizona, along the Scottish coast, and from more roadside pull-offs than I can count. After more than 15 years of shooting stars while travelling, I can tell you that astrophotography is one of the most rewarding things you can do with a camera.
It can also be one of the most frustrating, at least at first. You’re working in the dark (literally), with settings that feel counterintuitive, and your results won’t look anything like what you want until you get the hang of it. But once you nail your first shot of the Milky Way arching over a landscape, or catch a meteor streaking through a star field, you’ll be hooked.
This guide covers everything you need to know to get started with astrophotography. I’ll walk you through the gear, the camera settings, how to find dark skies, how to plan your shoot, and the different types of night sky photos you can take. I’ll also cover smartphone astrophotography, because modern phones are surprisingly capable.
One thing to note: this guide is about landscape astrophotography and nightscape photography. If you’re looking to photograph planets, nebulae, or deep-sky objects through a telescope, that’s a different discipline entirely and needs a different guide. This is about capturing the night sky as part of a wider scene, the kind of shot you might take while travelling, camping, or chasing a meteor shower from your back garden.
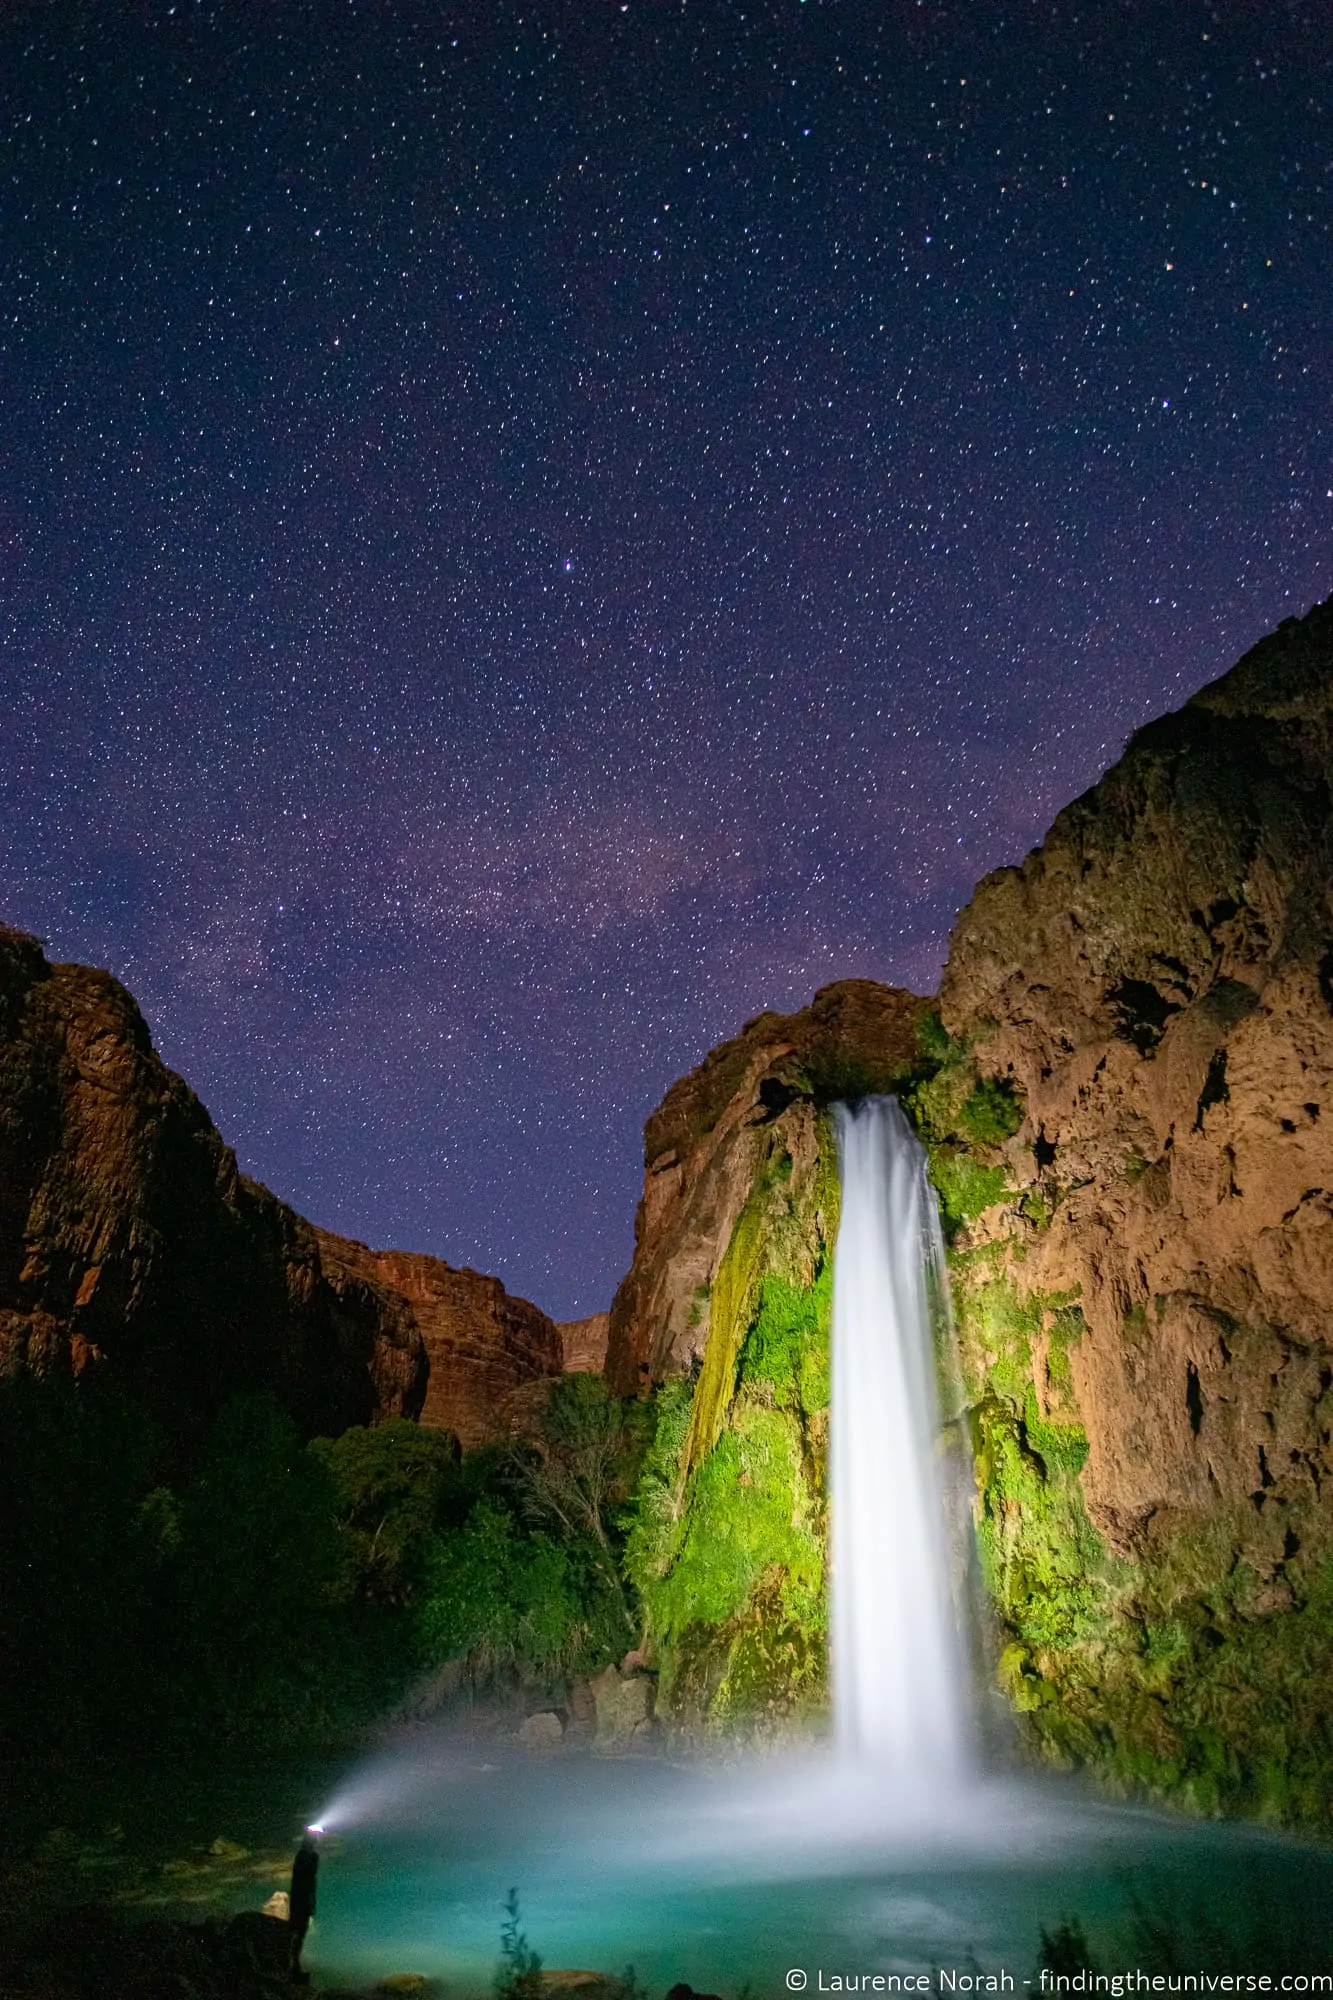
Table of Contents:
What You Need for Astrophotography
The good news is that you need less gear than you might think. You don’t need an expensive telescope or a dedicated astronomy camera. A regular interchangeable lens camera, a tripod, and a clear sky will get you started.
A Camera with Manual Mode
You need a camera that lets you control the shutter speed, ISO, and ideally the aperture. Any DSLR or mirrorless camera will do this. You don’t need the latest model, and you don’t need to spend a fortune.
I currently shoot with a Canon EOS R5, but some of my favourite night sky shots were taken on a Canon 6D, which you can pick up second-hand for very little money these days. A bigger sensor helps because it captures more light, and full-frame cameras tend to handle high ISO noise better than crop-sensor models. But a crop-sensor camera will still get you great results.
If you’re looking for camera recommendations, I have a detailed guide to picking a travel camera that covers options at various price points.
I’d also recommend shooting in RAW rather than JPEG, so you have more flexibility when editing. See my guide to RAW in photography for more on why this matters.
A Wide-Angle Lens with a Wide Aperture
Your lens matters more than your camera body for astrophotography. You want two things: a wide angle to capture as much sky as possible, and a wide aperture to let in as much light as possible.
For full-frame cameras, something in the 14-24mm range is ideal. For crop-sensor cameras, that translates to roughly 10-16mm.
The aperture is at least as important as the focal length. Aperture is measured in f-stops, and for astrophotography, the smaller the number the better. An f/2.8 lens is a big step up from an f/4, and an f/1.4 or f/1.8 is even better. That said, I shoot most of my night sky photos at f/4 with my Canon 16-35mm f/4 lens, and it works. It just means I need a slightly higher ISO or longer exposure to compensate. If you can afford an f/2.8 wide-angle lens, that’s my recommendation, but don’t let a slower lens stop you from trying.
If you have an interchangeable lens camera, the Samyang 14mm f/2.8 is one of the most popular lenses for astrophotography, and for good reason. It’s wide enough to capture a big sweep of sky, fast enough at f/2.8 to pull in plenty of starlight, and it’s available in most major lens mounts including Canon RF, Nikon Z, and Sony E. It’s manual focus only, but since you’ll be focusing manually for astrophotography anyway, that’s no real downside. At around $300-350, it’s a fraction of the price of the premium f/1.4 primes.
For those with a bigger budget who want the best possible results, Canon’s RF 14mm f/1.4L VCM was designed with astrophotography in mind. At f/1.4 it gathers four times as much light as an f/2.8 lens, which means you can use a much lower ISO and get cleaner, more detailed images. It’s sharp right into the corners even wide open, which is rare at this focal length. It’s pricey, but if you’re serious about night sky photography and you’re in the Canon system, it’s the best wide-angle lens you can buy for the job.
Continuing with the higher-end theme, Nikon shooters should look at the Nikkor Z 20mm f/1.8 S, which is excellent for astrophotography and costs around $1,000. For Sony, the Sony FE 20mm f/1.8 G is a similar option at a similar price. Both are sharp, well-corrected for coma, and fast enough to make a real difference over an f/2.8 lens.
If you want to understand more about how aperture, focal length, and other settings work together, I have a beginner’s guide to camera terminology and a more detailed guide to travel lenses.
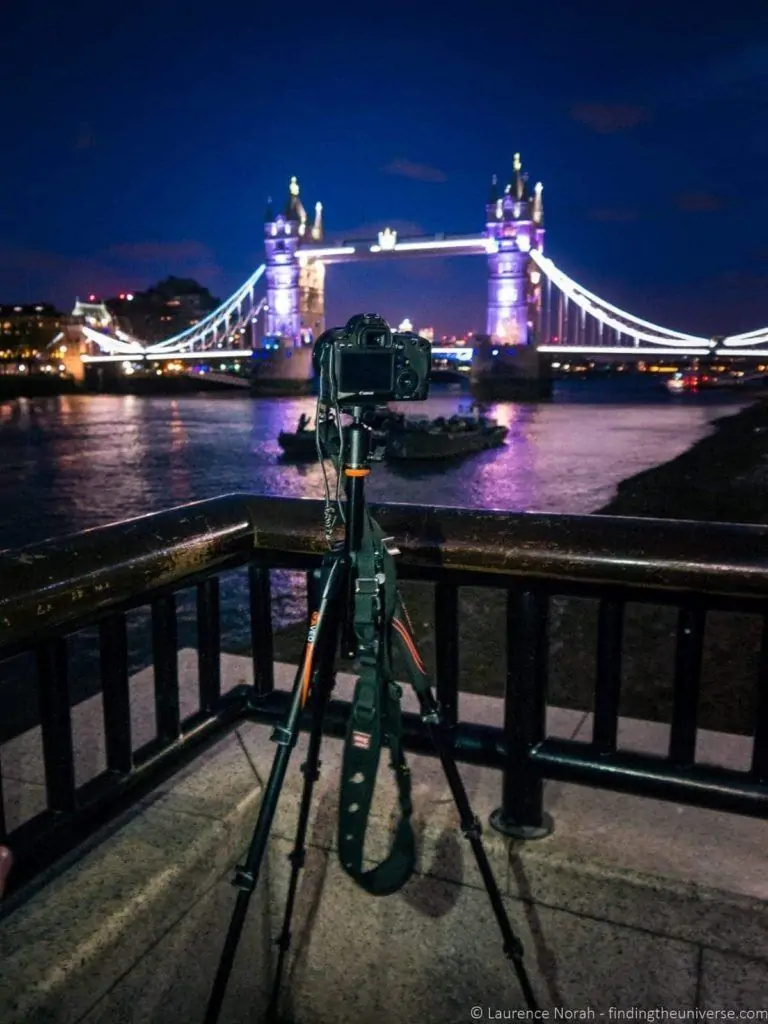
A Sturdy Tripod
A tripod isn’t optional for astrophotography. You’re going to be shooting exposures of 10 to 30 seconds, and there’s no way to hold a camera steady enough by hand for that long.
The key word here is sturdy. A cheap, lightweight tripod will vibrate in even a gentle breeze, and that vibration will blur your stars. You want something that can hold the weight of your camera and lens without wobbling, and that won’t move when the wind picks up.
I use Vanguard tripods (I’ve been a Vanguard ambassador for a number of years), and they’ve survived everything from Icelandic gales to Saharan sand. See my guide to why you need a tripod for more on this, and Jess’s guide to picking a travel tripod for specific recommendations at different price points.
A Way to Trigger the Shutter Without Touching the Camera
Even with your camera on a tripod, pressing the shutter button can cause enough vibration to blur your image. You need a way to trigger the shutter without physically touching the camera.
The easiest option with most modern cameras is to use the manufacturer’s smartphone app. I use the Canon Camera Connect app to trigger my Canon cameras, and it works well. Nikon, Sony, Fujifilm, and most other manufacturers have similar apps. Check whether your camera supports this before buying anything extra.
If your camera doesn’t have a companion app, or you’d prefer a physical option, a remote shutter release will do the job. A basic wired remote costs under $15. If you want one that also functions as an intervalometer (which lets you set up automatic sequences of shots, useful for star trails), expect to pay a little more.
The simplest free option is your camera’s built-in self-timer. Set it to a 2-second or 10-second delay, press the shutter, and step back. This works fine for single shots, though it’s less convenient for sequences.
Other Useful Extras
A few more things that aren’t essential but will make your life easier:
A red headlamp or red-filtered torch is very useful for navigating in the dark and adjusting your camera settings without ruining your night vision. White light destroys your ability to see in the dark, and it takes about 20 minutes for your eyes to fully adjust again.
Spare batteries are important, especially if you’re shooting in cold weather. Long exposures drain batteries faster than normal shooting, and cold temperatures reduce battery life further. I always bring at least two spare batteries for a night shoot.
A light pollution filter can help if you’re shooting near towns or cities. These screw onto the front of your lens and reduce the orange glow from artificial lighting. They won’t turn a city centre into dark sky territory, but they can help in suburban or semi-rural locations.
Finding Dark Skies
Light pollution is the biggest enemy of astrophotography. If you’ve ever tried to photograph stars from a city and wondered why you can only see a handful, light pollution is the reason. Streetlights, buildings, signs, and cars all send light upward into the atmosphere, washing out fainter stars and reducing the contrast between the sky and the stars.
The difference between shooting in a city and shooting somewhere properly dark is hard to overstate. Under dark skies, the Milky Way is clearly visible to the naked eye, and your camera will pick up far more than you can see yourself.
There are a couple of tools that help you find dark sky locations. DarkSiteFinder.com has an interactive light pollution map that shows you where the darkest skies are near your location. The map uses the Bortle scale, which rates sky darkness from 1 (the darkest skies on Earth) to 9 (a city centre). You’re looking for Bortle 4 or darker for the best results. Even Bortle 5 or 6 will give you reasonable shots, especially of brighter objects like the Milky Way core.
Some of the best astrophotography I’ve done has been while travelling. Deserts are excellent because they tend to have very little light pollution and clear, dry air. National parks and wilderness areas are often good too. If you’re in the UK, Scotland, Wales, and parts of northern England have some of the darkest skies, and several areas have official Dark Sky Park or Dark Sky Reserve status.
You also need to think about the moon. A full moon acts like a giant light pollution source, washing out fainter stars and making the Milky Way hard to see. For the best results, plan your astrophotography around the new moon, or at least avoid the nights immediately around a full moon. If the moon is up but not full, you can sometimes work with it by keeping it out of frame or shooting after it sets.
Planning Your Night Shoot
Good astrophotography starts before you leave the house. A bit of planning will save you a lot of frustration in the field.
The single most useful app for planning night sky photography is PhotoPills. It shows you where the Milky Way will be at any time and location, tells you when astronomical twilight ends (which is when the sky gets properly dark), calculates the ideal exposure time for your camera and lens combination, and gives you moon phase information. It costs a few dollars and is worth every penny. I also use the Golden Hour app for quick sunrise, sunset, and twilight times.
For identifying stars and constellations, Stellarium is excellent and free. Point it at the sky and it tells you what you’re looking at. Sky Map for Android and Star Chart for iPhone do similar things.
If you’re into aurora chasing, My Aurora Forecast will alert you to aurora activity. See my guide to photographing the Northern Lights for more on that.
Here are the key things to check before heading out:
Weather. You need clear skies, or at least large gaps in the clouds. Check both the regular forecast and a cloud cover forecast if one is available for your area.
Moon phase and moonrise/moonset times. The new moon phase is ideal. If there’s a crescent or half moon, check what time it sets so you can shoot after it dips below the horizon.
Milky Way position. The Milky Way core (the brightest, most photogenic part) is best seen from roughly February through October in the Northern Hemisphere, with the peak months being May through August. In the Southern Hemisphere, you can see it for more of the year. PhotoPills will show you exactly where it will be from your shooting location.
Astronomical twilight. The sky doesn’t get properly dark until astronomical twilight ends, which can be well over an hour after sunset. Plan to be set up and ready to shoot by this time.
Camera Settings for Astrophotography
Setting up your camera for astrophotography is less complicated than it might seem. Here’s what to do.
Put the camera into manual mode (usually “M” on the mode dial). Set your lens to manual focus as well, because autofocus can’t lock onto stars in the dark.
Set the aperture as wide as your lens will go. If you have an f/2.8 lens, shoot at f/2.8. If you have an f/4 lens like my Canon 16-35mm, shoot at f/4. The goal is to let as much light as possible reach the sensor.
Set the ISO to somewhere between 1600 and 6400. The exact value depends on your camera (newer cameras handle high ISO noise much better than older ones) and your aperture. With an f/2.8 lens, ISO 1600-3200 is usually enough. At f/4, you might need ISO 3200-6400.
The 500 Rule for Shutter Speed
The trickiest setting is the shutter speed. You need it long enough to capture plenty of starlight, but short enough that the stars still look like points of light rather than short streaks. The Earth’s rotation means stars appear to move across the sky, and if your shutter speed is too long, you’ll see that movement as trailing.
The quick way to calculate your maximum shutter speed is the 500 Rule. Divide 500 by your lens’s focal length (on a full-frame camera), and that gives you the longest exposure in seconds before trailing becomes noticeable.
For example: with a 16mm lens, 500 / 16 = 31 seconds. With a 24mm lens, 500 / 24 = about 21 seconds. With a 50mm lens, 500 / 50 = 10 seconds.
If you’re using a crop-sensor camera, you need to account for the crop factor. Multiply your lens’s focal length by the crop factor first (1.5 for most Nikon, Sony, and Fujifilm; 1.6 for Canon APS-C), then divide 500 by that number. So a 16mm lens on a Canon APS-C camera would be: 16 x 1.6 = 25.6, then 500 / 25.6 = about 19 seconds.
The 500 Rule is a good starting point, but it’s a guideline rather than an exact science. Modern high-resolution sensors are more demanding than the old film cameras this rule was designed for, and if you’re planning to print large or pixel-peep, you may want to use a shorter exposure.
The NPF Rule is a more precise alternative that accounts for your sensor resolution and aperture. You don’t need to memorise the formula because PhotoPills has a calculator built in (it’s called “Spot Stars” in the app). I’d suggest starting with the 500 Rule and tightening up from there as you get more experienced.
Getting Focus Right
Focusing in the dark is one of the things people struggle with most. Your camera’s autofocus won’t work on stars, so you need to use manual focus.
The technique I use: switch to live view on the camera’s rear screen, point at the brightest star or planet you can see, zoom in on the screen as far as it will go (this is digital zoom on the display, not changing your lens zoom), and then carefully turn the focus ring until the star is as small and sharp as possible. Once you’ve got it, don’t touch the focus ring. Some people put a small piece of tape over the ring to stop it moving accidentally.
If you can’t see any stars on the screen, try boosting the ISO temporarily to the maximum your camera allows. This will make the live view brighter and stars should become visible. Once you’ve focused, set the ISO back to your shooting value.
White Balance
If you’re shooting in RAW (and you should be), white balance doesn’t affect the actual image data and you can adjust it freely in editing. But setting it in-camera gives you a more accurate preview on the back of the screen, which helps with composition.
I typically set mine to somewhere around 3800-4200K (Kelvin), which gives the night sky a natural-looking deep blue. The Tungsten or Incandescent preset on most cameras will get you in a similar range. Some people prefer warmer tones, some cooler. Experiment and see what you like.
How to Take Static Star Photos
Static star photos capture the night sky as it looks to our eyes: stars as points of light, the band of the Milky Way stretching across the frame, maybe a meteor streaking through. These are the most popular type of astrophotography image, and the kind you’ll probably want to start with.
Composition: Foreground Is Everything
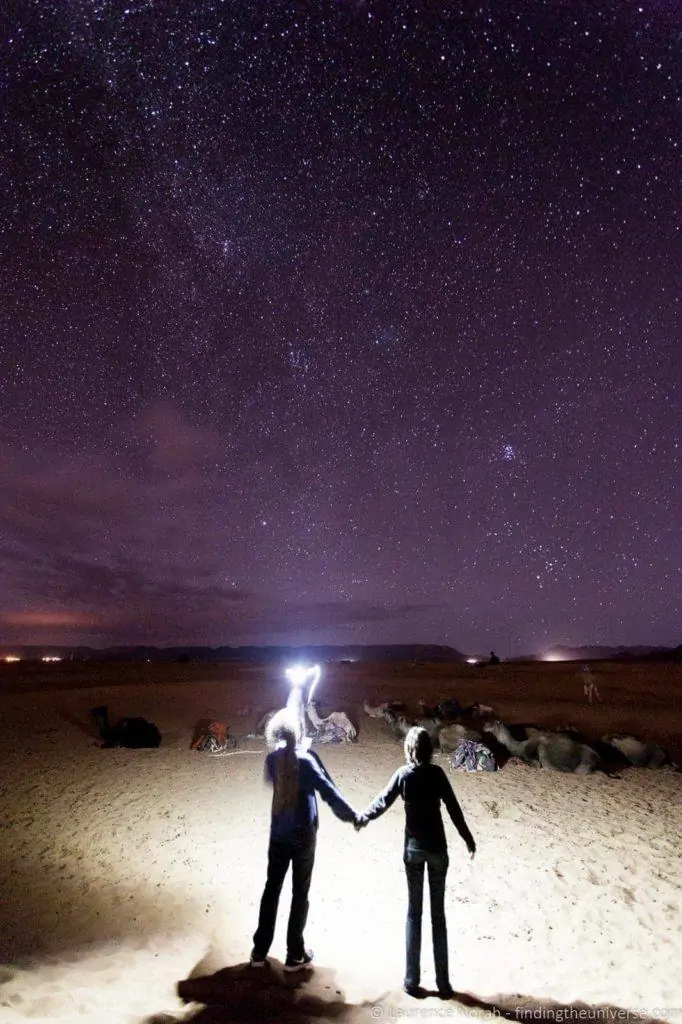
A photo of just stars can look impressive on a phone screen, but the shots that really stand out include something interesting in the foreground. A tree, a building, a mountain, a rock formation, a person, a tent, a lighthouse. This gives the image scale and context, and it’s what separates a good astrophotography shot from a great one.
Some of my favourite night sky images work because of what’s in the bottom half of the frame. The shot of Havasu Falls at the top of this post, for example, works because you’ve got the waterfall and the red canyon walls grounding the image, with the Milky Way above. Without the foreground, it would be a nice sky shot but nothing memorable.

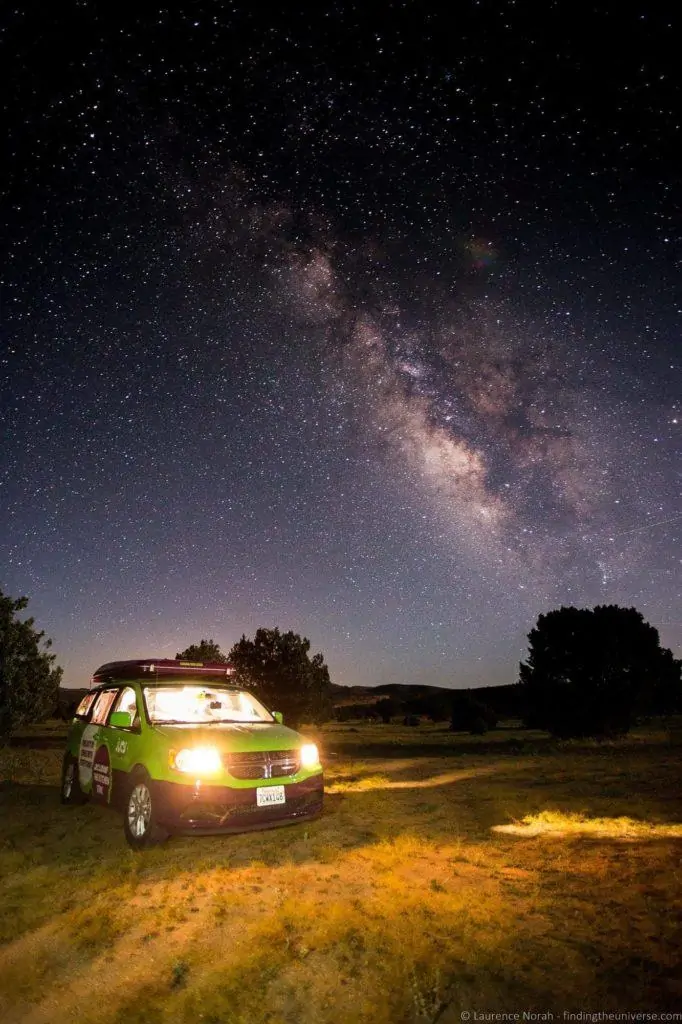
If your foreground subject is too dark, you can light paint it by briefly sweeping a torch or headlamp across it during the exposure. It doesn’t take much light. A quick sweep of a phone torch from a few metres away is often enough. Too much light will make it look artificial, so start gentle and build up.
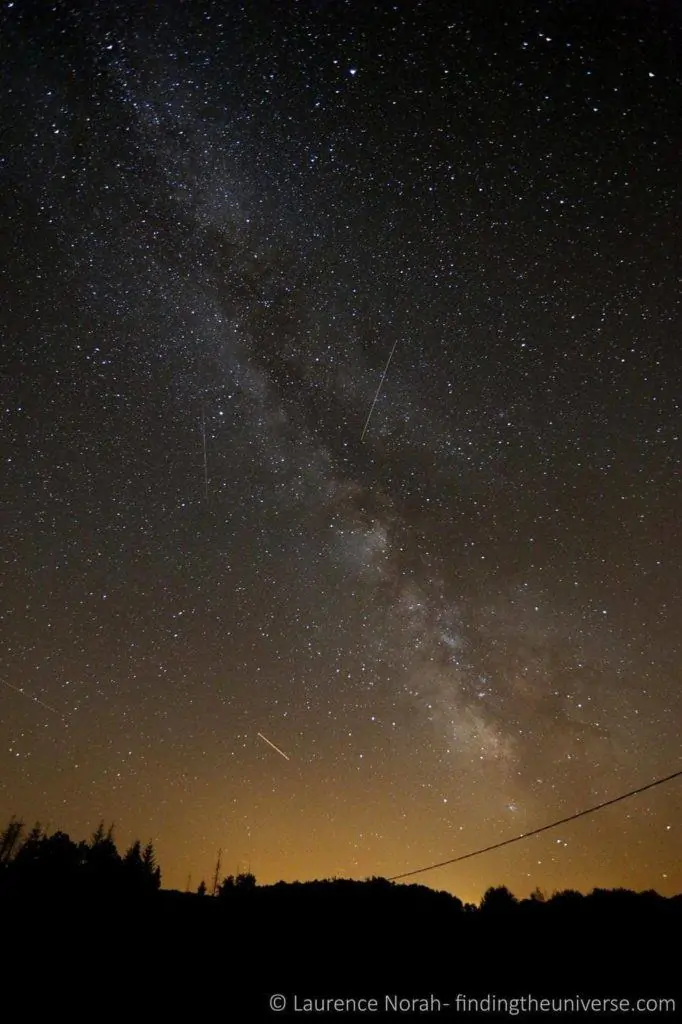
Photographing the Milky Way
The Milky Way core makes a brilliant compositional element. It acts as a natural leading line, drawing the eye up through the frame. The core is at its brightest and most photogenic from around May to August in the Northern Hemisphere, though you can photograph it as early as February (when it’s visible in the pre-dawn sky) through to October.
PhotoPills will tell you exactly where the Milky Way core will be at any given time and location, so you can plan your composition in advance. Arrive at your location during daylight to scout foreground elements, then come back once it’s dark and the sky is positioned where you want it.
The settings I described above (wide aperture, ISO 1600-6400, shutter speed via the 500 Rule) are exactly what you need for Milky Way photography. Take a test shot, review it on the screen, and adjust from there.
Photographing Meteor Showers
Meteor showers happen multiple times a year and often get media coverage, which means there are a lot of people searching for how to photograph them. The major ones include the Perseids (peaking around 11-13 August), the Geminids (around 13-14 December), the Quadrantids (around 3-4 January), and the Lyrids (around 21-22 April).
The basic approach is the same as for static star photos: wide-angle lens, wide aperture, and a shutter speed based on the 500 Rule. Point your camera at a wide area of sky (you don’t need to aim directly at the radiant point where the meteors appear to originate from), set up continuous shooting with your remote trigger or intervalometer, and take as many exposures as you can over the course of the night.
Meteor photography is a numbers game. Even during a strong shower, you might only capture one or two meteors per frame, and many frames will have none at all. That’s normal. Take hundreds of frames and keep the ones with meteors in them.
A few specific tips for meteor showers: the best activity is usually after midnight, when your location on Earth is facing into the stream of debris. Shoot facing away from the moon if it’s up, to keep the sky as dark as possible. And manage your expectations: most individual meteors are fainter and shorter-lived than you’d expect from media coverage. The bright fireballs everyone shares on social media are the exception, not the rule.
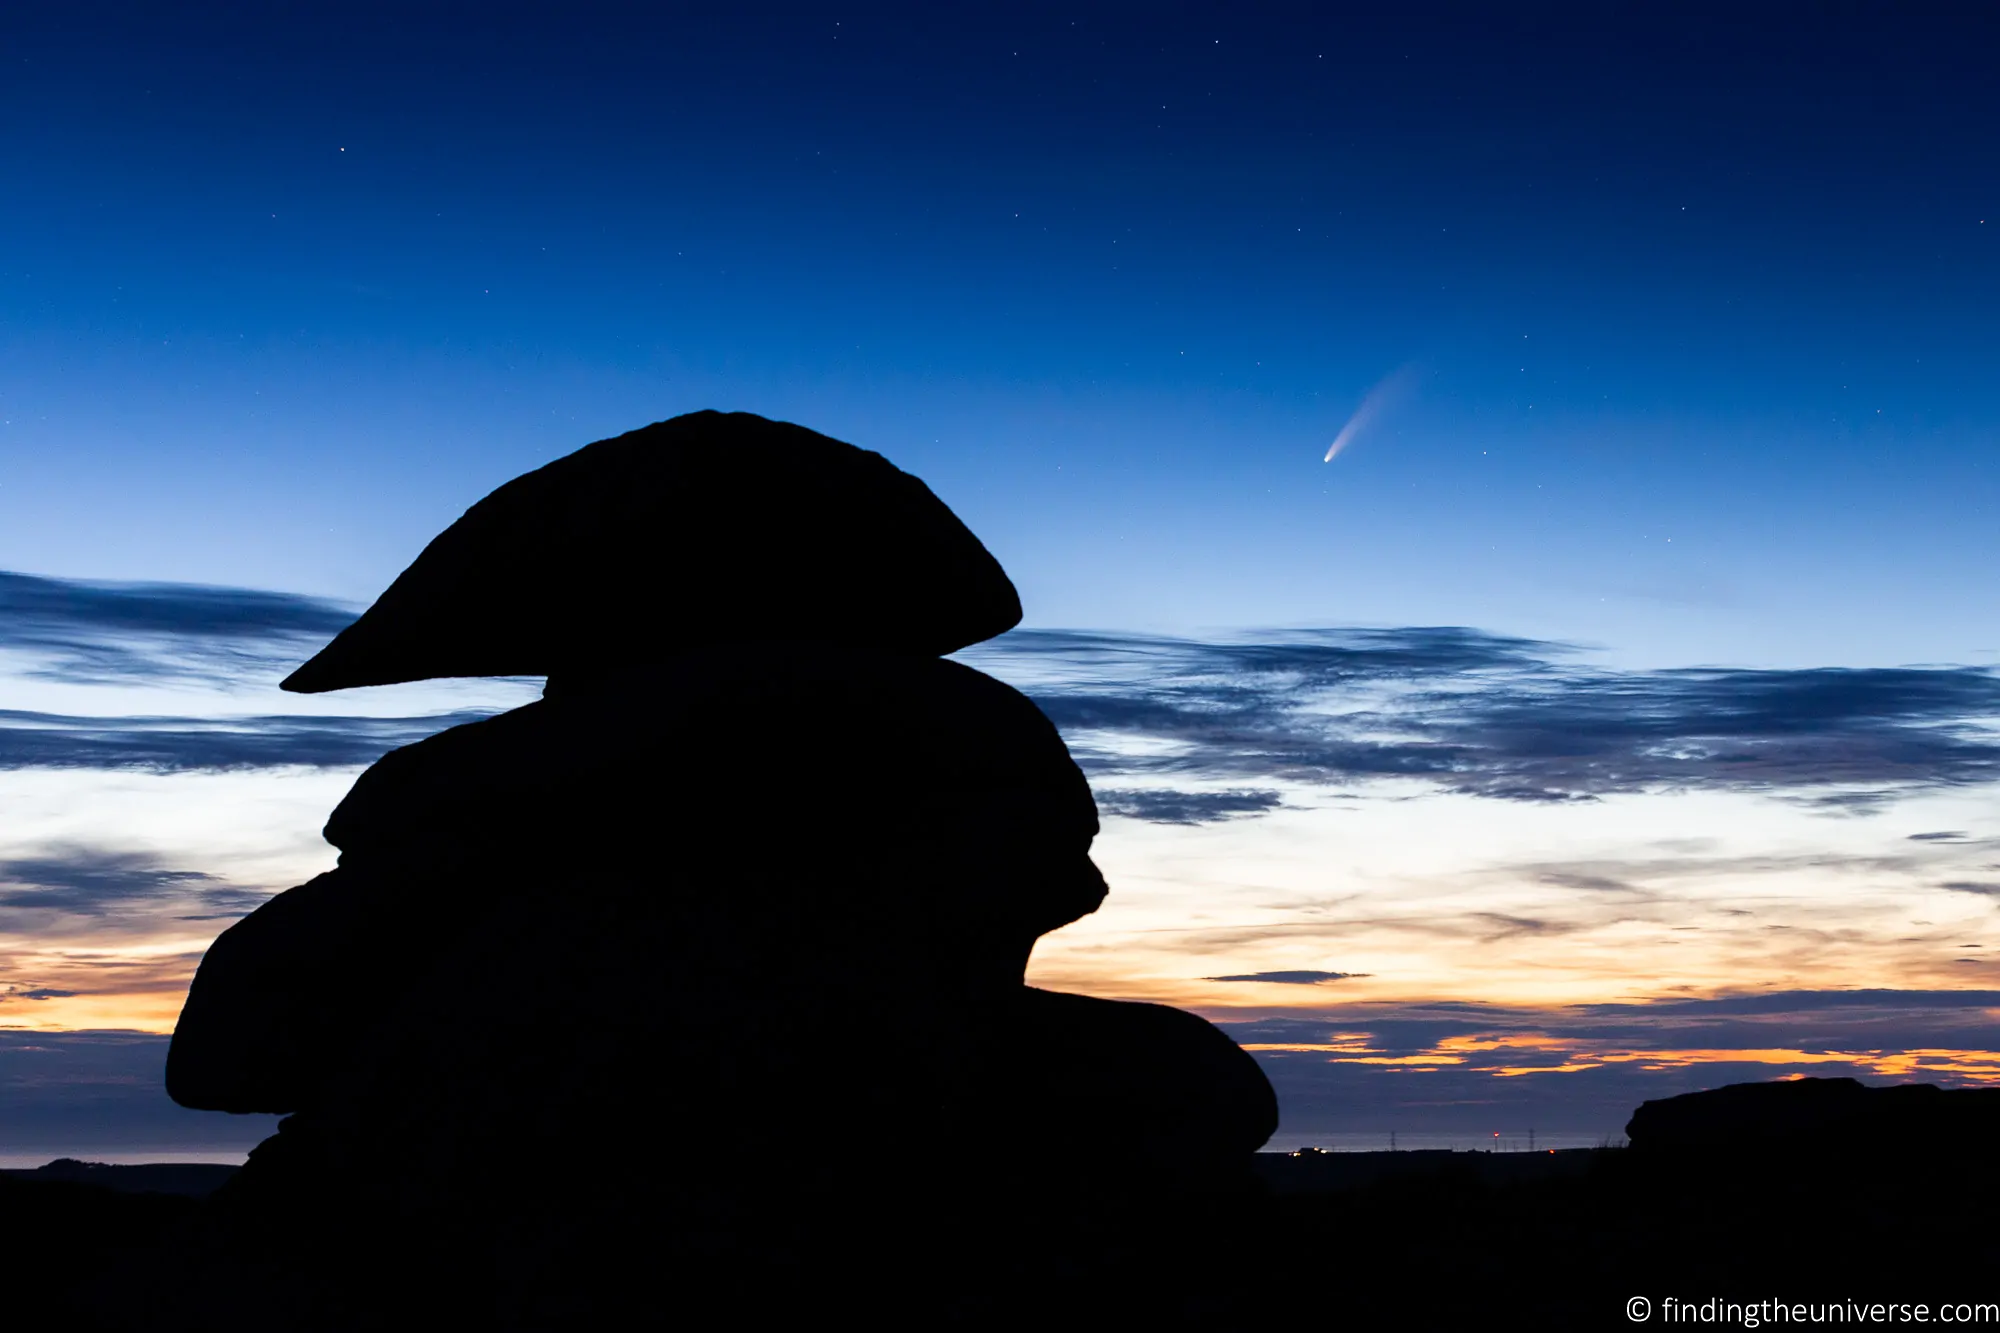
Photographing Comets
Bright comets are rarer than meteor showers, but when they appear they’re well worth photographing. Comet Neowise in 2020 was visible to the naked eye for weeks and was one of the best astrophotography opportunities in recent memory.
For comets, the same basic settings apply, though you may need to experiment with slightly shorter exposures if the comet is moving quickly relative to the background stars. A longer focal length (50-200mm) can work well for closer shots of the comet itself, while a wide-angle will capture it as part of a wider night sky scene.
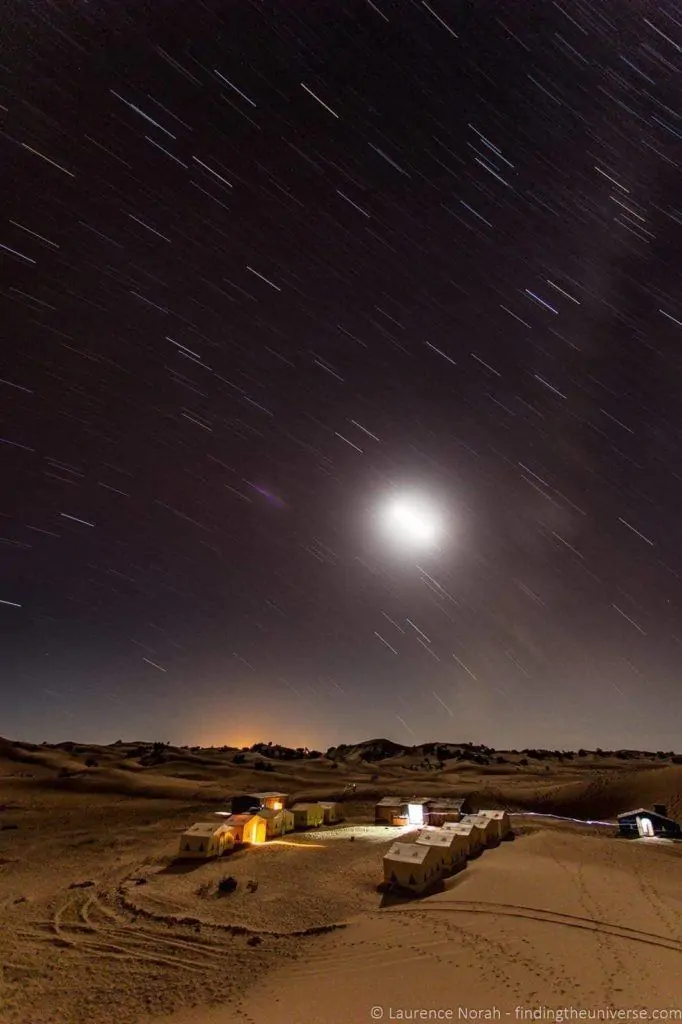
How to Take Star Trail Photos
Star trails are a more accessible form of astrophotography, and one where you don’t necessarily need a fast, expensive lens. Instead of freezing the stars as points of light, you’re deliberately capturing their movement across the sky over a long period of time, creating arcs of light.
The Stacking Method (Recommended)
The best approach for star trails is to take a series of shorter exposures (around 25-30 seconds each) over a period of an hour or more, and then combine them in software. This produces cleaner results than a single very long exposure, because shorter individual exposures generate less sensor noise.
Set up your camera on the tripod, compose your shot, and set your intervalometer or smartphone app to take continuous 30-second exposures with minimal gap between them. Let it run for at least 30 minutes, though an hour or more will give you longer, more dramatic trails.
To combine the images, you can use free software like StarStax, or the “Lighten” blend mode in Photoshop or similar editors. The software stacks the images so that only the brightest pixels from each frame are kept, building up the trails over time.
For star trail stacking, you can use a lower ISO (around 400-800) than you would for static star shots, since you’re combining many exposures rather than relying on a single one.
Single Long Exposure Method
If you don’t want to deal with stacking, you can also create star trails with a single very long exposure, measured in minutes or even hours. This requires your camera to have a Bulb mode (where the shutter stays open as long as you hold the button), plus a locking remote shutter release or intervalometer so you don’t have to hold the button yourself.
The trade-off is that very long single exposures produce more sensor noise, which shows up as coloured speckles in the image. Some cameras have a long exposure noise reduction feature that takes a second “dark frame” after the exposure and subtracts the noise, but this doubles your total capture time.
Choosing Your Direction
The direction you point your camera affects the shape of your star trails. In the Northern Hemisphere, aim at Polaris (the North Star) to get concentric circles, since all other stars appear to rotate around it. Polaris stays essentially fixed while everything else moves. In the Southern Hemisphere, you’ll find the same effect by pointing at the South Celestial Pole, though there’s no bright star conveniently marking it.
If you point east or west, you’ll get diagonal trails. Pointing south (from the Northern Hemisphere) gives you flat arcs across the frame. Each direction creates a different look, so experiment.
Astrophotography with a Smartphone
Modern smartphones are surprisingly capable of photographing the night sky. You won’t get the same level of detail or flexibility as a dedicated camera, but you can get usable results, and sometimes impressive ones. The gap has closed considerably over the last few years.

Google Pixel phones still set the bar for smartphone astrophotography. The dedicated astrophotography mode (available since the Pixel 4 and refined in every generation since) takes a series of long exposures and combines them automatically. On a current Pixel, point the phone at the sky on a tripod for around four minutes and you’ll have a recognisable Milky Way shot, no manual settings required. It’s the most hands-off astro experience you can get on any device, dedicated camera included.
iPhones (Pro models from the iPhone 11 onwards, and current generation iPhones generally) have Night Mode, which automatically takes longer exposures in low light. There’s no dedicated astrophotography mode, but mounted on a tripod the camera will offer exposures of up to 30 seconds and you can capture bright stars and the Milky Way under properly dark skies. The iPhone 17 Pro in particular handles star clusters surprisingly well at 1x and 2x zoom. The main limitation remains the lack of manual focus lock, which makes longer focal lengths frustrating.
Samsung Galaxy phones and other Android devices have steadily added dedicated night mode and pro mode options that allow manual control over shutter speed, ISO, and focus. Recent Galaxy S Ultra models are particularly capable. Check your specific phone’s pro mode for the available controls.
Regardless of which phone you use, you still need to keep it completely still. A phone tripod mount or a mini tripod with a phone clamp is essential. You can also use a Bluetooth remote, an Apple Watch, or the phone’s built-in timer to avoid touching it during the exposure.
For star trail shots with a smartphone, look for third-party camera apps that allow very long exposures or continuous shooting. NightCap Camera for iPhone is one option that offers extended exposure capabilities.
Keep your expectations realistic. Smartphone sensors are small, which limits how much light they can capture and how much noise they produce at high ISO values. Under properly dark skies with the phone on a tripod, you can get a nice shot of the Milky Way or capture the brightest meteors during a shower. In anything less than dark skies, results will be more limited.
Post-Processing Your Night Sky Photos
Astrophotography images almost always look better after some editing. The image that comes straight out of the camera will probably look darker and less colourful than what you saw with your eyes, and definitely less dramatic than the processed images you see online.
The key adjustments are fairly simple. Increase the exposure slightly if the image is too dark. Pull the highlights down and push the shadows up to bring out detail across the whole frame. Increase the contrast a touch to make the stars pop against the sky. Adjust the white balance until the sky looks natural (or however you prefer it). Apply some noise reduction, since high ISO images will always have some grain.
If you’re stacking multiple exposures for noise reduction (separate from star trail stacking, this is about reducing noise in a single final image), software like Sequator (free, Windows) or Starry Landscape Stacker (Mac) can align and average multiple frames to produce a much cleaner result.
I cover photo editing in detail in my guide to photo editing software, and my online travel photography course has a whole module on night photography editing, including astrophotography-specific techniques.
Star Trackers: Taking It Further
If you get serious about astrophotography and want to push beyond what’s possible with a fixed tripod, a star tracker is the next step. These are small motorised devices that sit between your tripod and camera and rotate at the same speed as the Earth, cancelling out the star movement. This means you can use much longer exposures (minutes instead of seconds) without the stars trailing.
Longer exposures mean you can use a lower ISO, which means cleaner images with less noise. You can also use narrower apertures for better edge-to-edge sharpness, or longer focal lengths to zoom in on specific regions of the sky.
Popular beginner-friendly star trackers include the Sky-Watcher Star Adventurer and the iOptron SkyGuider Pro. They typically cost in the range of $300-$500, and they’re lightweight enough to travel with.
I haven’t used one myself, but a number of students on my photography course have gone on to use star trackers and they’ve seen a massive improvement in their astrophotography results. It’s something I’d recommend exploring once you’ve got the basics down and want more from your images.
Frequently Asked Questions
What camera settings should I use to photograph stars?
Set your camera to manual mode with the widest aperture your lens allows (ideally f/2.8 or wider, though f/4 works too). Set the ISO between 1600 and 6400, depending on your camera and lens. For the shutter speed, use the 500 Rule: divide 500 by your focal length to get the maximum exposure time in seconds before stars start to trail.
For example, with a 16mm lens on a full-frame camera, that’s about 31 seconds. On a crop-sensor camera, multiply the focal length by the crop factor first. Take a test shot and adjust from there. Use manual focus and shoot in RAW for the best results.
Can you take pictures of stars with a phone?
Can you take pictures of stars with a phone?
Yes, modern smartphones can photograph stars, though the results won’t match a dedicated camera. Google Pixel phones have the best out-of-the-box experience thanks to a dedicated astrophotography mode that automatically combines long exposures. iPhone Pro models from the iPhone 11 onwards have Night Mode for exposures up to 30 seconds, and recent Samsung Galaxy phones offer manual pro mode controls.
The key requirement is keeping the phone completely still. Mount it on a small tripod or phone clamp, and use a timer or Bluetooth remote (or an Apple Watch) to trigger the shot. Under dark skies, you can capture the Milky Way and bright stars. For star trails, you’ll need a third-party app that supports long or continuous exposures.
What is the 500 Rule in astrophotography?
The 500 Rule is a formula for calculating the maximum shutter speed you can use before star trailing becomes visible in your image. Divide 500 by the focal length of your lens (using the full-frame equivalent if you’re on a crop sensor) and the result is your maximum exposure time in seconds.
It’s a useful starting point, but it was originally designed for film cameras and can be a bit generous with high-resolution modern sensors. The NPF Rule is a more precise alternative that factors in your sensor resolution and aperture. PhotoPills has a built-in calculator for both.
Do I need a telescope for astrophotography?
Not for the type of astrophotography this guide covers. Landscape astrophotography and nightscape photography use a regular camera with a wide-angle lens. You don’t need a telescope to photograph the Milky Way, star trails, meteor showers, or general night sky scenes.
Telescopes are used for deep-sky astrophotography, which involves photographing individual objects like planets, nebulae, and distant galaxies. That’s a different discipline with different gear requirements.
What is the best time of year to photograph stars?
You can photograph stars at any time of year, provided you have clear skies and it’s dark enough. For Milky Way photography specifically, the core is best visible from around February to October in the Northern Hemisphere, with the peak months being May through August. In winter, the core is below the horizon during the night hours.
Star trails and general night sky photography work year-round. Winter actually has some advantages: longer nights give you more dark hours to shoot, and cold, clear winter air often produces sharper images than hazy summer nights.
How do I photograph a meteor shower?
Use the same wide-angle settings as for static star photography: wide aperture, ISO 1600-6400, and a shutter speed calculated using the 500 Rule. Point your camera at a wide area of sky (not directly at the radiant point), set up continuous shooting with a remote or intervalometer, and take as many frames as you can.
Meteor photography is a numbers game. Even during a strong shower, many frames will have no meteors at all. Shoot hundreds of frames and keep the ones that caught something. The best activity is usually after midnight, when your part of the Earth is facing into the debris stream.
Further Reading
If you found this guide helpful, I have a lot more photography content that you’ll probably enjoy. My guide to photographing the Northern Lights covers similar territory with a focus on aurora photography, including specific camera settings and tips for chasing the lights. My long exposure photography guide goes deeper into the techniques used for both star trails and other creative long exposure work.
For gear advice, see my guides to the best travel cameras, best lenses for travel photography, and Jess’s guide to the best compact cameras. I also have guides to fireworks photography, snow photography, and cold weather photography, plus tips on neutral density filters and taking pictures of yourself while travelling.
For more photography tips and tutorials, see my full collection of photography articles, or Jess’s introduction to travel photography tips.
Want to Take Your Photography Further?
If this guide has been useful, my online travel photography course goes into much more detail on astrophotography and night photography, along with everything else you need to know about photography, from how your camera works through to composition, light, and editing.
The course has a dedicated module on advanced techniques including astrophotography, and I give feedback on student assignments as you progress. Over 2,000 students have taken the course, and many of them have gone on to produce astrophotography work that I’m really proud of. It’s $129 for lifetime access, which includes all future updates. If you’re serious about improving your photography, it’s well worth it.

Jim Brannan says
This seems like a strange option to offer on phones these days. Most people living in cities don’t even get to see stars anymore.
Laurence Norah says
True, but hopefully they might want to head out of the cities to at least try the feature out 😀
Emily Hines says
These are so helpful! I haven’t experimented with star photos but this guide makes it look easy.
Laurence Norah says
Thanks! It just takes a bit of practice 😀
Amanda says
Thanks for this! I’ve managed to take some nice shots of the Northern Lights, but have yet to master star photography – I think I’m not setting my ISO high enough! Hopefully I’ll have some opportunities to try some of these tips in New Zealand this month!
Laurence Norah says
Yep, a high ISO is definitely key to success for static star pictures! Looking forward to seeing your results 😀
budget jan says
I just purchased the NightCap camera app for my iphone after reading about it in this post. Can’t wait to try it on the night sky! Wonderful inspiring photos.
Laurence Norah says
My pleasure – let me know how it works for you!
Kristin says
This is so awesome, you guys! I admit: I’ve never really played with star photography, mainly because I rarely travel with my tripod. But now you’ve inspired me to take it with me on my next big-sky adventure. Thanks for these tips!
Laurence Norah says
Our pleasure, and thanks very much! Hopefully you get out and get some awesome star photos now 🙂