
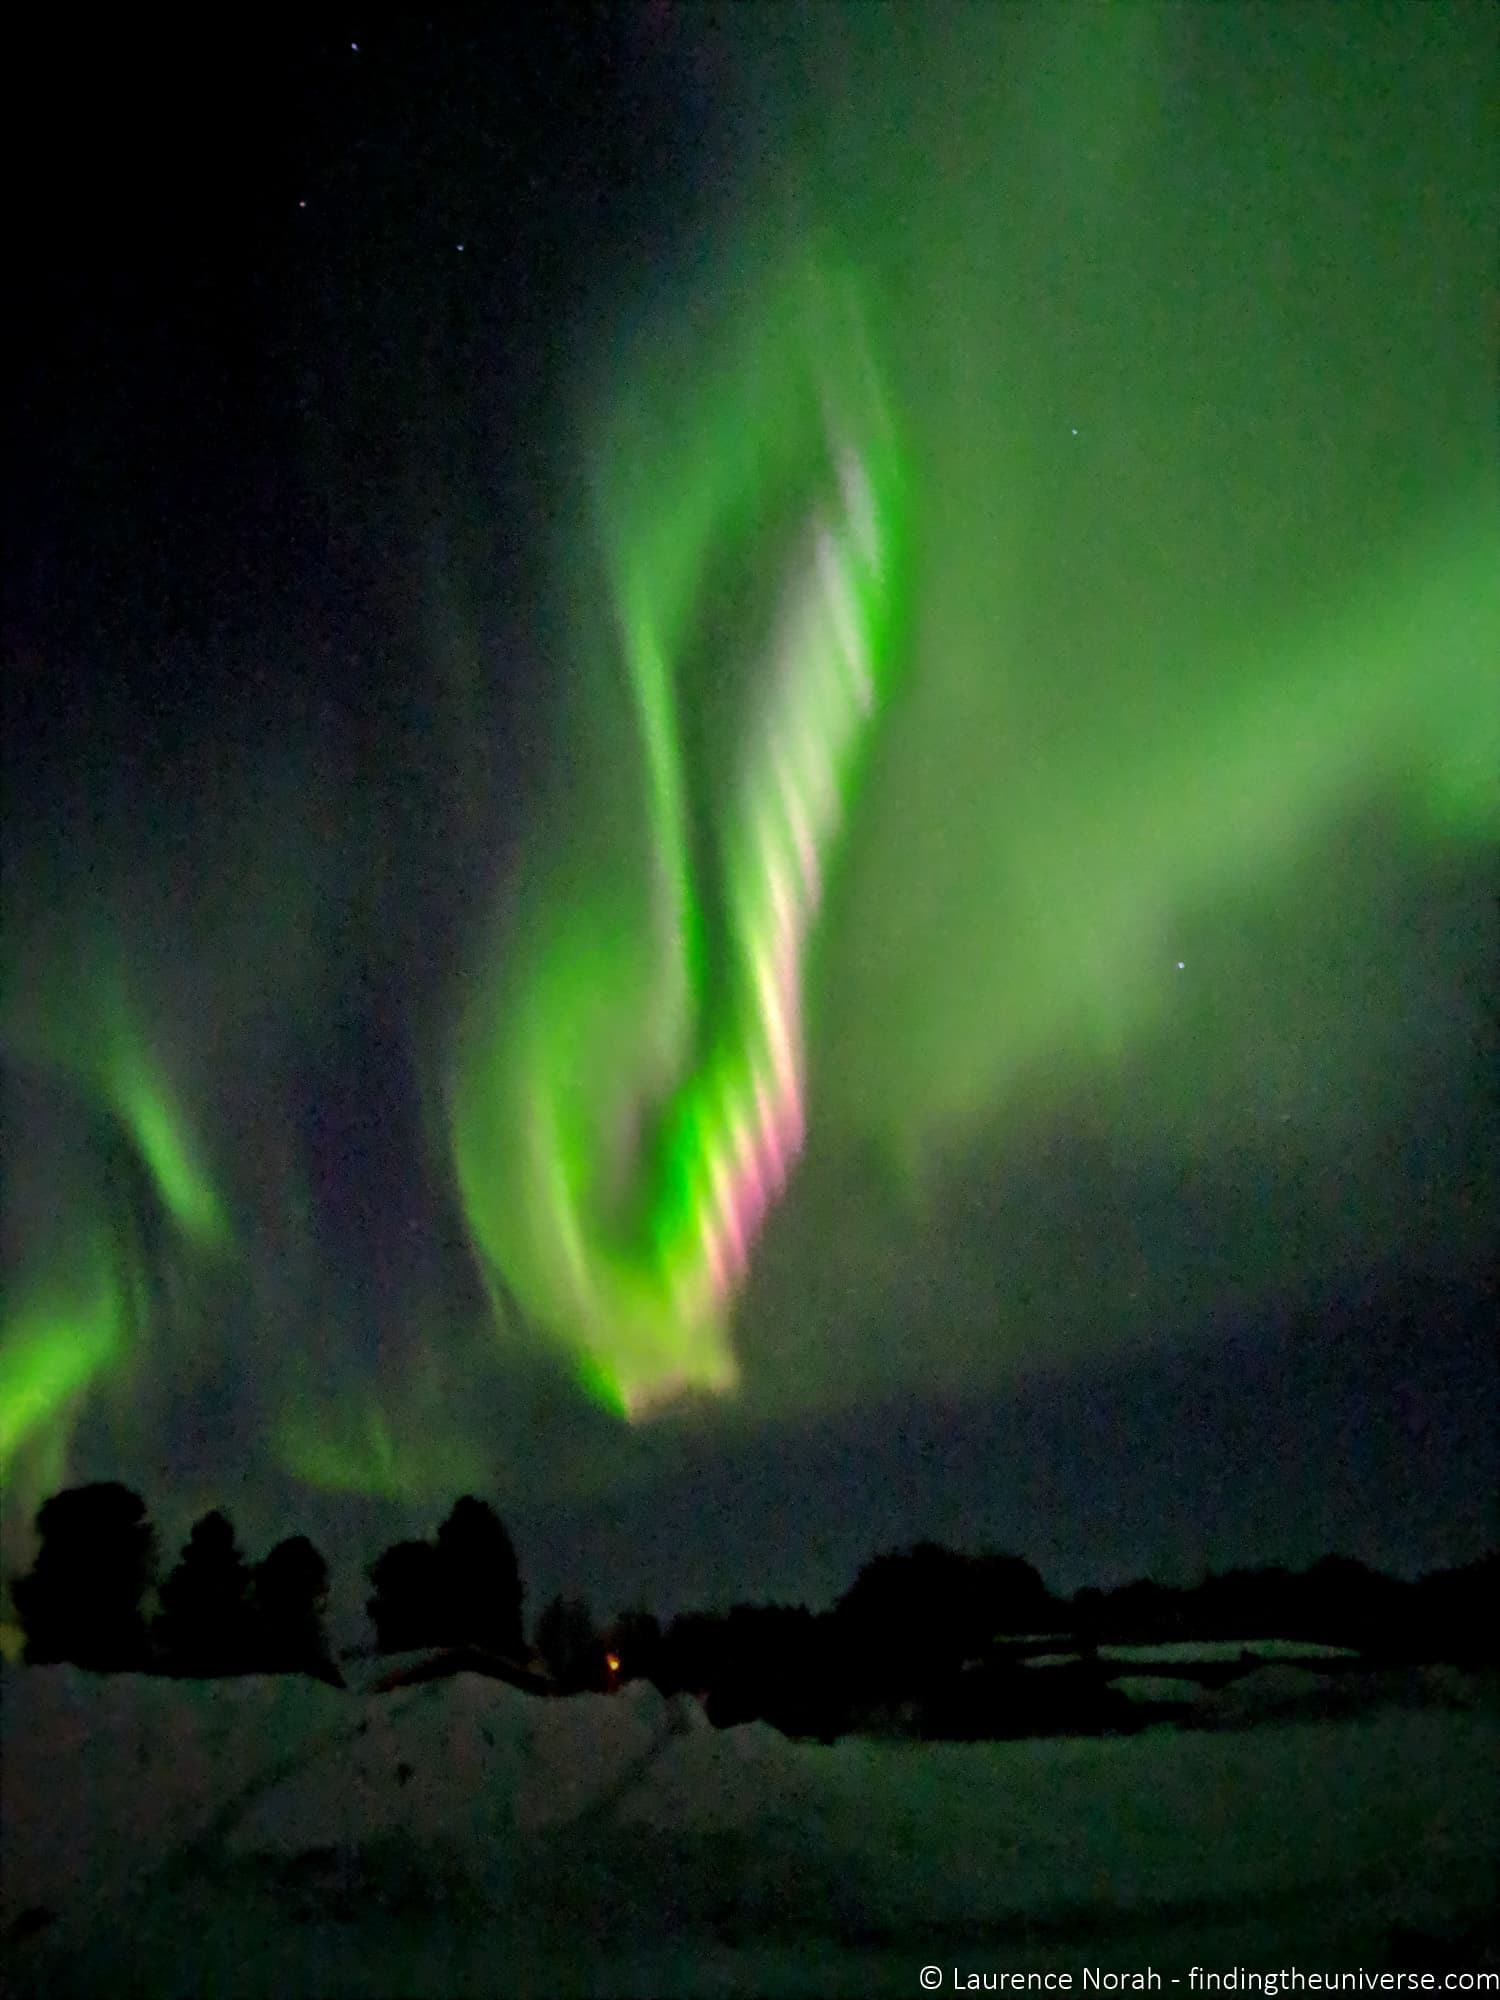
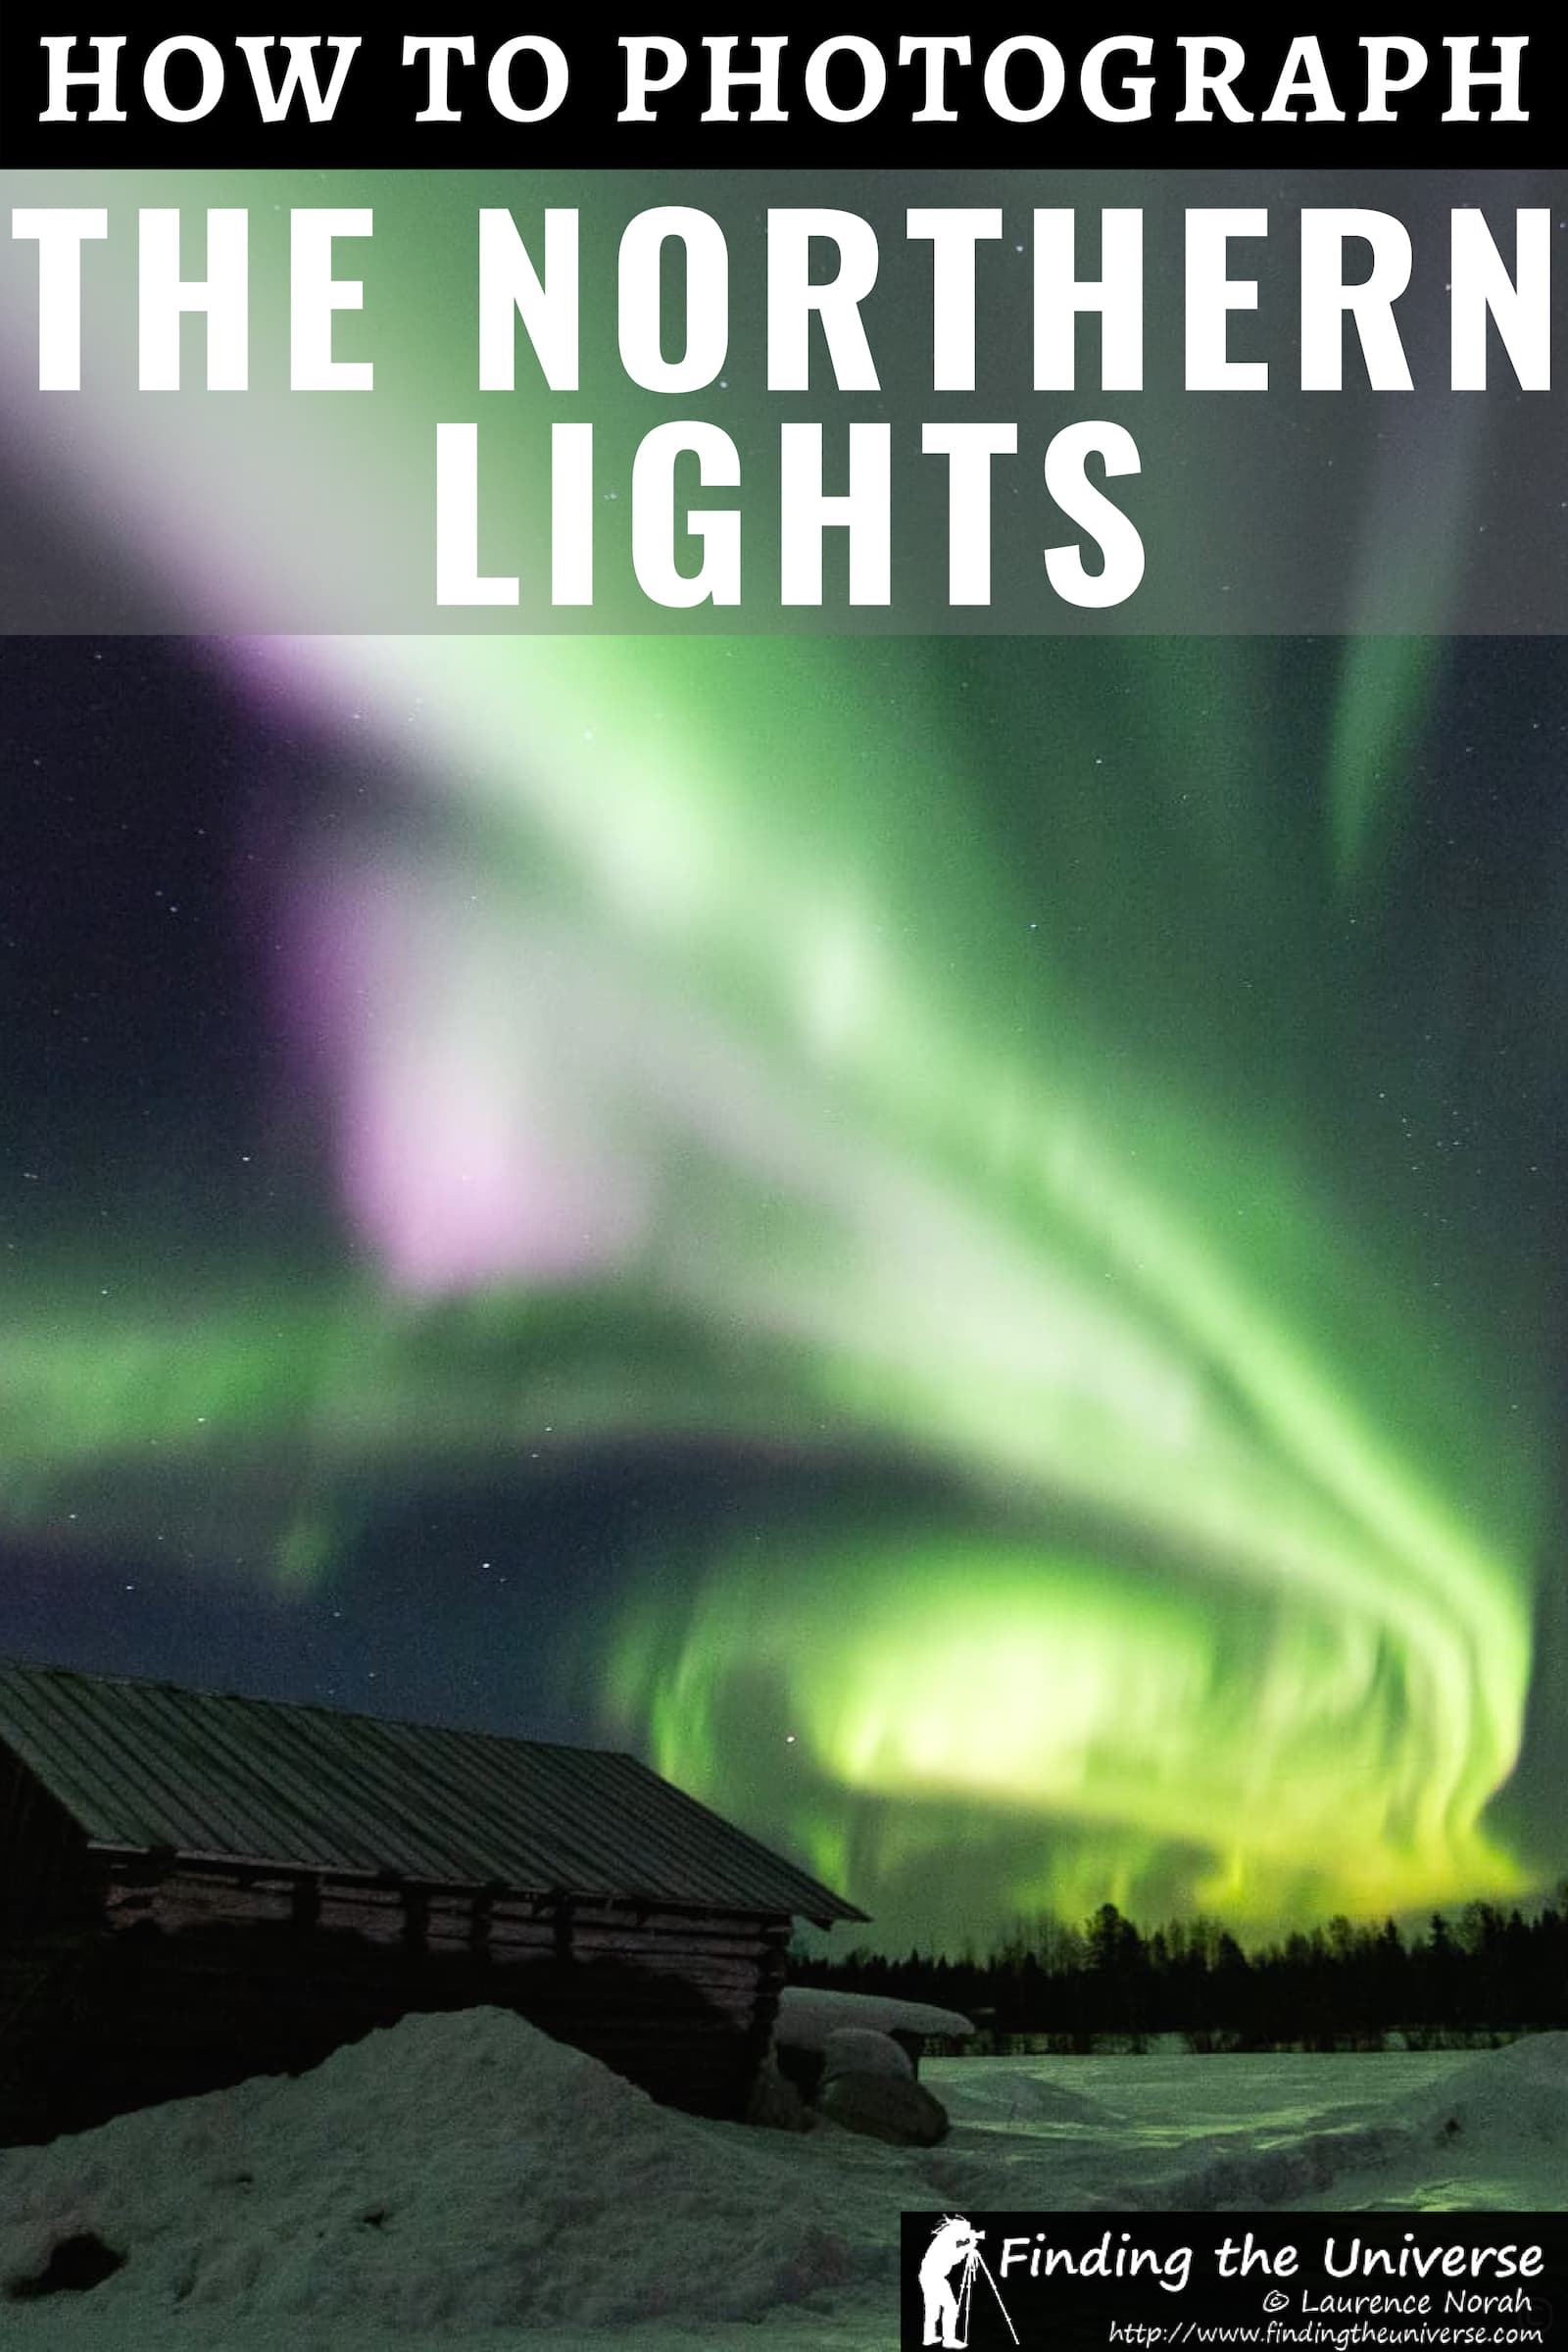
I’ve photographed the Northern Lights in Iceland, Finland, Norway and even Scotland. Every time is different. Sometimes the sky erupts in green and purple curtains that move so fast you can barely keep up with your camera settings. Other times, you wait for hours in the cold and get a faint grey-green glow that your camera captures better than your eyes ever could.
Either way, getting good photos of the aurora takes preparation. The Northern Lights are one of the more challenging subjects in photography: it’s dark, it’s cold, the lights are moving, and even simple things like focusing your lens become difficult when you can’t feel your fingers.
This guide covers everything I’ve learned from years of chasing the aurora, from the camera settings that actually work in the field, to the gear I use, to practical tips that no one tells you until you’ve frozen your way through a few sessions. I’ve also included advice for smartphone photographers, because modern phones are surprisingly capable in the right conditions.
This builds on my guide to astrophotography, which covers photographing stars and the Milky Way. There’s some overlap in technique, but aurora photography has its own set of challenges because the lights move and change intensity constantly.
Note that whilst this guide focuses on the Northern Lights (Aurora Borealis), everything here applies equally to the Southern Lights (Aurora Australis). The southern version is harder to see simply because there’s less accessible land near the south pole, but it can sometimes be spotted from New Zealand, the Falkland Islands and the southern tip of Argentina.
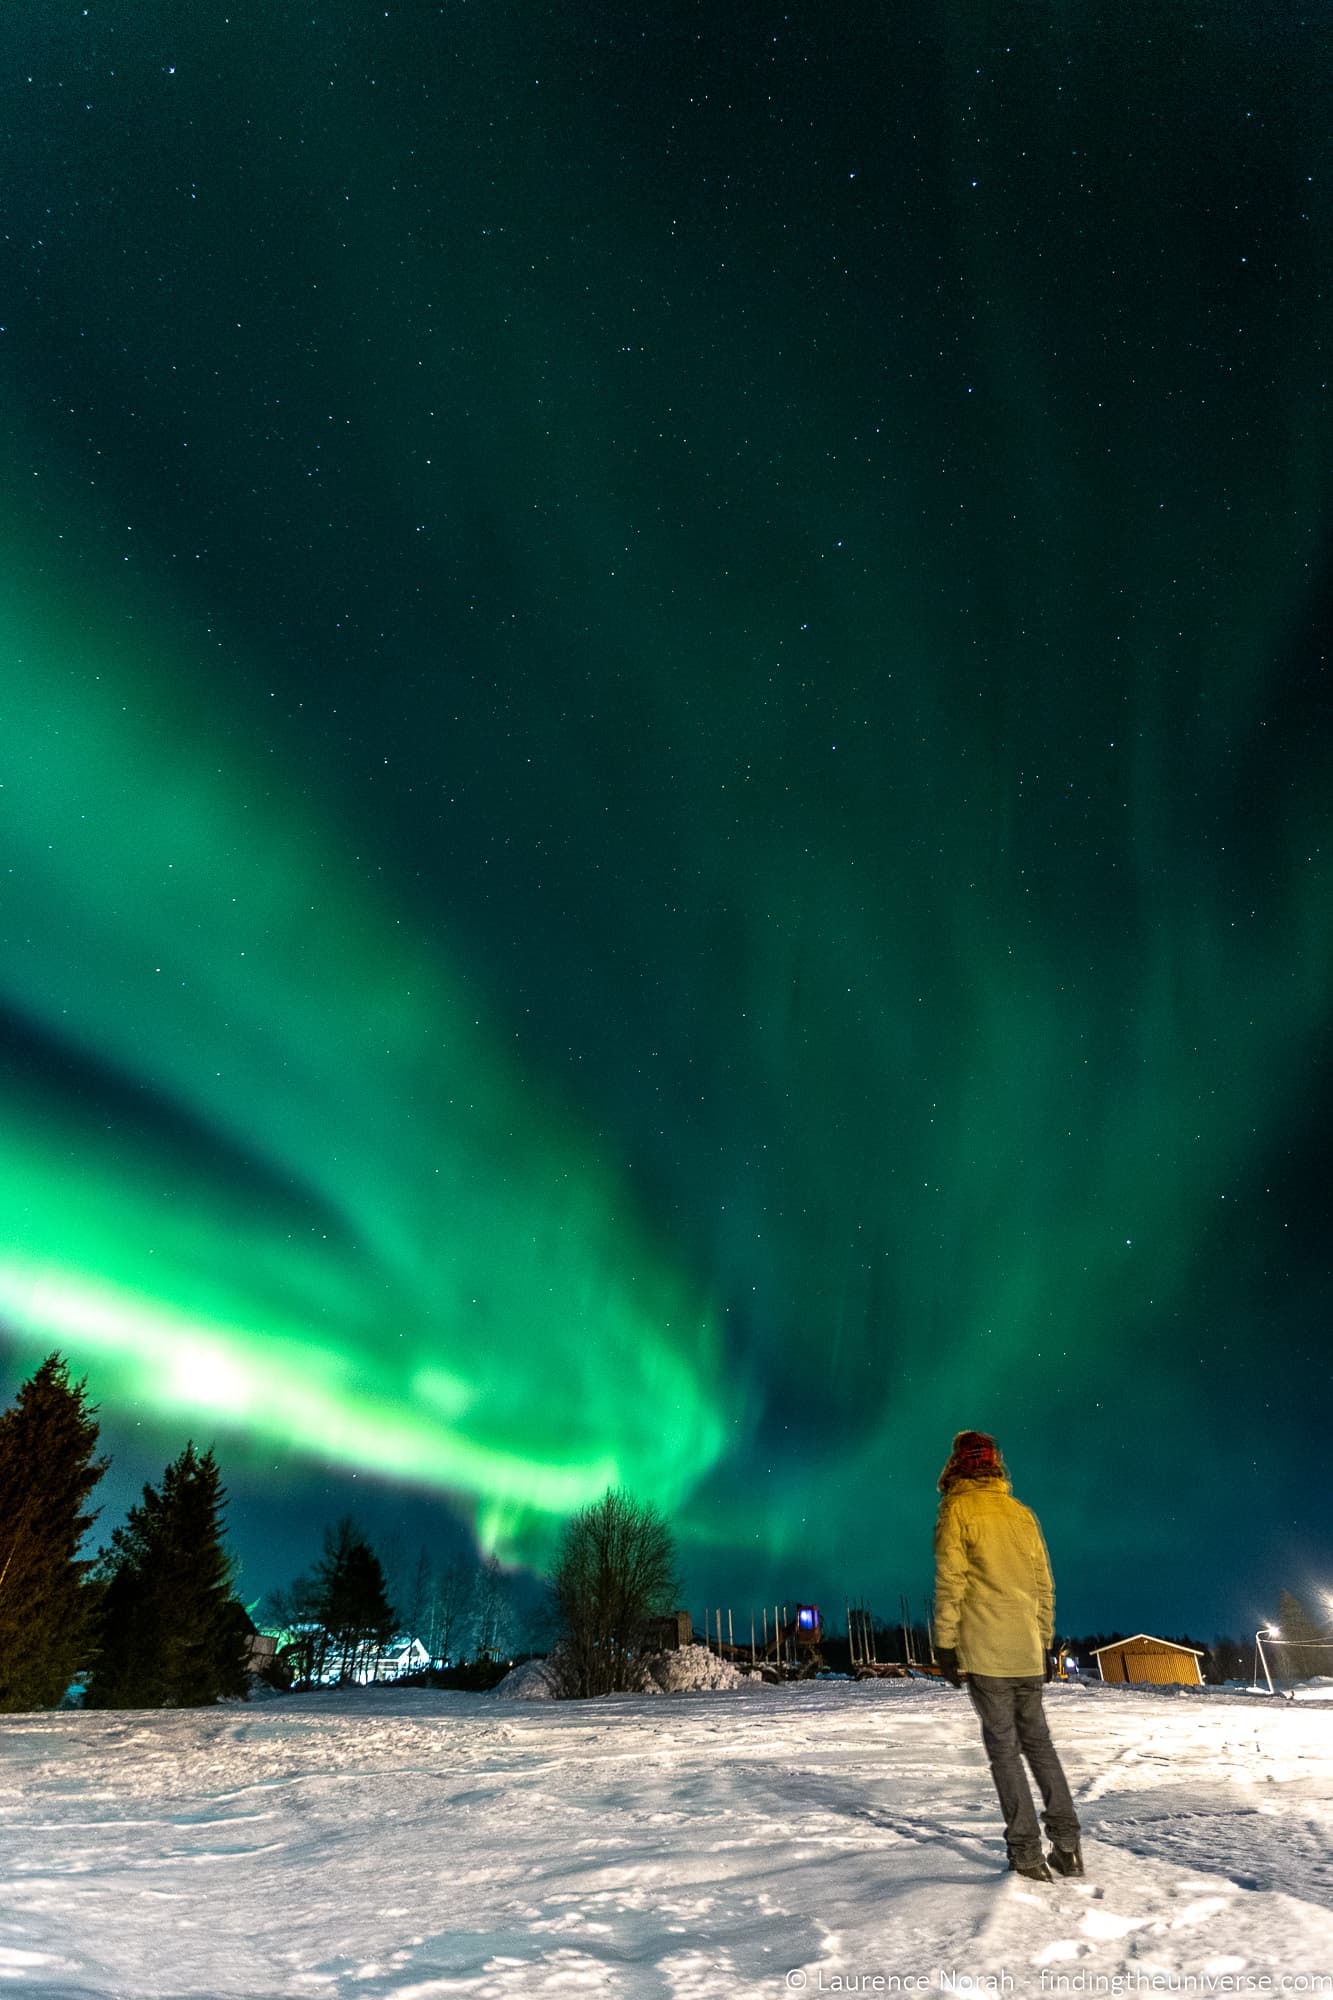
Table of Contents:
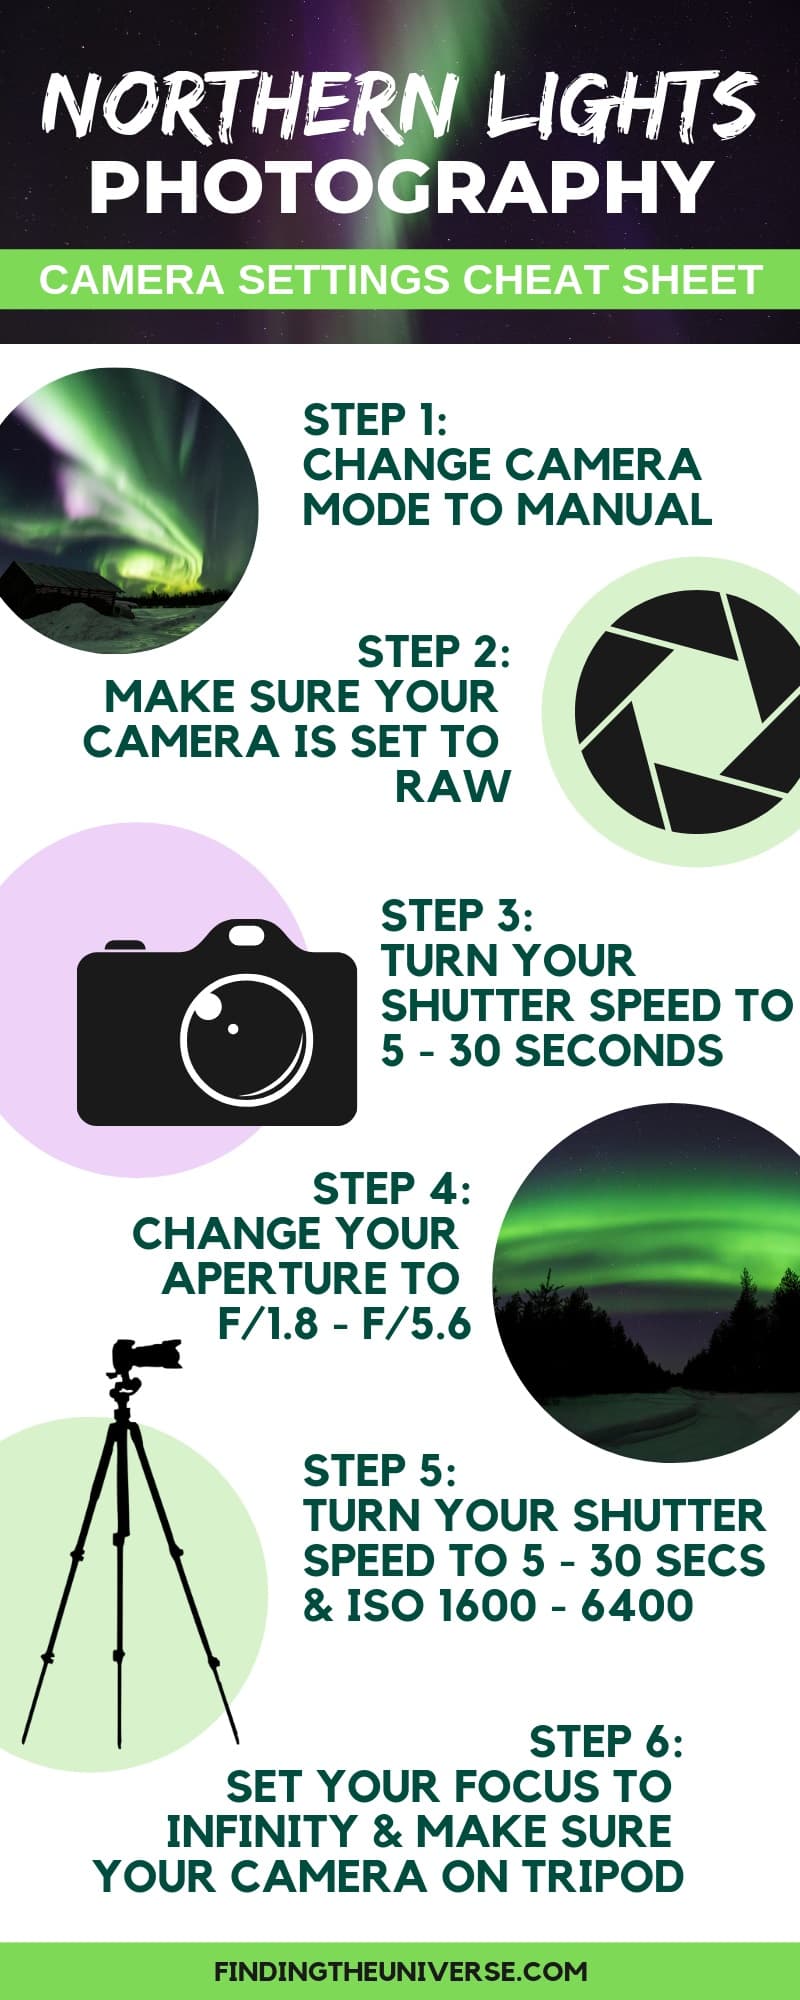
Quick Start: Camera Settings for the Northern Lights
If you’re heading out the door right now and just need settings, here’s what to start with. I’ll explain the reasoning behind each one in the sections that follow.
- Camera mode: Manual (M)
- Aperture: as wide as your lens allows (f/2.8 is ideal, f/4 is workable)
- Shutter speed: 8 seconds
- ISO: 3200
- Focus: manual, set to infinity (practise this in daylight first)
- White balance: 3500K (Kelvin), or Daylight preset
- File format: RAW (or RAW + JPG)
- Flash: off
- Trigger: remote release, 2-second timer, or smartphone app
Here’s a downloadable cheat sheet to help you remember these settings. You are welcome to share and use this image, but please accredit it back to this article with a link if you do.
Take a test shot with these settings and check the result on your screen. Then adjust based on what the aurora is doing. That adjustment process is where the real skill lies, and what the rest of this section covers.
How to Adjust Settings Based on Aurora Activity
There is no single “correct” setting for Northern Lights photography. The aurora changes constantly, sometimes within minutes, and your settings need to change with it. The key relationship to understand is between shutter speed and ISO, with aperture staying fixed at its widest.
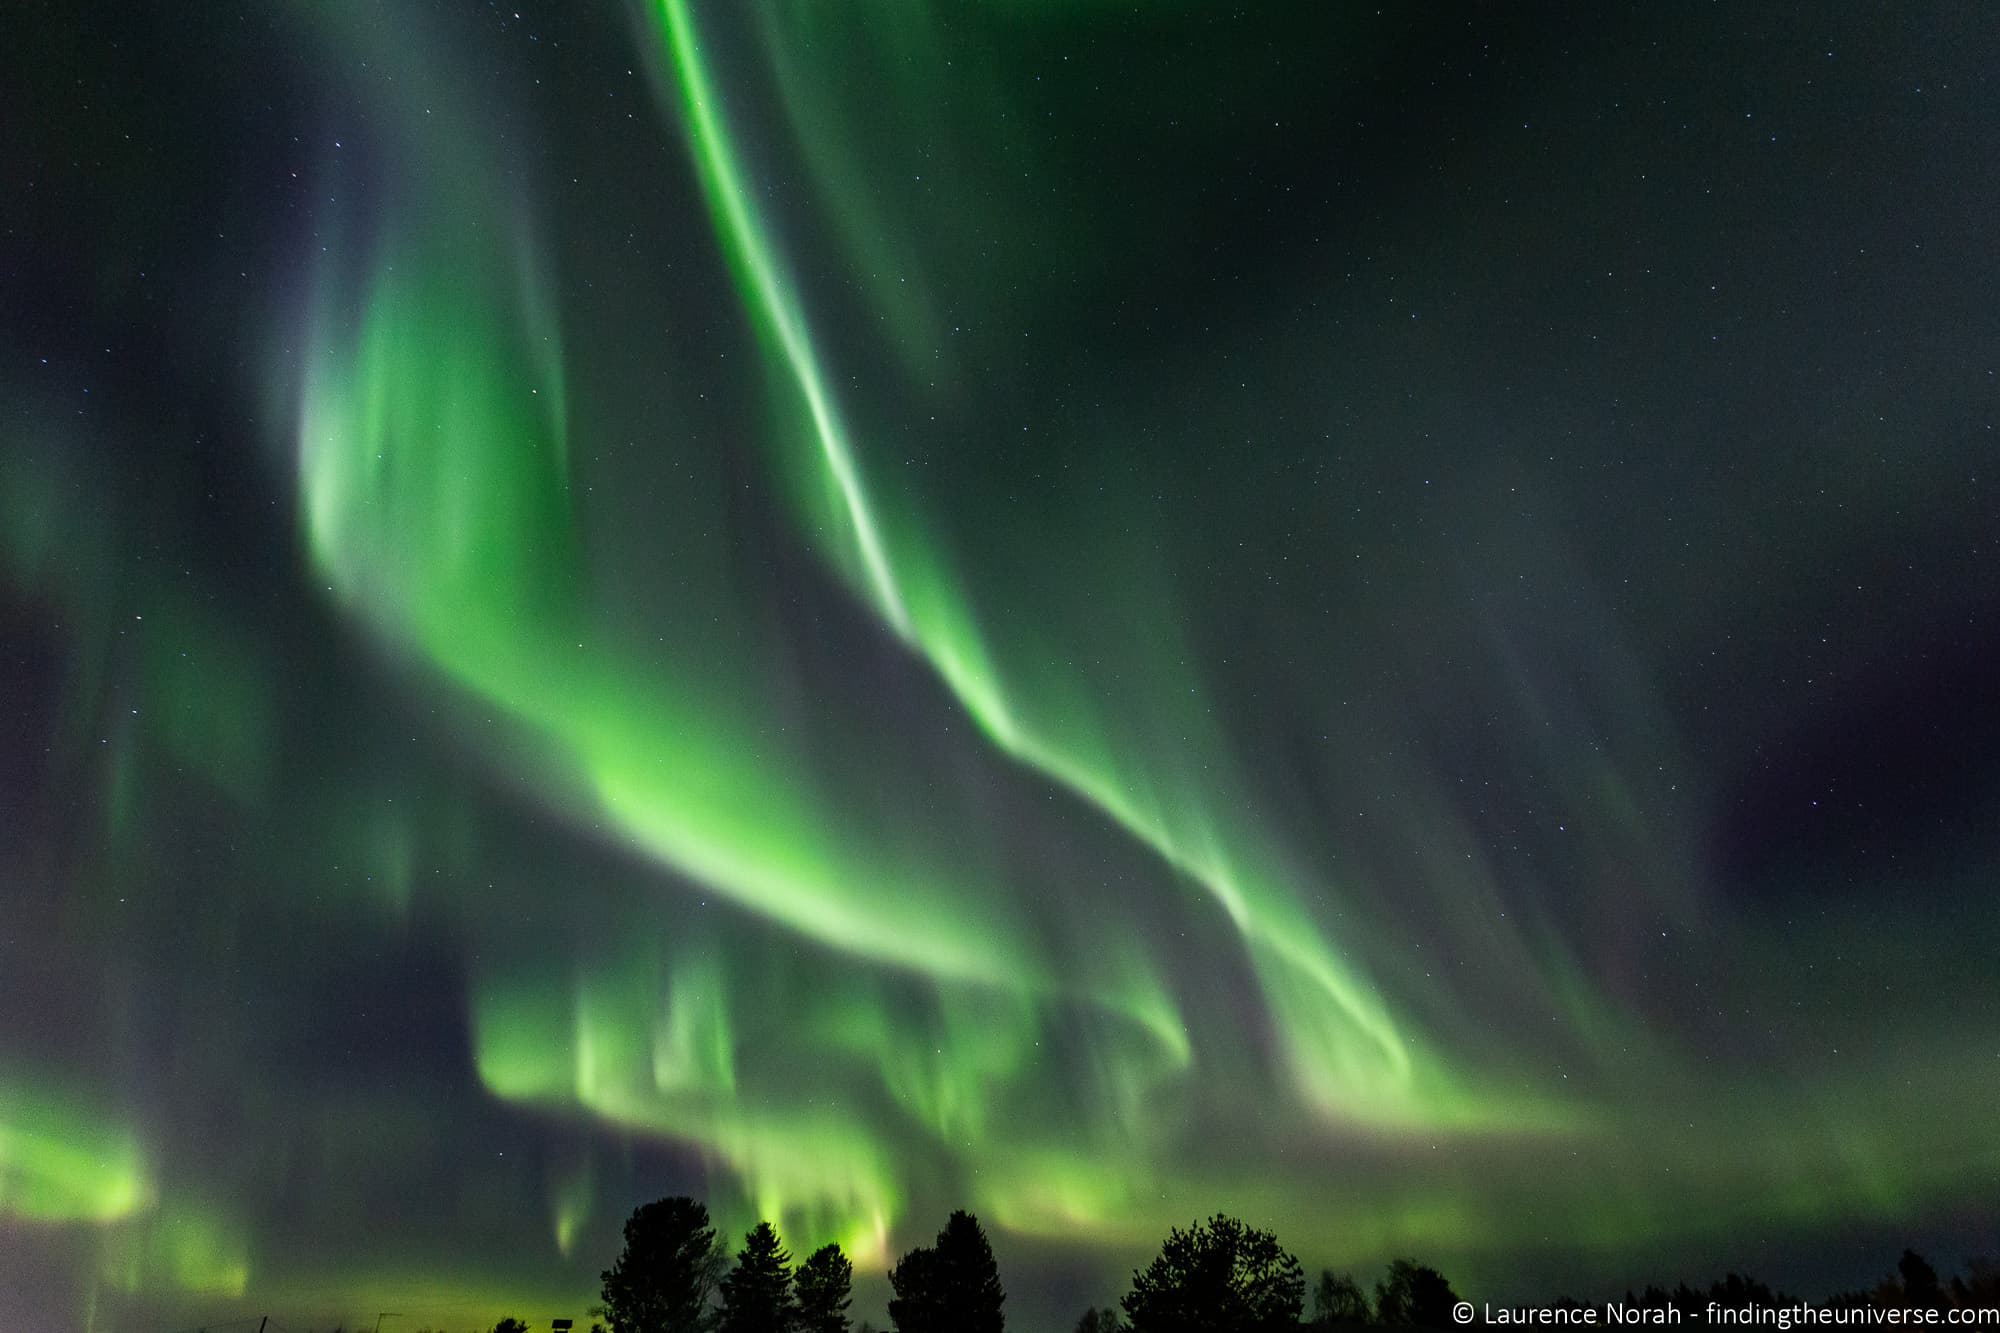
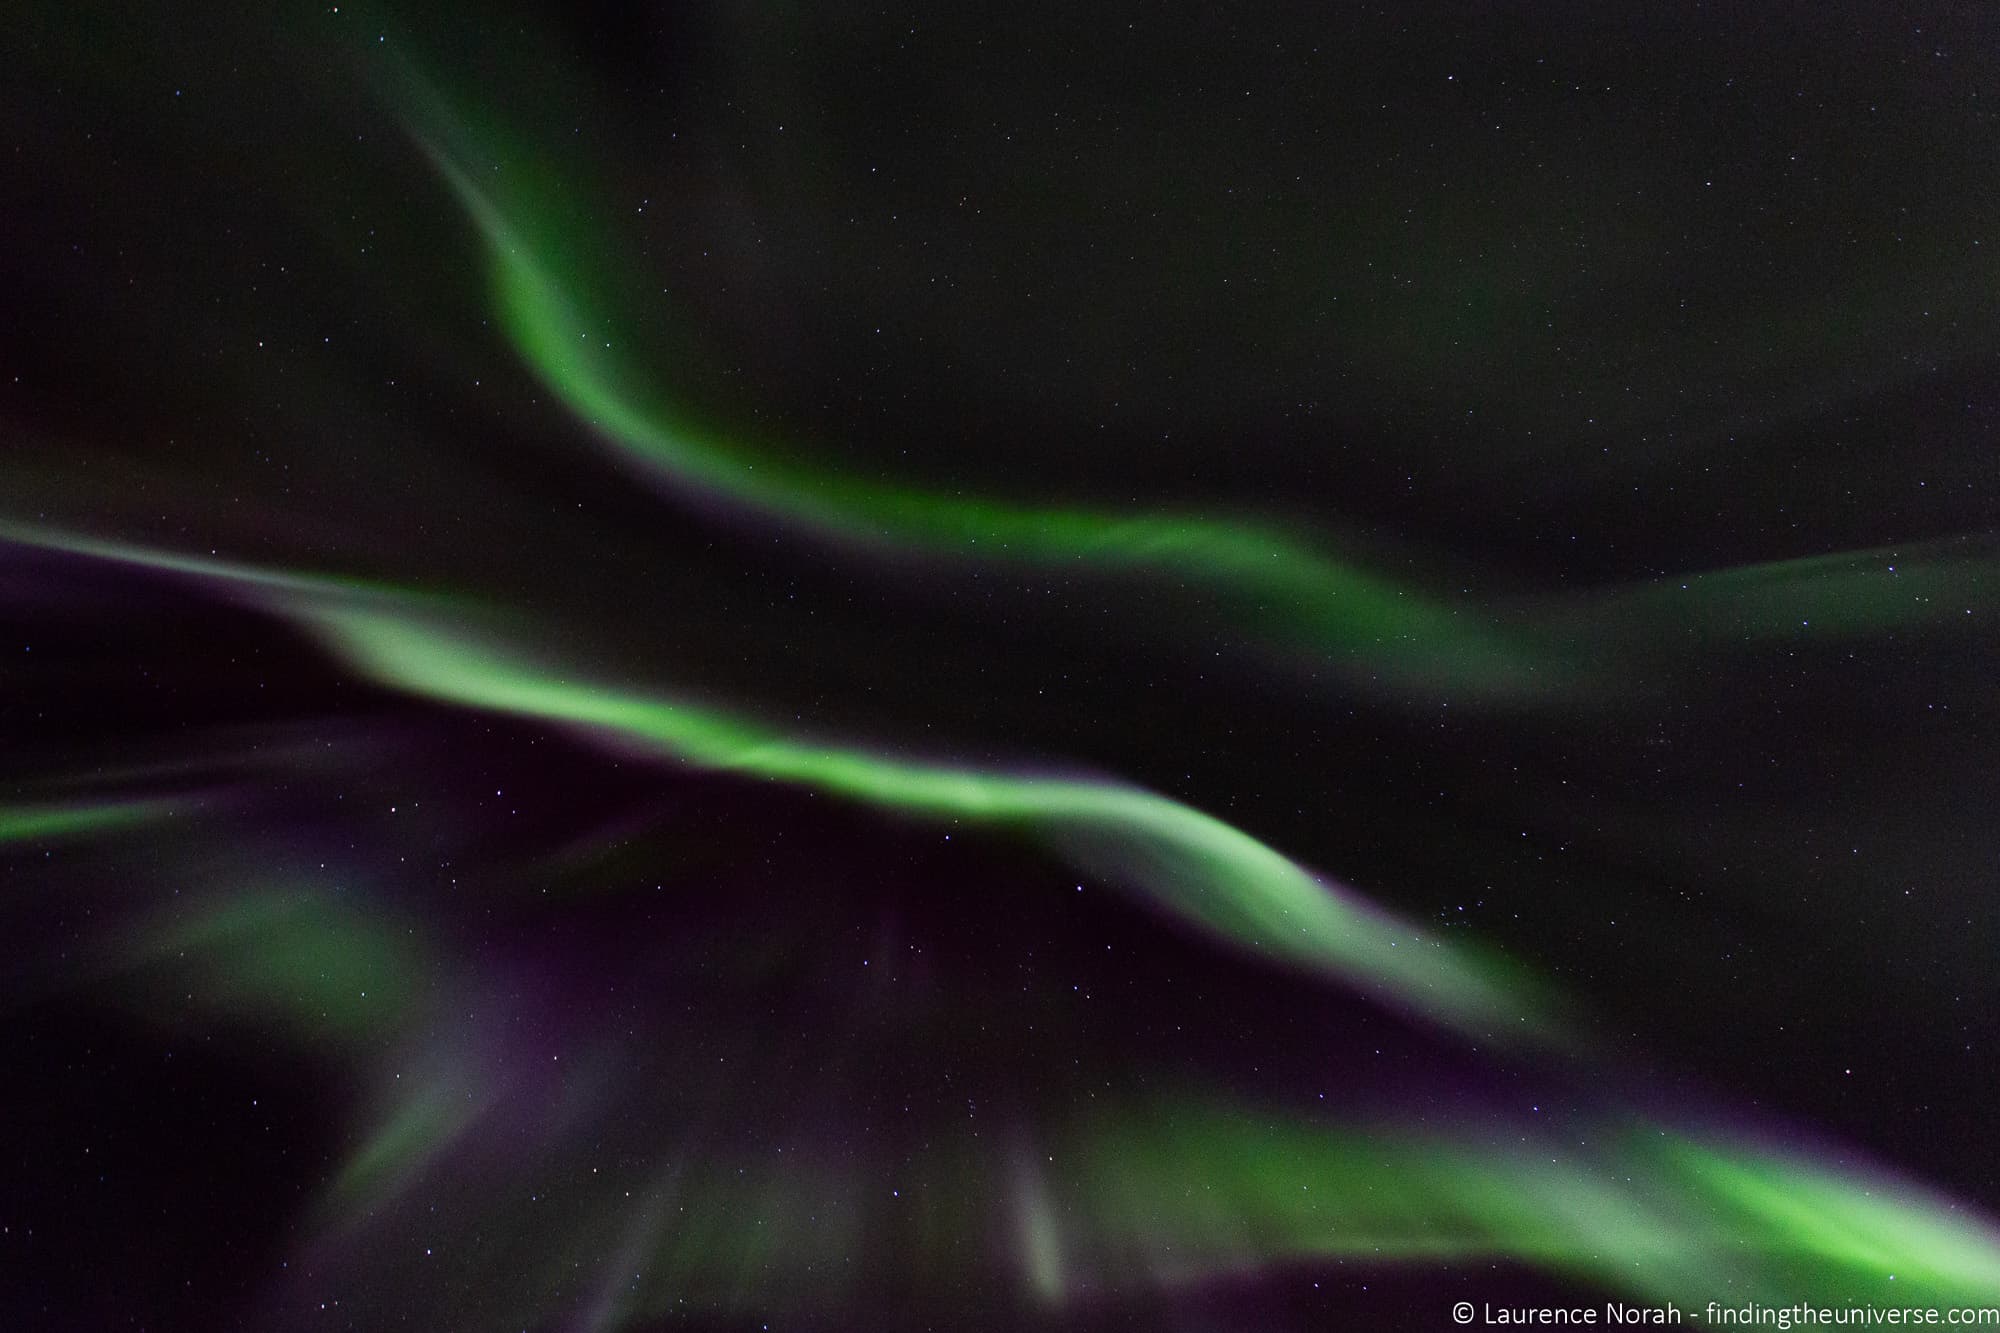
For a faint, slow-moving aurora: Use a longer shutter speed (15 to 20 seconds) with ISO 3200 or higher. The longer exposure gathers more light and will reveal colour and detail that might be barely visible to your eyes. The lights aren’t moving much, so there’s no risk of blur.
For a bright, active aurora: Drop your shutter speed to 3 to 8 seconds and reduce ISO to 1600 or even 800. Fast-moving curtains and pillars of light will blur into a green smear if you expose for too long. Shorter exposures preserve the structure and shape of the display.
For an aurora storm (very bright, very fast): You might need shutter speeds of just 1 to 3 seconds. I’ve shot some of my favourite aurora images at 2 seconds because the lights were racing across the sky. At these speeds, you can often drop ISO to 800 or lower, which gives you cleaner, less noisy files.
The pattern is simple: the faster the aurora moves, the shorter your shutter speed needs to be, and the higher your ISO needs to compensate. Check your shots regularly, zoom in on the screen, and adjust. Even after doing this for years, I still check and tweak constantly throughout a session.
Understanding ISO, Aperture and Shutter Speed for Aurora Photography
These three settings make up the exposure triangle, and all three affect how bright your final image is. Here’s how each one works for aurora photography specifically.
Aperture controls how wide the lens opens. For Northern Lights, you want this as wide as possible: f/2.8 is ideal, f/1.4 or f/2 is even better if your lens supports it. You can get usable results at f/4, but you’ll need higher ISO or longer exposures to compensate, which means more noise or more motion blur. Once you’ve set your aperture wide open, leave it there for the entire session.
Shutter speed controls how long the sensor is exposed to light. For aurora photography, this typically ranges from 1 second to 20 seconds. Unlike star photography, there’s no simple rule like the 500 Rule to calculate the right shutter speed, because the aurora moves at different speeds throughout the night. You have to react to what’s happening in the sky.
ISO controls the sensor’s sensitivity to light. Higher ISO means brighter images but more digital noise (grain). Modern full-frame cameras handle ISO 3200 to 6400 well. APS-C and older cameras may start to struggle above ISO 3200. Start at ISO 3200 and adjust from there. A noisy photo of a great aurora display is always better than a clean photo of nothing, so don’t be afraid to push the ISO when you need to.
White Balance and Shooting in RAW
Set your white balance to around 3500K (Kelvin mode) for the most natural-looking aurora colours. This keeps the greens crisp without adding an orange or yellow cast. Avoid Auto White Balance, which tends to warm up the image and can make the aurora look washed out.
If your camera doesn’t have a Kelvin setting, the Daylight or Daylight Fluorescent preset is a reasonable alternative.
I’d always recommend shooting in RAW format for Northern Lights photography. RAW files keep all the data your sensor captures, which gives you much more flexibility when editing. You can adjust white balance, recover shadow detail, and reduce noise far more effectively than with a JPG. Most cameras also offer a RAW + JPG mode, which gives you the best of both.
For more on this, see my guide to RAW in photography.
How to Focus in the Dark
Getting sharp focus at night is one of the most frustrating parts of aurora photography. Your camera’s autofocus system needs light to work, and there usually isn’t enough.
The solution is manual focus. Switch your lens to manual focus mode and set it to infinity. On most lenses, infinity is marked with the ∞ symbol on the focus ring. However, and this is important, many lenses (particularly Canon lenses) actually focus slightly past infinity, so you can’t just twist the ring all the way to the end and call it done.
Here’s the approach I recommend. During daylight, before you head out, switch to manual focus and focus on a distant object (a building on the horizon, a distant mountain). Once you have sharp focus, mark the position on your focus ring with a small piece of tape or a marker pen. That way, when you’re standing in the dark with numb fingers, you can set the ring to the correct position without guessing.
If you didn’t prepare in daylight, you can use live view to focus on a bright star. Zoom in to maximum magnification on your camera’s screen, find a bright star, and adjust the focus ring until the star appears as a small, sharp point rather than a soft blob. Some newer cameras also have focus peaking, which highlights the areas in focus, which can help.
Take a test shot, zoom in on the screen, and check the stars are sharp. If they look like soft circles rather than points, your focus is off and you need to adjust.
If you don’t get focus right, you’ll come home with images that look like this, which is not what you want.

The 500 Rule and Why It Doesn’t Apply to Aurora
If you’ve read my astrophotography guide, you’ll know about the 500 Rule, which gives you a maximum shutter speed for star photography before stars start trailing. The formula is 500 divided by your focal length equals your maximum shutter speed in seconds.
For aurora photography, the 500 Rule is mostly irrelevant. The reason is that the aurora itself is moving, often much faster than the stars appear to. A 25-second exposure might keep stars sharp, but it’ll turn a fast-moving aurora into a featureless green smear. Your shutter speed for aurora is almost always dictated by how fast the lights are moving, not by star trailing.
That said, if the aurora is faint and slow-moving, and you’re pushing to 20+ second exposures, the 500 Rule becomes useful again as a check against star trailing. But in most aurora photography scenarios, you’ll be well within the limit.
Essential Gear for Northern Lights Photography
Camera Bodies
You need a camera that lets you control shutter speed, aperture and ISO manually. That rules out the most basic point-and-shoot cameras, but includes most mirrorless cameras, DSLRs, and even some advanced compact cameras.
The bigger the sensor, the better your results will be in low light. Full-frame cameras (like the Canon EOS R5 or Sony a7 series) will give you the cleanest images at high ISO. APS-C cameras (like the Canon R7 or R10, Sony a6700, Fujifilm X-T5) are also very capable. Micro Four Thirds cameras can work but will show more noise at the same ISO.
I won’t list specific models here because they change frequently. If you’re thinking about a new camera, my guide to choosing a travel camera covers the current options in detail.
Lenses for Northern Lights Photography
You want a wide-angle lens with a fast aperture. Wide-angle lets you capture the full sweep of the aurora across the sky, and a fast aperture (low f-number) lets more light reach the sensor.
The sweet spot is a focal length between 14mm and 24mm on a full-frame camera, with an aperture of f/2.8 or wider. If you’re on a crop-sensor camera, the equivalent would be roughly 10mm to 16mm.
Here are the lenses I recommend, which are the same recommendations from my astrophotography guide since the requirements are very similar:
- Samyang/Rokinon 14mm f/2.8 (available for most mounts). The best value option for aurora photography. Sharp, wide, fast, and a fraction of the price of the brand-name alternatives. This is my go-to recommendation for anyone on a budget.
- Canon RF 15-35mm f/2.8 L IS USM. If you’re shooting Canon mirrorless, this is the one to get. Zoom flexibility from 15mm to 35mm means you can go ultra-wide for the full sky or zoom in for tighter compositions. It’s not cheap, but you get what you pay for.
- Nikkor Z 14-24mm f/2.8 S. The Nikon equivalent, with excellent sharpness across the frame.
- Sony FE 14mm f/1.8 GM. If you want the absolute best low-light performance and shoot Sony, this f/1.8 prime lets in twice as much light as an f/2.8 lens.
If you already have a kit zoom lens (like an 18-55mm), it can work in a pinch. Zoom it out to 18mm, open the aperture as wide as it goes (probably f/3.5), and increase your ISO to compensate. The results won’t match a dedicated wide-angle lens, but you can still capture the aurora.
For more lens options across different camera systems, see my guide to the best lenses for travel photography.
Tripods for Northern Lights Photography
A tripod is not optional for aurora photography. You’ll be shooting exposures from 1 to 20 seconds, and no one can hold a camera still for that long. If you try to handhold it, every image will be blurry.
Here are three tripods I’d recommend at different price points. I use Vanguard tripods myself and have done for years.
- Vanguard VEO 3T 204ABP. A solid budget travel tripod in aluminium. Compact enough to pack easily, stable enough for a mirrorless camera with a wide-angle lens. A good starting point if you don’t already own a tripod.
- Vanguard VEO 3 GO 265HCB. This is what I use as my travel tripod. Carbon fibre keeps the weight down (just over 3 lbs), and it has a 22 lb load capacity, so it’ll handle even a full-frame camera with a heavy lens. The detachable leg converts to a monopod, which is handy for other situations.
- Peak Design Travel Tripod. A beautifully designed travel tripod that packs incredibly flat. It’s more expensive than the Vanguard options, but if portability is your top priority, it’s hard to beat.
You’ll also want a way to trigger the shutter without touching the camera, since pressing the button can cause vibration. Options include a wired remote shutter release, your camera’s built-in 2-second timer, or a smartphone app if your camera has WiFi or Bluetooth. In very cold weather, the 2-second timer is often the simplest option because it doesn’t require removing your gloves.
If your camera or lens has image stabilisation (IS, VR, IBIS, or similar), turn it off when shooting on a tripod. Stabilisation systems can actually introduce small vibrations when the camera is already still, which shows up as soft images in long exposures.
For more on choosing a tripod, see our guide to the best travel tripods and our post on why you need a tripod.
Other Essentials
Northern Lights photography means standing outside in the dark in some of the coldest places on earth. I’ve been out shooting at -35°C, and preparation makes the difference between an incredible experience and a miserable one.
Photography gloves are worth the investment. I use these photography gloves which have a warm merino wool lining and magnetic finger caps that flip back so you can adjust camera dials without taking the whole glove off. The company that makes them specialises in cold-weather photography gloves, and they have a full range depending on how cold it gets where you’re going. For really extreme cold (below -20°C), go for one of their heavier-duty options.
Spare batteries are essential. Cold weather drains batteries much faster than normal. I usually bring at least three fully charged batteries and keep the spares in an inside pocket close to my body. Swapping a dead battery for a warm one from your jacket pocket can give you another hour of shooting.
A headtorch with a red light option keeps your hands free while preserving your night vision. White light from a regular torch or phone screen will wreck your ability to see the aurora (and annoy other photographers nearby). Something like this one with a red light mode is ideal.
Warm clothing is obvious but worth emphasising. Layers are the key: thermal base layers, a fleece or down mid-layer, and a windproof outer shell. Don’t forget warm socks and a hat. See our guides to what to pack for winter in Iceland and what to pack for winter in Finland.
For more detailed advice on protecting your camera gear in freezing temperatures (including the plastic bag trick for avoiding condensation), see my full guide to cold weather photography.
How to Photograph the Northern Lights with a Smartphone
Modern smartphones are surprisingly capable aurora cameras. If you have an iPhone 12 or newer, a Samsung Galaxy S21 or newer, or a recent Google Pixel, your phone can capture the Northern Lights. It won’t match a dedicated camera with a fast wide-angle lens, but you can get images that are well worth keeping.
Using Night Mode (The Easy Way)
The simplest approach is Night Mode, which is built into the camera app on most recent smartphones. Night Mode automatically takes a longer exposure and processes the image to brighten the scene while reducing noise. Here’s how to use it for aurora photography:
On an iPhone, open the Camera app and Night Mode should activate automatically in low light (you’ll see a moon icon turn yellow). Tap the moon icon to adjust the exposure time. Slide it to the maximum (usually 10 to 30 seconds, depending on how stable your phone is). The longer the exposure, the more aurora detail you’ll capture.
On a Samsung Galaxy, open the Camera app and swipe to “More”, then select Night Mode. You can adjust the exposure time in the settings.
On a Google Pixel, Night Sight activates automatically or can be selected from the camera modes. The phone will tell you to hold still for several seconds.
Whichever phone you use, the single most important thing you can do is stabilise it. Handheld Night Mode photos are possible, but a phone tripod or even propping the phone against something solid will dramatically improve your results. A small phone tripod costs very little and makes an enormous difference.
Also make sure to turn off your flash. It won’t help (the aurora is too far away) and will just light up whatever is directly in front of you.
Manual Camera Apps (For More Control)
If you want more control, or your phone’s Night Mode isn’t giving you good results, you can use a manual camera app to set the shutter speed yourself. On Android, Open Camera is free and gives you full manual control. On iOS, apps like NightCap or ProCamera let you set long exposures.
Set the shutter speed to somewhere between 5 and 15 seconds, and the app should handle ISO automatically. You’ll definitely need a tripod or stable surface for this approach.
Be realistic about expectations. Phone sensors are tiny compared to dedicated cameras, so images will have more noise and less detail, especially in the darker parts of the sky. But for sharing on social media or having a personal record of an amazing experience, smartphone aurora photos can be really good.
The image below was shot handheld with a Google Pixel 3 in Night Mode. It’s not going to win any awards, but it captured the moment. A newer phone with a tripod would do considerably better.
Planning Your Northern Lights Shoot
When and Where to See the Northern Lights
The Northern Lights are visible from roughly September to April, when the skies are dark enough at high latitudes. The best viewing is typically between 68°N and 74°N latitude, which includes northern Finland, Sweden and Norway, Iceland, and large parts of Canada.
September and March are my favourite months for aurora hunting. The depths of winter (December and January) offer the longest dark hours, but it can be brutally cold. The shoulder months give you enough darkness with more bearable temperatures. February and March also have snow on the ground, which makes for particularly beautiful compositions.
A common misconception is that you need a moonless night. A half-moon or quarter-moon can actually help by lighting up the foreground landscape naturally, so you don’t end up with a bright aurora over a pitch-black silhouette. A full moon can wash out fainter displays, but for stronger aurora, some moonlight adds a lot to the scene.
We’d suggest the following locations as being good for the Northern Lights, and also as being easily accessible:
- Finnish Lapland (particularly well set up for Northern Lights tourism)
- Swedish Lapland
- Northern Norway (Tromsø and the Lofoten Islands are popular)
- Iceland (the entire country is well-positioned)
- Canada (Yukon, Northwest Territories, and Manitoba)
During periods of strong solar activity, the aurora can also be visible much further south. I’ve seen Northern Lights in Scotland, and they’ve been spotted in the northern United States and central Europe during geomagnetic storms.
We have lots of content on aurora destinations to help you plan. See our guide to planning a trip to Iceland as a starting point, or our guide to visiting Finland in winter.
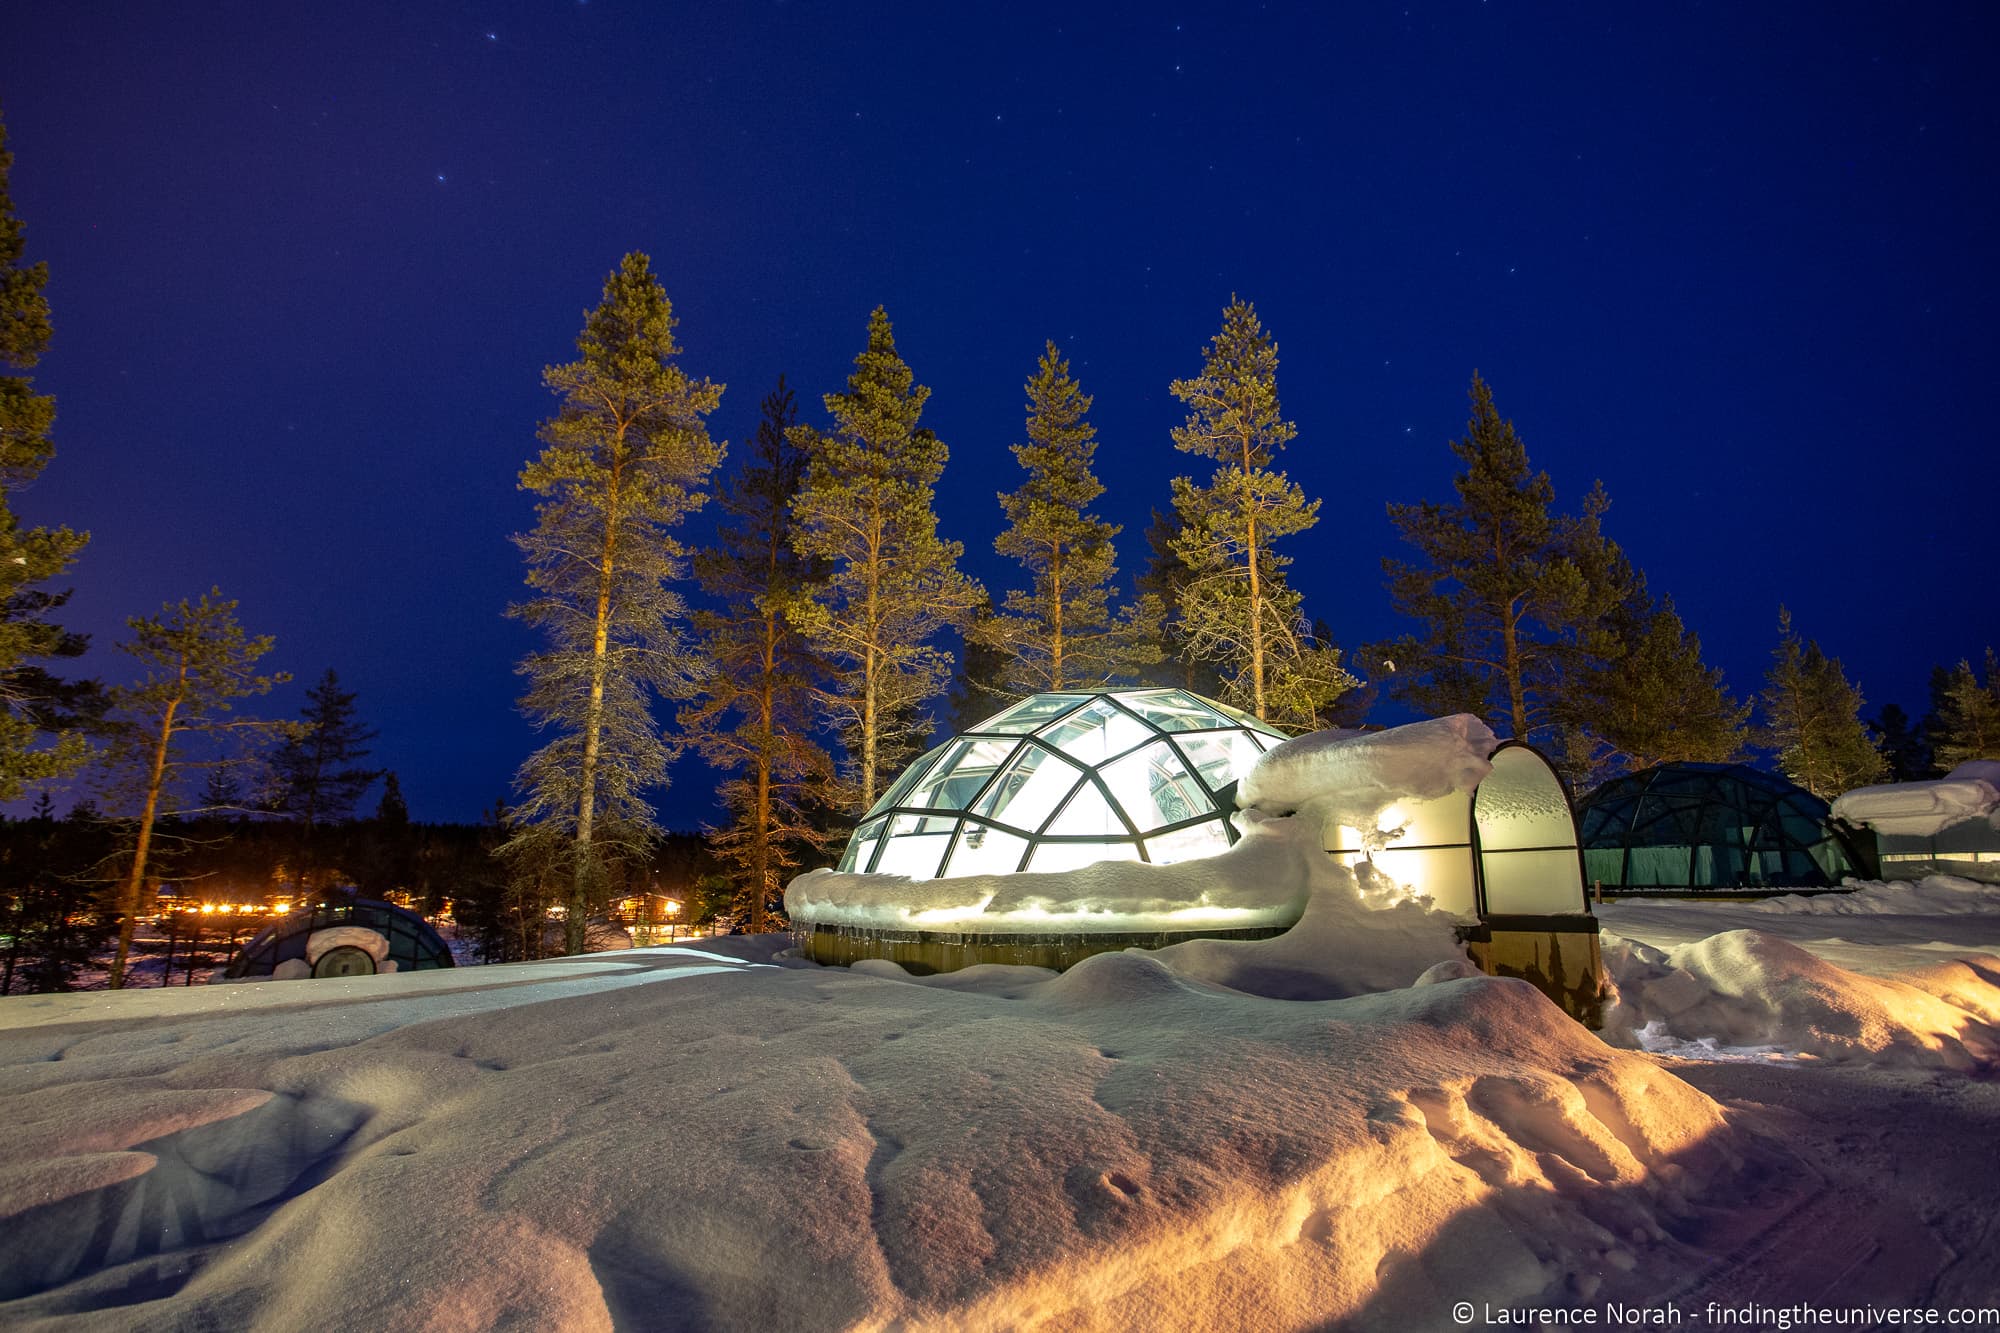
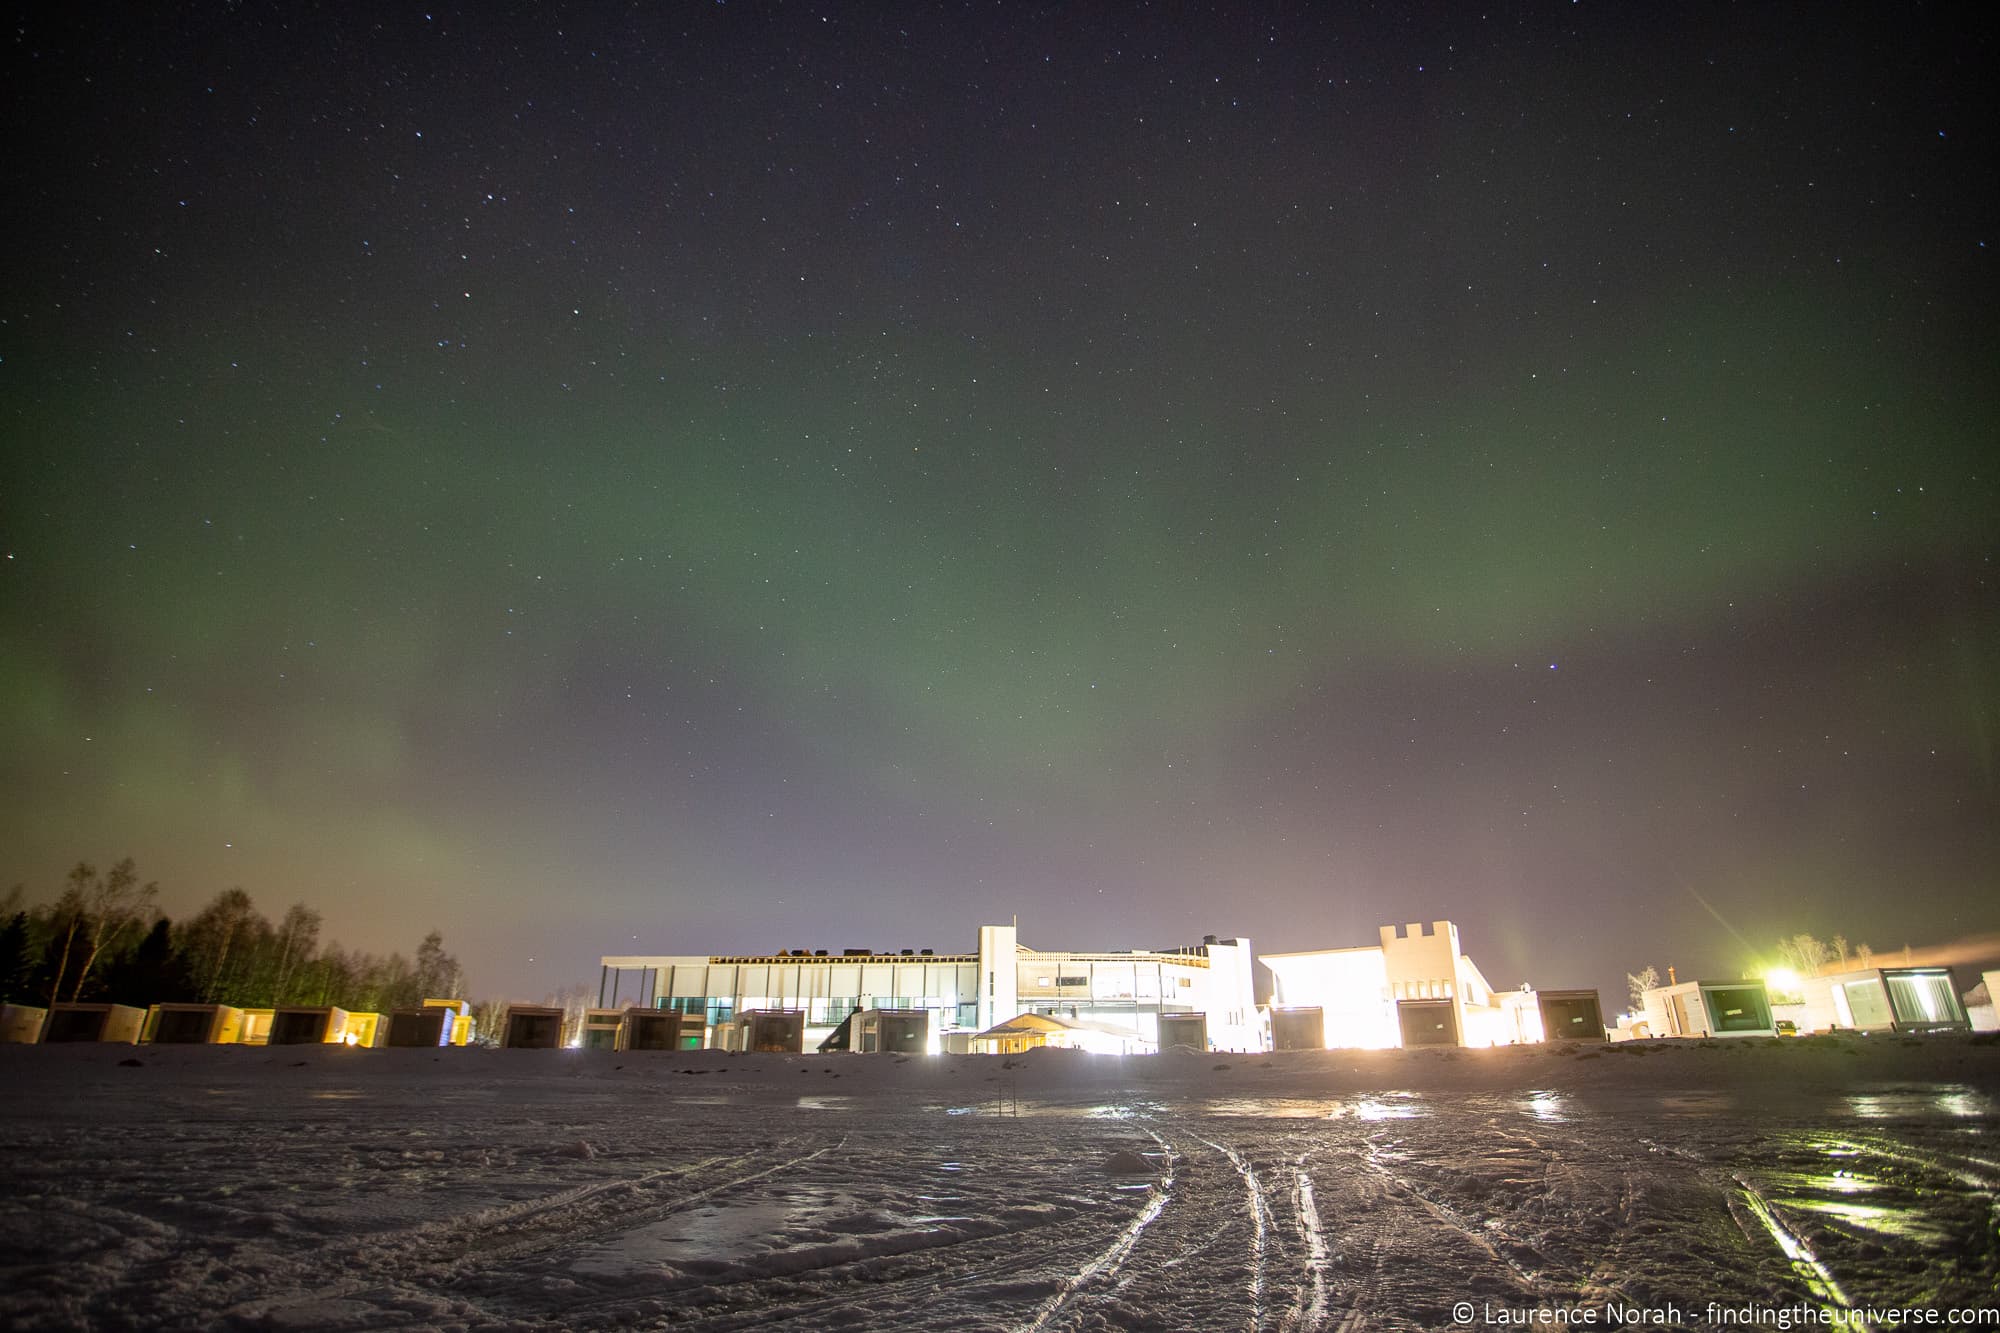
Some locations are particularly well set up for Northern Lights viewing. In Finland, for example, you can stay in glass igloos at Kakslauttanen Arctic Resort, which gives you a great viewing experience without having to brave the cold all night. You can read our full review of the resort here.
Planning Apps
A few apps will make your aurora hunting much more productive.
An aurora forecast app is a must. I use My Aurora Forecast Pro, which takes aurora forecast data from various sources combined with weather data, and sends you a notification when there’s a chance of seeing activity in your area. I’ve caught displays I would have completely missed without it. It’s available for both Android and iOS in free and paid versions.
PhotoPills is the planning app I use for all my photography work. It combines sun and moon position data, star tracking, weather forecasts, and mapping into one app. For aurora photography, it’s particularly useful for finding dark sky locations and planning where to position yourself relative to the northern horizon. It’s available for Android and iOS.
A weather app is also essential. Clear skies are a requirement for seeing the aurora, and a good weather forecast will save you from driving for hours to find clouds. I check both the standard weather forecast and cloud cover maps before heading out.
A light pollution map will help you find dark locations. You want to be as far from city lights as possible. The website Light Pollution Map is a free resource that shows light pollution levels worldwide.
Composition Tips for Aurora Photography
Getting the camera settings right is half the battle. The other half is composing an image that tells a story rather than just documenting a green sky.
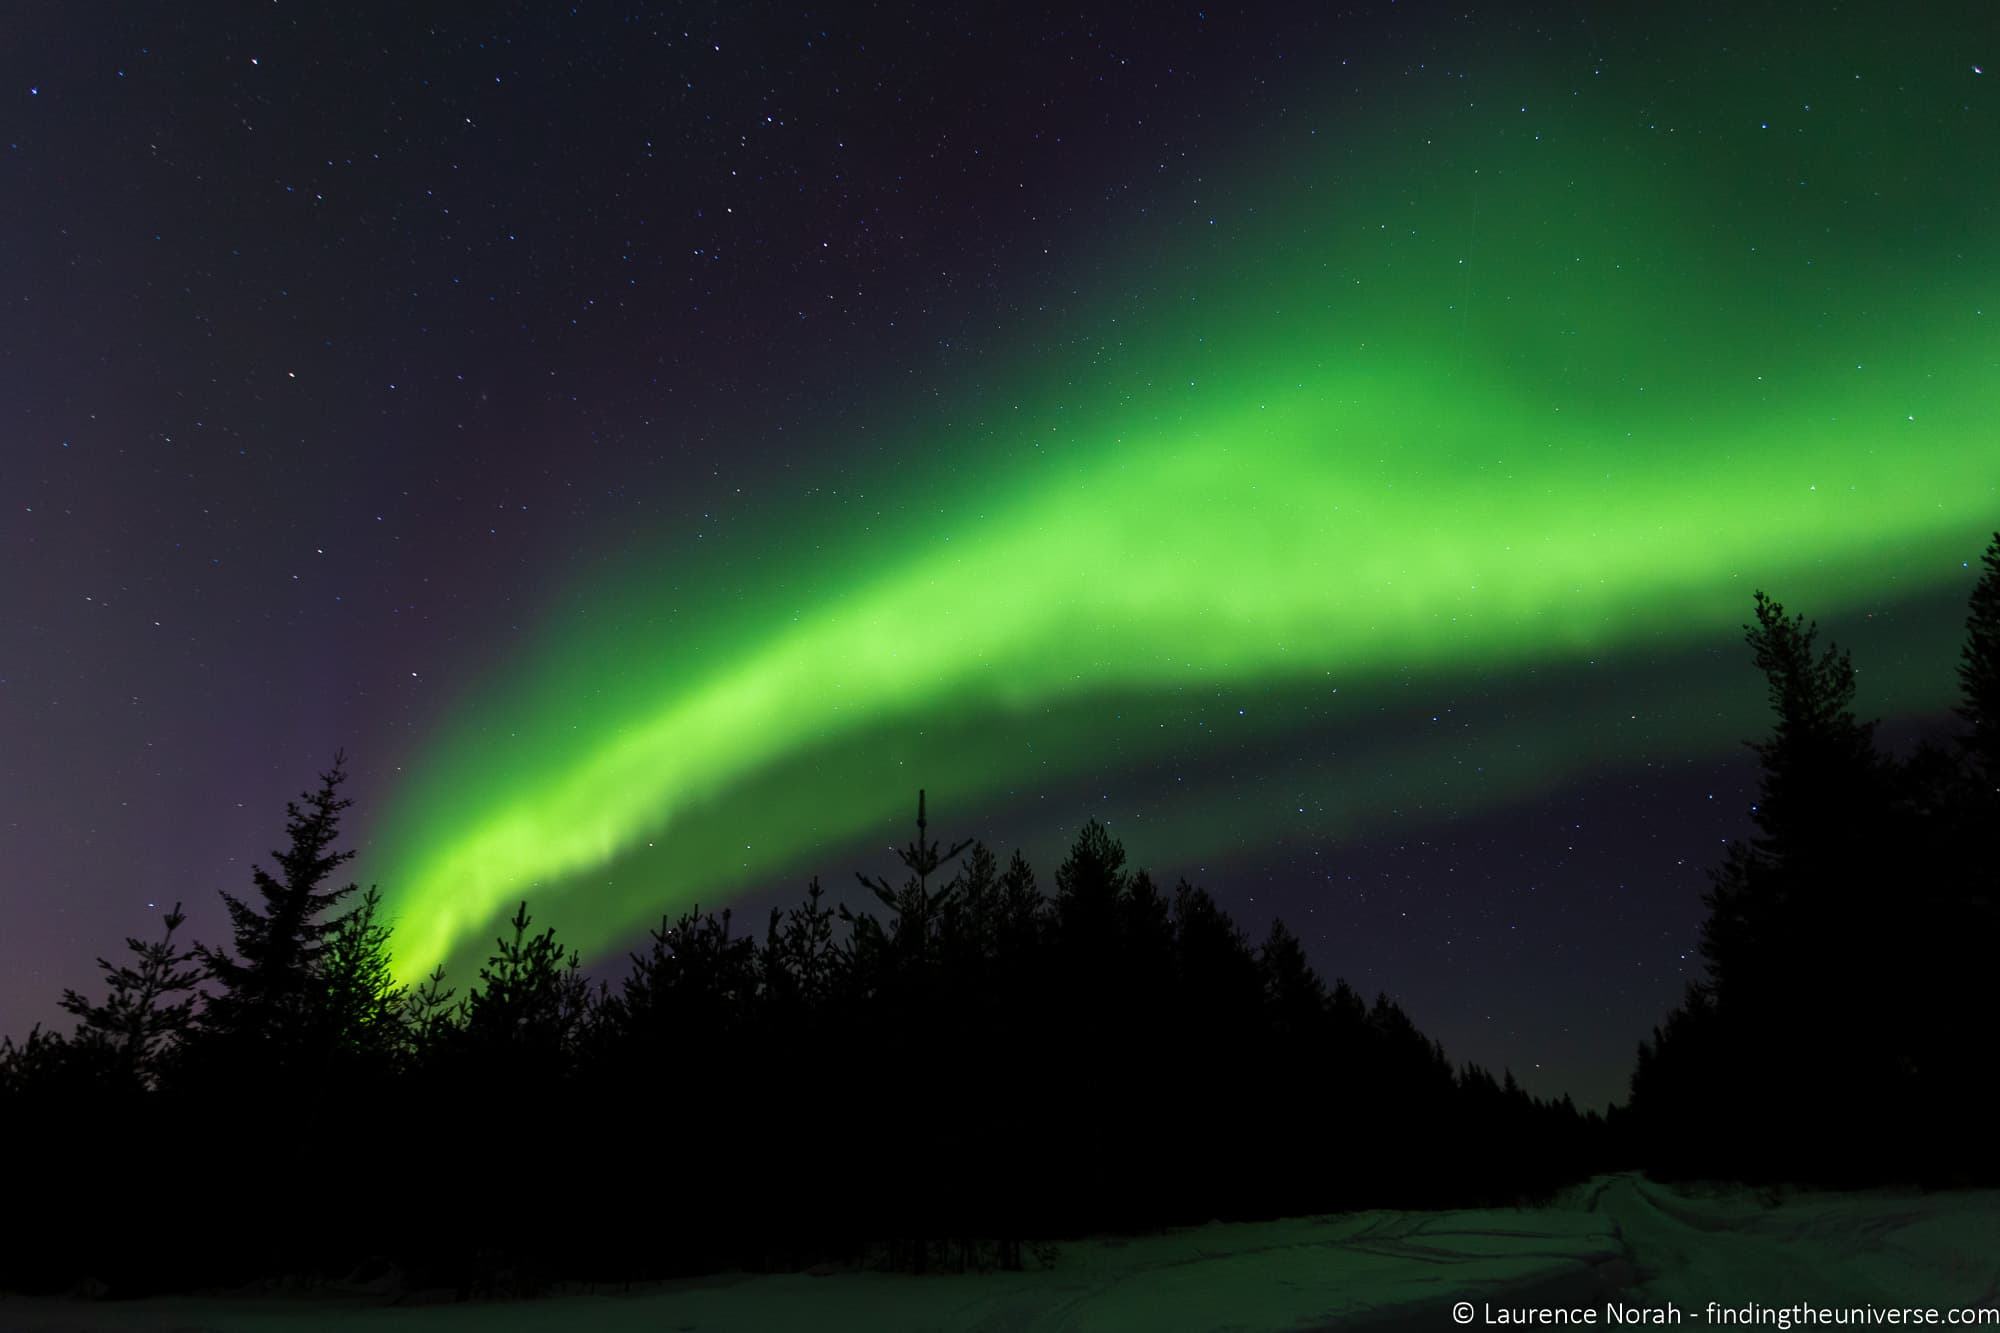
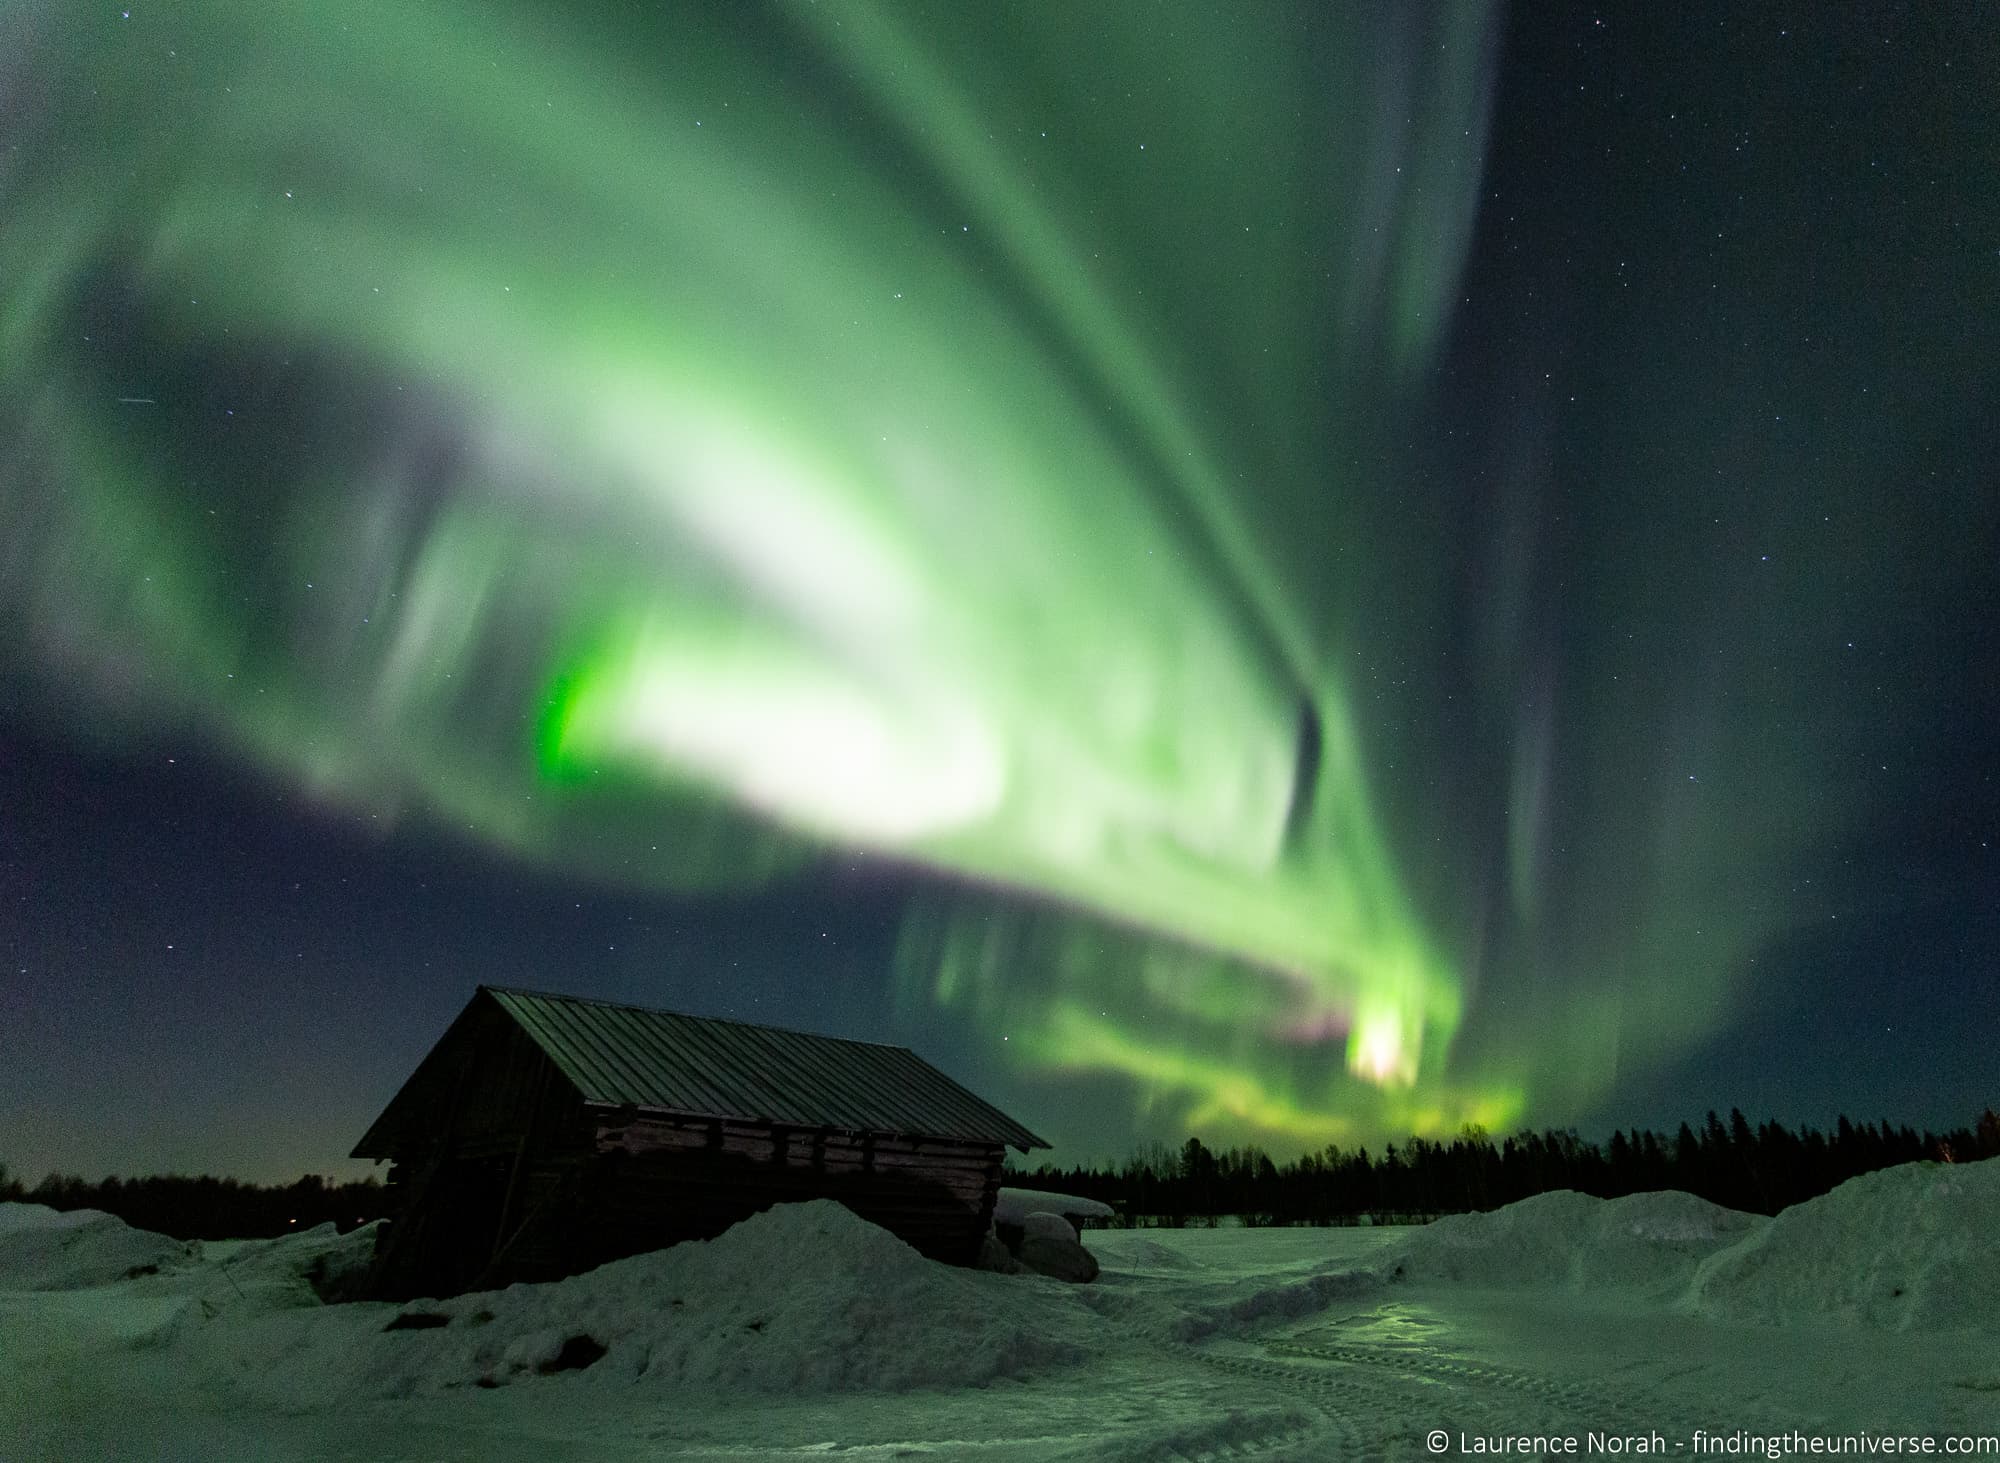
Include foreground interest. A photo of just the aurora against a black sky is impressive for about three seconds. An aurora arching over a snow-covered cabin, reflecting in a still lake, or framing a familiar landmark is an image someone will remember. Scout your location during daylight if possible, and plan your compositions before the lights appear.
Commit to one composition. When the aurora starts dancing, the temptation is to run around pointing your camera in every direction. Resist this. Pick a composition you like, set up your tripod, and wait. The lights will come and go. If you’ve chosen a good foreground facing north (where the aurora is most commonly visible), you’ll get your shot. Running around means you’ll get a memory card full of half-composed images and no keepers.
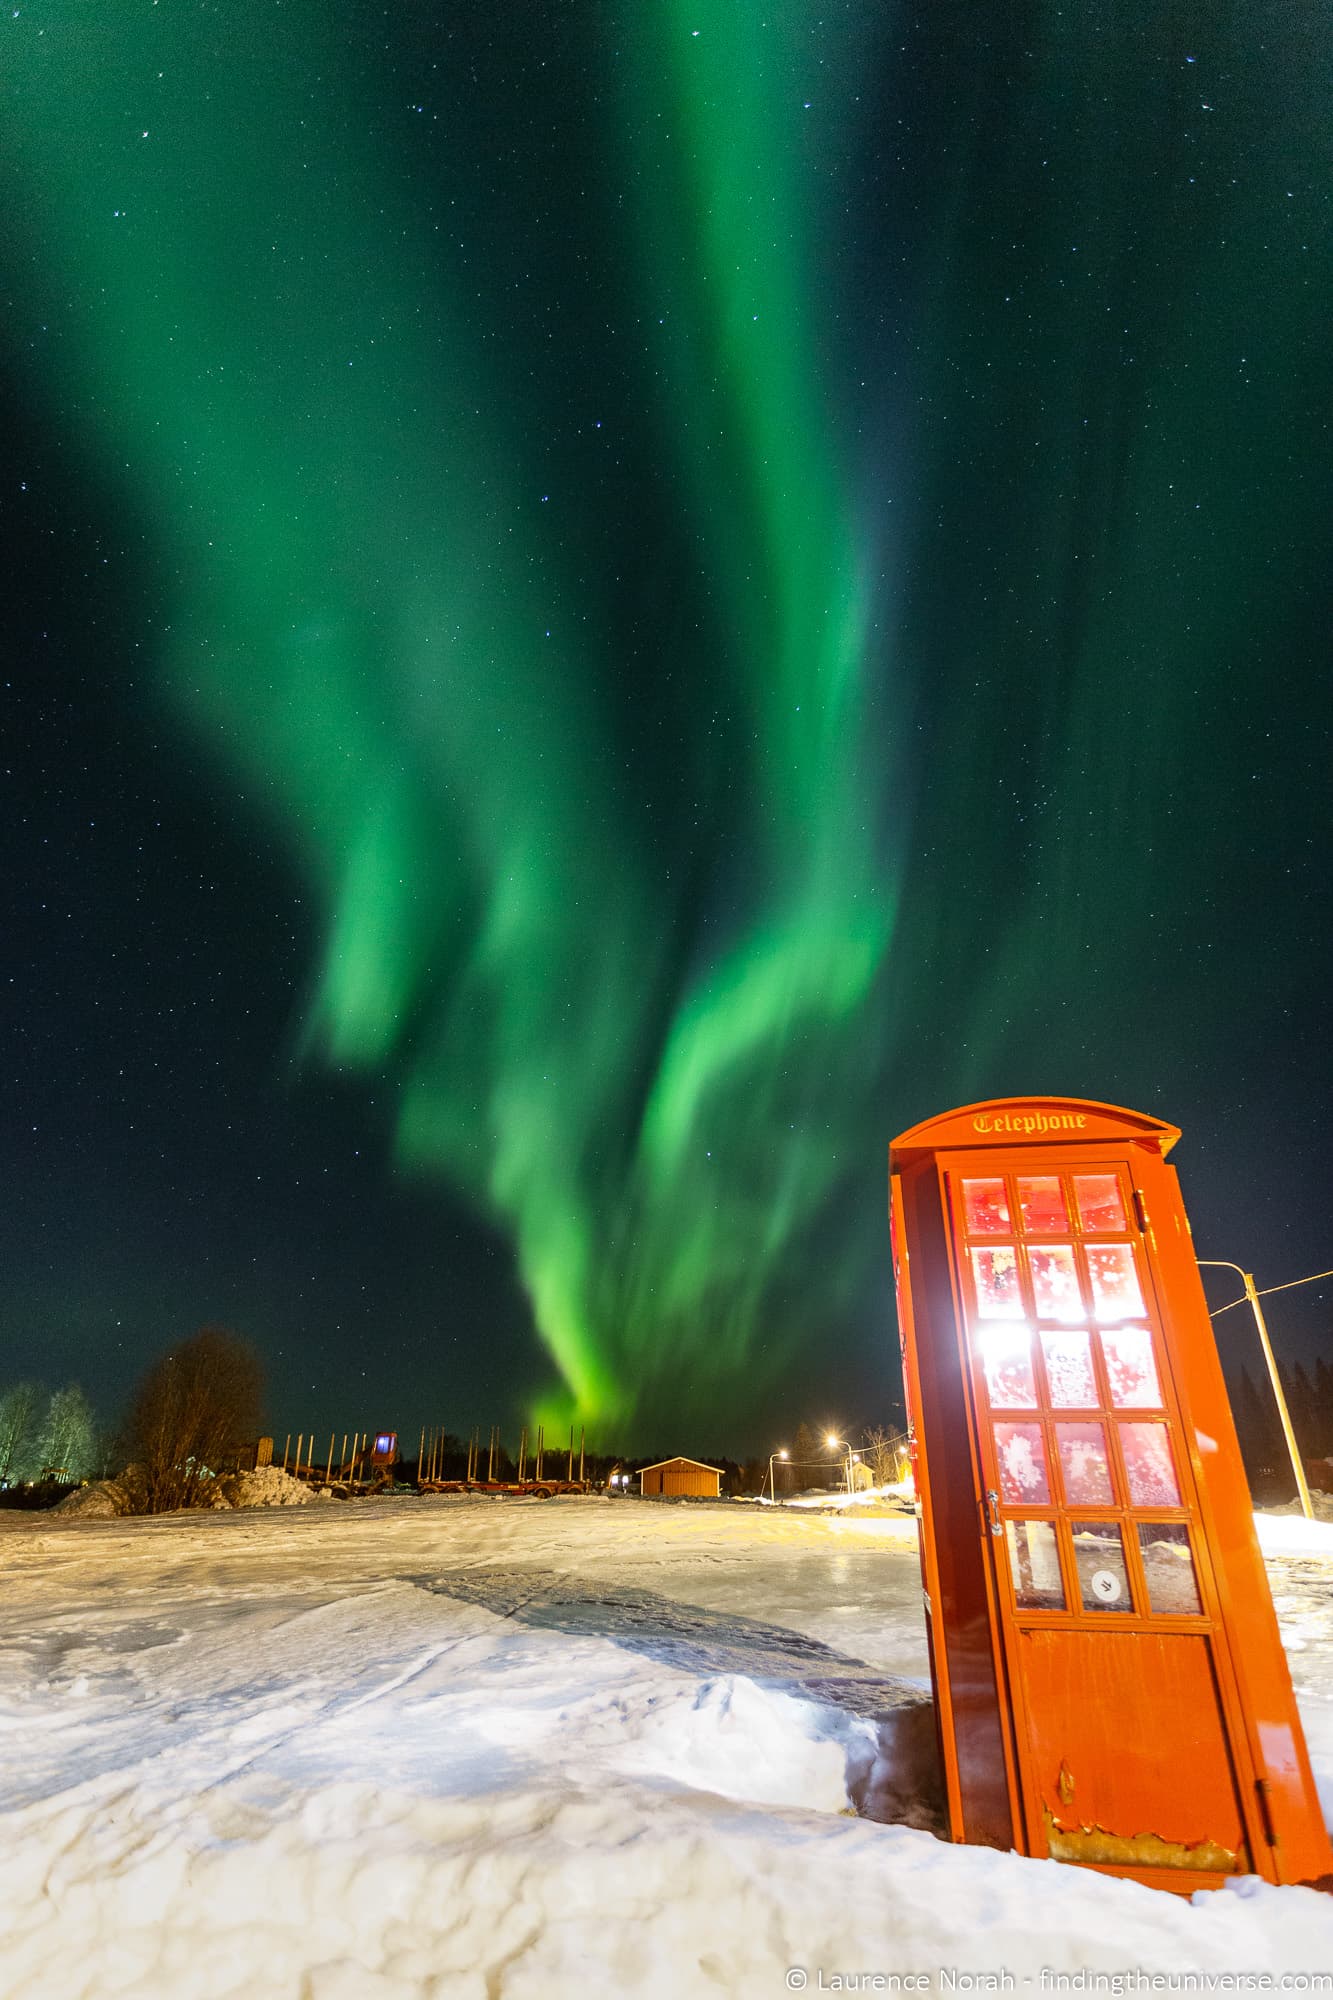
Use light sources creatively. A lit cabin window, a distant streetlight, or a headtorch briefly shone on a rock in the foreground can add depth and interest. Just be careful not to overdo it, and be considerate of other photographers nearby.
Compare that image, where the artificial light adds character to the scene, with this one below, where the city lights wash out much of the display. You want to be somewhere as dark as possible for the best results.
Consider including a person. A silhouette of someone standing under the aurora gives a powerful sense of scale. Set a long exposure, have your subject stand very still, and briefly illuminate them from behind with a headtorch. This takes practice but can produce some of the most striking aurora images.
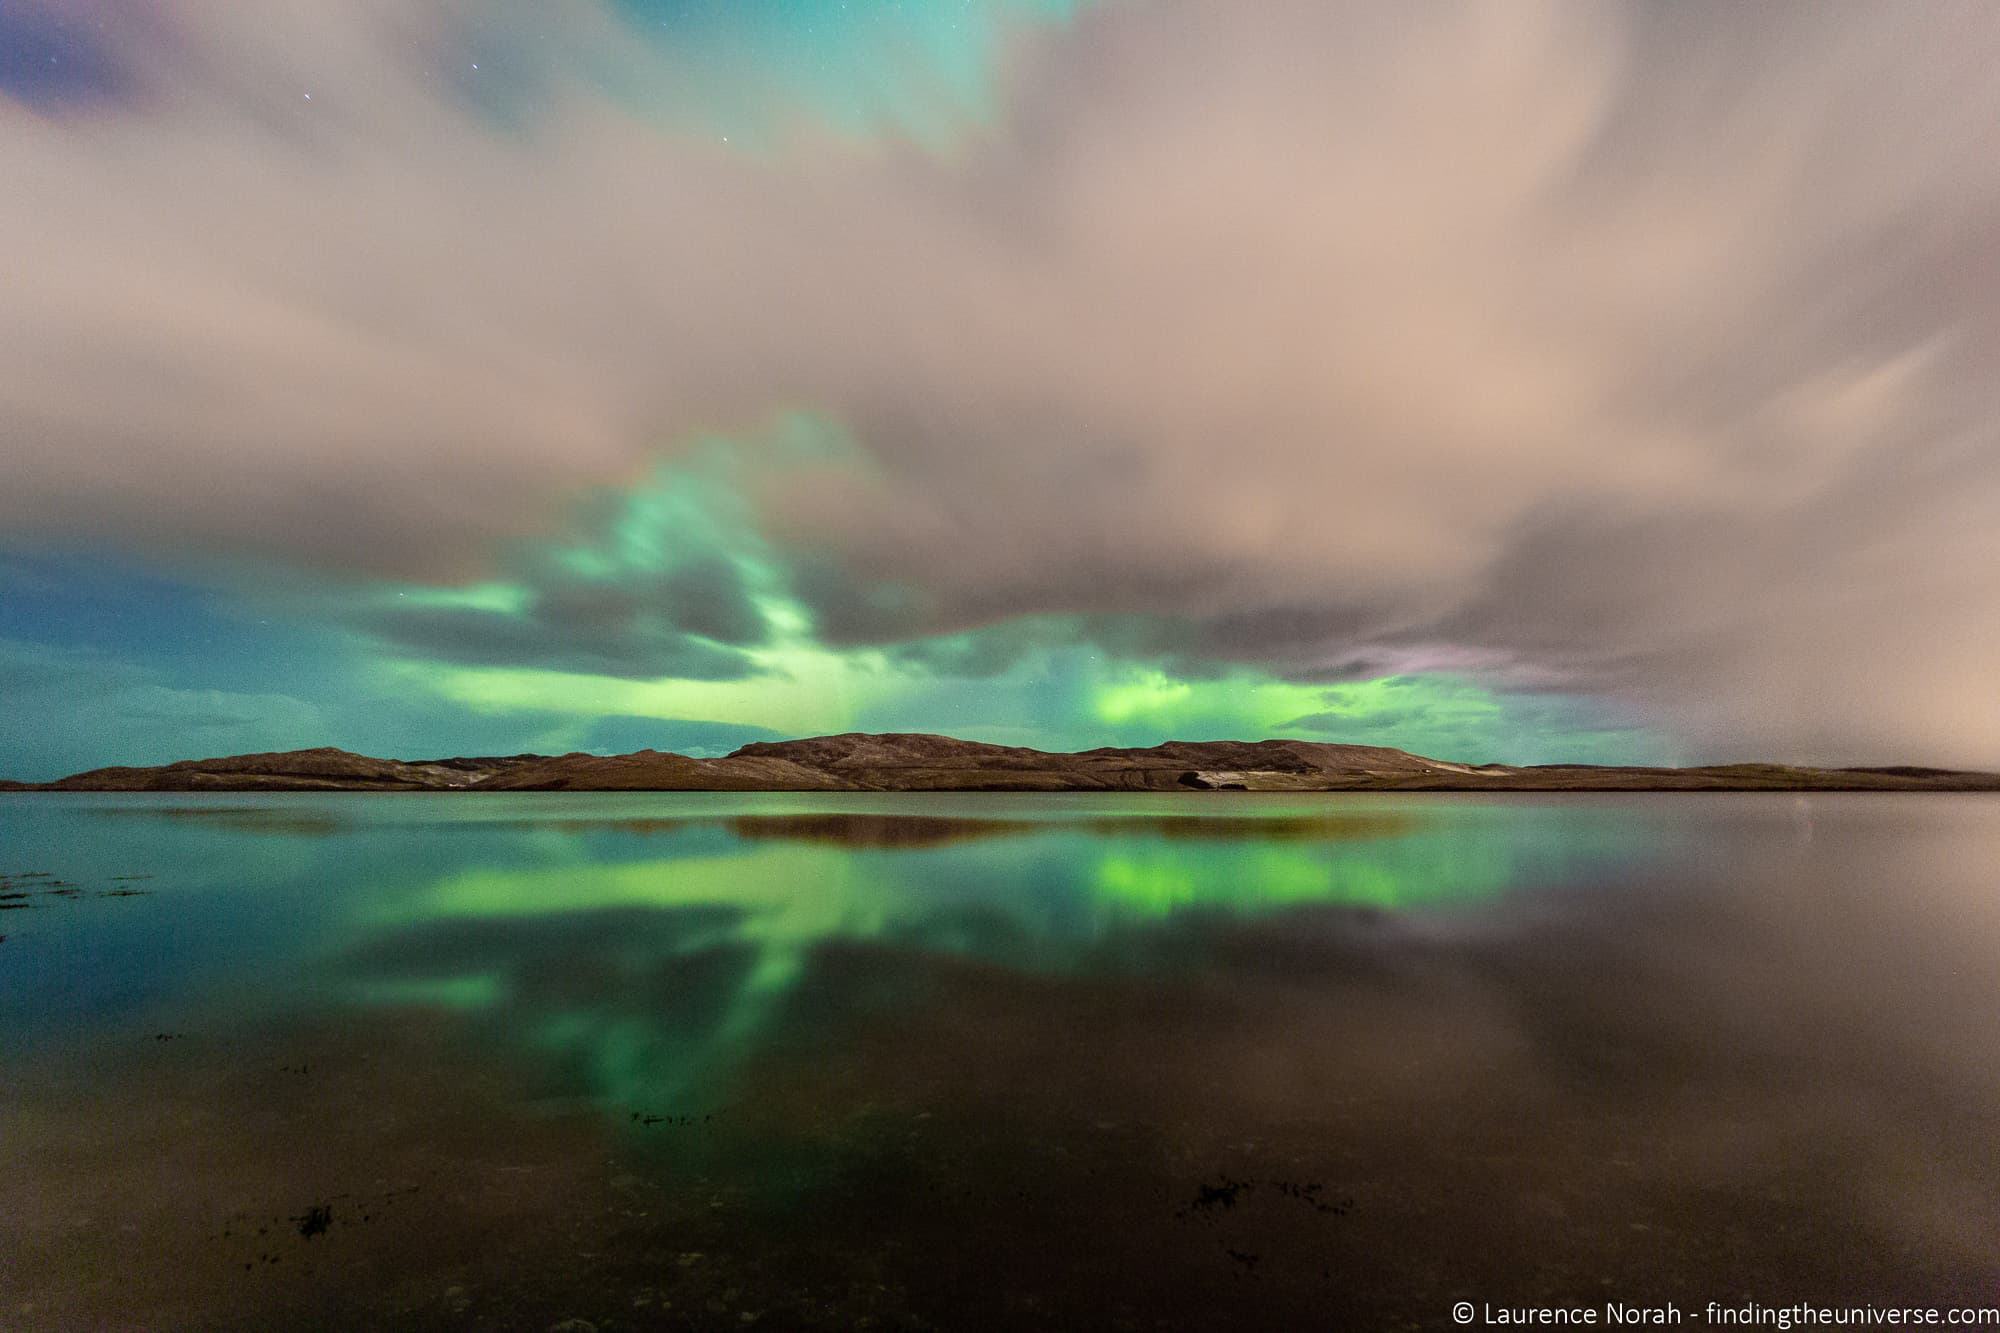
Look for reflections. If you’re near a calm lake, river or fjord, the aurora reflecting in the water doubles the impact of the display. Sheltered water works better than exposed sea for this.
For more on composing landscape and travel photos, see my guide to photography composition.
Processing Your Northern Lights Photos
If you’ve shot in RAW (which I recommended earlier), you’ll have plenty of room to improve your images in post-processing. The main adjustments I typically make are:
White balance fine-tuning. Even if you set 3500K in camera, you may want to adjust this slightly to get the aurora colours looking natural. Cool the image down if the greens look too yellow, or warm it up slightly if things look too blue.
Noise reduction. High-ISO images will always have some digital noise. Modern editing software (Lightroom, Capture One, or dedicated tools like Topaz DeNoise) can reduce this significantly without losing too much detail. Don’t overdo it, though. Over-processed aurora photos with aggressive noise reduction look plastic and artificial. See my guide to the best noise reduction software for some options.
Check the histogram, especially the green channel. Aurora photography is one of the few situations where you can blow out highlights in the middle of the night. The green channel in particular can clip if the aurora is bright, and once that detail is gone, you can’t recover it. If you check your histogram in the field and see the green channel touching the right edge, reduce your exposure.
For more on editing, see my guide to the best photo editing software.
Northern Lights Tours
If you’re visiting somewhere like Iceland or Finland, a guided Northern Lights tour can be a great way to improve your chances of seeing (and photographing) the aurora. The guides know the best dark-sky locations, they monitor the forecasts, and they can drive you to wherever the skies are clearest. Some tours also include photography advice, which is a nice bonus if you’re still learning.
Iceland has a huge range of evening tours departing from Reykjavik. Options range from large coach tours to small-group minibus trips. I’d suggest looking at the options on GetYourGuide. For multi-day guided tours that combine Northern Lights viewing with exploring the rest of Iceland, check the listings on Guide to Iceland and TourRadar.
Finland is particularly well set up for Northern Lights tourism, with tours departing from Rovaniemi, Levi, Saariselkä and other Lapland towns. Options include tours by snowmobile and dedicated photography tours where the guide helps you with your camera settings.
Canada offers excellent viewing in the Yukon, Northwest Territories and Manitoba. Multi-day tours are available on TourRadar and GetYourGuide.
Many tour companies offer a rebooking policy: if you don’t see the aurora on your trip, they’ll let you join another tour for free. It’s worth checking for this when booking.
Don’t Forget to Look Up
One last piece of advice. When the aurora is dancing overhead, put the camera down for a few minutes and just look at the sky. It’s easy to spend the entire evening staring at the back of your screen, tweaking settings, checking focus, reviewing shots, and missing one of the most spectacular natural displays on earth.
It is one of the most amazing things I’ve ever seen, especially when it’s a strong display. A camera can struggle to capture the experience, but your eyes won’t. You’re often standing alone, in the middle of nowhere, with what seems like a personal display being put on just for you by the universe. So make sure you don’t miss it in a quest to capture a perfect photo.
Take your photos. Get the settings right. And then step back, tilt your head up, and just watch.
Improve Your Photography
If you found this guide helpful and want to develop your photography skills further, check out my online travel photography course. It covers everything from the basics of how a camera works through to composition, lighting, and editing, plus dedicated sections on astrophotography and long exposure photography that complement this guide.
I’ve helped over 2,000 students learn to take better photos since launching the course in 2016. You get feedback from me as you progress, access to webinars and videos, and membership of a community where you can share your work and get constructive critique. It’s a one-off payment for lifetime access, and you can find out more by clicking here.
We also have plenty of free photography guides on the site, including posts on astrophotography, long exposure photography, cold weather photography, snow photography, and photography composition.
Frequently Asked Questions About Northern Lights Photography
What camera settings should I use for the Northern Lights?
Start with manual mode, aperture wide open (f/2.8 is ideal), ISO 3200, and an 8-second shutter speed. These are starting points, not fixed rules. If the aurora is bright and fast-moving, shorten your shutter speed to 3 to 5 seconds and reduce ISO. If it’s faint, push to 15 to 20 seconds and increase ISO to 6400 if needed.
The key is to check your shots as you go and adjust. The aurora changes constantly, and your settings need to keep up.
Can you photograph Northern Lights with a phone?
Yes, particularly with newer smartphones. An iPhone 12 or later, Samsung Galaxy S21 or later, or recent Google Pixel can all capture the aurora using Night Mode. The phone handles the settings automatically. You’ll get the best results with a phone tripod to keep it stable during the longer exposure.
The results won’t match a dedicated camera with a fast wide-angle lens, but they’re more than good enough for social media and personal memories.
What is the best lens for Northern Lights photography?
A wide-angle lens with a fast aperture. Specifically, something in the 14mm to 24mm range (on full frame) with an aperture of f/2.8 or wider. The Samyang/Rokinon 14mm f/2.8 is the best budget option. The Canon RF 15-35mm f/2.8, Nikkor Z 14-24mm f/2.8, and Sony 14mm f/1.8 GM are top choices for their respective camera systems.
Do you need a tripod for Northern Lights photography?
Yes, and this is non-negotiable. Northern Lights photography requires exposures of at least a few seconds, and often much longer. There is no way to hold a camera still for that long by hand. Even smartphones benefit from a small tripod in Night Mode, as a longer, more stable exposure captures more light and detail.
When is the best time to see the Northern Lights?
September to April, with the peak months being September to October and February to March. You need dark skies, which means the summer months at high latitudes won’t work because the sun barely sets. The equinox periods (late September and late March) often produce strong displays due to the alignment of Earth’s magnetic field with the solar wind.
Within any given night, the most active displays tend to occur between 10pm and 2am, though they can happen at any time after dark.
What is the best app for predicting Northern Lights?
I use My Aurora Forecast Pro, which is available for both Android and iOS. It monitors aurora activity and sends notifications when there’s a chance of seeing the lights in your area. For general photography planning, including finding dark sky locations and checking moon phases, PhotoPills is my go-to app.
Can you see the Northern Lights with clouds?
No, not really. The aurora occurs high in the atmosphere (around 100 to 300 km up), and clouds will block your view of it. Clear skies are a requirement. Partial cloud cover can sometimes create interesting effects, with the aurora visible through gaps in the clouds, but heavy overcast will prevent you from seeing anything. Always check the cloud cover forecast before heading out.
What Kp index do I need to see the Northern Lights?
The Kp index measures geomagnetic activity on a scale from 0 to 9. If you’re inside the auroral zone (northern Scandinavia, Iceland, northern Canada), you can see aurora at any Kp level, even Kp 0. The further south you are, the higher the Kp needs to be. For Scotland or the northern US, you’d typically need Kp 5 or above. Most aurora forecast apps show the predicted Kp level, which helps with planning.
Keep in mind that space weather forecasting isn’t as precise as regular weather forecasting. A high Kp number improves your chances but doesn’t guarantee a show, and aurora can sometimes appear when forecasts suggested nothing would happen.
Fanna MALHERBE says
Any WHITE BALANCE suggestions for Northern lights photography?
Laurence Norah says
Hi Fanna,
Honestly, the best option is to shoot in RAW and then adjust the white balance when editing. I usually just shoot in Auto White Balance and it seems to work fine!
LAurence
Tami Rauch says
Planning a trip to Iceland mid march, your posts and blog have been extremely useful and loaded with applicable how to knowledge.
Thank you
Laurence Norah says
Thank you so much Tami, your kind words are much appreciated. Thanks for taking the time to leave a comment! Have a wonderful time in Iceland 🙂
Laurence