The majority of cameras on the market today, including most smartphones, have some kind of flash system. This is usually used to illuminate dark scenes, such as when you are indoors in a low light situation or outside at night.
In most instances, the flash will be set to come on automatically. This means that if the camera detects that the scene is a bit too dark, it will fire the flash to compensate.
This is all well and good, but sometimes you will want to turn your camera flash off. This can be for a variety of reasons. Many museums for example allow you to take photos, but only with the flash disabled, as the intensity of the light produced can damage artwork.
Sometimes the flash will also do more harm than good. The built-in flash on most cameras usually only has a range of a few feet, so using it to try and illuminate a larger scene will often not give you positive results.
In these situations, you are better off disabling the flash and relying on something like a tripod and long exposure photography techniques.
As you can see, there are a variety of reasons you might want to disable your cameras flash. You can see more in my guide to why you should turn your camera flash off.
That’s why I’ve put together this guide for how to disable your camera flash, so you can learn how to turn it off.
This guide gives you a general overview of how to turn off your camera flash, as well as specific instructions for devices like smartphones which are a little bit different.
Table of Contents
How to Turn Off Your Camera Flash
Many cameras have the same process for disabling the flash, so I will go through this general process first before moving onto specific steps for devices like smartphones. This general process should work for disabling the flash on the majority of cameras from most manufacturers.
So whether you have a compact camera, mirrorless camera or DSLR camera, and whoever it is made by (Canon, Sony, Nikon, Panasonic, etc), 90% of camera users should be able to turn their flash off with the following steps.
Step 1 – Find the flash button on the back of the camera
The majority of compact cameras, mirrorless cameras and DSLR cameras that have a built-in flash unit will also have a dedicated button on the back of the camera.
This will look like a little bolt of lightning, and will give you direct access to the camera’s flash control. Here’s an example of what this flash button looks like on the back of a Sony compact camera.
The flash symbol is universal, so just look for the lightning bolt icon on your back of your camera. You can see it to the right of the circular wheel in the image below of my Sony compact camera.
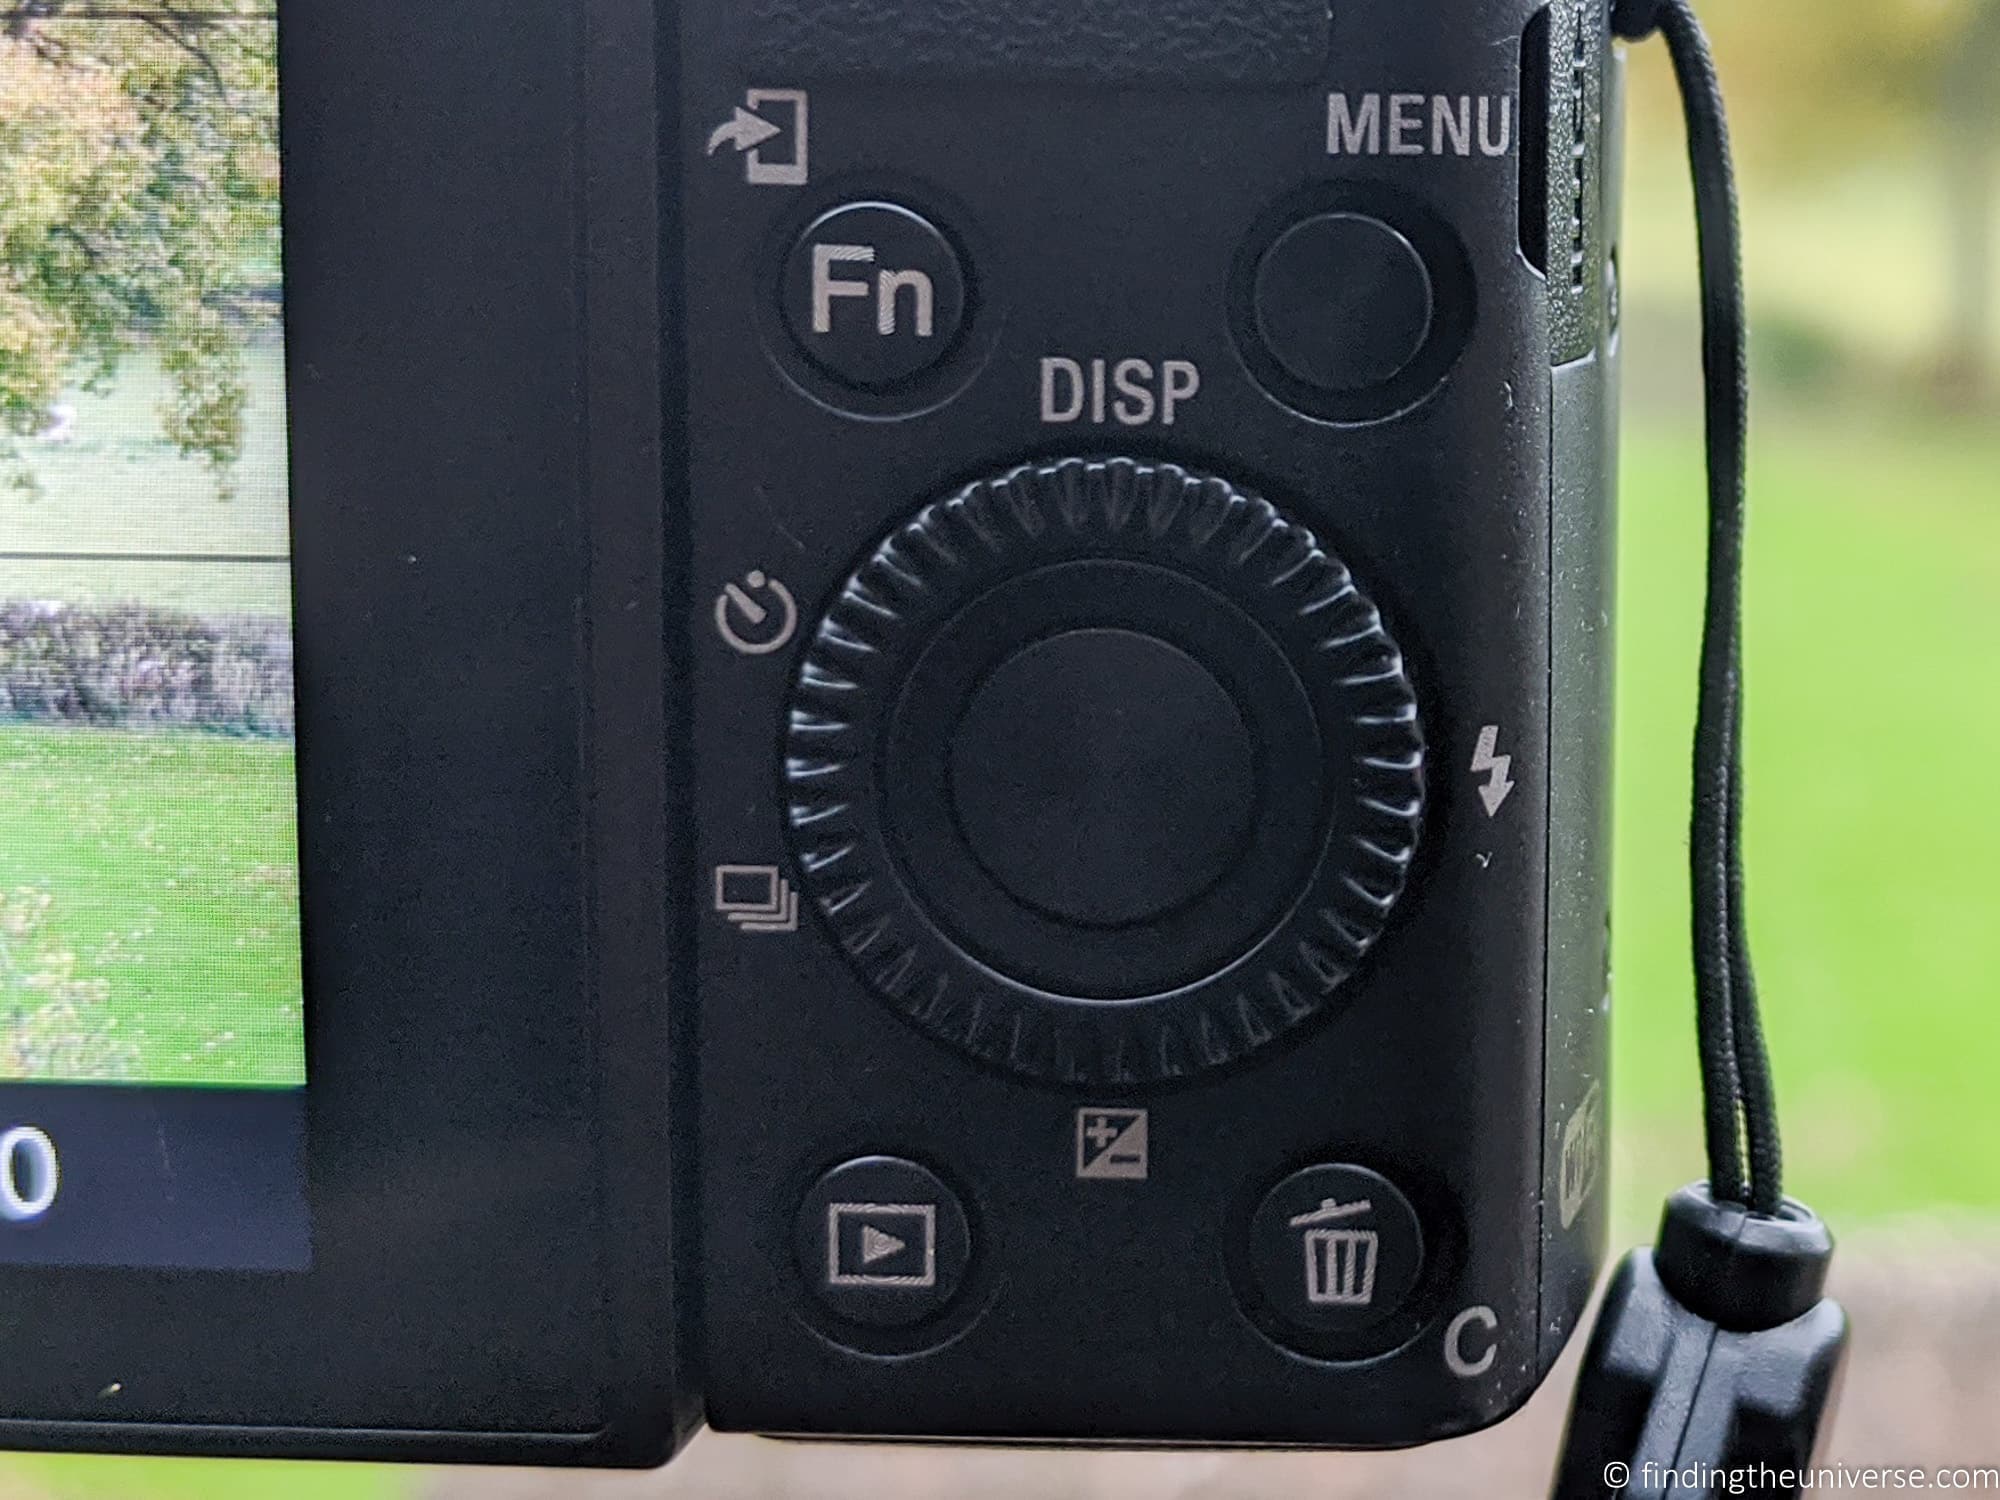
When trying to disable your camera’s flash, I would first start by trying to locate this flash icon on the back of your camera. If your camera doesn’t have it, move on to the specific camera / phone guidelines section below.
Step 2 – Press the flash button
Once you’ve located the flash button, the obvious next step is to press it! This should cause a menu to pop up on the back of your camera screen, which is what you will use next to disable the flash.
Step 3 – Choose the flash off option
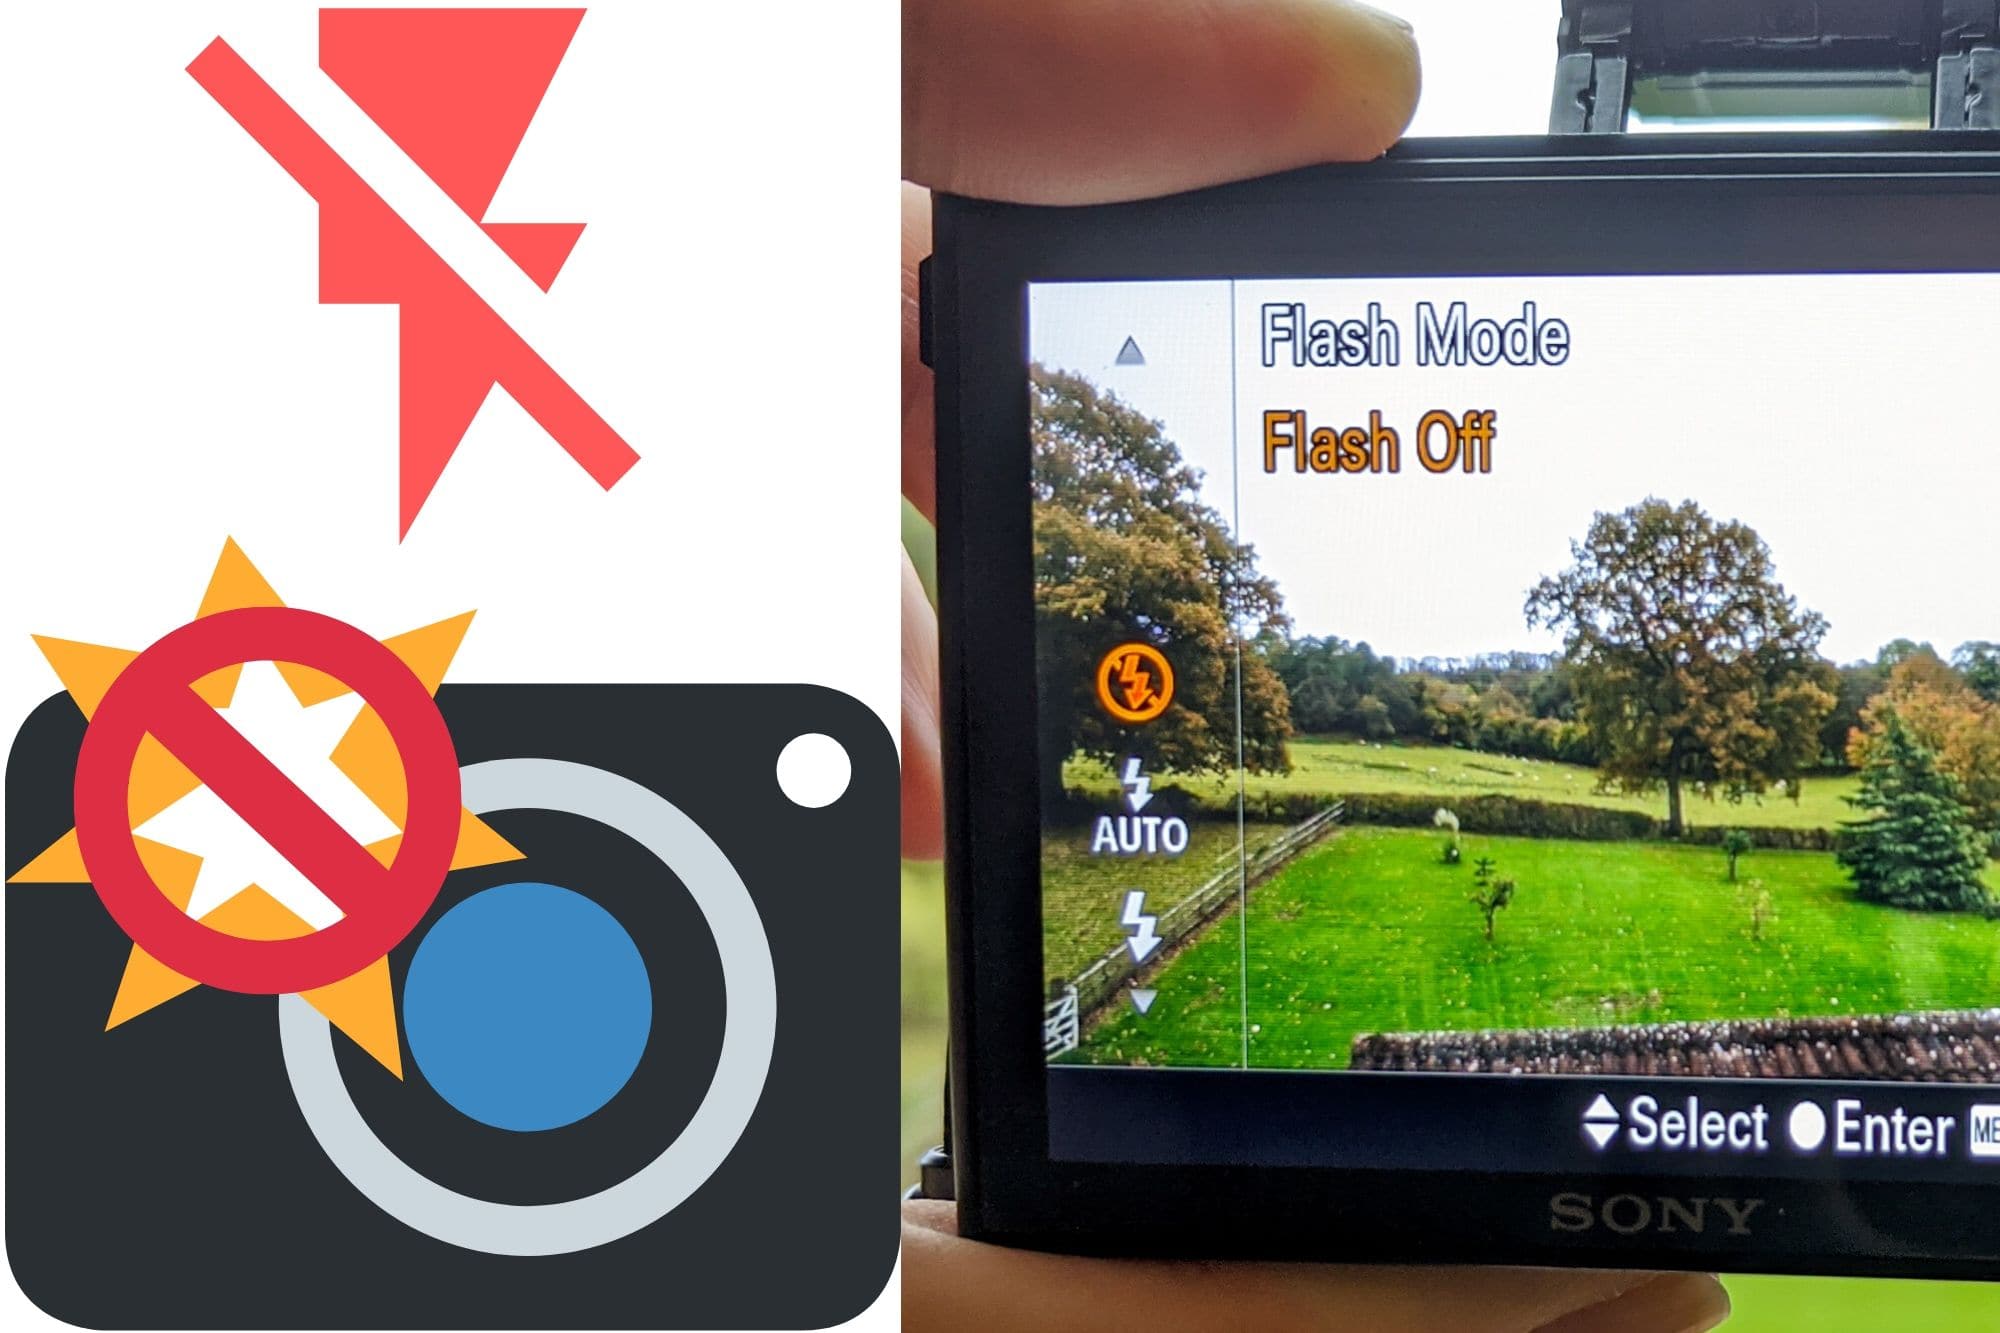
How you navigate the menu to disable your flash menu will vary depending on your camera. On the Sony camera I am using, there is no touchscreen. Navigating the menu is done using the mode dial.
To go up and down, I use the top and bottom buttons on the mode dial. Usually there will be a hint on the screen as to how to navigate for your camera model – you can see this hint on my screen at the bottom right.
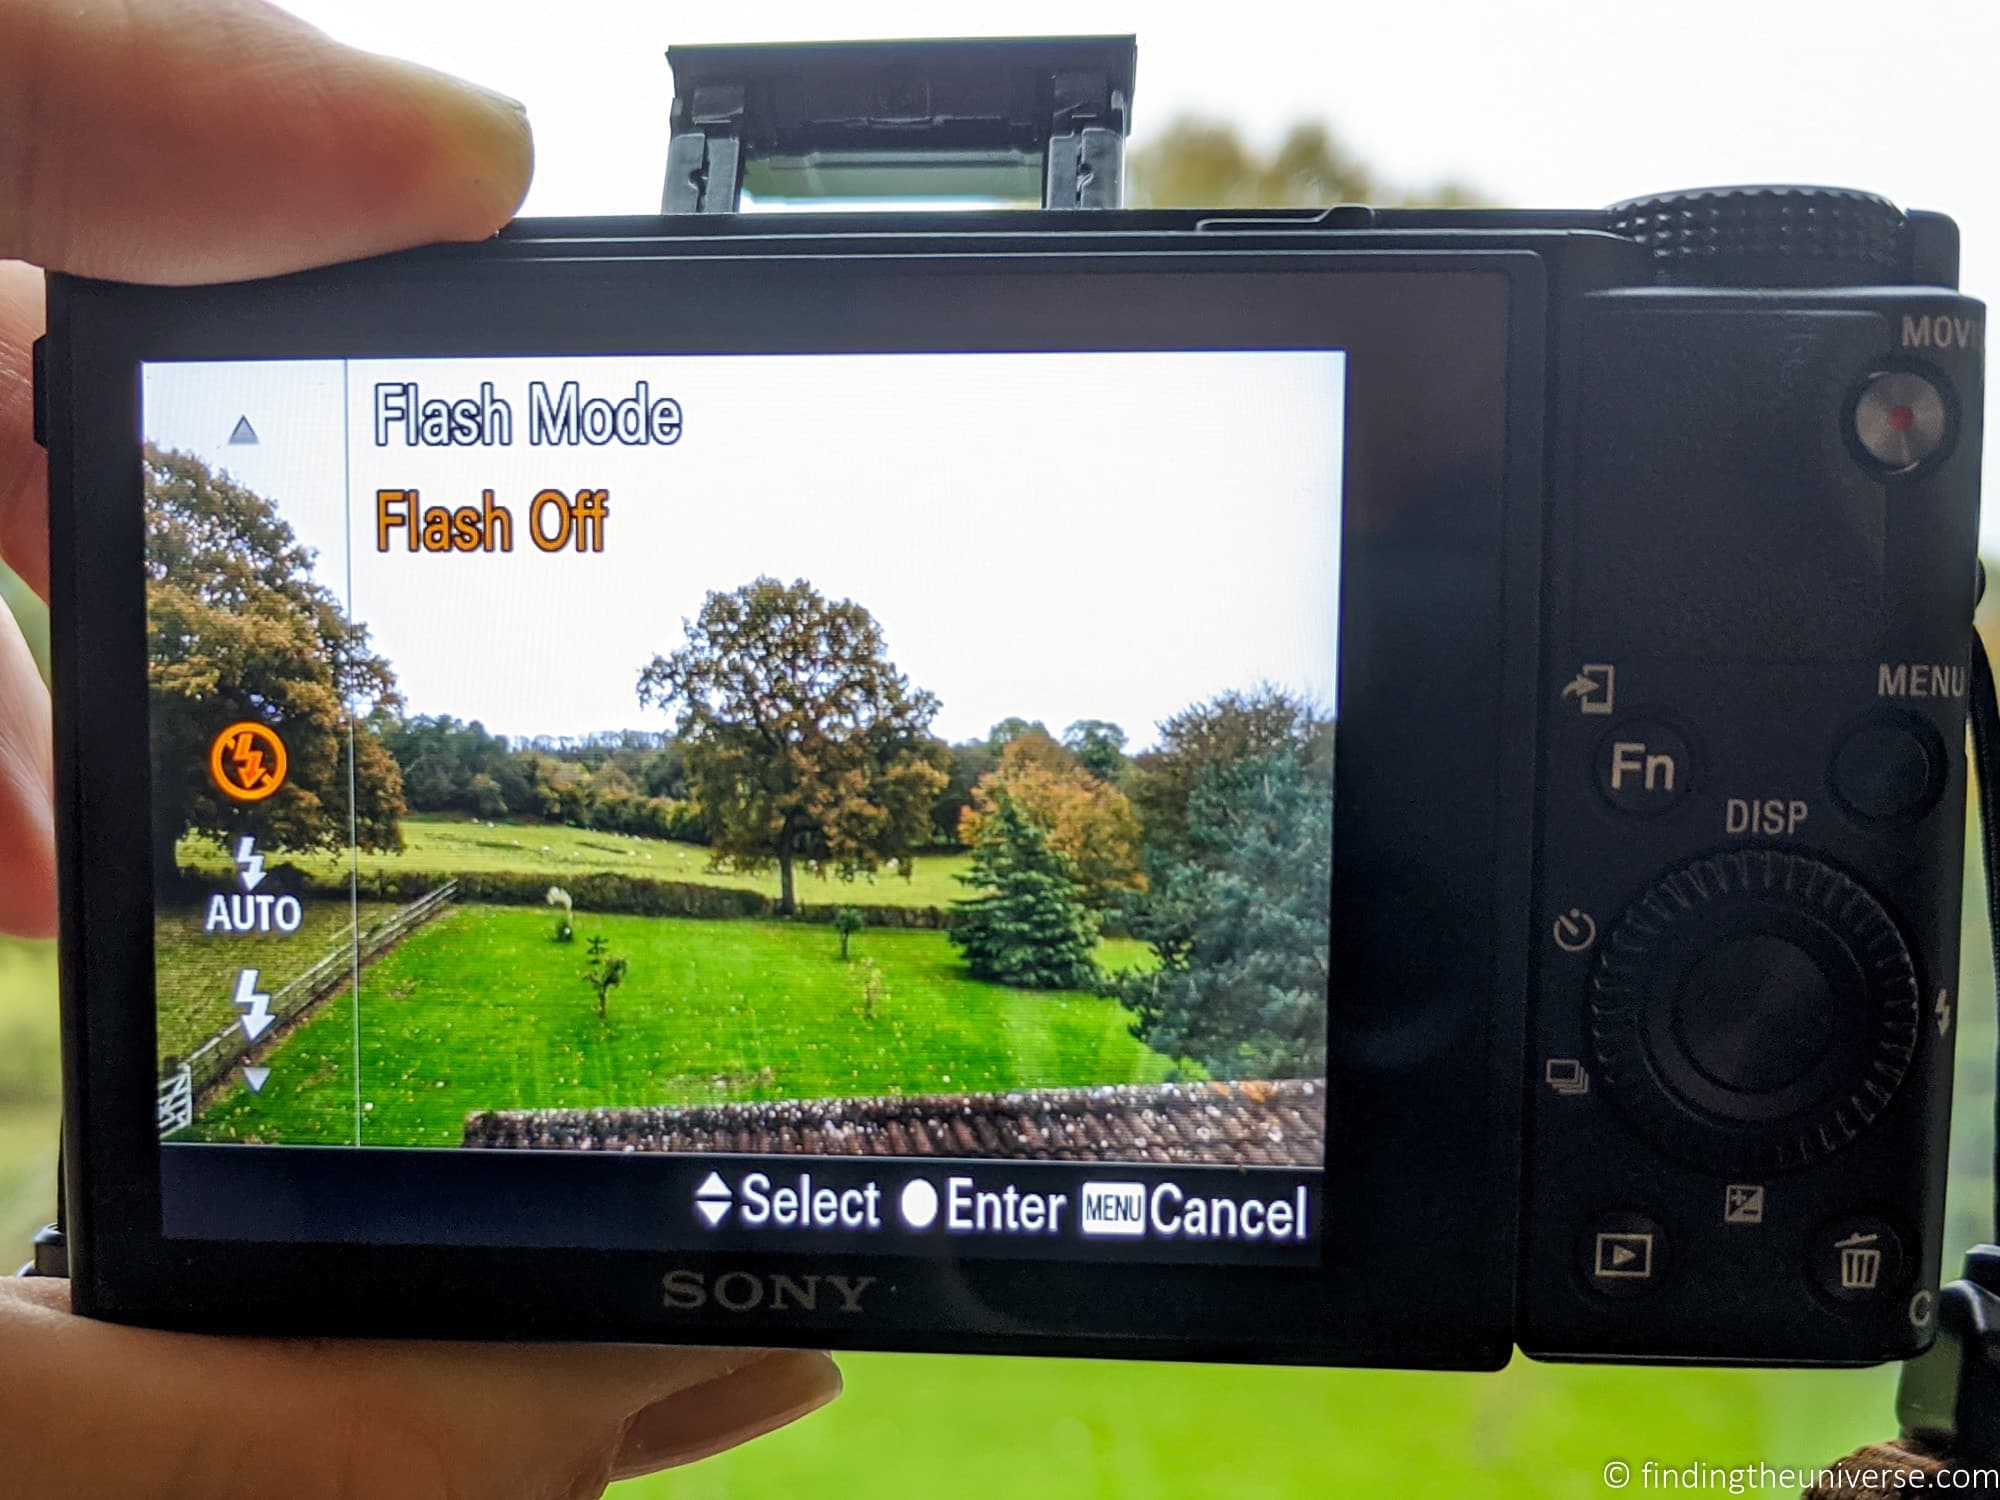
If you have a touchscreen camera, you will likely be able to navigate using the screen itself.
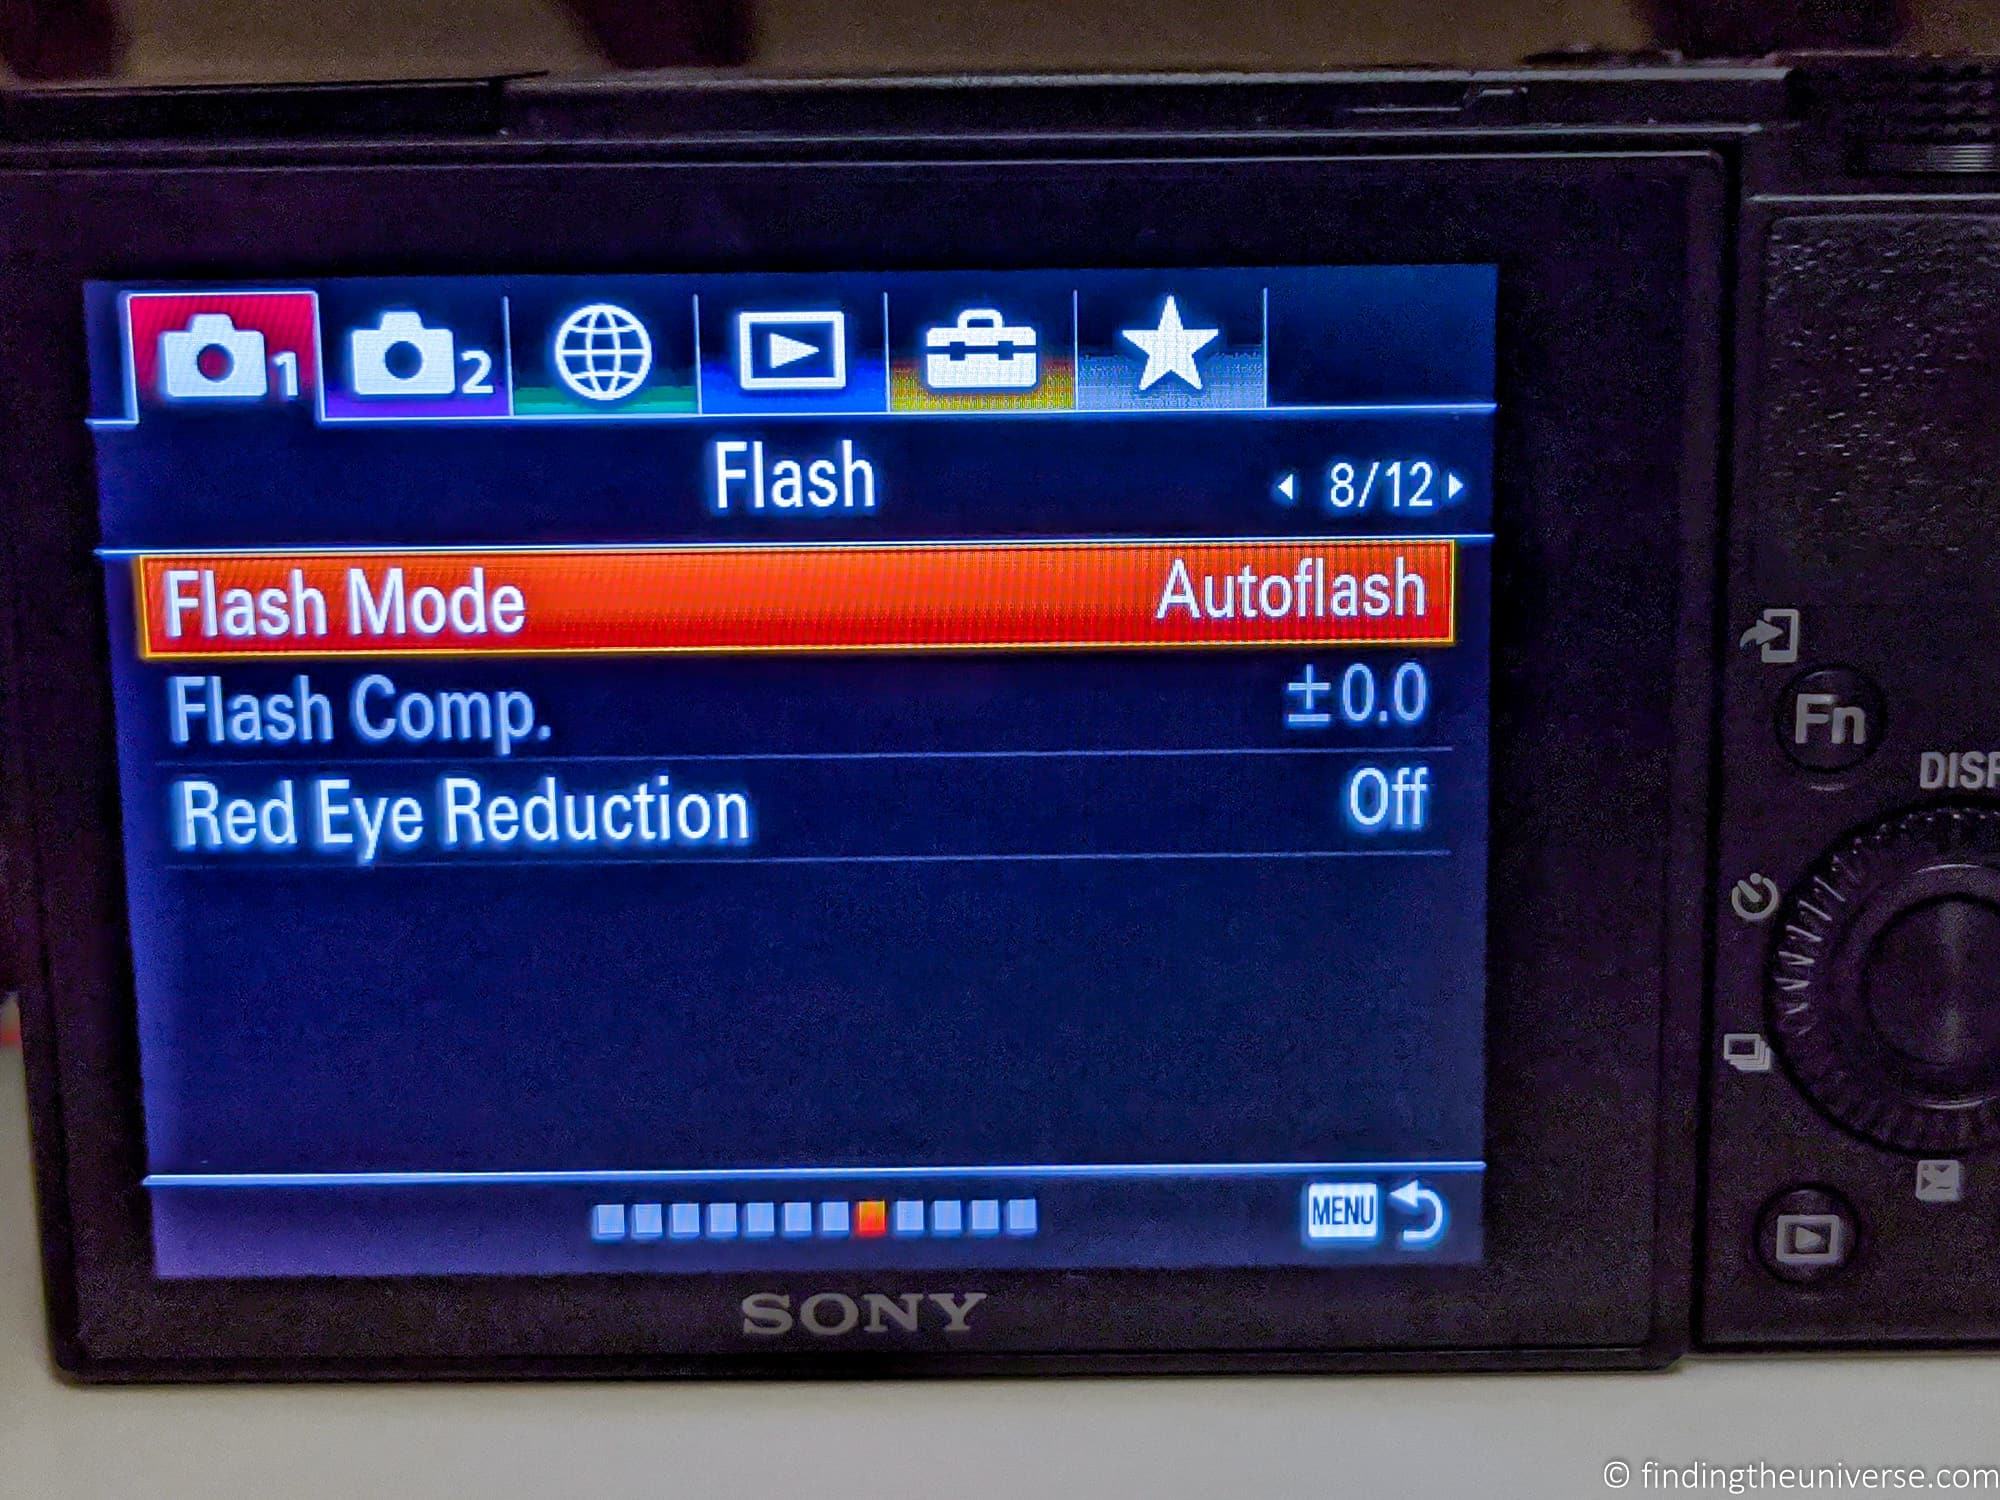
The flash menu will have a variety of options, which will likely be as follows:
- Flash off – completely disables the flash
- Flash auto – the flash will automatically fire if the camera thinks it is too dark
- Fill-flash – the flash will always fire. Useful for backlit subjects, even in daytime
Depending on your camera you may have additional flash options, such as a red-eye mode or more advanced modes. However these aren’t relevant to this post.
The goal is to find and select the flash off mode, which should look like the lightning symbol with a line through it. Depending on your camera, the screen may also say something like “flash off”. You can see what this looks like on my Sony camera in the previous image.
Step 4 – Press ok
Once you have identified and selected the off option for your flash, you just need to select it. For a camera with physical buttons like the Sony in my images, I just press the “enter” button, which is in the middle of my mode dial.
If you have a touchscreen camera, just pressing the flash off button should be enough.
Once you have the flash off, you should be back to where you started, ready to take an image. Depending on your camera model, an icon may now appear on the screen to indicate the flash is off. This will usually look like the flash icon with a line through it.
Step 5 – Final tips
Once you have identified how to turn the flash off and on again for your camera, my advice is to leave it in the off mode until you need to use it.
In my opinion it’s better to get a dark photo from time to time because you forgot to turn the flash on, than possibly damage a priceless artwork when the flash goes off accidentally. Just don’t forget to turn the flash on when you need to use it.
The above guidelines should work for the majority of camera’s on the market, but obviously there are some exceptions. I’ll go through some of the more popular types of camera on the market now.
How to Turn Flash Off on iPhone
The steps below will show you how to turn the flash off on your iPhone, and apply to all the iPhone models that we are aware of.
Note that these steps are for the default camera app on the iPhone. If you install a third party camera app, the steps should be similar, but the location of the flash toggle might change.
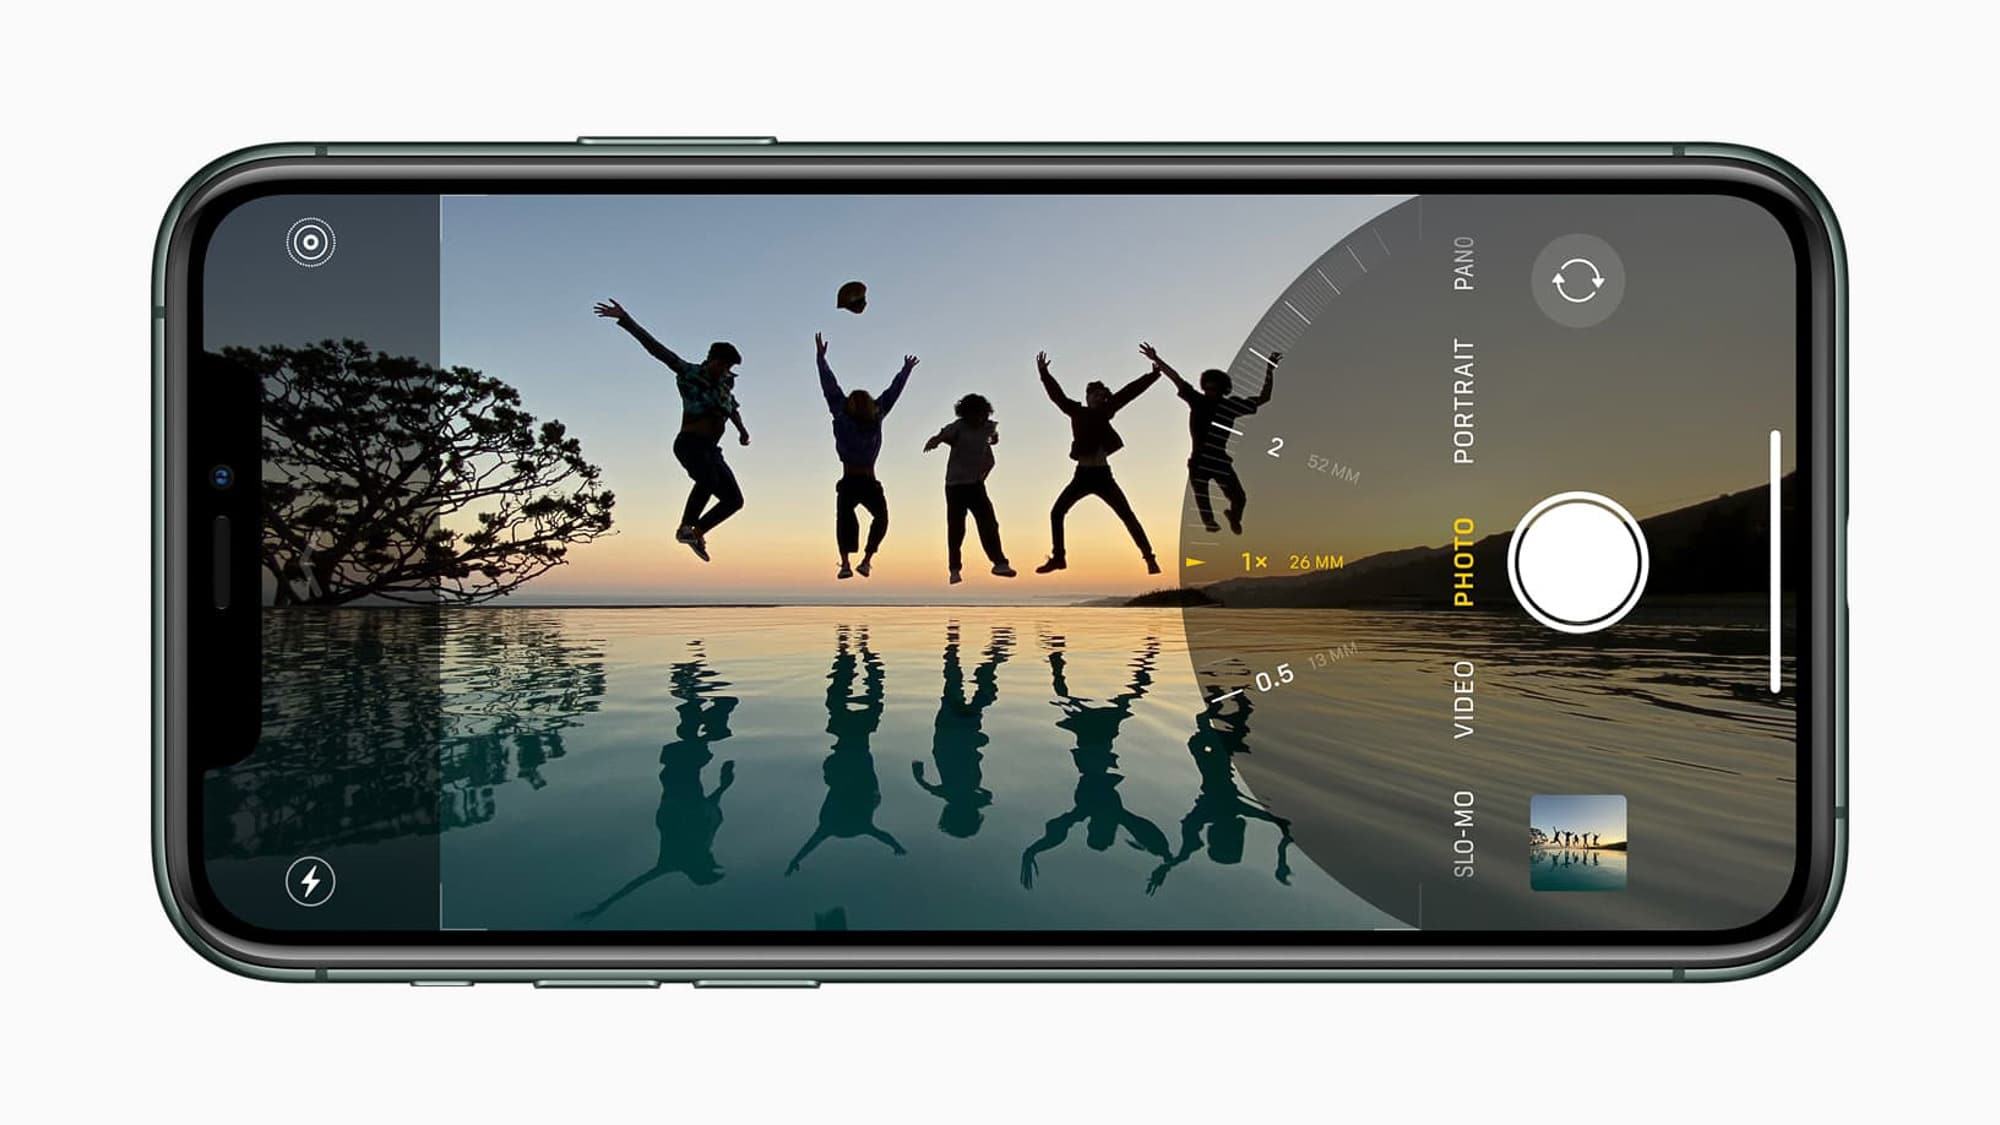
Step 1 – Open the Camera App
This might seem obvious, but you’ll need to be in your iPhone’s camera app in order to turn the flash off.
Step 2 – Press the Flash Button
The flash button on an iPhone camera will be located to the left of the screen. If you are holding the phone vertically, it will be in the top left. If you are holding the phone on its side, it will be at the bottom left.
The flash icon will look like a little lightning symbol. Pressing this with your finger will bring up the flash menu.
Step 3 – Choose the “Flash Off” option
When you press the flash icon a menu will appear with a number of options. These should be:
- Auto – the flash will fire if the camera thinks it needs to
- On – the flash will always fire, regardless of the light
- Off – the flash will never fire
You will want to choose the “off” setting. When you have selected this, you will be returned to the main camera screen, and the flash icon will now show with a line through it, to indicate the flash is off.
How to Turn Off Flash on Android Phones
There are a huge number of Android smartphone manufacturers, many of whom ship their own custom camera applications for their devices. So a one size fits all guide is a bit of a challenge to create.
This guide is for the default Google Camera app which ships on many Android smartphones, including Google’s own line of Pixel phones. If you are using a different app, the below steps will likely be similar but may not be exactly the same as the images show.
Step 1 – Open the Camera App
To turn the flash off, you’ll need to be in the Camera app. Launch this before proceeding.
Step 2 – Open the camera settings menu
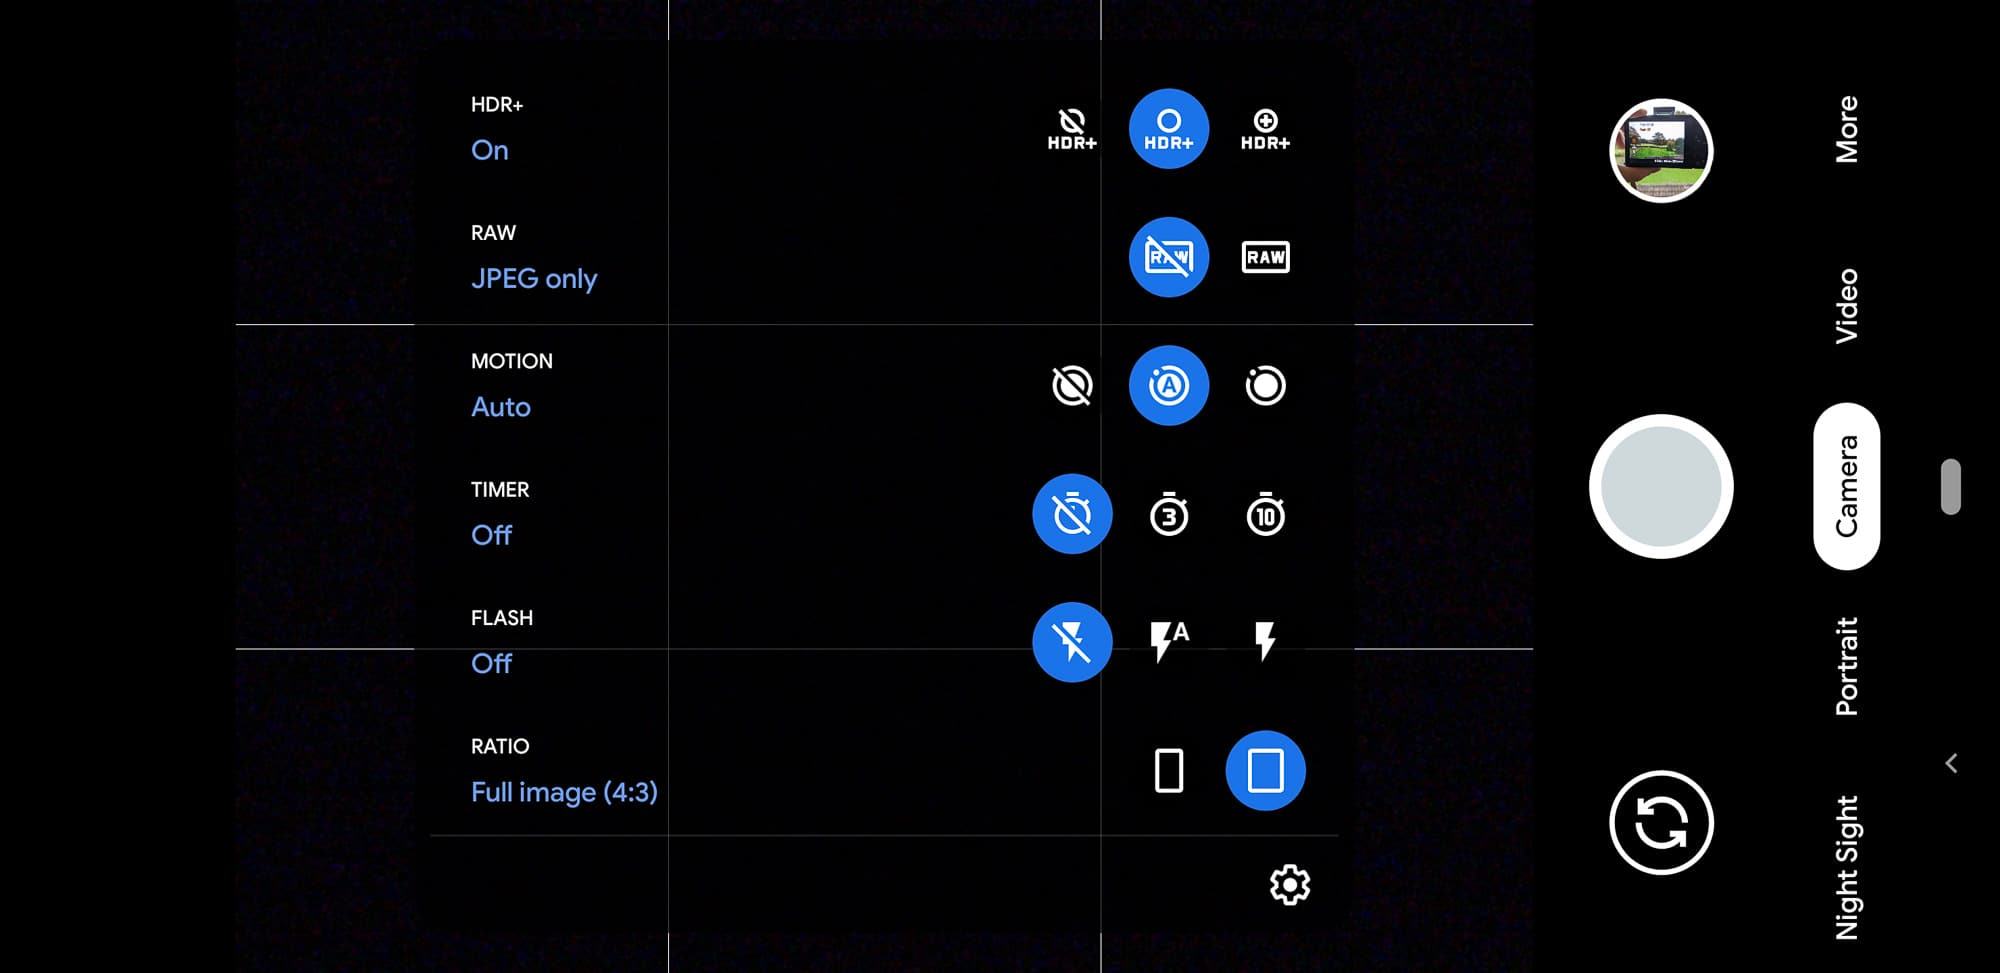
In the latest version of Google Camera, there’s a little arrow near the top of the screen (in portrait mode), and to the left of the screen (in landscape mode). Clicking this will give you access to a number of settings.
If you don’t have this interface, look for either the flash icon on your screen and try touching it, or look for a settings icon (it might look like a gear wheel). One of these methods should bring you to an interface where you can disable the flash.
Step 3 – Locate the flash settings
Once you are in the camera settings menu, find the entry for flash. There should be at least three options, as follows:
- Flash off – this will be a symbol of the flash with a line through it. Selecting this will turn the flash off entirely.
- Flash auto – marked as a symbol of the flash with the letter “A” next to it. The flash will fire if the camera thinks it is required
- Flash on – marked as a symbol of the flash. Flash will always fire, regardless of lighting.
Step 4 – Set the flash to off
Select the “flash off” icon. To dismiss the menu and return to the main camera screen, press anywhere outside the menu.
Currently the Google Camera app does not show you that the flash is disabled, which is a bit of an oversight. Hopefully a future update will resolve this.
How to Turn Off Flash on Cameras without a dedicated Flash button
If you have a compact camera, mirrorless camera or DSLR camera that doesn’t have a dedicated flash button, disabling the flash will require you to follow a different process.
This process will vary from manufacturer to manufacturer, but as a general guide, will likely require you to do one of two things:
If you have a touchscreen camera: there might be a symbol on the touchscreen that lets you control the flash, similar to a smartphone. You are looking for the flash lightning bolt symbol. If you can find it, touch it, and a menu should appear with options to disable the flash.
If you have a non-touchscreen camera: You will need to enter your camera menu and find the flash setting. There should be a “menu” button on the back of your camera. Navigate through your camera’s menus until you find the flash settings, and select flash off.
Further Reading
Well, hopefully the above guide has helped you figure out how to disable the flash on your camera, whatever type of camera you are using.
Before you go, I just wanted to share some of our other photography guides and resources that we think you’ll find helpful in improving your photography.
- We have a guide to common camera problems, which you will probably find answers a lot of your camera questions, from blurry photos to fixing brightness issues
- We have a beginner’s guide to photography to help you get started. We also have a guide to the exposure triangle, which is a key photography concept to master early on.
- Knowing how to compose a great photo is an important photography skill. See our guide to composition in photography for lots of tips on this subject
- We are big fans of getting the most out of your digital photo files, and do to that you will need to shoot in RAW. See our guide to RAW in photography to understand what RAW is, and why you should switch to RAW as soon as you can.
- You’re going to need some way of editing your photos. See our guide to the best photo editing software, as well our our guide to the best laptops for photo editing
- We have a guide to improving Adobe Lightroom Classic CC performance. It’s our favourite editing software, but can be a bit slow if not properly configured!
- If you’re looking for advice on specific tips for different scenes, we also have you covered. See our guide to Northern Lights photography, long exposure photography, fireworks photography, tips for taking photos of stars, and cold weather photography.
- If you’re looking for a great gift for a photography loving friend or family member (or yourself!), take a look at our photography gift guide for some inspiration
- We have a detailed guide to how to use a DSLR camera
- We have a guide to why you need a tripod, and a guide to choosing a travel tripod
- If you’d like a book to help you understand all this, check out this guide to mastering shutter speed, aperture and ISO
- Our guide to the best travel camera – a great overall post to get started with
- Our guides to the best compact camera, best mirrorless camera and best DSLR camera. These posts dive deep into each of these camera types to help you decide which might be best for you
- Our guide to the best camera for hiking and backpacking. Different needs require different cameras, and this guide will help you pick a camera if you hike or backpack regularly
- Our guide to the best lens for travel photography. If you buy a DSLR or mirrorless camera, you’ll be able to change the lens. This guide will help you figure out the best lens for your camera and budget.
- Finally, if you want to improve your photography overall, you can join over 1,000 students on my travel photography course. I’ve been running this since 2016, and it has helped lots of people take their photography to the next level.
And that’s it for our guide to disabling the flash on your camera. As always, if you’ve got any questions or comments about this post, or photography in general, just pop them in the comments below and we’ll get back to you!
Olivia says
Thanks for this helpful post. I am trying to help my father turn off his flash on his new camera, it is a Olympus OM-D E-M5 Mark II. We thought we had it and then it went off on some auto setting I think…not very tech savvy so any help appreciated.
Laurence Norah says
Hi Olivia!
My pleasure. So, the Olympus OM-D E-M5 Mark II doesn’t have a built-in flash as far as I know, but it does have a clip-on flash accessory. Can you confirm if that is what you are using, or is it a different flash unit?
If if is the Olympus clip-on unit, it should have an on/off lever in the middle of the back of the flash. Moving this lever up and down should disable the flash. You can see this described on page 63 of the manual here.
The other way to disable the flash is through the system menu for the camera. To do this, press the “ok” button on the back of the camera. One of the options that you should now be able to select should be flash mode, which will be on the left hand side of the screen in the middle. There will be various options – to fully disable the flash select “flash off”.
I hope this helps – let me know if you need more advice!
Best
Laurence