A safari puts you closer to a huge range of wildlife than almost any other kind of trip, and for many of us, photographing that wildlife is a big part of the appeal. There are, however, some unique challenges to taking photos on safari that you don’t run into anywhere else.
I’ve been a professional travel photographer for over 15 years, and I’ve been lucky enough to shoot on a number of safaris across both Africa and Asia, from Kenya and Uganda to Sri Lanka. Every photo in this guide is one of mine, shot on those trips, and I’ve listed the camera settings I used under most of them so you can see exactly how each shot came together.
Table of Contents:
Safari Photography: The Quick Take
If you only take five things away before your first game drive, make it these.
- Get as much lens reach as you can. A focal length of 400mm or more is what lets you fill the frame with an animal that won’t let you get close, and on safari, reach matters more than almost anything else.
- Keep your shutter speed up. For anything moving, start at 1/1600th of a second and go faster. I shoot most wildlife around there and only drop lower for a deliberately still subject resting on a bean bag.
- Shoot in burst mode with continuous autofocus. Animals move without warning, and firing a burst while the camera tracks the eye is how you come home with one sharp frame instead of ten soft ones.
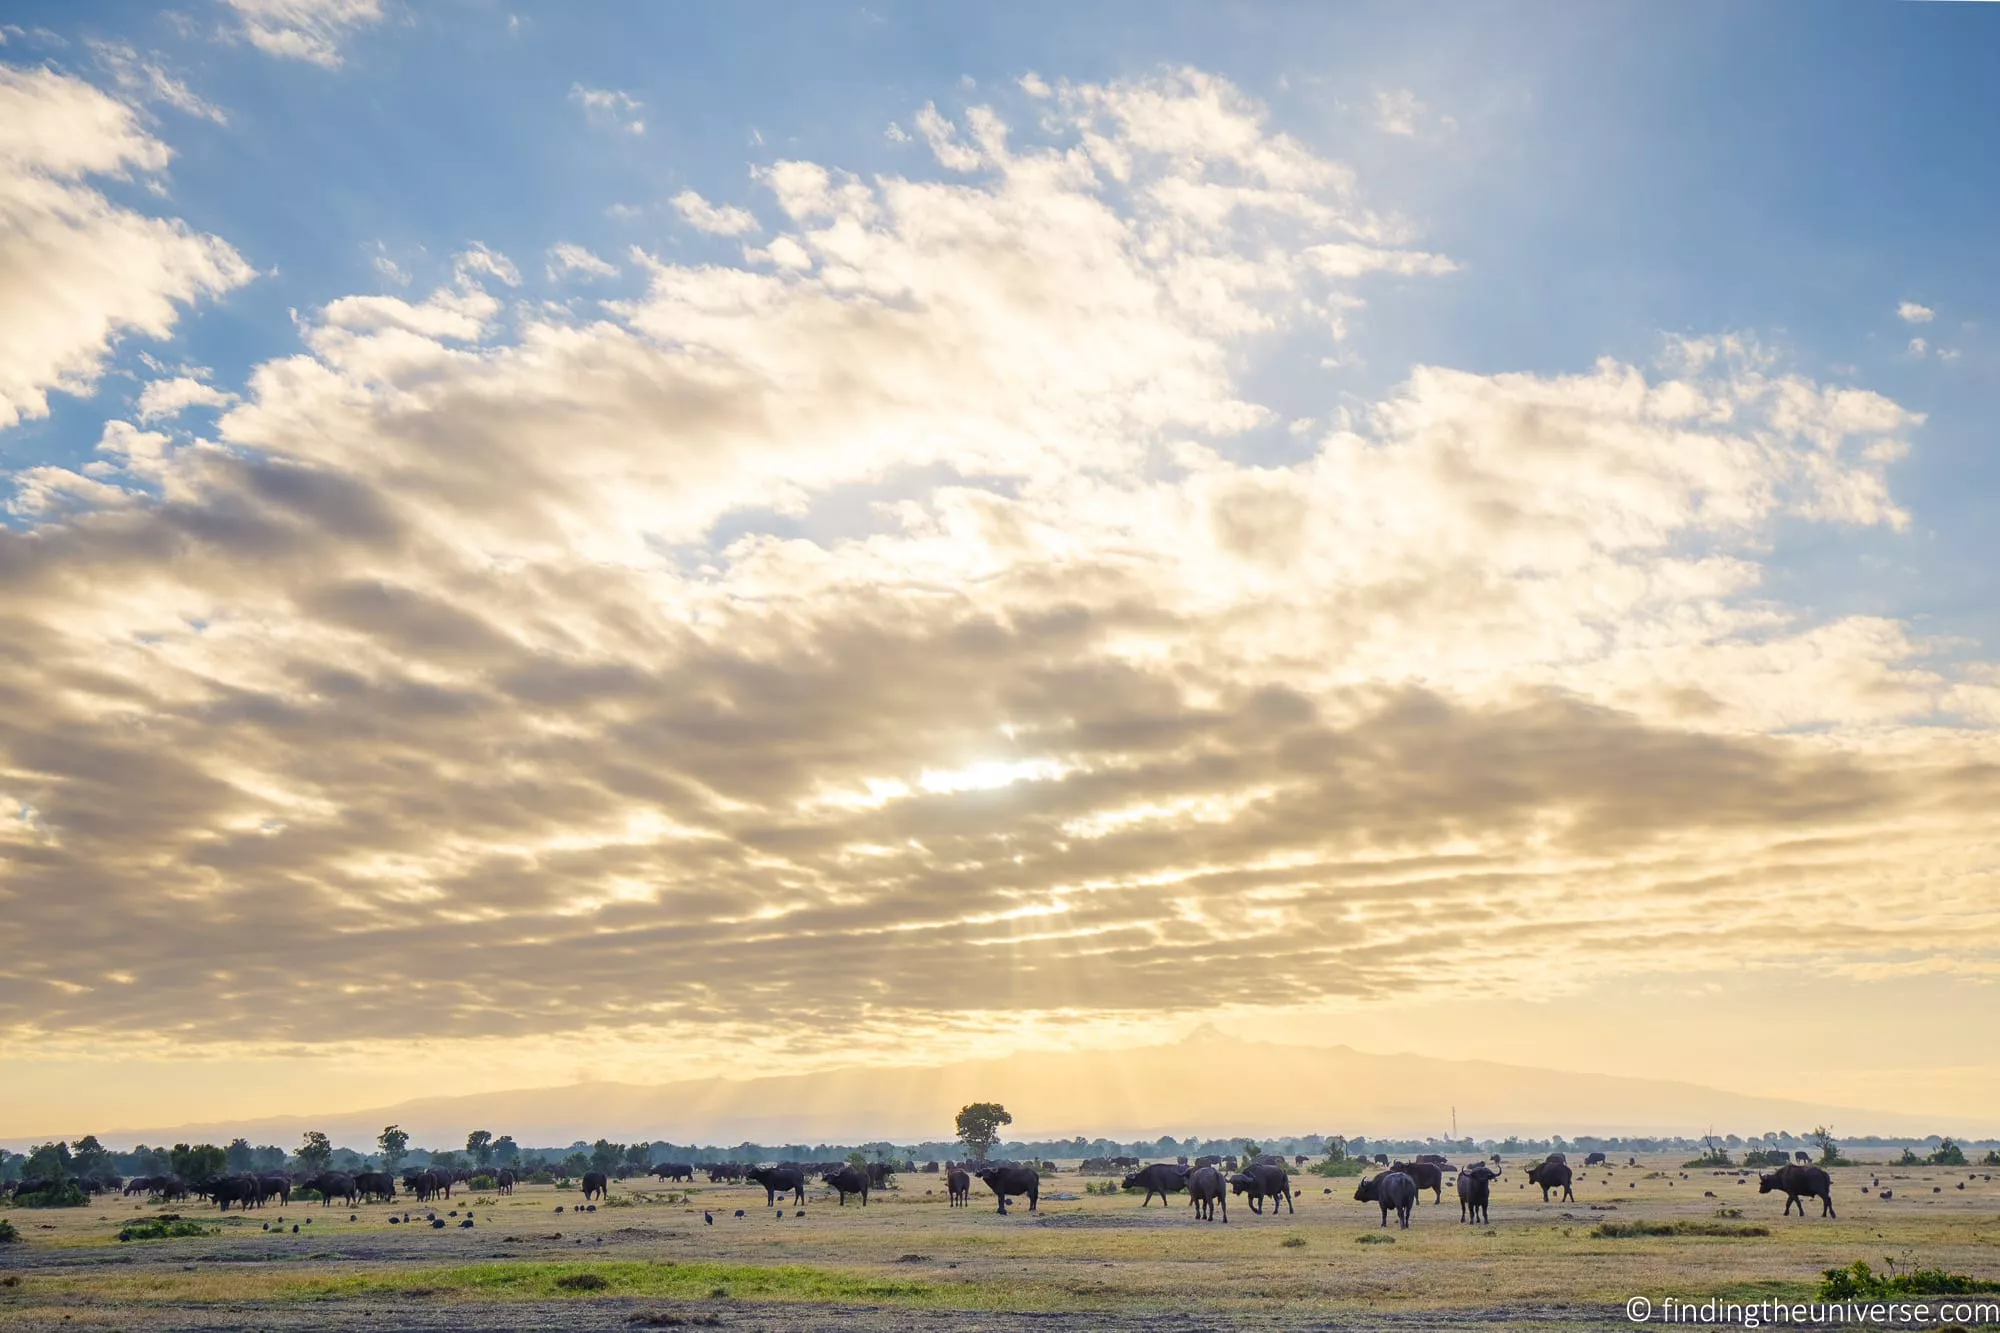
- Be out at first and last light. The couple of hours after sunrise and before sunset give you soft, warm light and the most active animals. The middle of the day is hot, hazy, and quiet.
- Be patient. The best sightings come from waiting at one animal rather than rushing off to the next. Patience is the single most useful wildlife photography skill there is.
The rest of this guide unpacks all of that, with example shots and the settings behind them. I’ve grouped it into planning and gear, camera settings, working in the field, and what to do after the drive. A safari is a big investment for many of us, and is often a once in a lifetime trip, so getting great photos to remember it by really is worth the effort.
Planning Your Safari and Choosing Your Gear
The photos you come home with are shaped long before you pick up your camera, by where you go, when you go, and what you pack. This first section covers all of that.
Plan Where you Want to Go
The first thing you are going to have to do is decide where you want to go on safari. It’s likely that you already have an idea as to what you want to see and photograph, be it specific animals or birds, or maybe you are interested in certain landscapes.
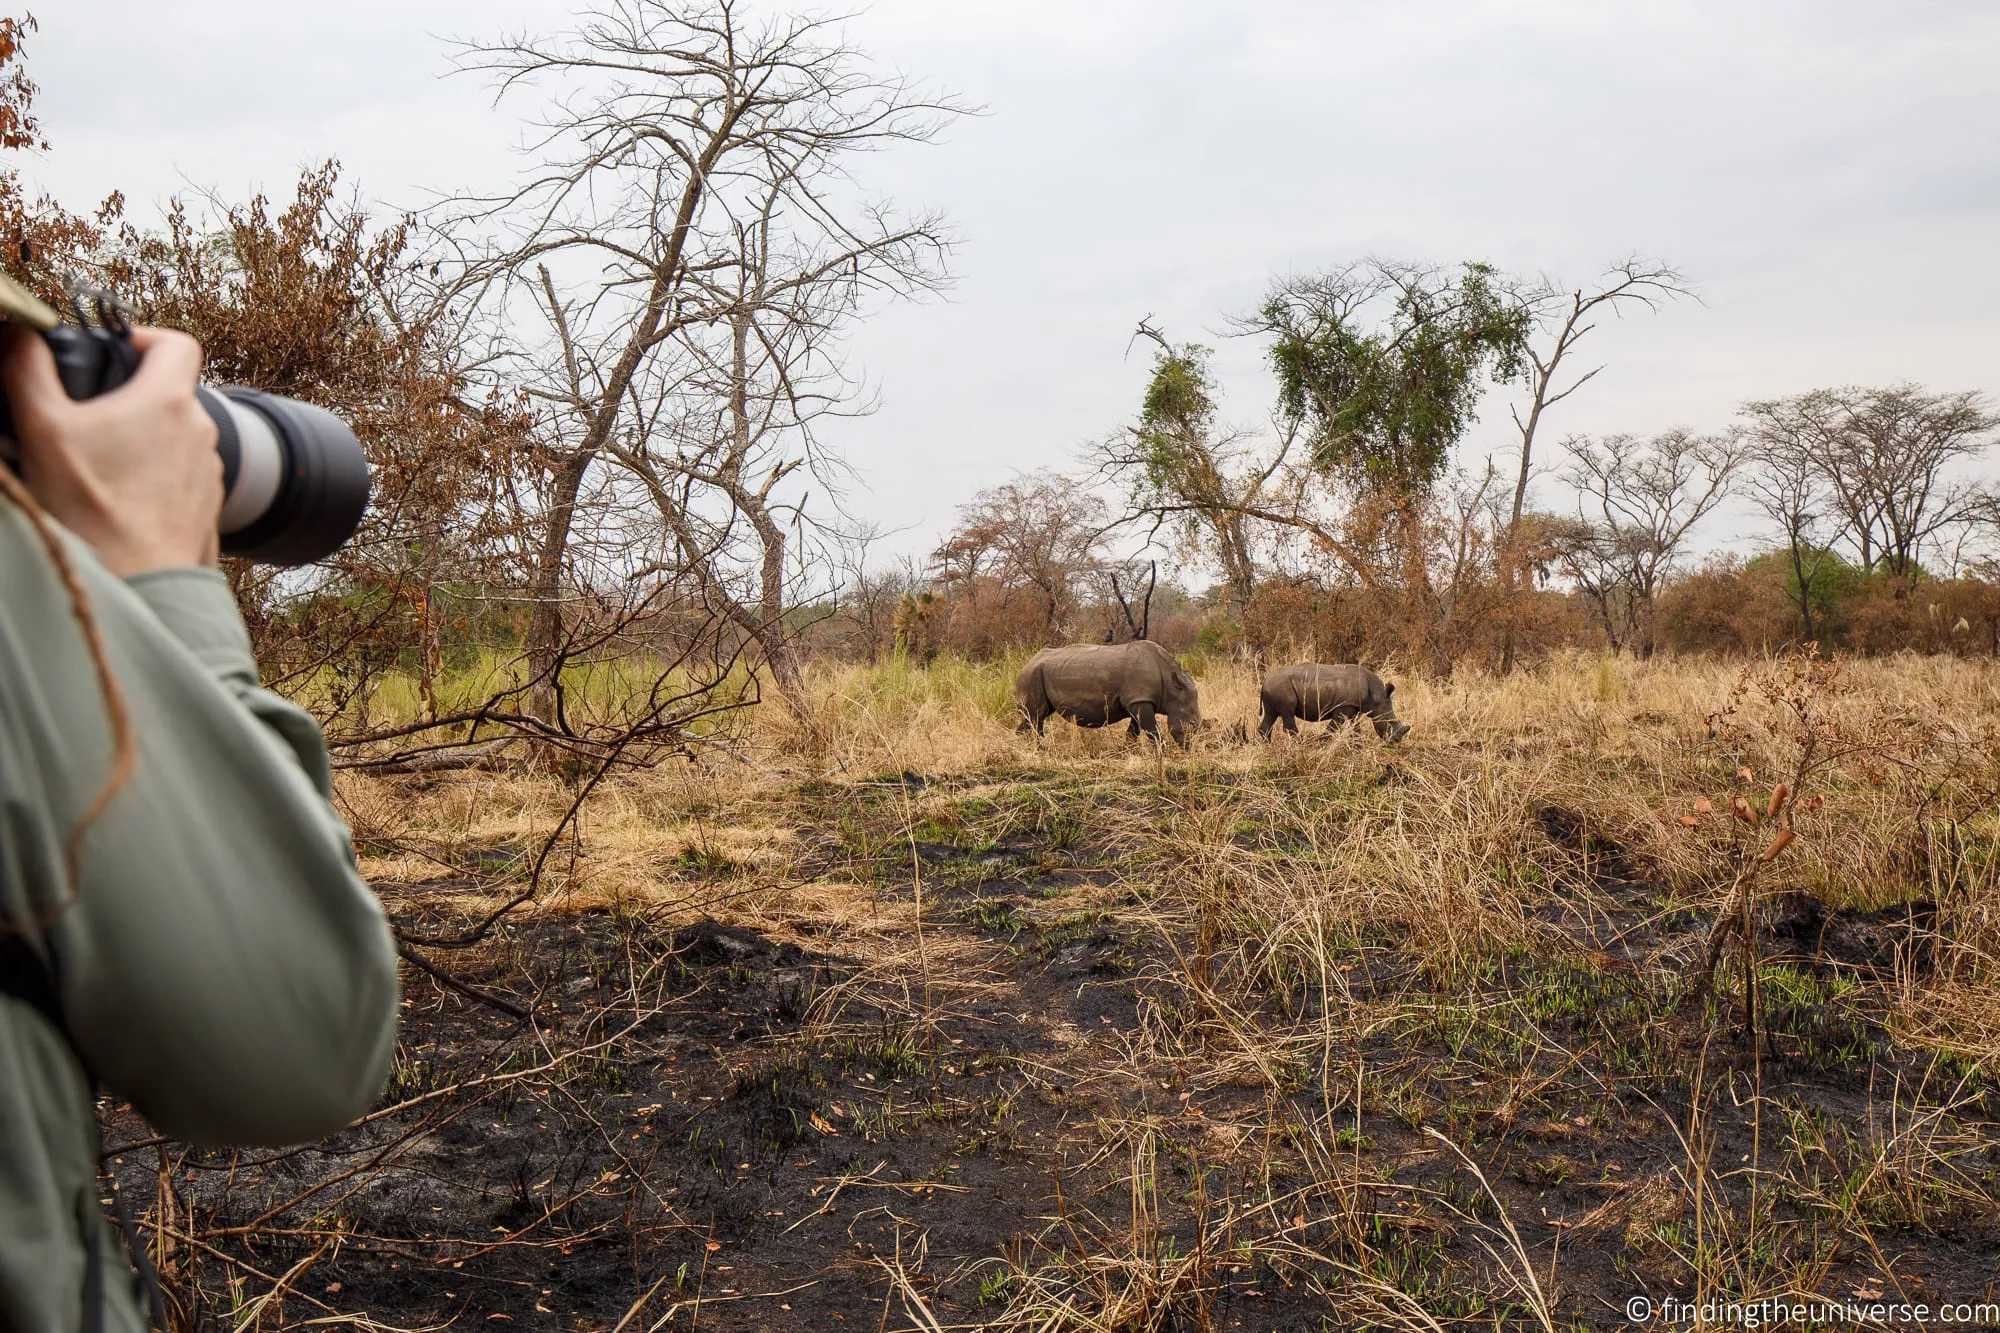
The main thing is that you pick a destination that will give you a good chance of seeing the things you really want to see and photograph. This is particularly the case with animals or birds that are rarer, like rhinos.
On a trip across East Africa, we knew that we wanted to see and photograph things like gorillas, chimpanzees, rhinos, and spoonbill storks. We picked the countries we visited as well as the time of year we travelled to ensure that we would have a good chance of seeing these particular animals.
We also wanted to see the Great Wildebeest Migration on that trip. The migration itself is always taking place, a continuous year-round movement of around two million animals around the Serengeti and Maasai Mara ecosystem, so it was just a question of researching where the herds would be at the time of year we would be visiting. Do note that the famous river crossings tend to happen from around late July into September, and the calving season is roughly late December to March, so if there’s a particular spectacle you want to see, time your trip around it.
Choosing the right destination is definitely the first step to getting the photos you want on your safari.
Research Your Chosen Safari Location
Once you have chosen your safari destination, do some research to better understand your trip itinerary and the wildlife, landscape, and climate of the destination.
All of these things can affect how you will want to prepare for your safari and the type of camera equipment you might need.
For instance, if your main photography goal of the trip is to take photos of lions, you will want to try to make sure that you spend a sufficient amount of time in places with healthy populations of lions to increase your chances of seeing and photographing them. Lions are often best seen in savanna areas.
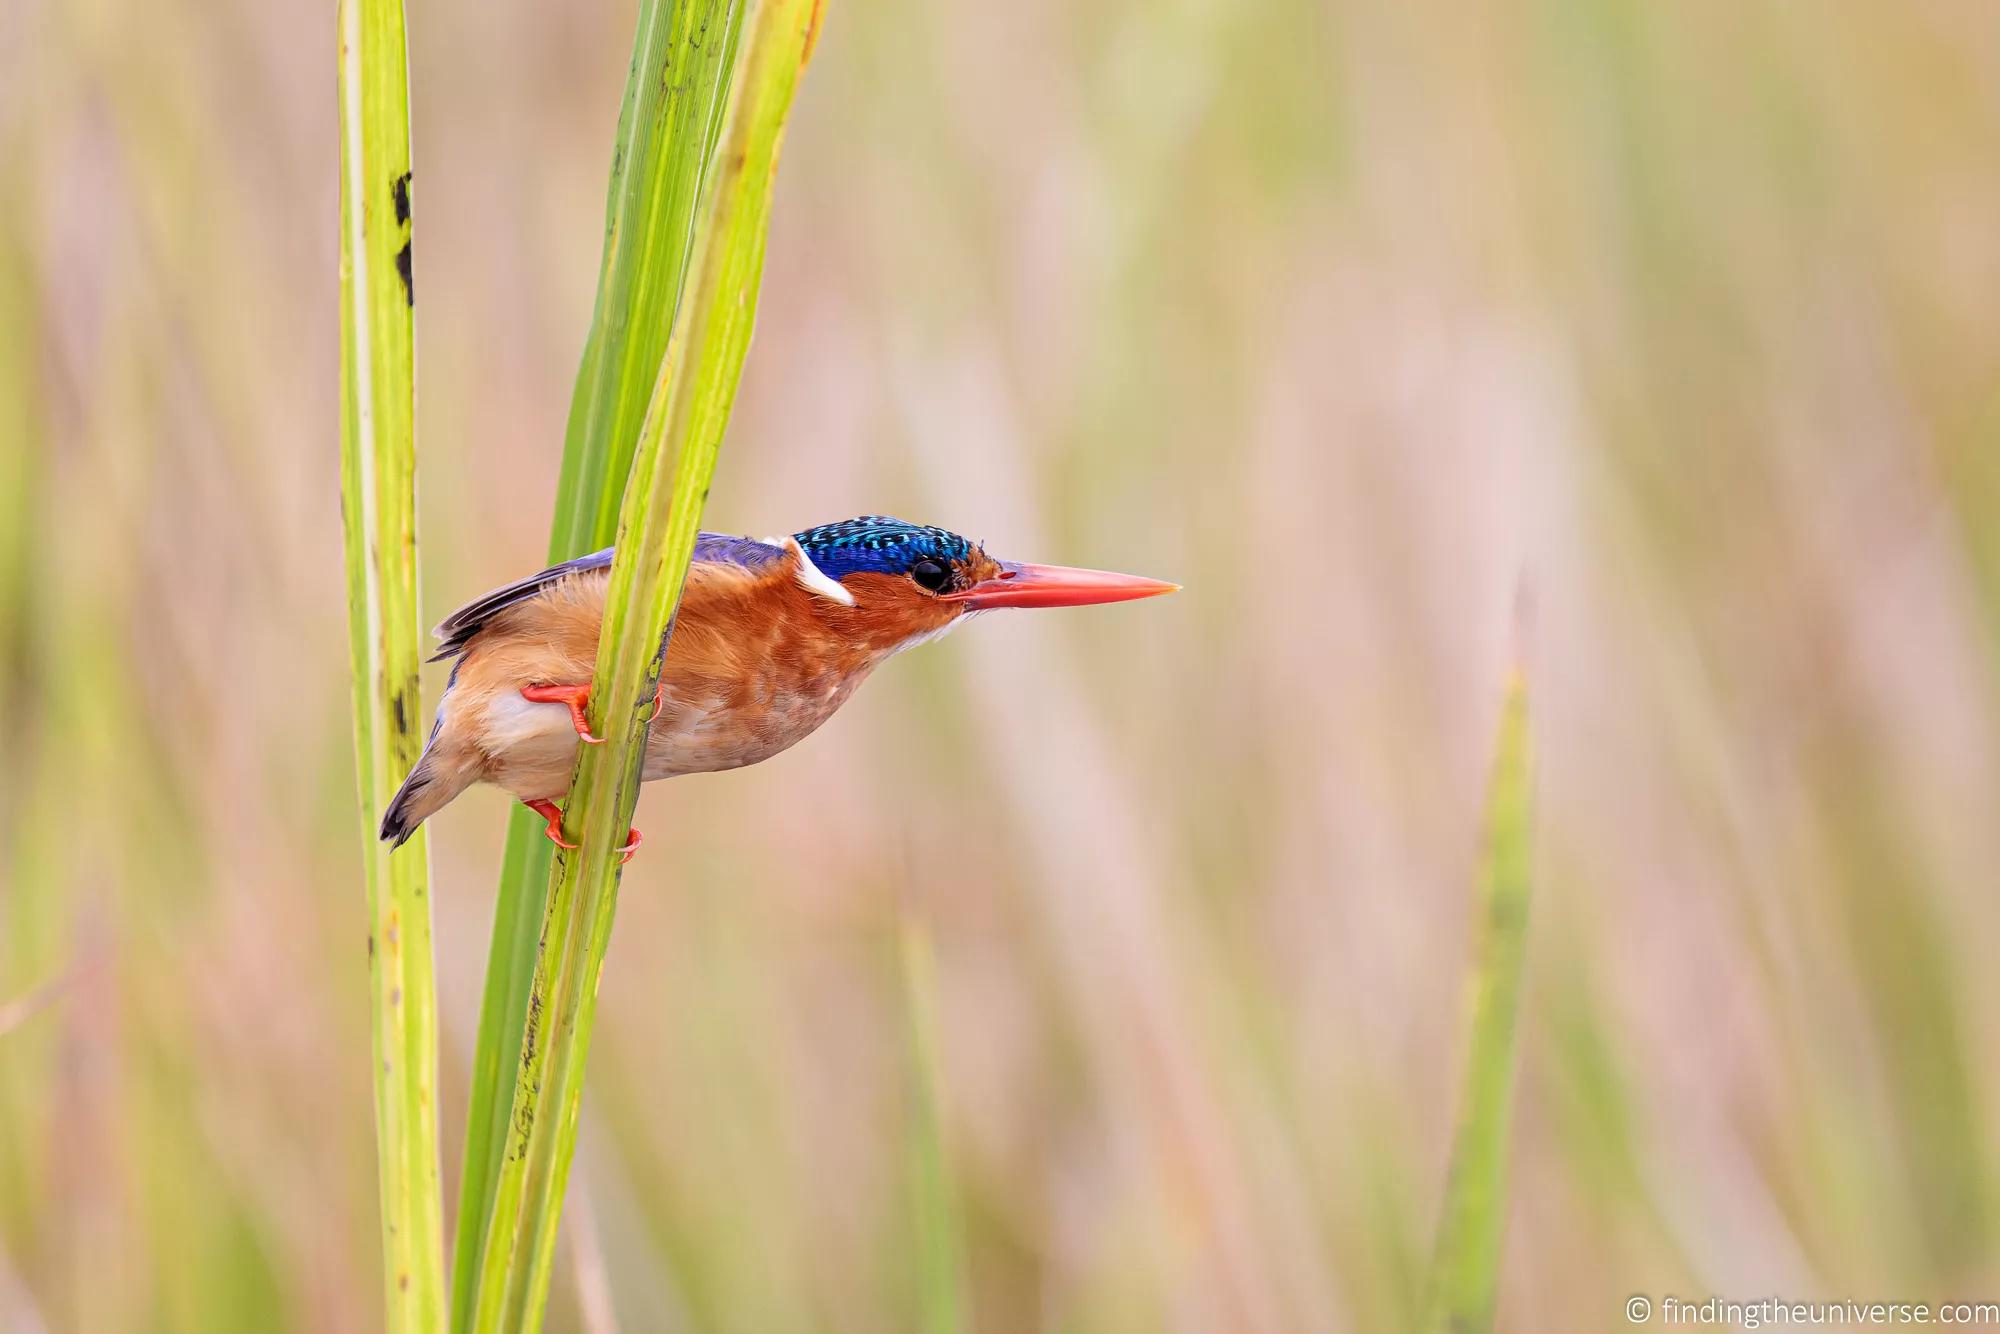
However, if you are interested in malachite kingfishers, you’ll want to make sure that you spend enough time in wetland areas for a good chance to see these birds. These little birds are best spotted and photographed either from a boat or on foot.
This research will also help you decide on the equipment you will need to take with you. For photography of smaller birds for example, you’re likely going to need a longer lens. If you are more interested in landscapes, then a wide-angle lens will be an essential item.
Finally, check out the climate for the country you are visiting and the time of year you plan to visit. Having an idea of what to expect will ensure you bring the right clothing as well as any protective equipment like camera rain covers on your trip.
A good field guide is also worth packing, both to help you research beforehand and to identify what you’re looking at in the moment. Jess and I travel with the pocket guides to the Mammals of East Africa and the Birds of East Africa, which are compact enough to keep in the vehicle and brilliant for settling the inevitable “what was that?” debates.
Choose the Right Camera for Safari
One of the main decisions you’ll have to make when planning your safari trip is what camera to take with you. This decision will have you weighing various factors, from your budget through to the size and weight of the camera.
When you are deciding how much to spend and how much you are willing to carry with you, consider what sort of images you want to get. If you are looking for shots of fast action or in low light, then you will want to invest more money in a high-end set-up.
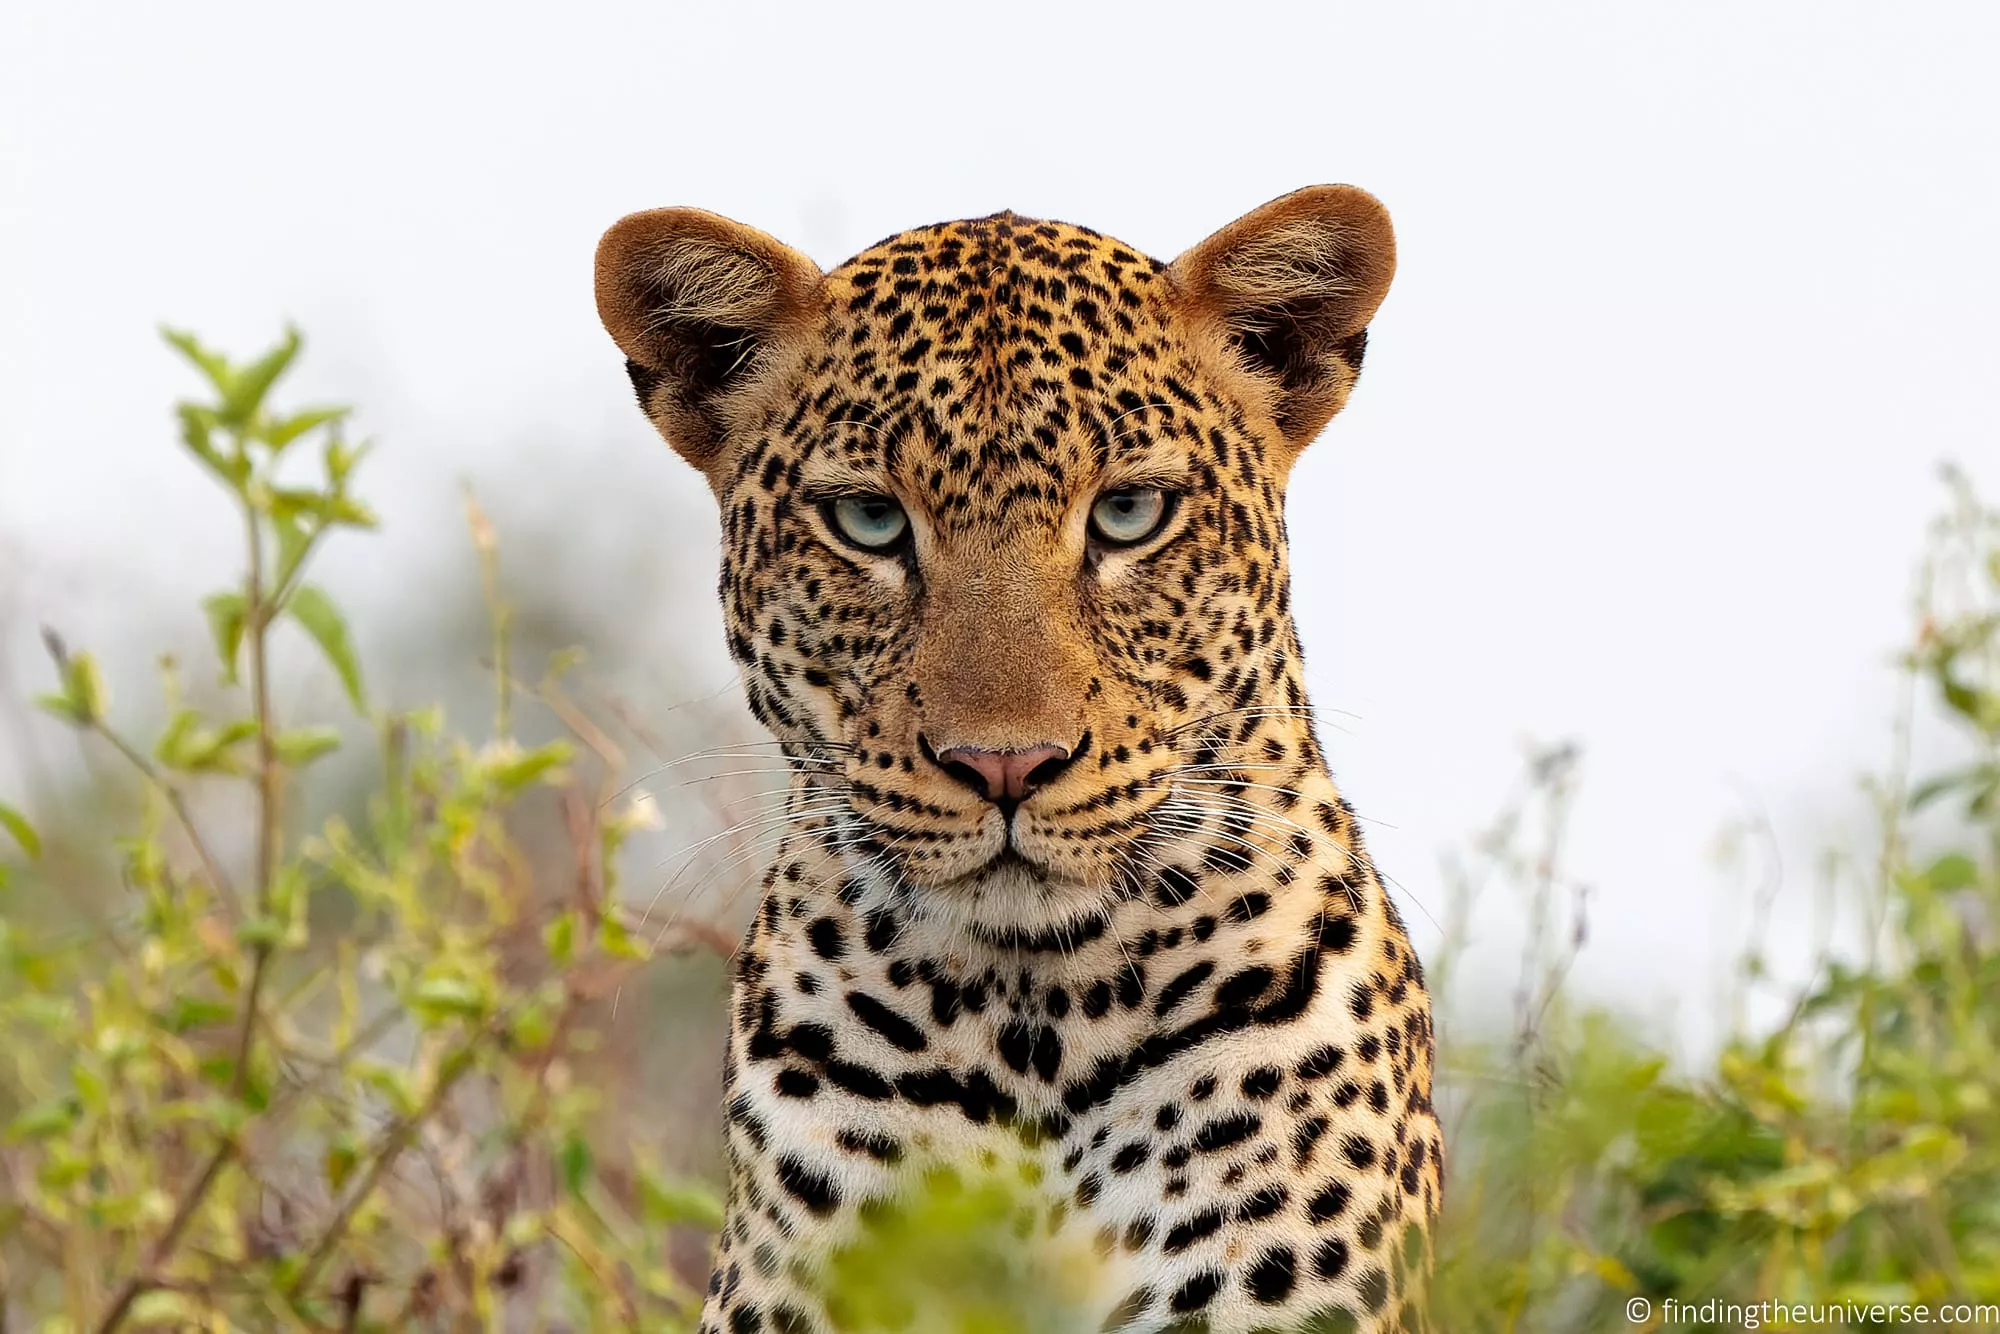
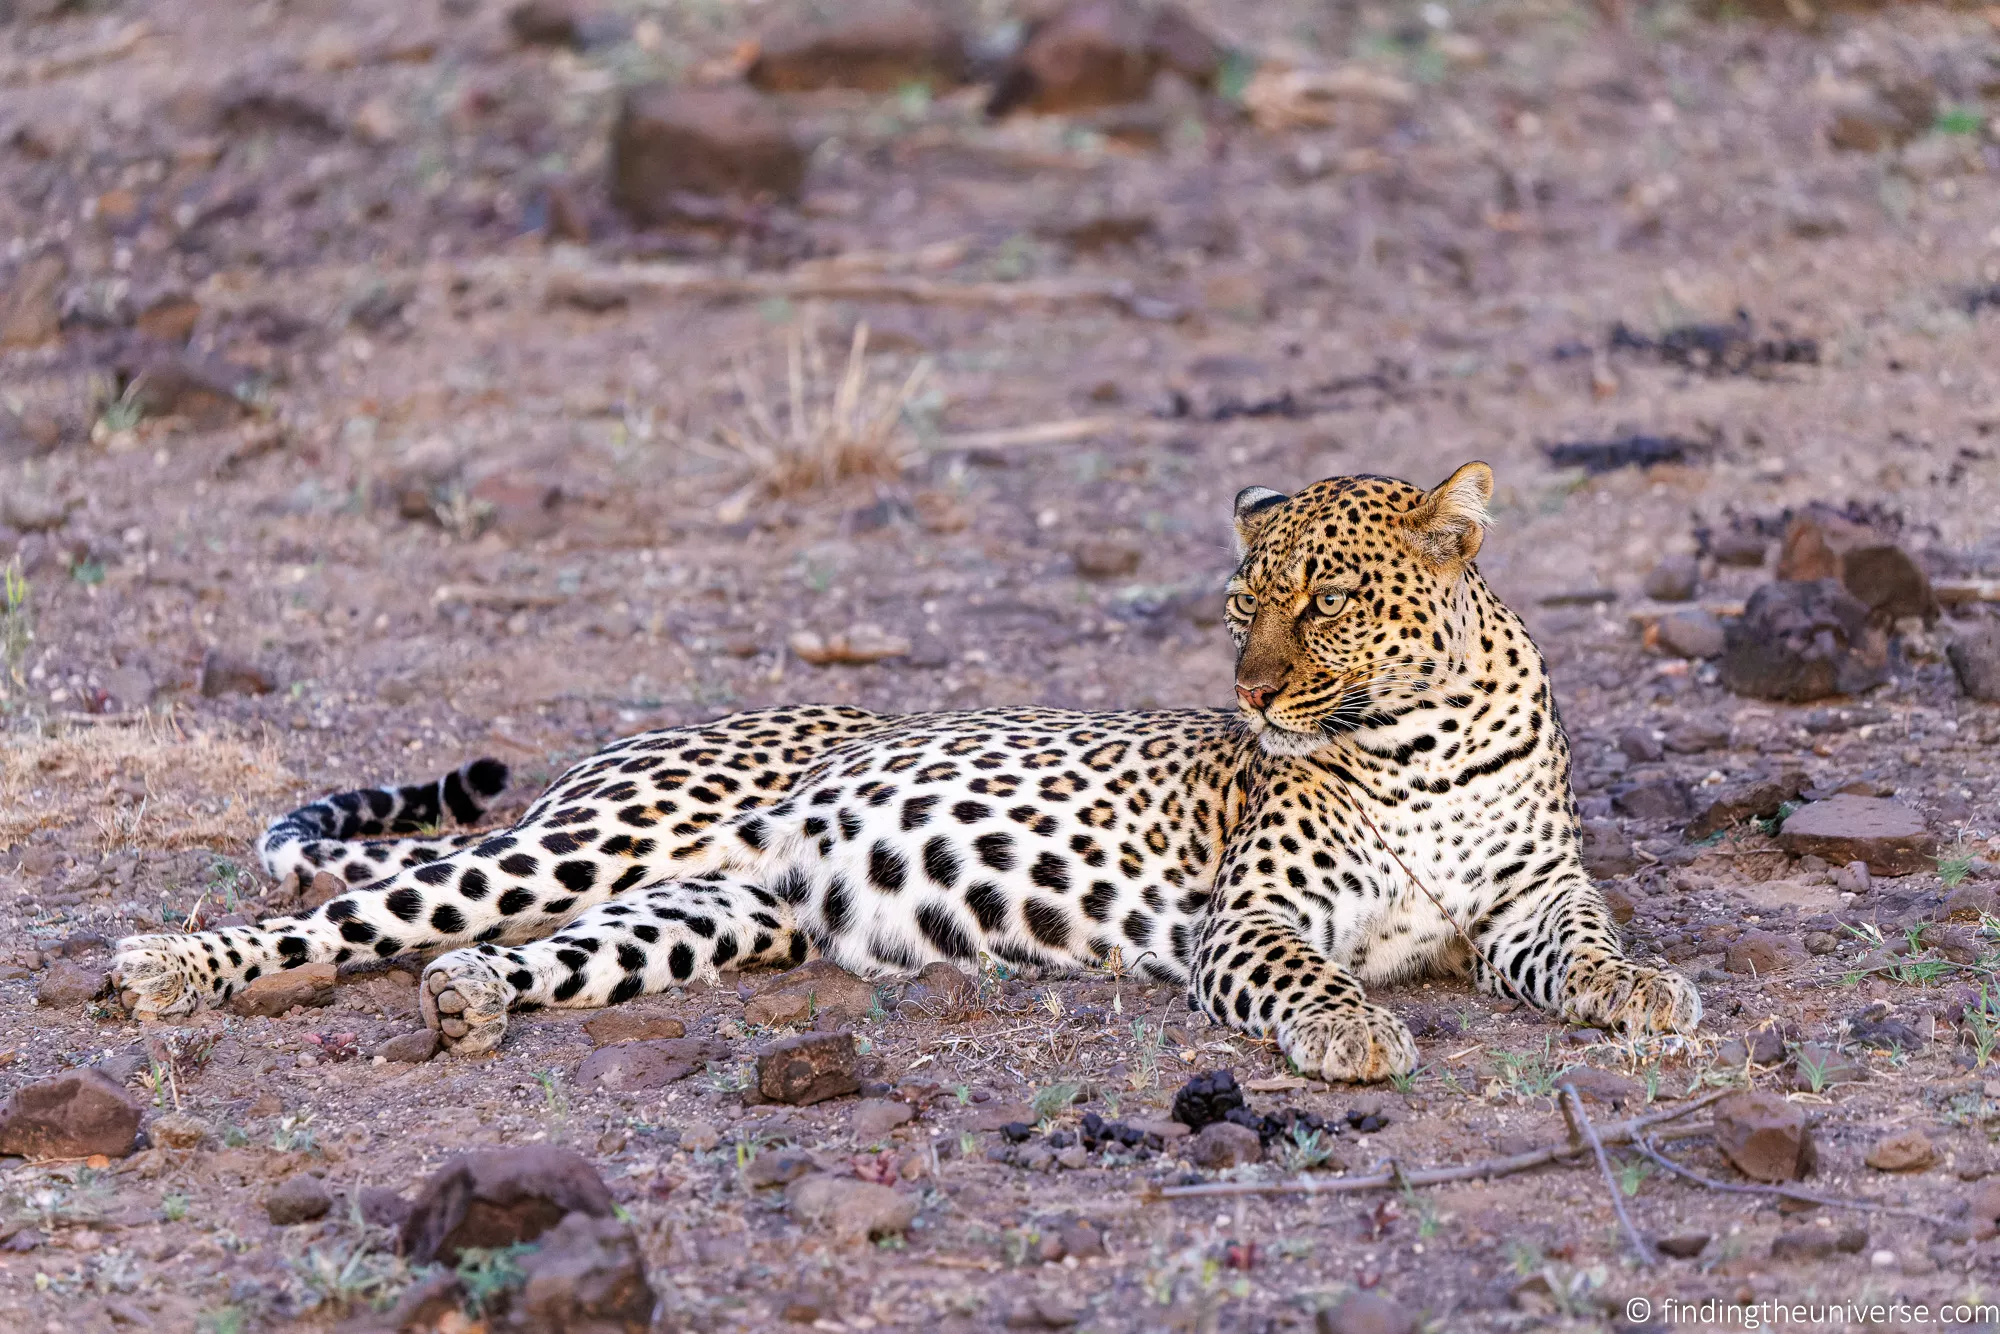
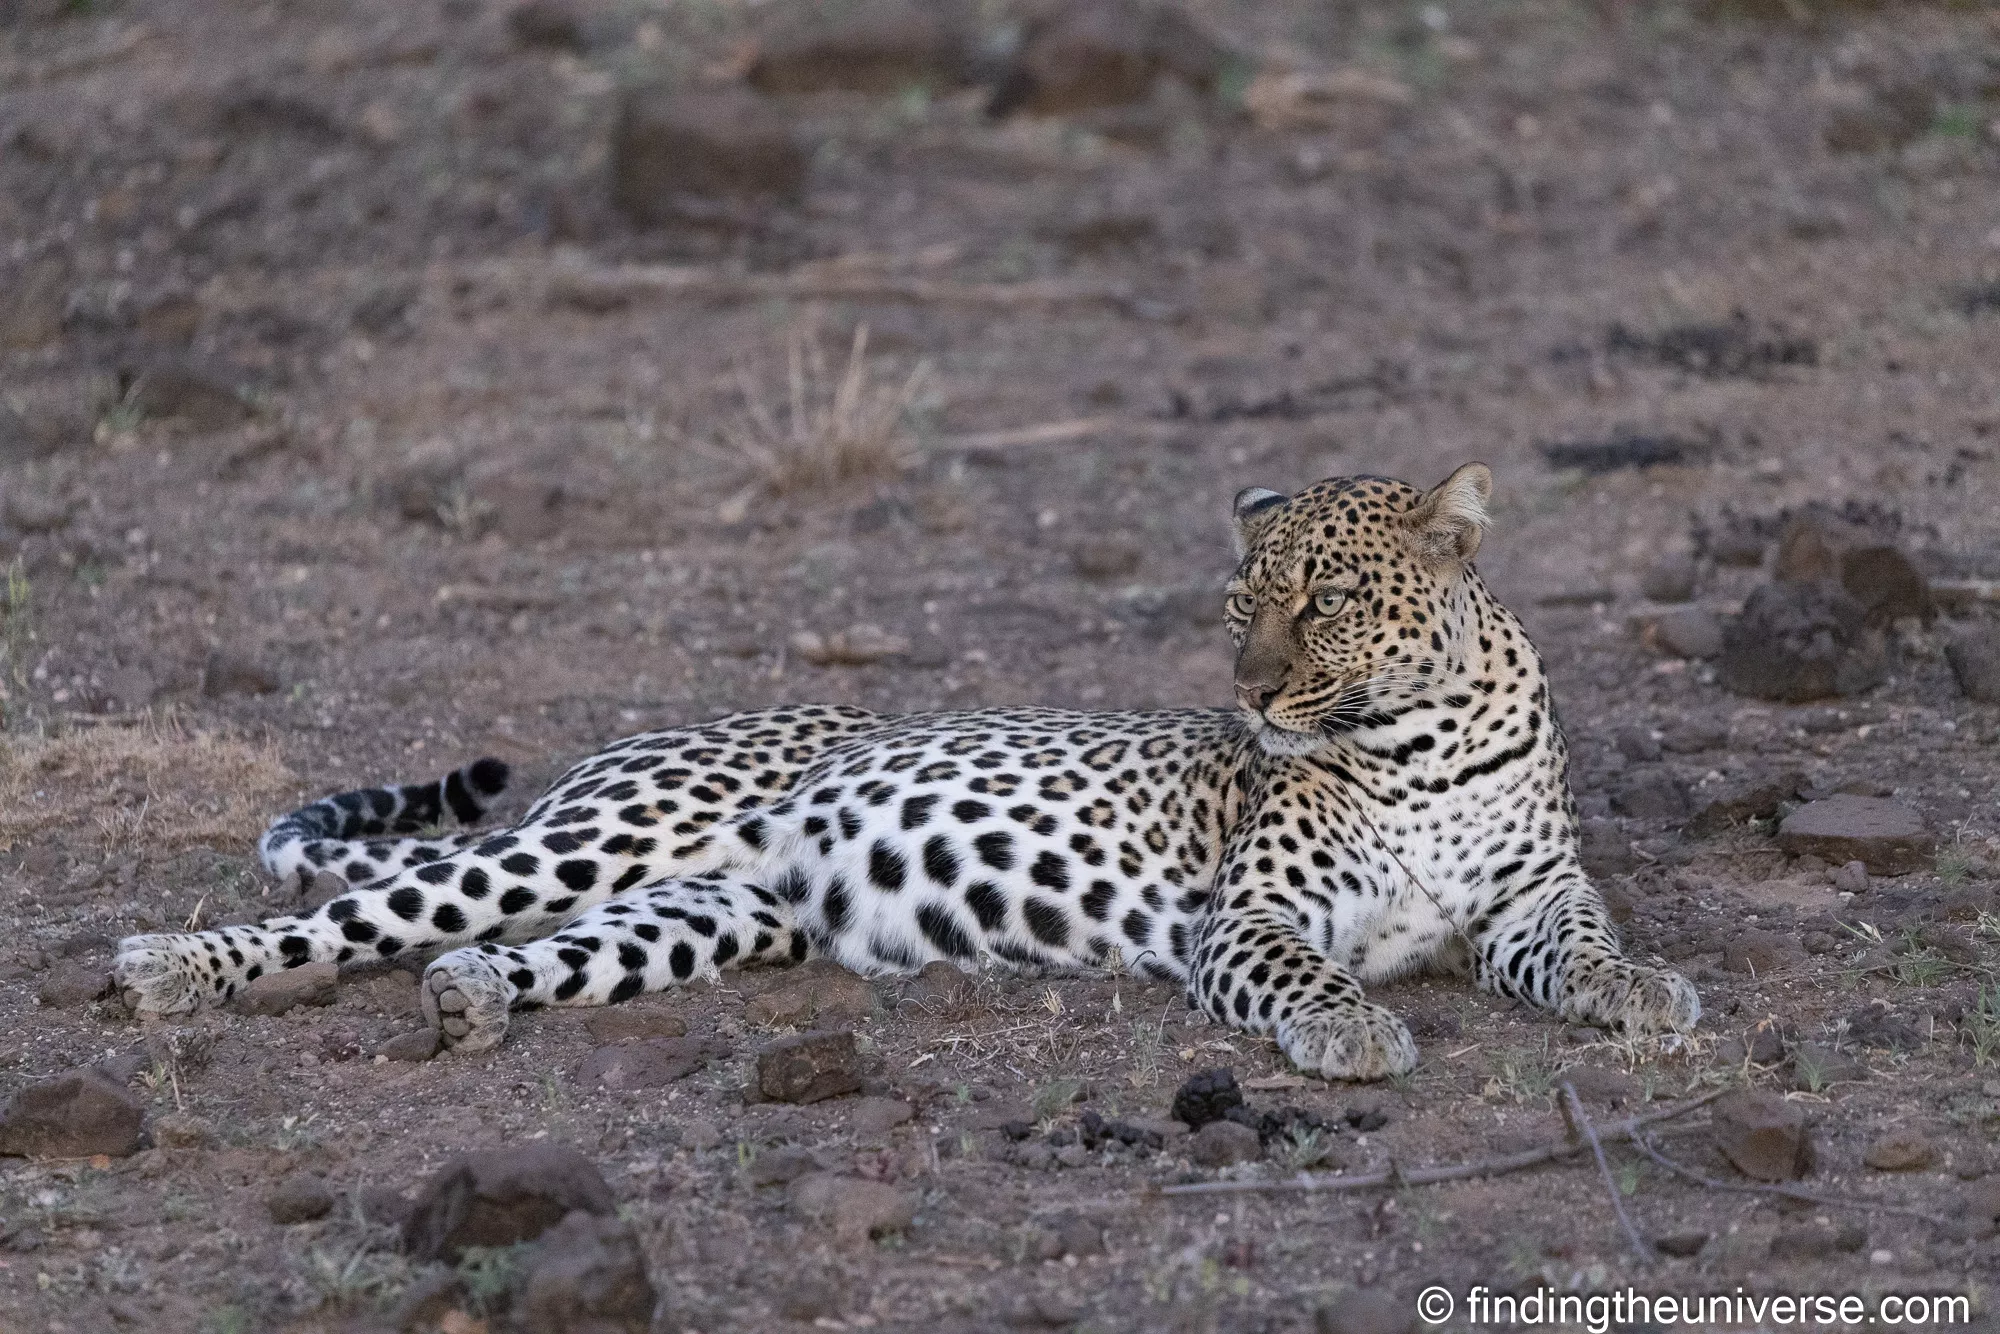
As an example, compare these two shots of a leopard taken in low light at the end of the day. Both are uncropped.
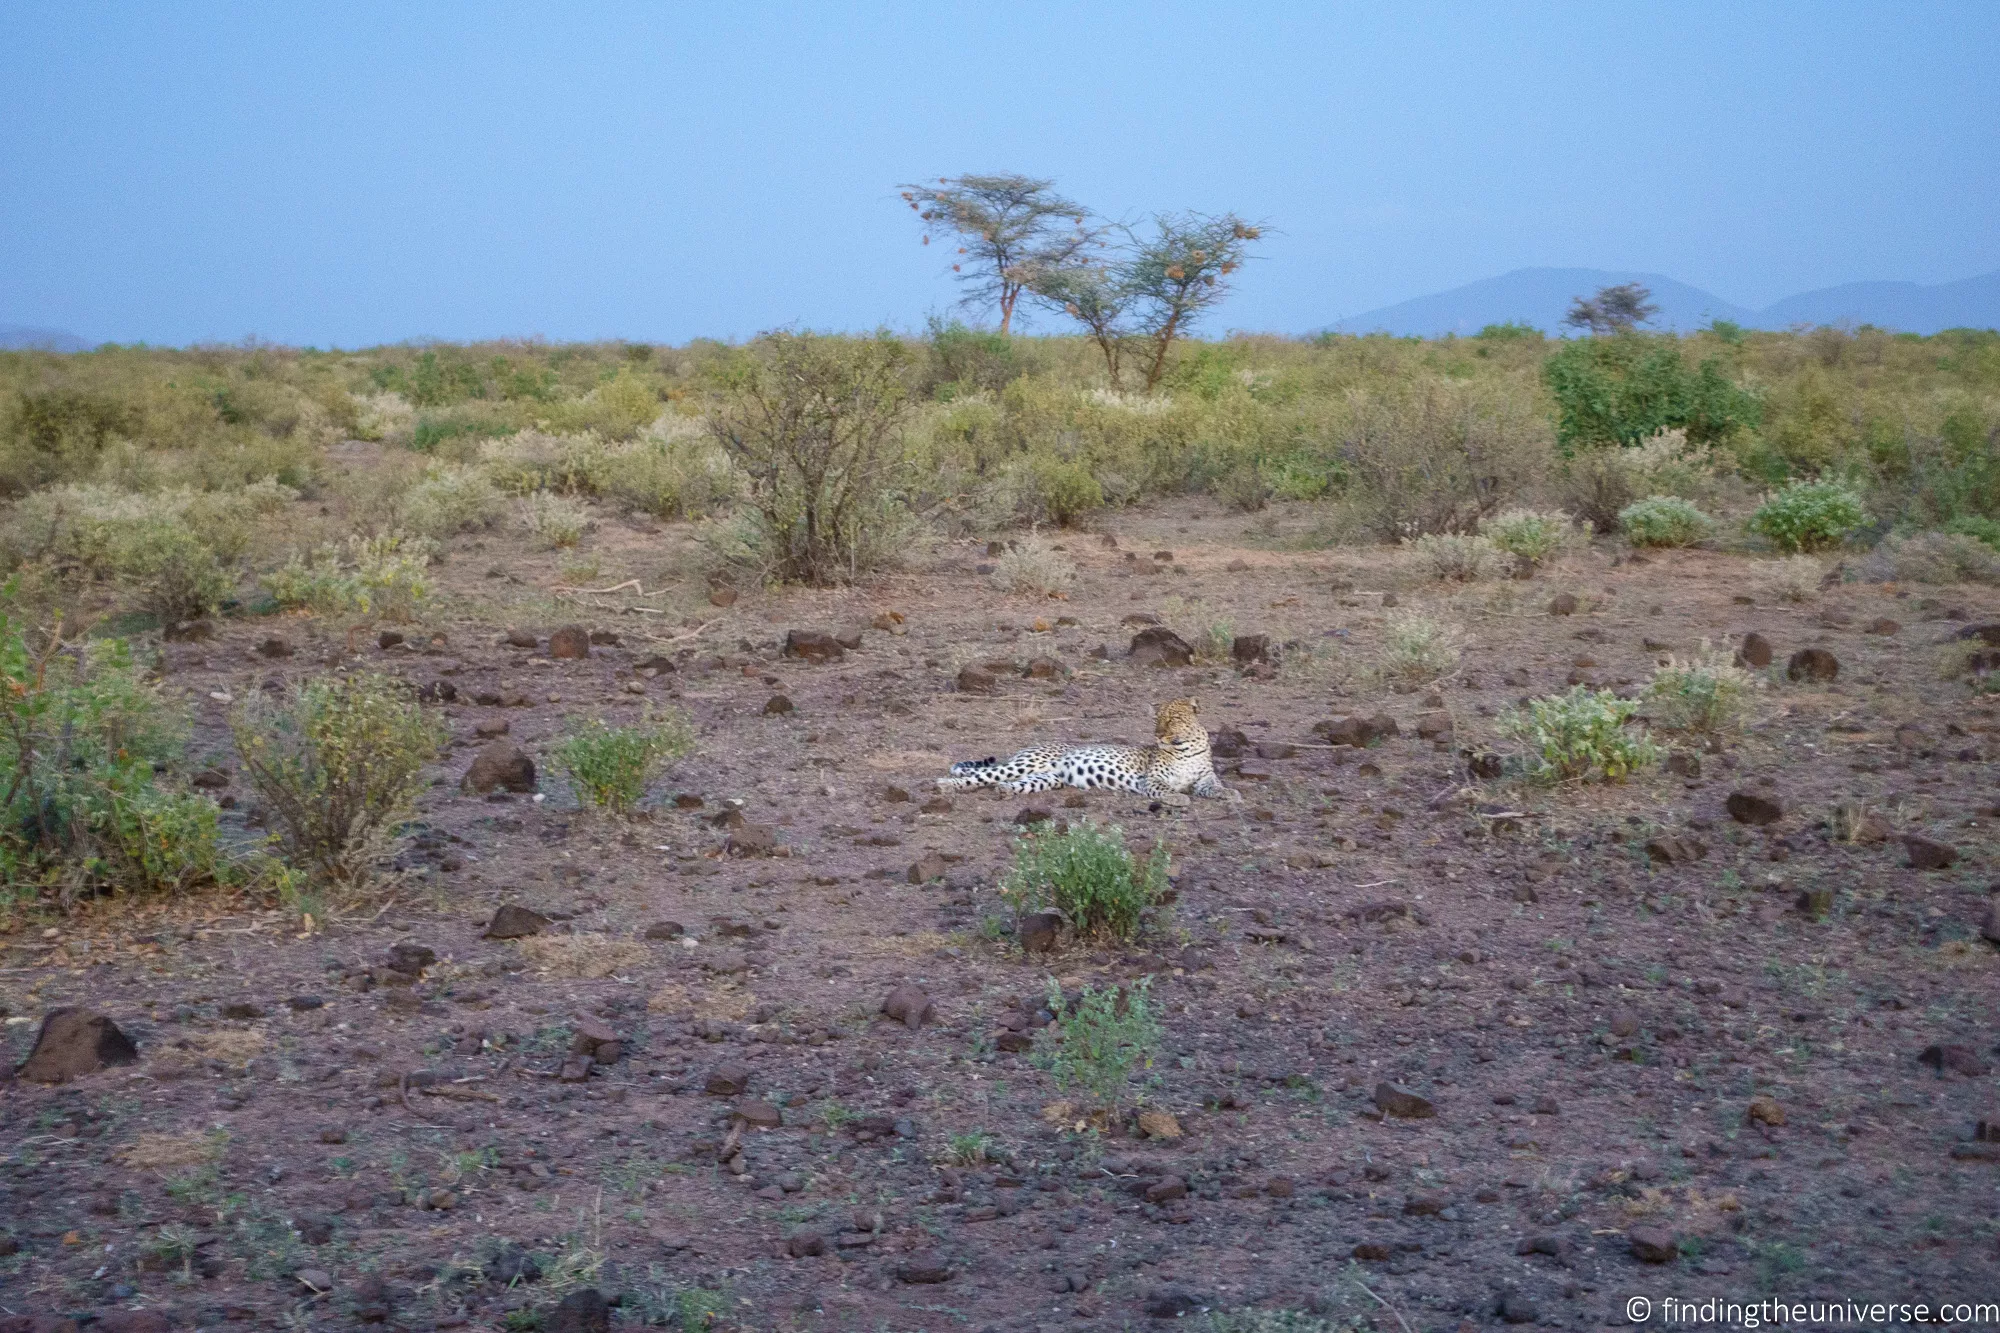
Both images are obviously of a leopard. However, the compact camera struggles to get a close up shot due to the maximum 70mm equivalent focal length, and even at ISO 800 the image ends up being quite noisy. The slow shutter speed, even with image stabilisation, also means the shot is not too sharp.
The larger and more professional Canon EOS R5 mirrorless camera paired with a 100-400mm lens is still able to get a very usable image, even at ISO 10,000, and the extra reach means the leopard actually fills the frame.
If you are just happy to capture memories of your trip, then a compact camera or smartphone will likely do the job.
A good compromise for many users is a bridge camera, which offers a good balance between a long zoom, affordability, and image quality.
However, if you want the most flexibility and the best opportunity to get great shots from your trip, then a higher end mirrorless camera would be my recommendation.
If money and size are no object, my recommended camera for safari would be a high-end mirrorless system. The latest mirrorless models feature excellent auto-tracking autofocus which can recognise and lock onto a subject very quickly, which really helps with fast moving subjects.
In this situation, I’d pick something like a Canon EOS R5 II, a Sony a7 V, or a Nikon Z6 III. I’d pair it with a telephoto zoom in the range of 100-500mm with stabilisation and as wide an aperture as I could afford. My own safari setup is a Canon EOS R5 with the EF 100-400mm lens, and it’s the combination behind most of the shots in this guide.
I have a whole post on the best camera for safari which I’d suggest reading if you don’t already have a camera you want to bring with you. It’s definitely important to choose the right camera for you.
So, here are some current cameras I suggest you take a look at, depending on the type you’d like to take on safari:
- Smartphone: a Samsung Galaxy S26 Ultra or the latest iPhone 17 Pro. Both have excellent cameras with usable zoom, though they’re still limited for distant wildlife.
- Compact camera: the Sony RX100 VII, which packs a lot of zoom range into a pocketable body.
- Bridge camera: the Panasonic Lumix FZ80D for great value, or the Sony RX10 IV. Note that the RX10 IV has now been discontinued by Sony, so if you want one you’ll need to grab it while the remaining new stock lasts.
- Mirrorless camera: for APS-C, the Sony A6700. For full-frame, the compact Sony A7C II, the Canon EOS R6 Mark III, the Nikon Z6 III, the Sony a7 V, or the Canon EOS R5 (still a superb value option) up to the flagship Canon EOS R5 Mark II.
- DSLR camera: if you already own a DSLR, it will do the job just fine on safari, so there’s no need to rush out and replace it. That said, I wouldn’t buy a new DSLR for this kind of trip today, as a mirrorless body will serve you better for wildlife. See our guide to how to use a DSLR camera if you’re bringing one along.
For more on choosing a camera in general, we also have guides to the best travel camera, best compact camera, best bridge camera, best mirrorless camera and best DSLR cameras.
If you have, or plan to buy, a mirrorless camera or DSLR camera, you may be wondering what kind of lens would be best for safari. It depends of course on your photography goals and what you want to photograph, but I would generally recommend a lens with a focal range of 100-400mm. See my safari camera post for lens recommendations.
Pack a Photography Bean Bag
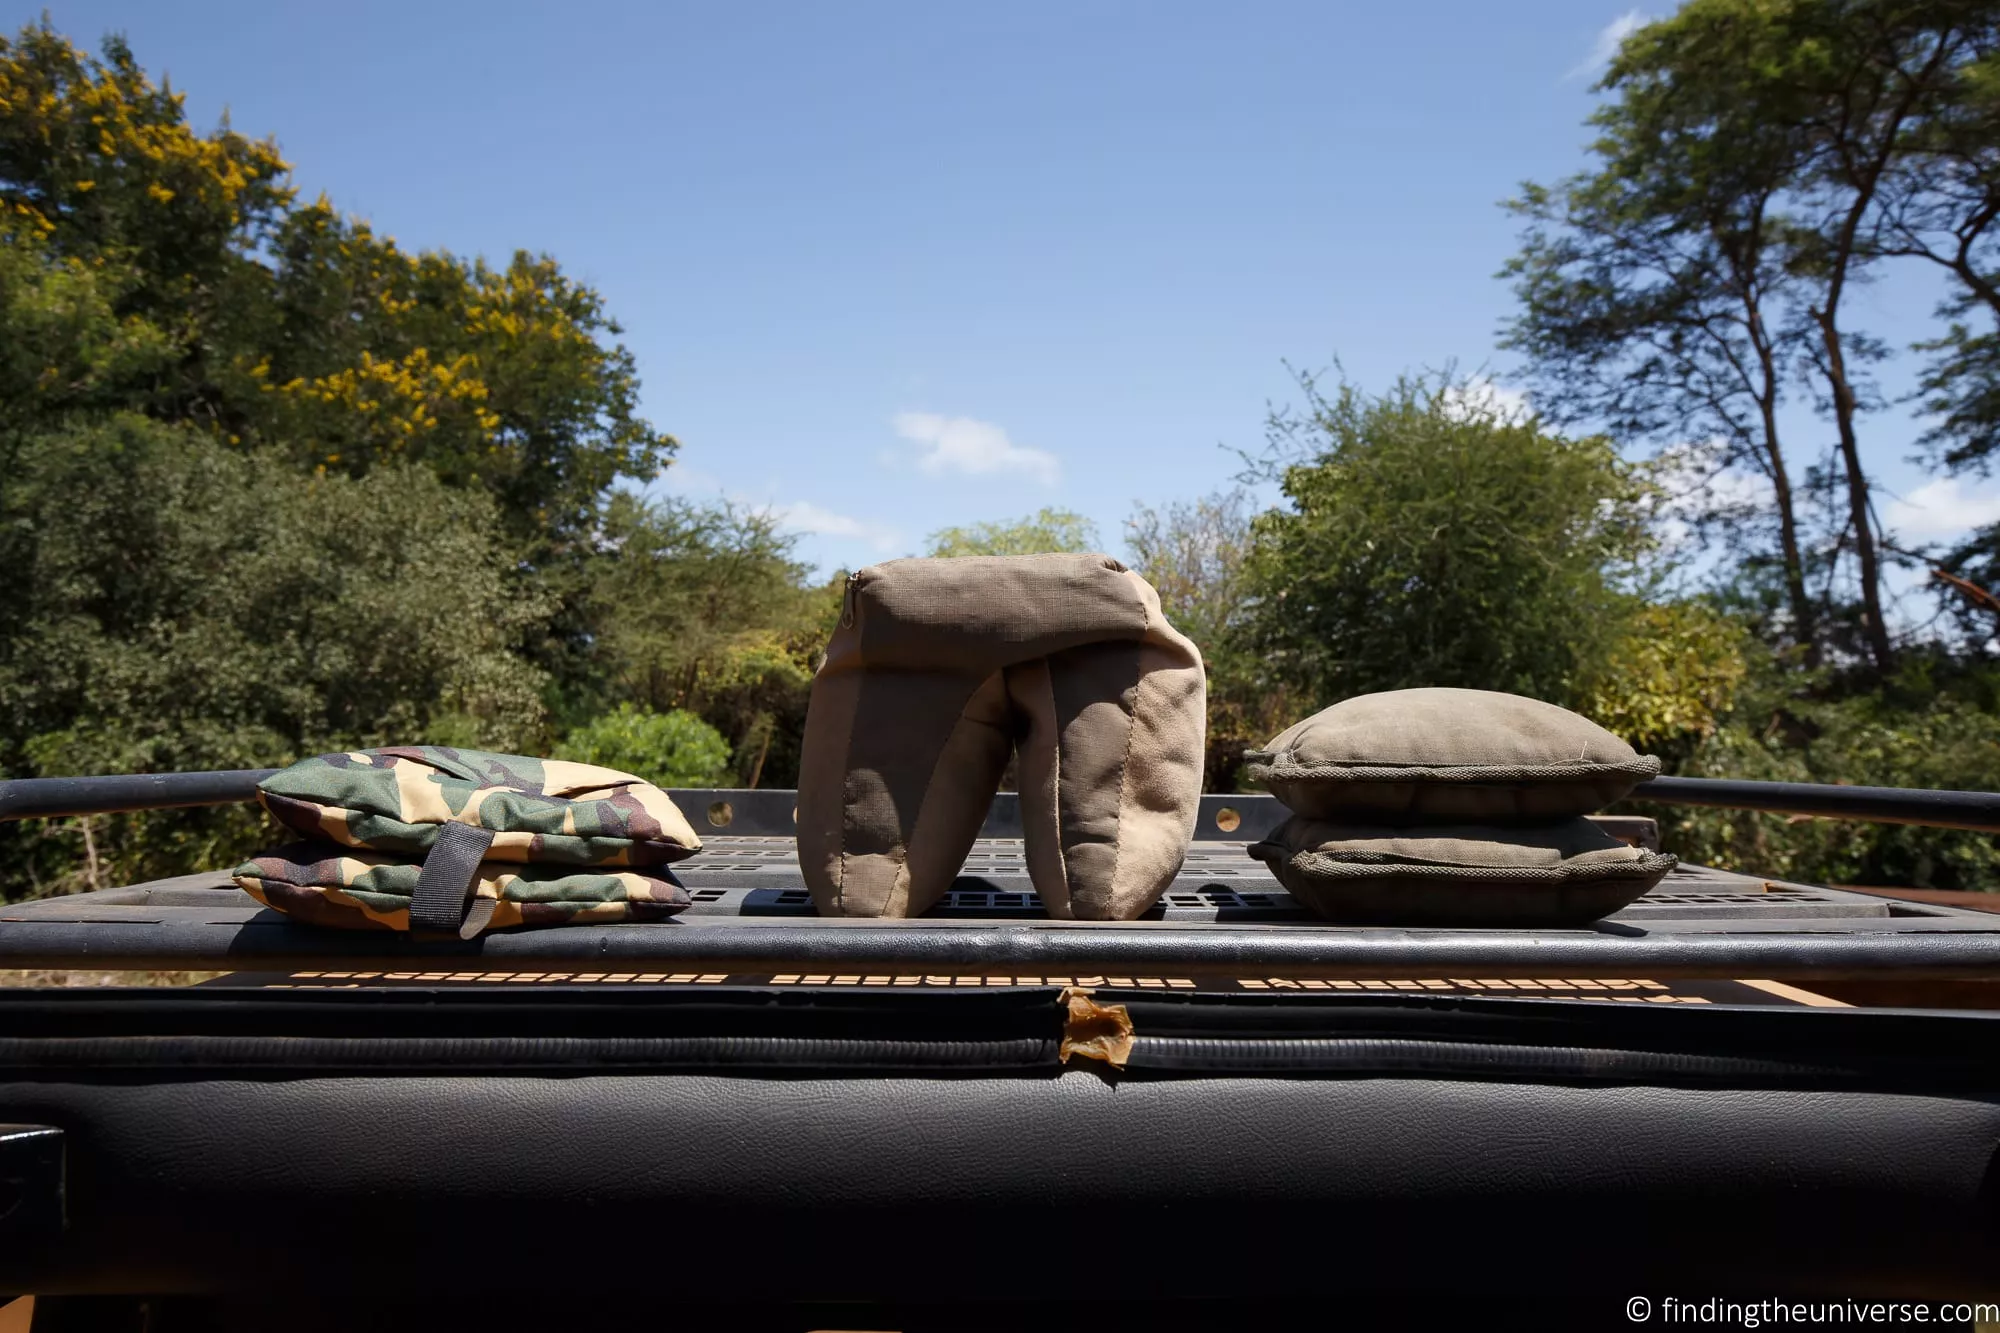
If you are travelling with a longer lens, I’d consider getting a safari photography bean bag or two for your safari trip.
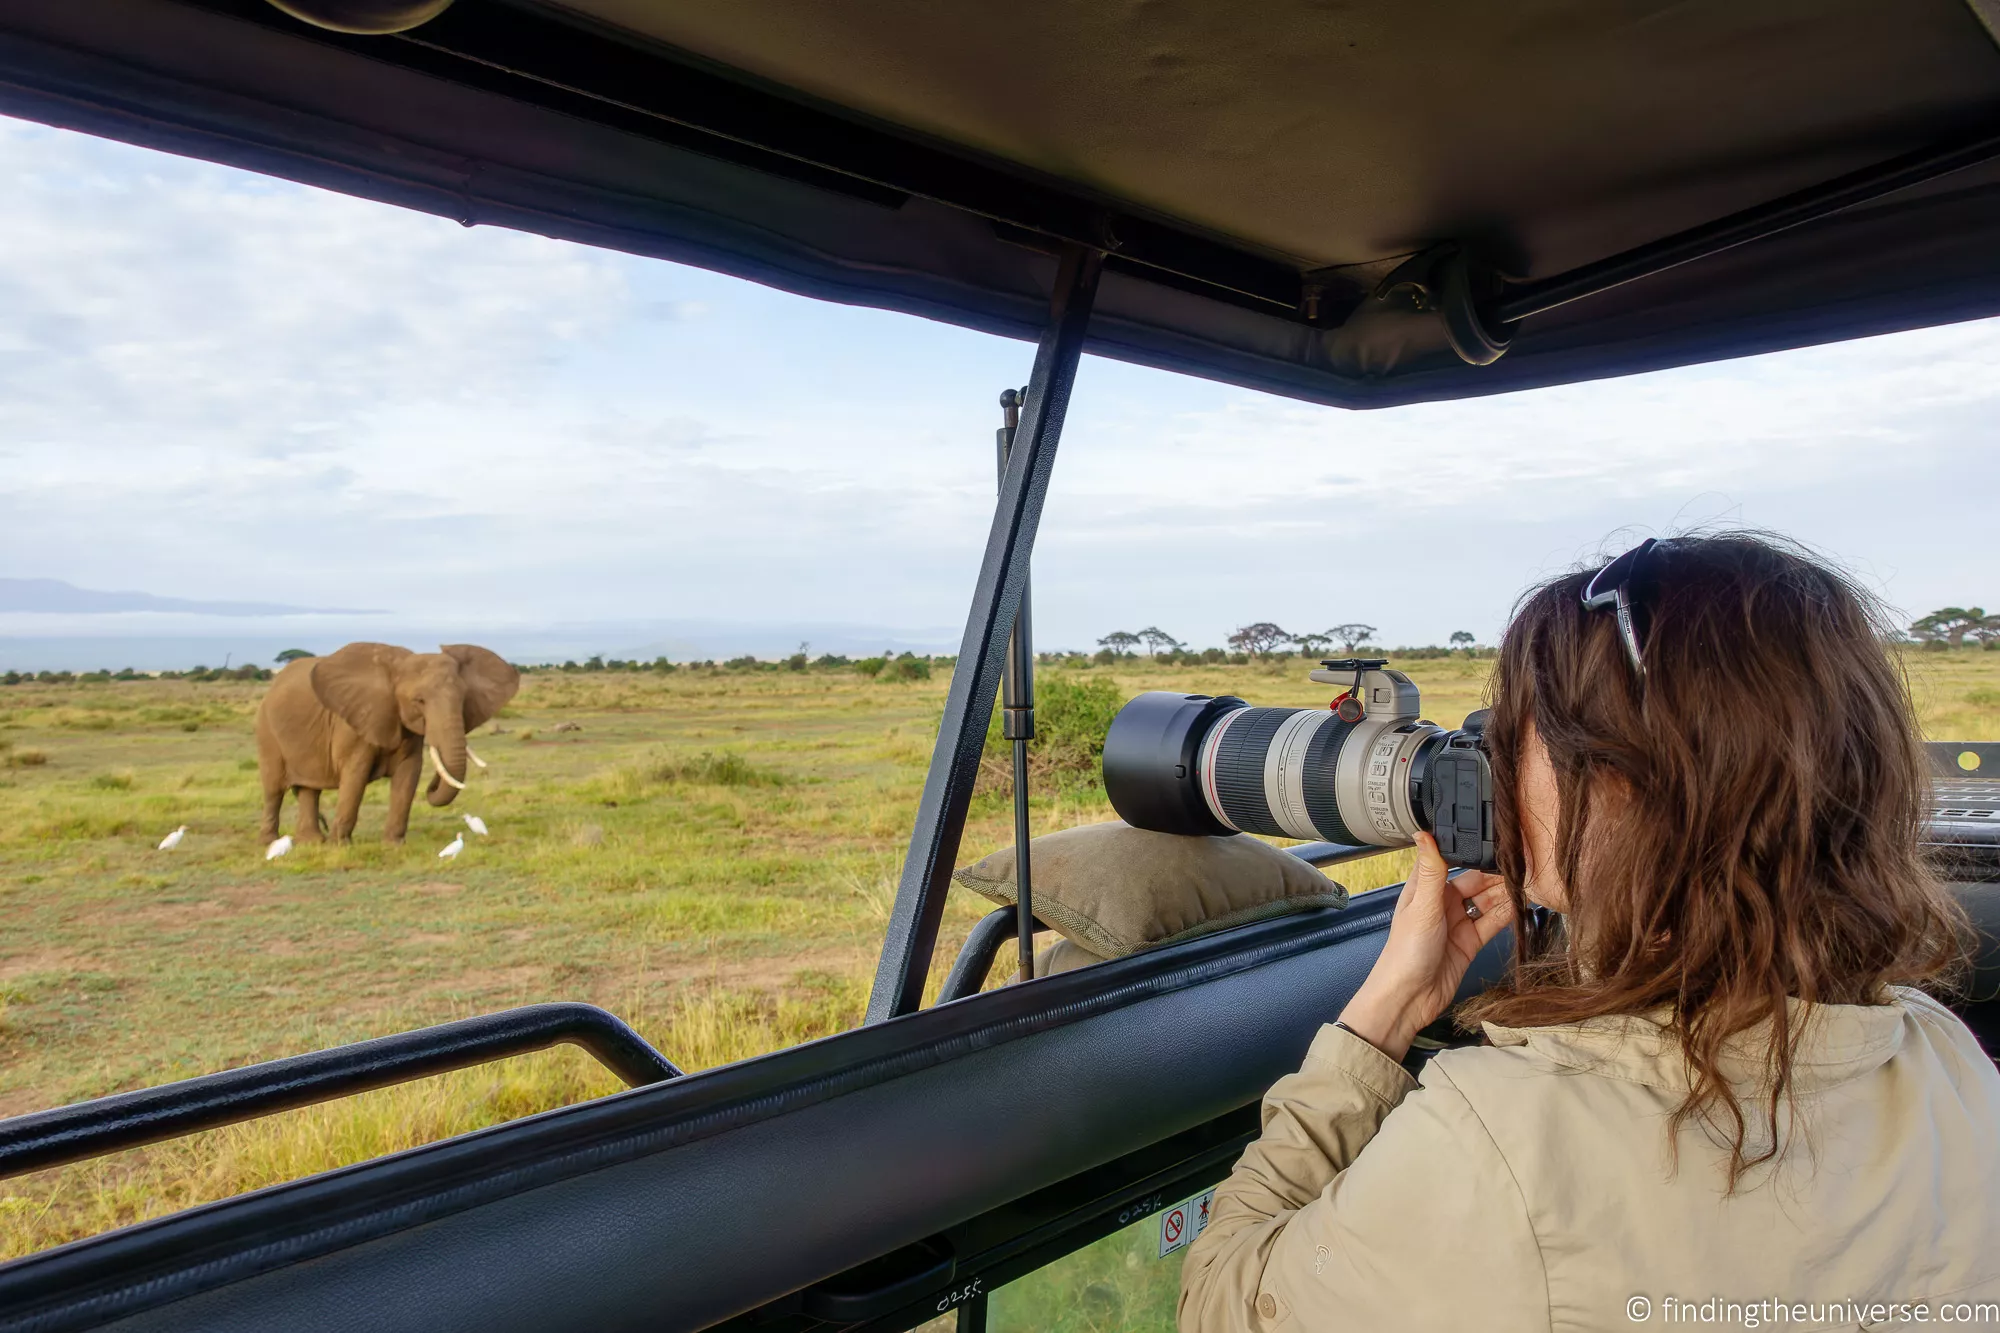
For wildlife photography on safari, I find that a photography bean bag like this one is one of the most useful photography accessories I pack. Generally, I find I get a lot more use out of a bean bag on safari than I do a tripod or monopod.
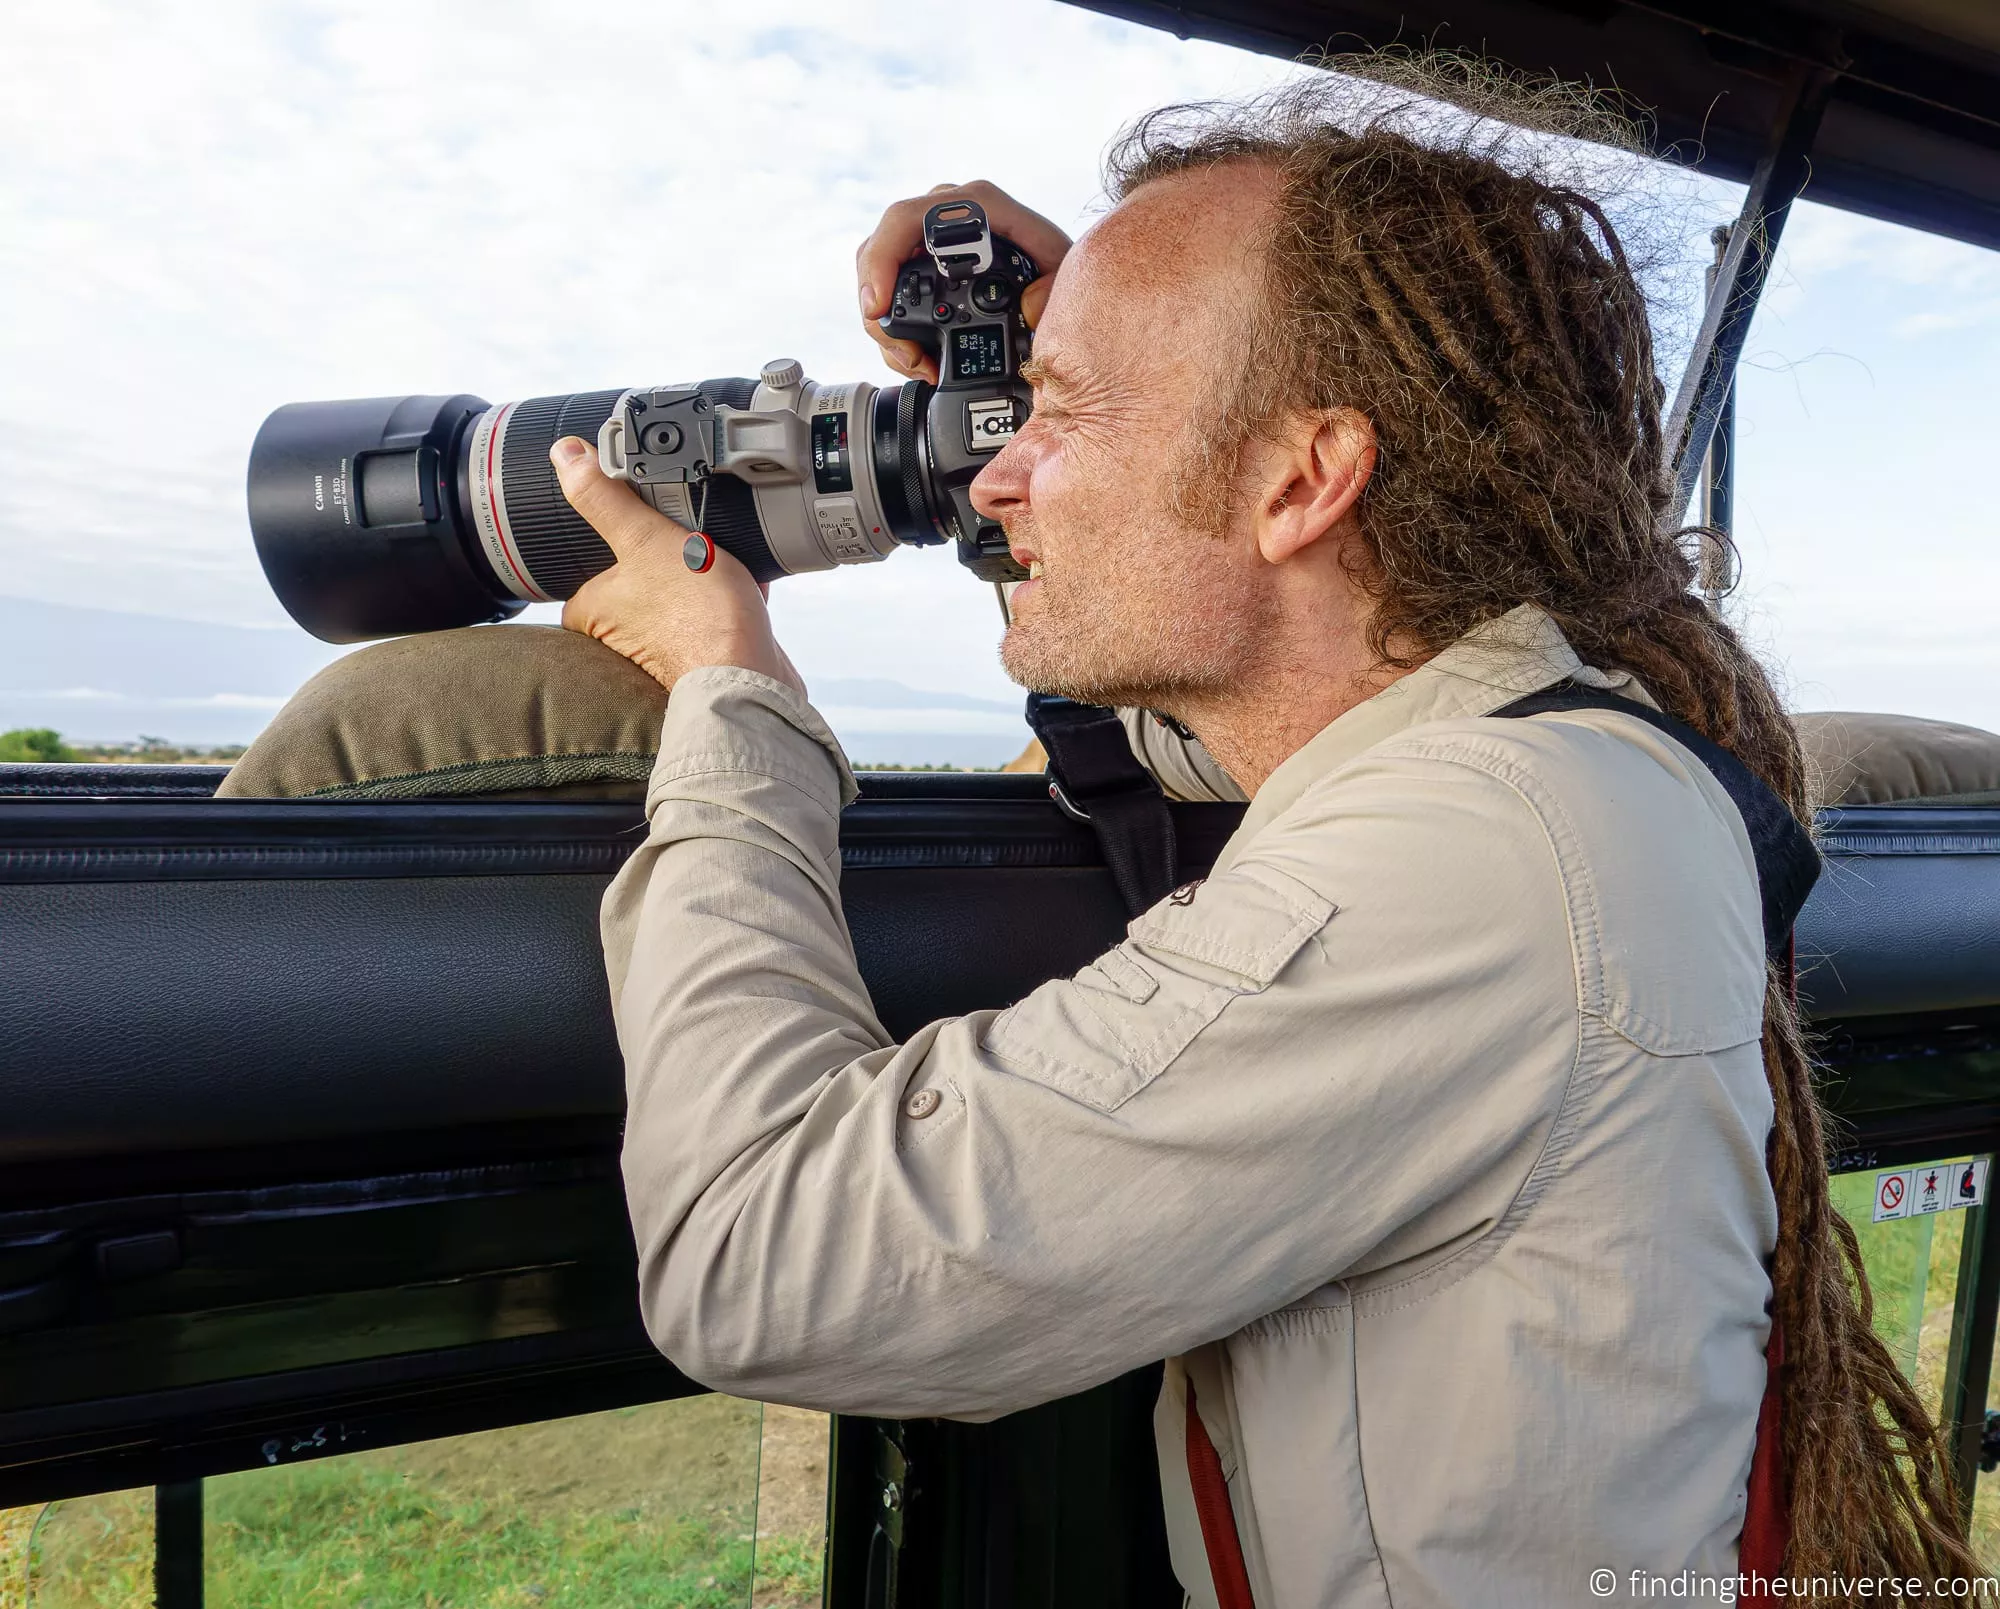
This is because on safari you are often shooting from a vehicle, either from the window or via the pop-up top, and in both cases, setting up a tripod or even a monopod isn’t always going to be possible.
A bean bag, on the other hand, can rest on the top of the vehicle or over a window, and you can then rest your lens or camera on it. If you are shooting with a larger camera and lens setup, you will definitely be thankful of having somewhere to steady it, as it’s unlikely to be practical to hold it up for prolonged periods. It also keeps you from putting your camera or lens directly on the metal edges of windows and roofs, which could lead to damage.
Using a bean bag means you’ll be able to use slower shutter speeds for more stationary animals, so you don’t have to worry about camera shake so much. This is especially helpful when shooting with very big telephoto lenses from around 400mm and up.
Jess also found the bean bags useful just as armrests and for resting her elbows on when using binoculars.
Bean bags are very light to travel with, and you can usually find inexpensive materials like dried beans to fill them with at your destination. My only tip is not to fill them with anything obviously edible, as some animals in some parks might sniff out the tasty treats within and decide to give them a nibble! Dried (obviously uncooked!) beans are a good option for this reason.
You can see more in my guide to bean bags for safari, as well as my more general guide to bean bags for photography.
Prepare Your Equipment
If you already have a camera that you plan to take with you on safari, you want to make sure it’s in great working order before you head off. This is especially the case if you have older gear or gear that gets a lot of use.
Before you go, I recommend testing and cleaning the camera yourself to make sure it’s working. You’ll also want to make sure all the gear from your lenses to your camera straps are in good shape. Your trip is not a good time to learn about a preexisting scratch in your lens, a corrupted memory card, a fraying strap, or a battery that doesn’t hold its charge!
You might also consider taking your camera to have a professional clean and check before your safari. Often you can do this at a local authorised dealer or repair shop for your camera brand, as they will have servicing options. Alternatively, your manufacturer might offer mail-in servicing.
I try to get my cameras serviced every year or two, especially if I know I’ve been hard on them. As well as cleaning the sensor professionally, they check the camera over and make sure things like seals and screws are all in good working order. In my opinion this is well worth the investment, especially on high-end equipment.
Protect your Equipment on Safari
Safaris can be really hard on camera equipment. From dusty conditions to bumpy roads, there are all sorts of hazards that can either damage your equipment or cause it to function less effectively. In this section, I’m going to talk about the common issues you can expect to encounter and how to overcome them.
Dust or Sand
When it’s hot and dry, the roads will be dusty. As your vehicle and other vehicles travel on the roads they kick the dust up, and it gets everywhere. If you have the top down or windows open, expect dust to get on your camera equipment.
If you are travelling to a place where sand is a concern, such as a desert or beach, be careful as blowing sand can get into your gear and can also leave scratches on your lens if you accidentally wipe them. Never put your camera down in the sand as it can easily work its way inside.
Cameras contain a lot of sensitive electronics as well as some moving parts, neither of which appreciate dust or sand. In addition, if dust gets onto your camera’s sensor it can cause unsightly spots to appear in your images.
There are a few things you can do to minimise the impact of dust or sand. First, a good camera bag that you can put your camera in between uses will help to prevent general dust getting in. So when you are not using your camera, I’d recommend securing it in a case or bag.
Also be careful about where you set your camera. Don’t place it on the ground or other dirty surfaces, and don’t leave it outside for any longer than it needs to be.
Next, remember to use a lens cap if your camera lens supports one, as this will help to keep the front element dust free. Just keep the lens cap in your pocket and place it on the camera whenever you are not using it. If your lens supports it, then a lens hood and a UV filter can also provide much needed protection for the front of the lens.
If you are using a camera where you can change lenses, try to change the lens in a dust-free location if possible, such as in your hotel or when stopped in a sheltered place. Try not to change your lenses more than you need to when in dusty situations.
In addition, I’d recommend packing a small camera cleaning kit so you can get accumulated dust off your gear as you travel. I’d particularly recommend having a lens cloth, a brush, and a blower with you.
Once you are done with your safari and you have all the amazing photos you wanted, you might consider getting your camera professionally serviced and cleaned to get rid of any errant dust and to ensure it’s back to full working order for your next adventure.
Rain
Not all safaris take place whilst in a closed vehicle. Sometimes you might be on foot or trekking, or in an open top vehicle. In these situations, even when visiting a country in the dry season, there’s always a possibility of rain.
Whilst some cameras do offer a level of weather-sealing or rain resistance, the majority are not fully waterproof. So having a camera rain cover to keep your gear dry like this one is a good option.
I’d also recommend having a good camera bag or backpack with a rain cover where you can put your camera in between shots.
If you have a smaller camera like a compact camera or smartphone, something like a resealable freezer bag or clear dry bag can also work well to keep it dry.
Bumpy Roads
As well as dust and rain, another issue you will have to contend with will be bumpy roads. Most roads in safari parks are unpaved, and some of them can be very bumpy.
You definitely don’t want your camera equipment flying around the inside of a vehicle as this can damage it, and could even cause injury to the other occupants. I have a few suggestions to help avoid this scenario.
First, I recommend bringing along a good camera bag or case. Camera bags are specially designed to provide padding and protection for your gear, and many of them also come with rain covers. This means that you have somewhere safe, protected, and padded to put your gear in between shoots.
Personally I use Vanguard photography bags, and I’ve been an ambassador for Vanguard for many years now. If you see something on their store that works for your equipment, you can save money using our exclusive Vanguard discount code. This will give you 20% off everything in the Vanguard store.
Just use the code FindingTheUniverse for your discount! This code works in the Vanguard USA, UK, Australia, Spain, and Germany stores.
When you are actually using your equipment, I recommend having a strong and comfortable strap to keep it secure around your neck or shoulders. I use the Peak Design strap system, which has reliably kept my camera gear comfortably slung at my hip for many years now. You’ll want to find one that is comfortable for you.
I once left my DSLR on the seat of our Land Cruiser and it fell on the floor after we hit an unexpected bumpy patch in the road. I was lucky that nothing was damaged, but it sure made me more careful about either putting gear away in my bag or keeping it around my neck.
I also recommend that if you’re someone like me who enjoys standing up in a safari vehicle, you sit down or at least put your camera in a bag when the roads get really bumpy. If your guide tells you to hold on, or you see that you’re going to be crossing a river, it’s probably best for both you and your gear to sit down. This way you’ll have a better grip on your gear and avoid banging it on something or falling.
Dress Appropriately
Packing appropriate clothing is going to ensure you are comfortable and ready for the weather during your trip. Whilst it might not directly help you get better photos, comfort is a really important factor. When you are comfortable you will be able to focus on getting great photos rather than the temperature or the insects.
When choosing clothes for your trip, consider the climate, weather, and insects of where you are going as well as the activities you plan to do. You are going to pack very differently for a cool weather destination than a tropical one. You also need to pack differently if visiting a country during its rainy season versus its dry season.
In terms of photography specific clothing, you might want to consider having lots of pockets so that you have plenty of places to store things when standing in a vehicle and when hiking. This will give you quick access to things like extra batteries, lens wipes, and your lens caps.
There are a range of different vests you can get, including specialised photography vests. I personally prefer something a bit more versatile that I can use in a variety of situations, and I like the SCOTTeVEST range, which has a lot of pockets and is great for travel in general. I find it particularly useful for airport travel as there are so many handy pockets.
Generally though, on safari I wear the NosiLife long-sleeve shirts and convertible trousers from Craghoppers. These have lots of pockets and also come with built in insect protection and sun protection, and they dry very quickly.
Jess and I mainly wore Craghoppers tops and bottoms throughout the days when we were either in the vehicles on safari or doing treks. This is the most common brand we’ve seen people wearing for proper safari clothing throughout our travels.
Depending on where you are going, you will probably also want to consider packing a hat, sunglasses, insect repellent, sunscreen, good practical shoes (we generally wear Scarpa or Merrell hiking shoes), layers for warmth, and a rain jacket or poncho.
For more tips, check out our detailed guide to what to pack for safari, which has lots more suggestions for your trip.

Pack Spare Memory Cards and Batteries
The chances are that you are going to be taking a lot of photos when on safari. If you are shooting with anything other than a smartphone, your camera will likely have a battery you can change and a memory card slot.
It is definitely worth bringing at least one spare battery for your camera, and ideally two. In addition, bringing plenty of memory is also a good idea.
You don’t want to be half way through a busy day and run out of battery or memory card space, and then potentially miss some great shots. Modern mirrorless cameras in particular can eat through batteries, so a spare or two is definitely a must in my opinion.
Consider bringing a USB Powered Battery Charger and Power Pack
Accommodation options on safari can vary greatly, from simple campsites to high end luxury safari lodges. One thing we have found is that not every accommodation, especially the more remote and basic ones, will have AC power outlets. Or at least not one in your room (there is usually at least one public shared power outlet somewhere in a lodge or campsite).
If they have wall outlets, they will likely be 220V-240V, so you will want to check that all your equipment supports this if you are coming from a country like the USA, Japan, or Canada which has 110V-120V power. Many people will also need a travel adapter to adapt their plugs, depending on where they’re coming from and their travel destination. We use the Epicka universal travel adapter, which covers pretty much every socket type you’re likely to run into at an African lodge.
However, rather than full power outlets, many locations offer USB outlets. These don’t use so much electricity, and are often powered by solar panels.
What this means is that if your camera only has a standard wall outlet charger for its batteries, you might not be able to charge them. Note that some cameras do charge via USB, so do check if that is the case.
So we recommend making sure that you are able to charge your batteries using both the local AC power outlets and via USB so you can take advantage of either charging option. We also recommend considering packing a power pack.
We personally travel with a USB battery charger for our Canon camera batteries. This is better than our standard charger in some respects, as it can charge two batteries at once and charges over standard USB. The main thing is to find one that matches your specific camera battery.
As well as the USB battery charger, we also travel with a power bank. We currently use the INIU 20,000mAh power bank, which has 65W USB-C fast charging and is flight-safe. We can use it to top up all our USB powered devices, including our phones and the USB camera battery charger, which is a real help when we have periods of time without power.
Ask About Your Safari Vehicle
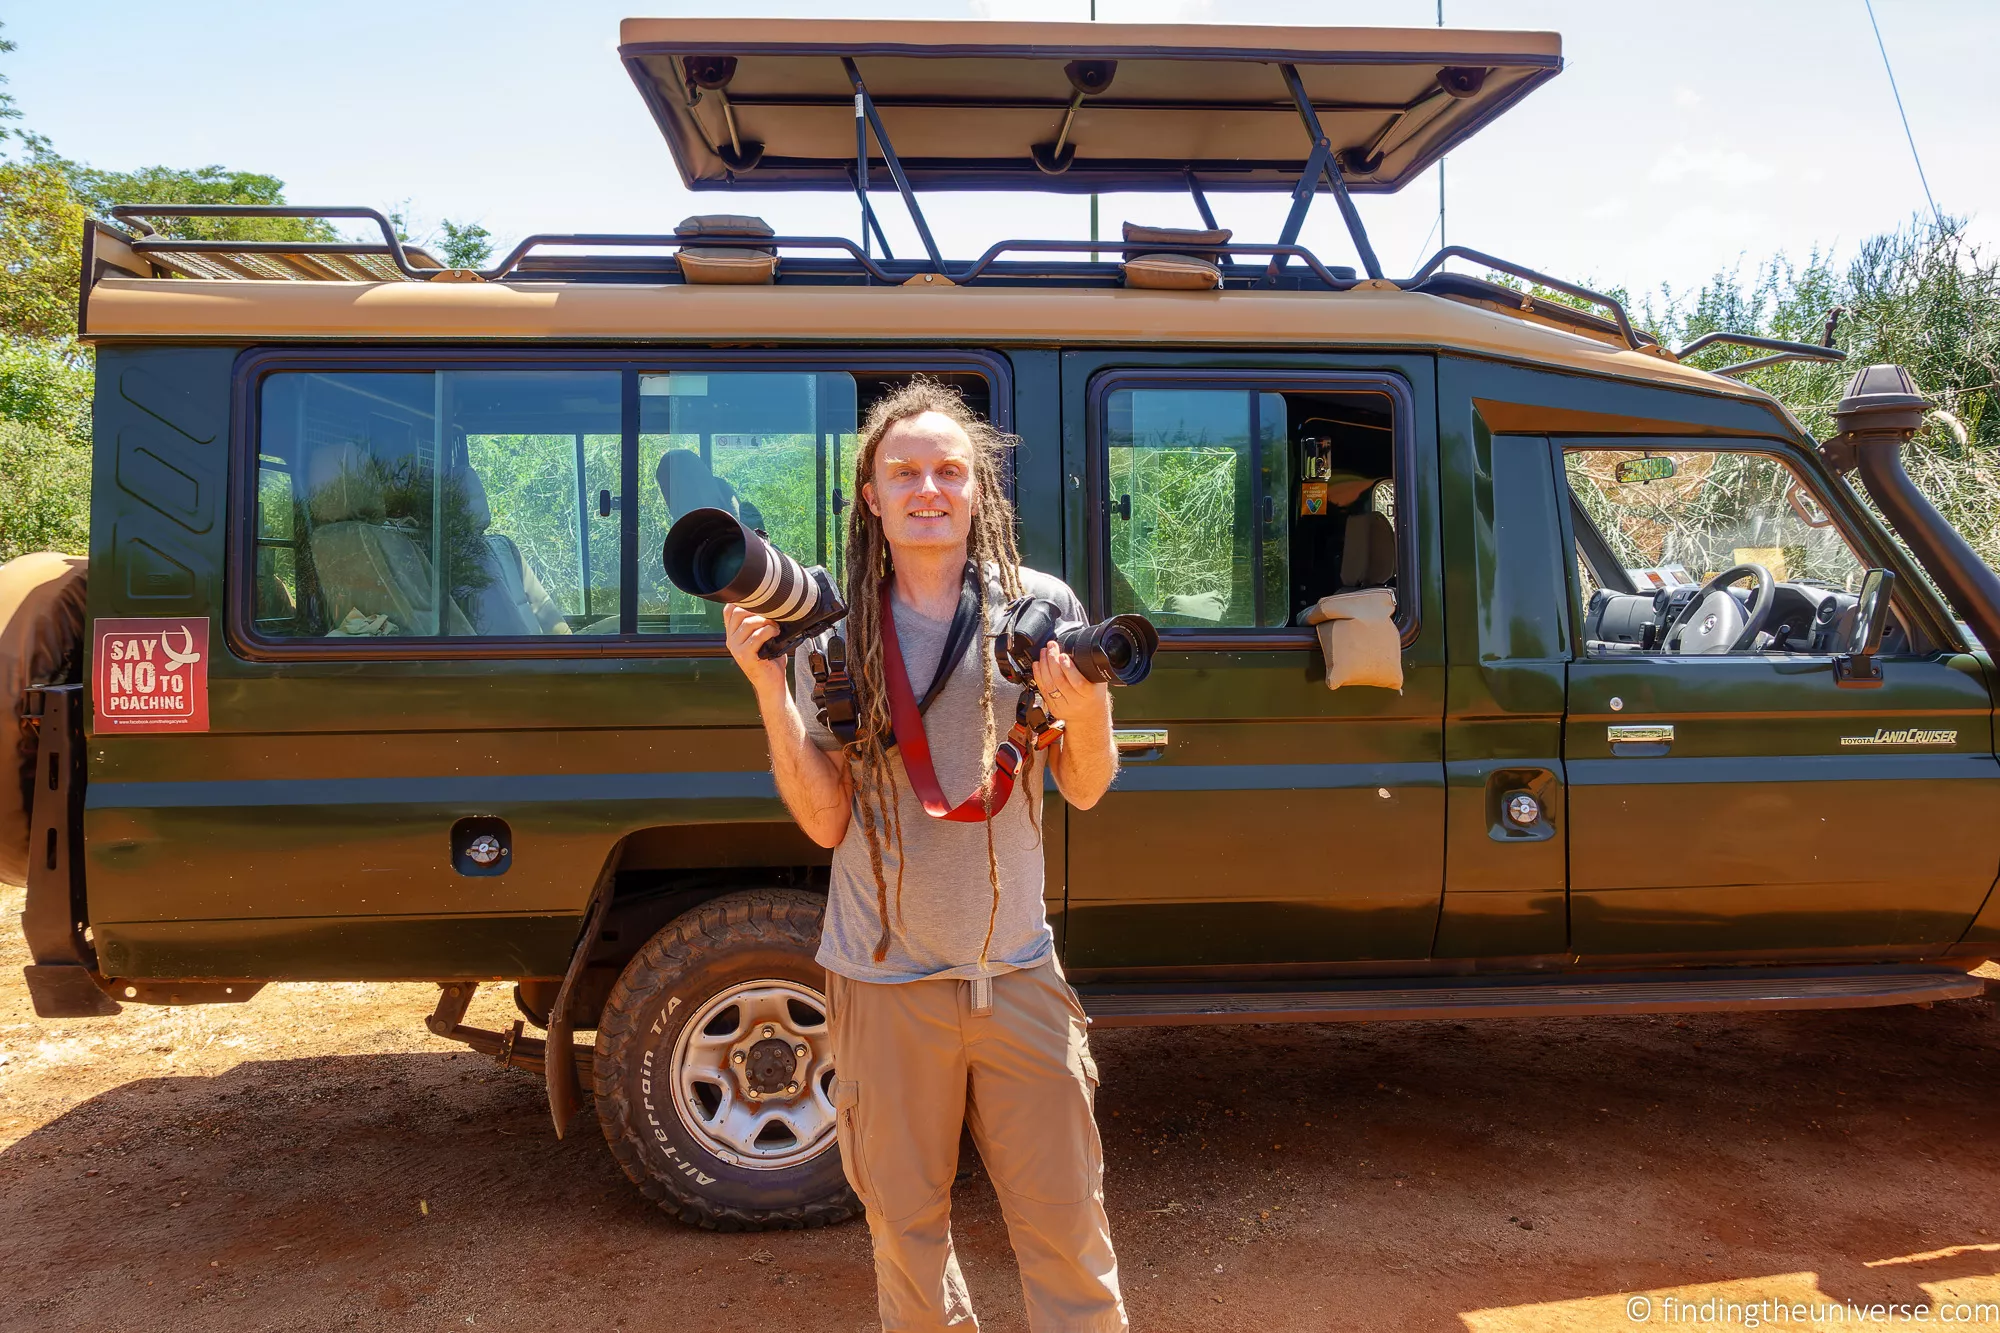
Before you go on safari, it’s a good idea to check with your safari company about the type of vehicle you will be in. There are a number of different models that companies use in different locations around the world, with Toyota Land Cruisers being the 4X4 vehicle of choice for many companies. However, there are many different models of Land Cruisers used for safaris, so knowing the specific model can be very helpful.
The same vehicle model’s features can also be different across companies depending on the specific conversion. Probably the most important thing for most people is the number of seats, luggage space, and the configuration of the top.
We highly recommend a vehicle with a pop top. This means the top of the vehicle will pop up, allowing you to stand up inside the vehicle and get a better view, as well as better photos.
For the majority of these vehicles, the top pops up and remains over your head, providing much needed shade. However, in some vehicles the tops actually come off completely, so you won’t have any shade.
We highly recommend a vehicle where the top doesn’t come off completely, as otherwise you are going to be in the sun a lot.
It’s also a good idea to check on the height. In some of the vehicles we have found that even when standing up, the lip is a little high for Jess to get a good view. So if you are shorter (or very tall) you should definitely check about this if you really want to be able to stand up for game viewing.
Another thing to check is whether or not the vehicle has charging points (some have standard wall outlets whilst others might have USB outlets). Some of our vehicles have had this, some didn’t, but it is becoming more common.
If you are planning a very photography focused safari, you can also ask if the vehicle has any photography specific features. Some of the vehicles we’ve travelled in came with photography bean bags for our use, for example, which was very helpful.
Other special features might include camera mounts, tripod mounts, the ability to fully open or remove windows, and even the ability to remove a door or two. I wouldn’t expect most of these features unless you are paying extra for a special photography trip.
Mastering Your Camera and Its Settings
Great gear only gets you so far. Knowing how to actually drive your camera, especially the settings that matter for fast, unpredictable wildlife, is what separates the keepers from the blurry misses. Before the detailed tips, here’s a cheat-sheet you can screenshot and keep on your phone. All the values come from the settings I actually use in the field.
| Scenario | Shutter speed | Aperture | ISO | Focus and drive mode |
|---|---|---|---|---|
| Stationary animal, good light | 1/1000s | f/5.6 | ISO 400 (Auto) | Continuous AF, single or low burst |
| Moving animal (walking or running) | 1/1600s or faster | f/5.6 | ISO 400 to 800 (Auto) | Continuous AF, high burst |
| Low light, dawn or dusk | 1/60s to 1/250s | f/5.6 (wide open) | ISO 6,400 to 25,600 (Auto) | Continuous AF, burst, braced on a bean bag |
| Birds in flight | 1/2000s to 1/3200s | f/5.6 to f/8 | ISO 400 to 500 (Auto) | Continuous AF with animal or bird eye detection, high burst |
| Deliberate motion blur (panning) | 1/5s to 1/15s | f/16 to f/20 | ISO 100 | Continuous AF, pan smoothly with the subject |
| Primates in forest shade | 1/125s to 1/250s | f/5 to f/5.6 (wide open) | ISO 6,400 to 12,800 (Auto) | Continuous AF, no flash |
These are starting points rather than hard rules, and I’ll explain the thinking behind each one in the tips below. If you take nothing else away, favour a faster shutter speed than you think you need, and don’t be afraid of high ISO values. A slightly noisy sharp photo beats a clean blurry one every time.
Learn How to Use Your Camera
Once you have decided on which camera to take with you, it’s important that you learn how to use it properly. This applies to whatever kind of camera you are using, be it a smartphone camera or a high-end DSLR or mirrorless camera.
A camera is ultimately just a tool to help you take great photos, and like any tool, it will only do what you ask of it. Understanding the various features of your camera and how to access and adjust key settings really matters if you don’t want to miss a shot.
When you are on safari, great photography opportunities can arise very quickly and be gone just as quickly. For example, for the shot of the leopard at the start of this post I had just a couple of seconds to frame the shot and make sure all the settings were correct before he decided to sit up and slink away out of sight.
Had I not been able to nail the focus or adjust ISO, aperture, and shutter speed appropriately in time, I would have missed the shot. I’d recommend checking out my guide to the exposure triangle, as well as how to use a mirrorless camera, for detailed advice.
Understanding how to adjust the settings and set up your camera properly means you’ll have more control over the final look of your shots. For example, you could learn how to manually change the shutter speed so as to capture movement in different ways.
Here are a couple of examples of different shutter speeds to show the difference.

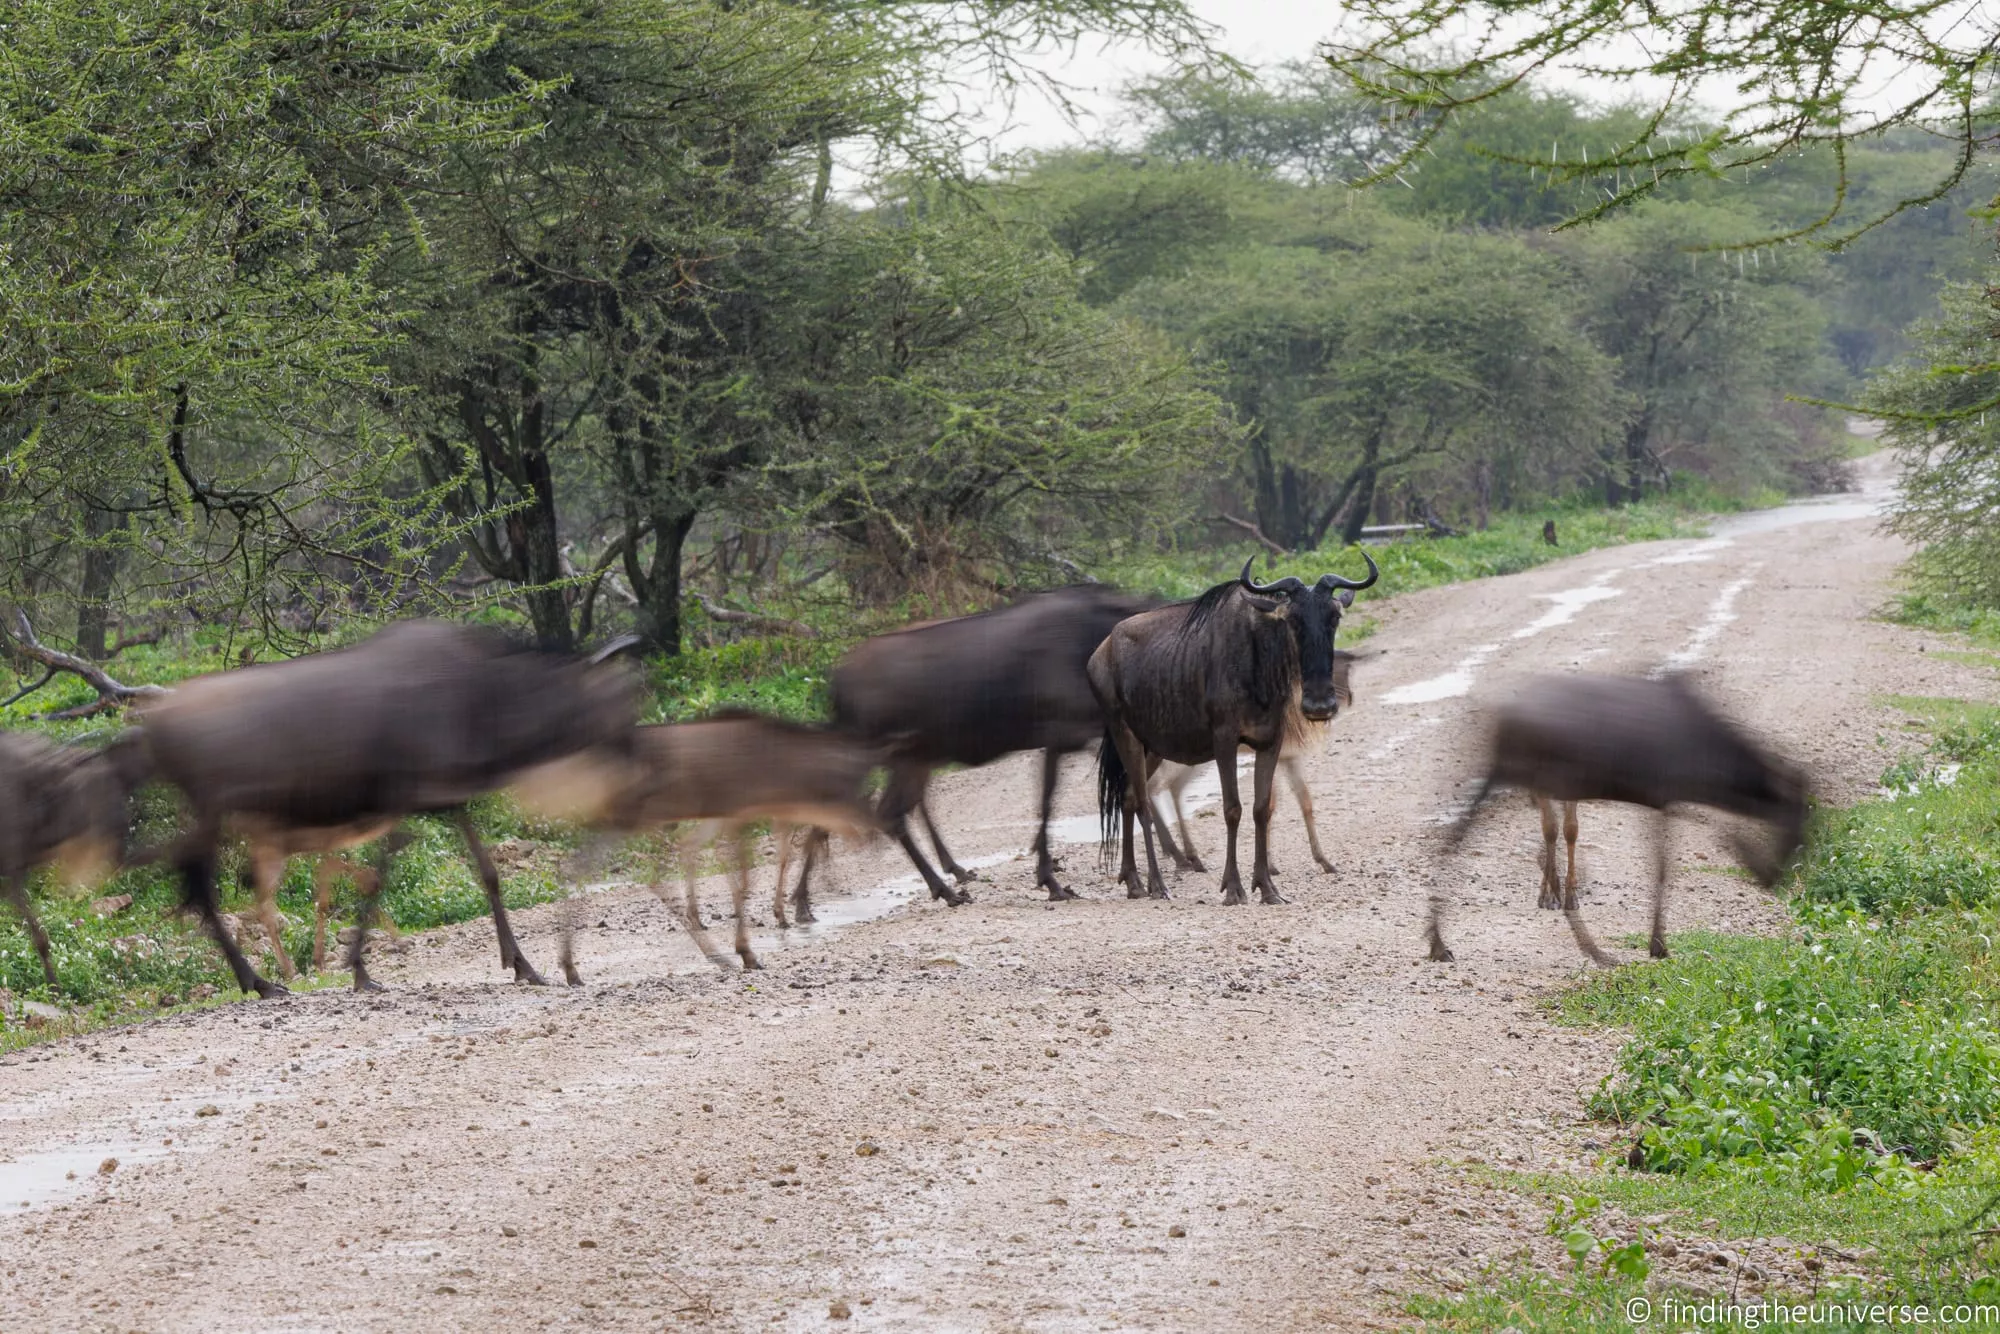
In the first shot, even though the fighting zebras are moving quickly, the fast shutter speed freezes the action. In the second shot of the wildebeest crossing, they are just walking over the road. But in 1/5th of a second, they cover a small amount of ground, and so they become blurry. The single stationary wildebeest remains sharp as it isn’t moving.
There are many features of a camera which can be used to adjust how the final shot looks, and understanding how to control them will help ensure you get the shots you want.
If you feel you need help with using your camera and would like to improve your photography, there are a lot of photography courses, books, and workshops out there. You can also improve your photography at home between trips. I run an online photography course that teaches all the basics as well as more advanced skills, and have proudly helped thousands of people improve their photography.
Understand the Limitations of Your Camera
Every camera has limitations as to what it can do. These limitations will vary, and even high-end cameras will have some sort of limitation.
Examples of limitations are:
- The zoom isn’t very big, meaning you can’t capture animals which are far away and will have limitations capturing smaller animals like birds
- The camera sensor is small, and so produces noisier images when there is less light
- The lens is big and heavy, so you need to use a fast shutter speed to avoid blurry images from your own hand movement when handholding it
- Big and heavy equipment is more difficult to pack and travel with
The important thing is to understand the limitations of your camera so you can work around them, or at least know what to expect before you go on safari.
The most common issue is probably not being able to take photos of animals that are further away. We saw a number of travellers frustrated by this on our trip in East Africa. All cameras will have their distance limitations, just be sure to have a good idea of yours so you can have realistic expectations of what kinds of photos you will be able to take. You can simply go outside and take photos of local animals or birds to get a good sense of this.
Another common issue I see from safari photos, and wildlife photos in general, are images that are not as sharp as they could be.
This is usually because the shutter speed is too low and the user is handholding a larger lens. A slow shutter speed means that any movement in your hand is translated into motion blur as you take the picture. You can fix this by increasing the shutter speed and/or resting the lens on a steady surface.
Some limitations can’t be overcome though, and are usually down to the actual hardware inside the camera. For example, the maximum zoom, the sensor size, and the maximum aperture will be fixed.
However, if you know what the limitations of your equipment are, then you will be able to either accept them and work around them, or decide on upgrading to a different camera for your trip.
I’d also add at this point that you shouldn’t compare your photos to those you’ve seen on TV, online, and in wildlife magazines. You have no doubt seen some amazing wildlife photos and videos on sites like National Geographic or the BBC, and might wonder why you aren’t able to get the same sorts of shots.
Whilst it is of course possible to get images like those photographers do, they often have a lot of advantages over the average tourist. They typically travel as a crew with tons of high-end equipment, and they often take photos in locations that are hard to get to with limited public access.
They also often pay for special press or filming permits to get off-road access or shoot in private areas outside of national parks. They spend weeks planning and trying to get the right shots, and only share the very best with the public.
So don’t be too hard on your gear or yourself. Just be aware of the limitations of your photography equipment and know how to get the most out of it.
Understand What Causes Blurry Wildlife Images
It’s important that your images are sharp. Two things can cause an image not to be sharp. The first is using too slow a shutter speed for the situation you are shooting. The second is not focusing correctly.
A slow shutter speed can result in blurry images for a number of reasons. If you are handholding your camera, then any movements in your hands can translate to blurry images. Movement of the subject can also translate to blur, as can movement due to you taking photos from a moving vehicle or boat.
You can resolve the slow shutter speed blur problem by using a faster shutter speed and ensuring you are as still as possible when shooting. Ideally, you’ll want to rest your camera on something totally stable when shooting. Then all you have to think about is the motion blur that might result from the animal moving.
For focus, the main issue is likely to come about as a result of the camera’s autofocus system picking the wrong part of the scene to focus on, leaving your subject out of focus. I’ll cover that in my next tip.
Master Your Camera’s Focus System
An important aspect of wildlife photography is knowing how to use your camera’s focus system.
It is important to be able to focus on the animal or thing that you want the viewer’s eye to go to in the image. This means that you will want to be able to use your camera’s manual focus system (if it has one) and/or learn how to change the focus if your camera’s autofocus gets it wrong.
A shot can technically be in focus and sharp, but if you have focused on the wrong part of the scene your actual subject will be out of focus, and so you won’t end up with the image you want.
Nearly every camera on the market today has an automatic focus, or autofocus, system. As the name suggests, this system automatically focuses for you when you point the camera at a scene.
There is however quite a difference in the capabilities of these systems. At the more basic end, an autofocus system will allow you to select an area of the scene to focus on, and then focus appropriately.
More advanced autofocus systems will be able to identify specific types of subject, like animals or people, and track them as they move so you can keep focus.
Many cameras and lenses also feature manual override, so you can manually adjust the focus if you need.
The main camera I use for wildlife photography, the Canon EOS R5, has a very sophisticated autofocus system which is able to recognise and lock onto a wide range of subjects. If it can find an eye, it will lock focus on that. Otherwise it will try to track a torso or head. It can also continue to track the subject as it moves, switch between subjects, and I can override the focus selection if necessary.
It took me quite a while to get to grips with this system, and also to get used to its quirks and limitations. For example, on some occasions it would prefer to focus on the grass in front of the subject rather than the subject. Other times it might focus on a marking on an animal’s hide rather than the eye.
Results like this are why it is so important to understand both the various focus modes of your camera and how to override them.
For example, on my Canon EOS R5 I have a separate button set up for centre spot focus. This lets me point the centre of the frame at the area I want to focus on, and know I’ll get sharp focus in that area when I press the focus button. I can also entirely override the focus with the manual focus ring on the lens.
Whilst I can rely on the autofocus subject tracking 90% of the time, this also means I don’t miss focus in those edge cases where the camera doesn’t get it right. Technology can be smart, but it can’t read minds quite yet, so it’s usually working off a best guess as to what you want to take a photo of.
Whatever your camera is, my recommendation is to spend some time learning the various focus modes, what they are, and how to quickly override the focus if necessary, either manually or by selecting a different focus area.
Ideally you’ll want the camera to be in a continuous focus mode so it keeps tracking a moving subject. Try to find some subjects like wildlife in your garden or a moving pet that you can practice on before you go on safari to master your camera’s focus features.
Try Shooting in Burst Mode
Most cameras have a range of shooting modes, which may also be called drive modes. The choices normally vary, and will include single shot and burst shot modes. The drive mode menu on your camera is also where you’ll often find the camera’s self-timer mode.
For wildlife photography, a lot can happen in a short sequence of time. For this reason, shooting in burst mode is usually the way to go when you have a moving subject. This means that as you hold down the shutter button the camera will keep taking images.
Alternatively, in single shot mode, you have to keep pressing and releasing the shutter button. This loses you time and you may miss the shot.
Shooting in burst mode will let you take a sequence of images and then pick the best one. For example, here’s a sequence showing a yellow-billed stork coming in to land.
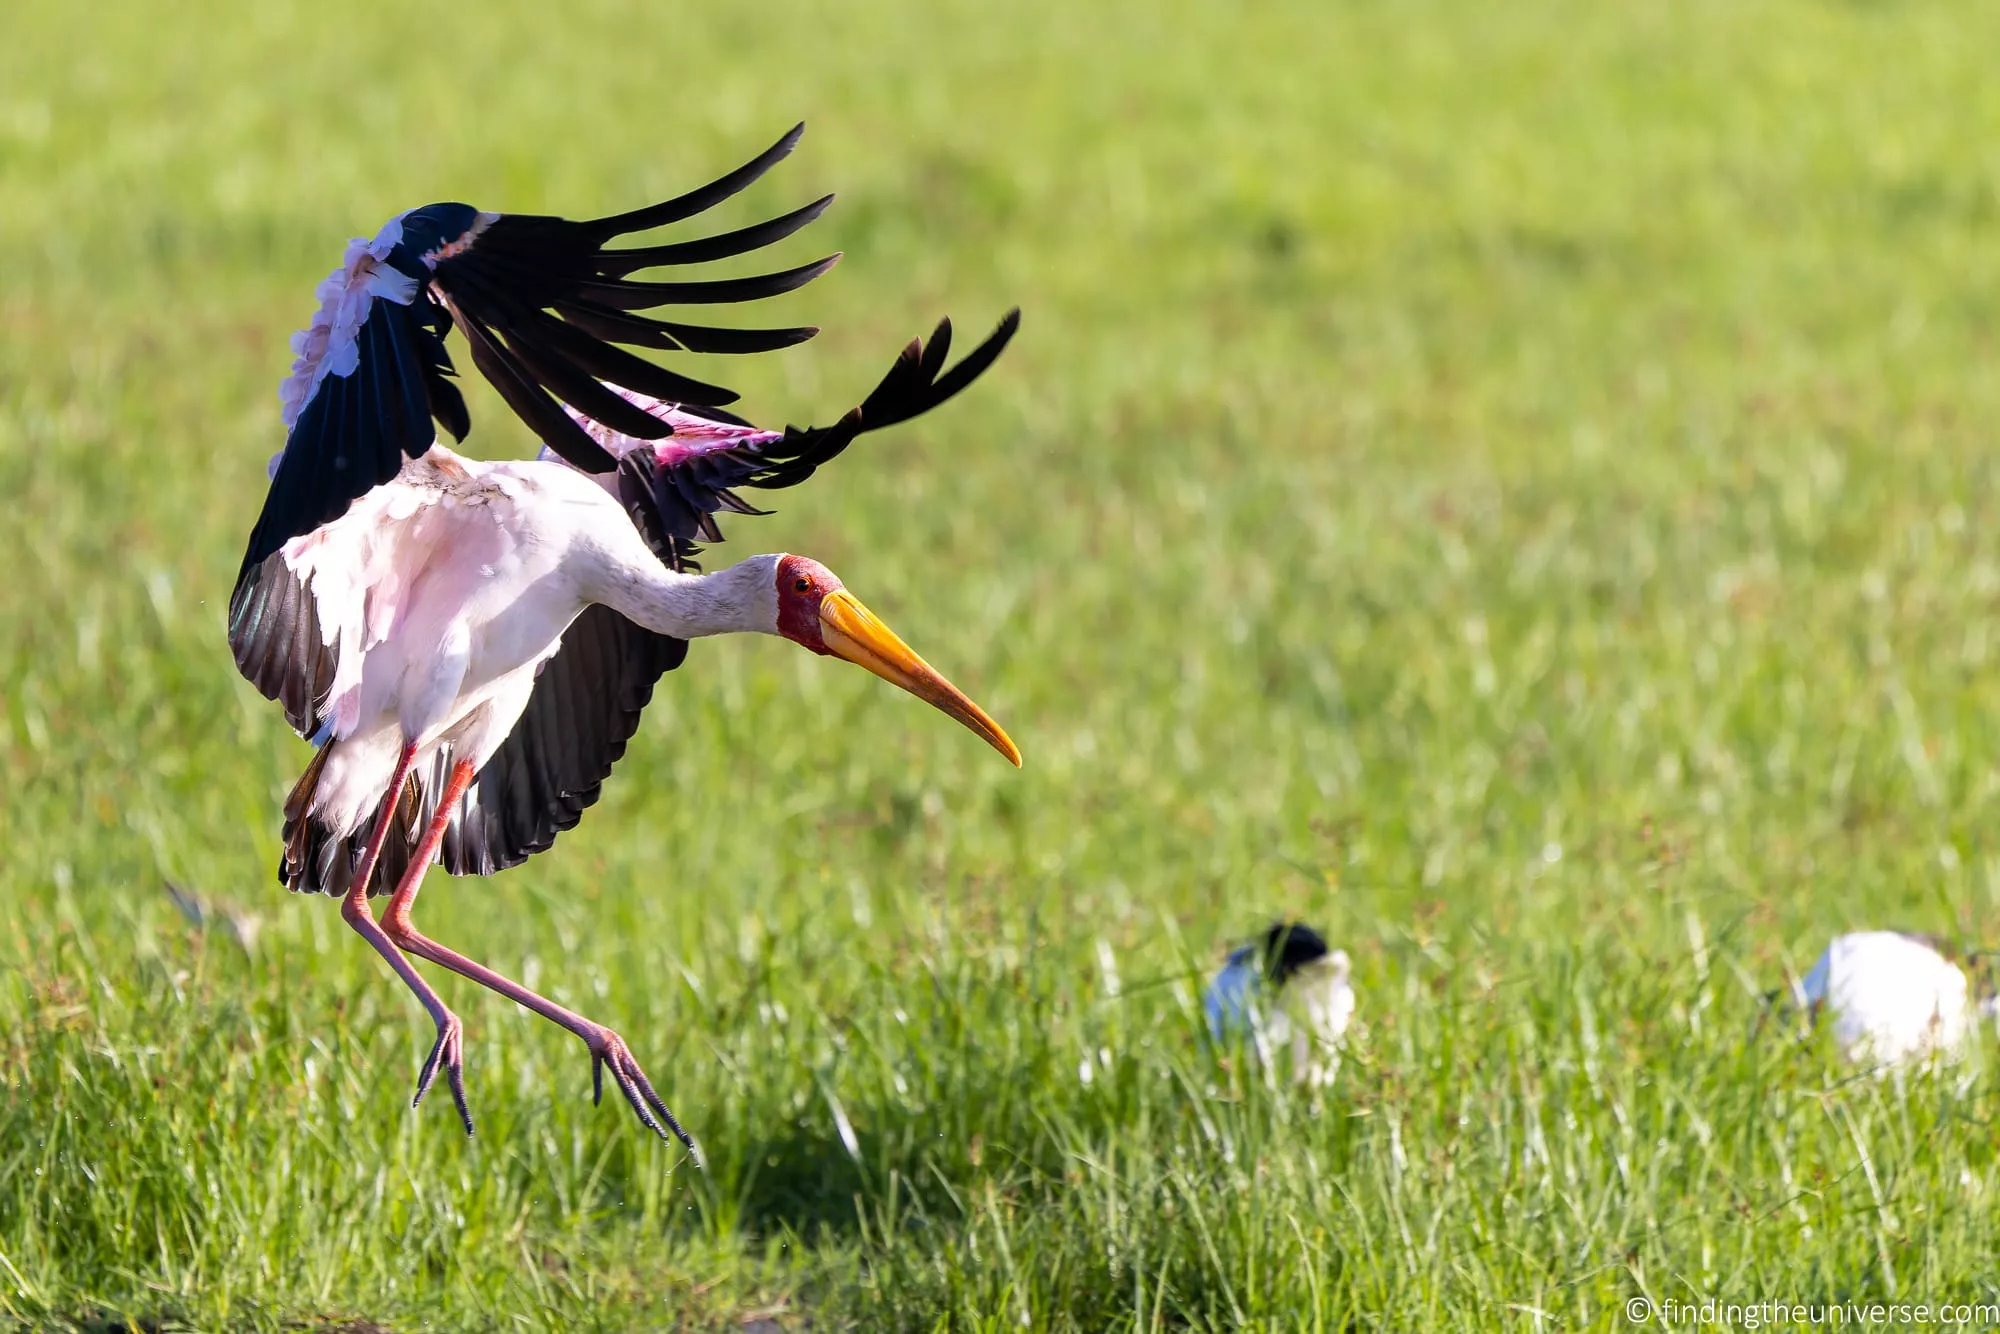
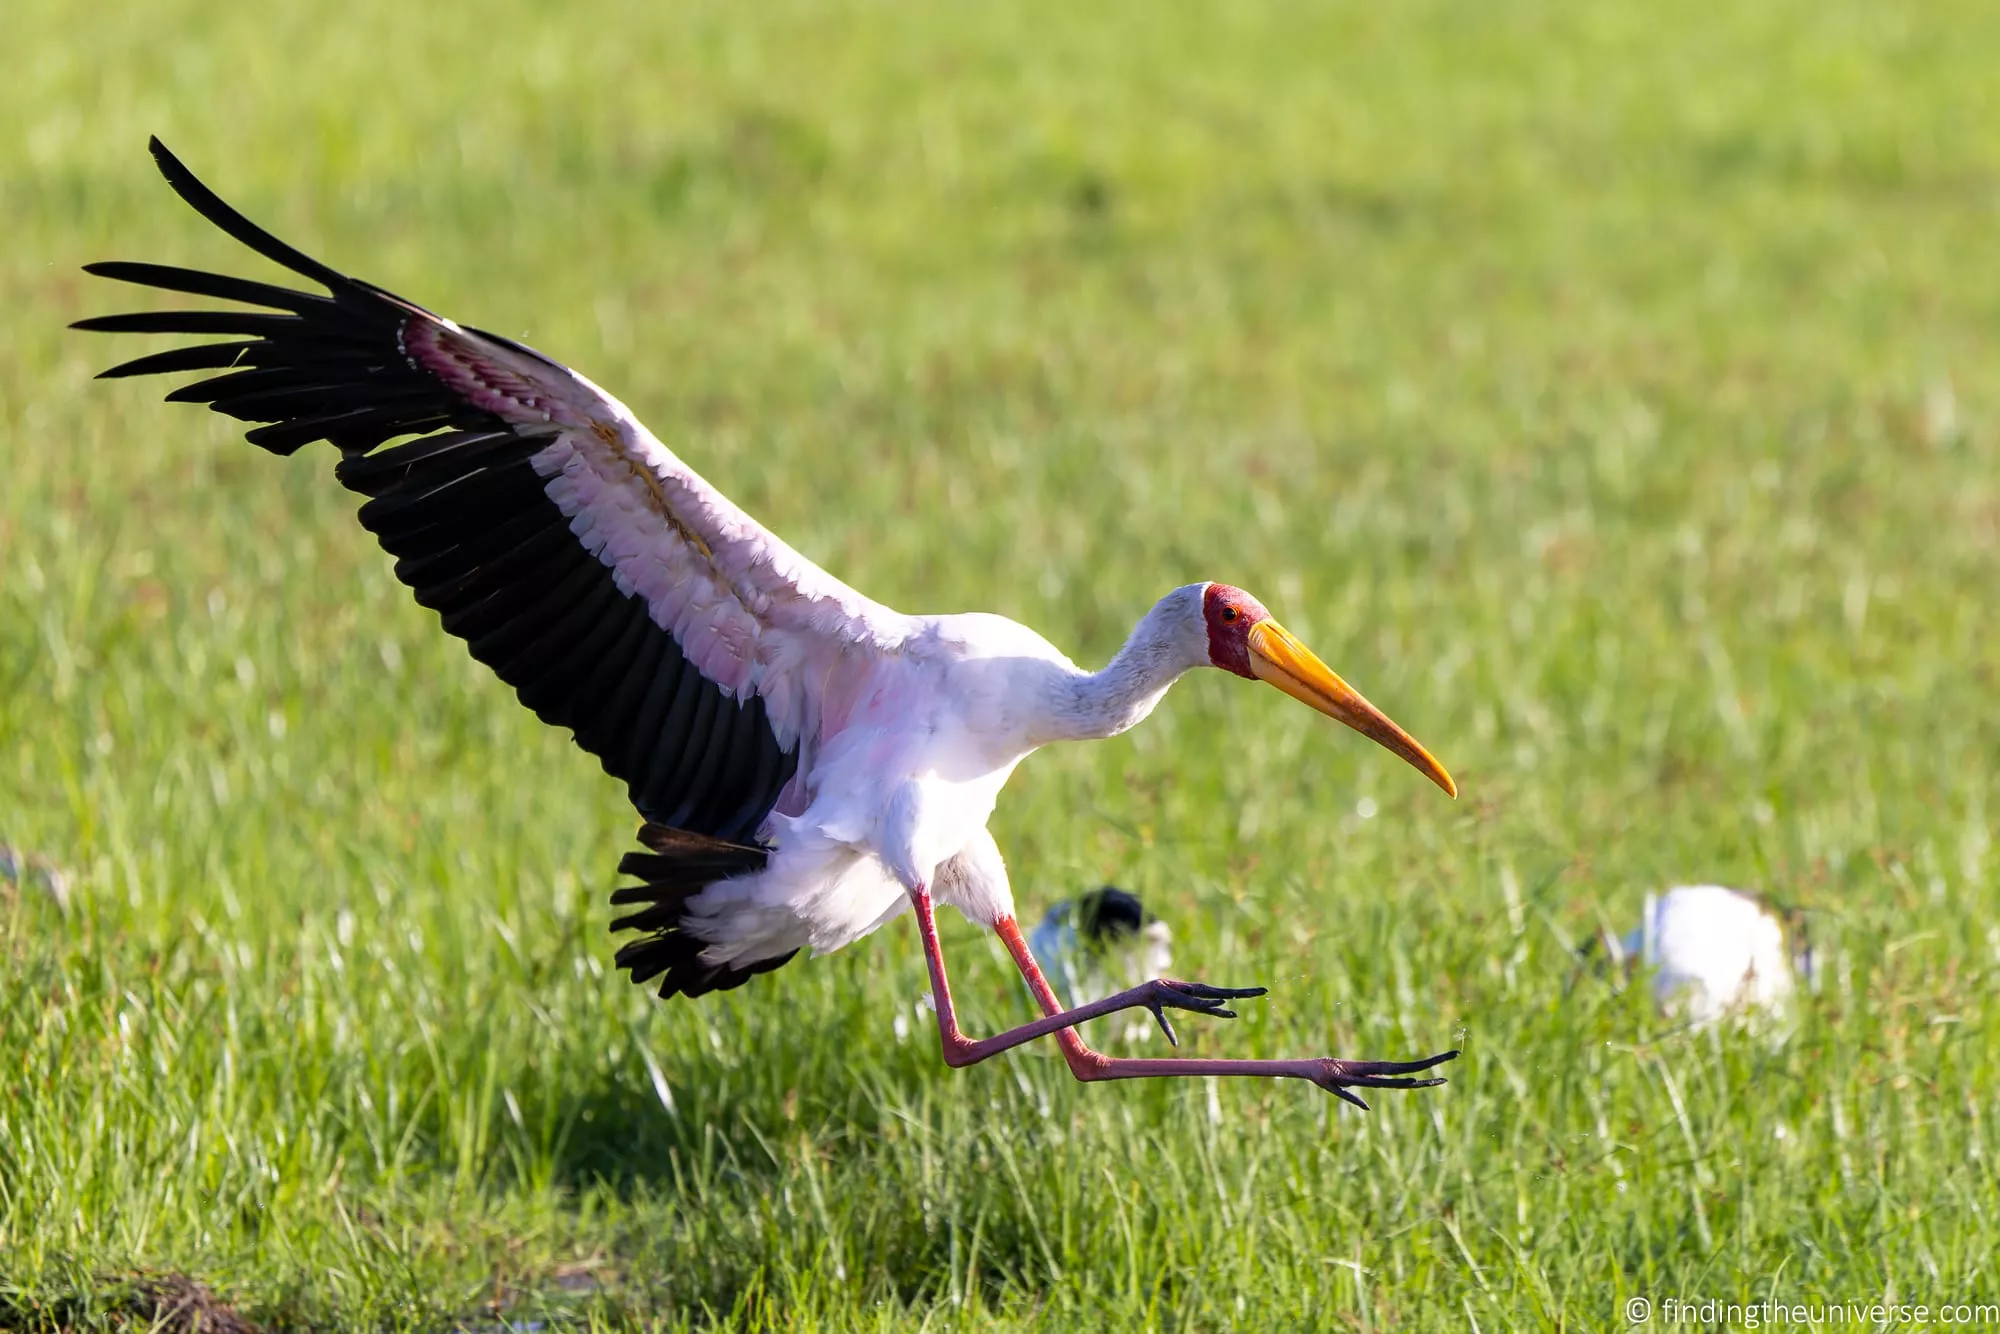
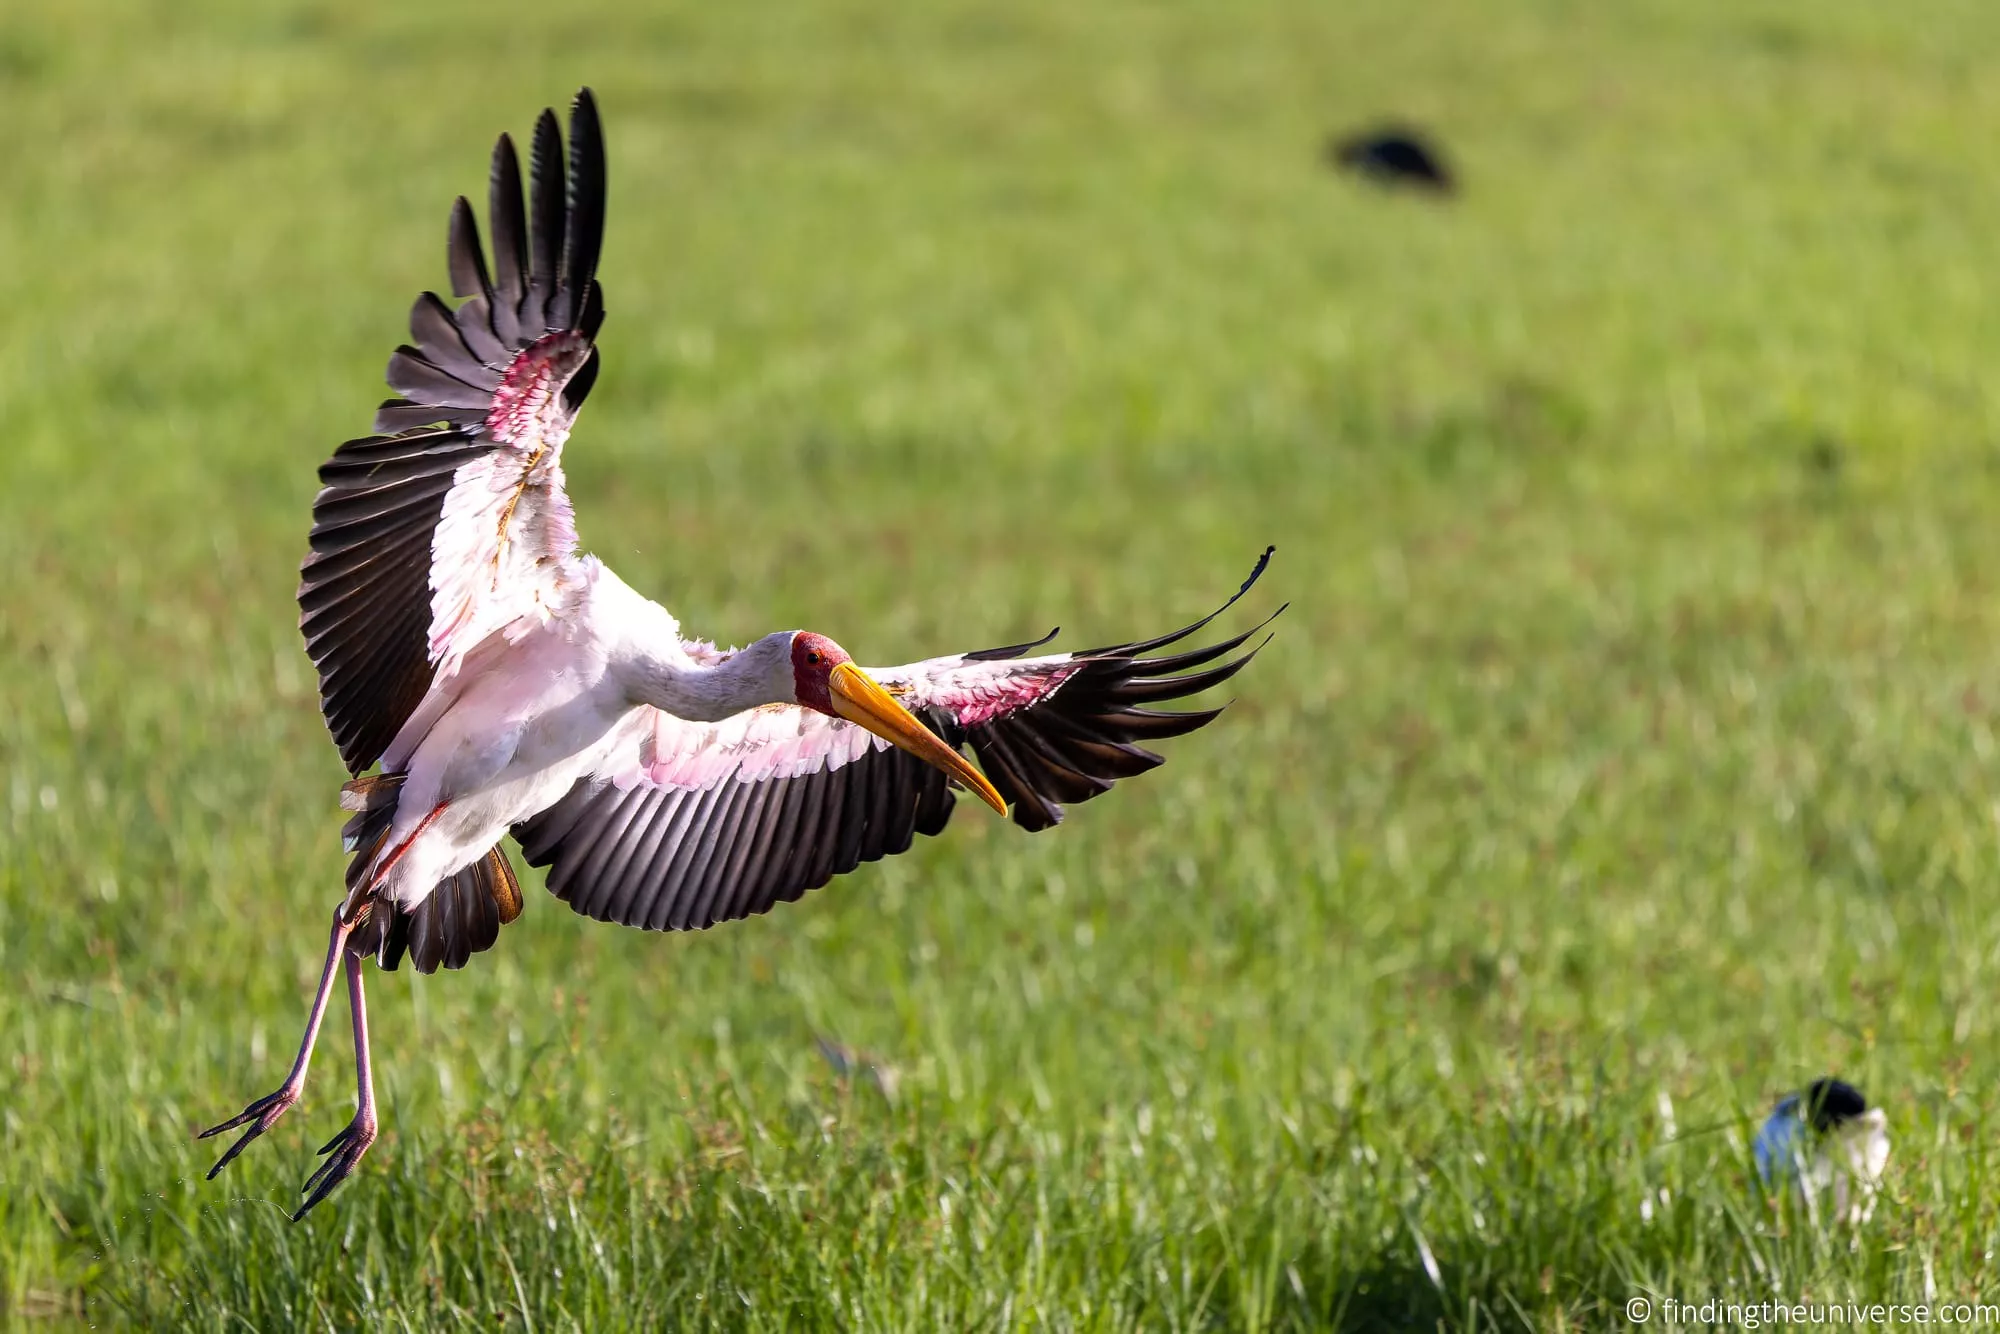
The number of images the burst mode will take will depend on two main factors.
First, the camera’s burst speed, which is the number of images per second your camera can take. For instance, a camera with a burst speed of 10fps (frames per second) can take up to 10 photos per second.
Second, the speed that your camera can write to the memory card inside the camera as it takes pictures.
Most cameras will be able to take a certain number of images at the maximum burst speed for a few seconds, and then, as the memory buffer fills up, this rate will slow down or even stop until the images have been written to your memory card. These details should be made clear on the specification sheet for your camera.
When you shoot in burst mode you will definitely also want to have continuous autofocus enabled. This will mean that if your subject moves as you are shooting, it will hopefully stay in focus.
The main disadvantage of shooting in burst mode is that you will end up taking a lot more photos and using more memory card space. However, memory cards and memory in general are relatively inexpensive now, so this shouldn’t be too much of an issue. Just be sure to always have an extra memory card with you.
Shoot in RAW
If your camera supports it, and nearly all do now, I highly recommend setting it up so it saves your image files in RAW format. Whilst this takes up more memory, and does require you to edit your photos, you will get a lot more latitude for editing your final image.
I go into a lot more detail on why to shoot in RAW in my guide to RAW in photography. For now, I recommend enabling it. Most cameras have the option to shoot in both RAW and JPG if you need a stepping stone, although this will take up more memory card space.
However, if you want to be able to share your photos instantly online during your trip, then you will probably want to also shoot in JPG/JPEG because you don’t need to edit them prior to uploading.
Shooting in RAW is especially valuable on safari because so many of your best shots will be in tricky light, at high ISO values, or with quickly changing exposure. That extra latitude is what lets you rescue detail in shadows and tame noise when you get home, as I’ll show in the editing section below.

In the Field: Working the Vehicle, Guide, and Composition
This is where it all comes together. You’re in the vehicle, the light is good, and an animal appears. How you time your drives, work with your guide, and compose your shots in these moments makes an enormous difference to what you bring home.
Try to Shoot at the Best Times of Day
If you’ve ever read a photography guide, it will normally advise you that shooting in the earlier morning and later afternoon will give you better results. This is because the light at the start of the day and in the evening is softer and has that nice warm yellow glow.
In addition, the lower angle of the sun in the morning and evening produces shadows, resulting in images that have better contrast and depth compared to images shot in the overhead midday sun, which can produce flatter images.
On safari, the same advice holds, but there are additional reasons to shoot earlier in the morning and later in the evening.

To start with, the majority of animals are going to be more active earlier in the morning and then towards the evening. The middle of the day tends to be hotter, and is a time when many animals are likely to be resting in a nice shady spot.
You will tend to see fewer animals in the hottest part of the day, and those you do see will tend to be less active.
If you are looking for nocturnal species like genets, bushbabies, or aardvarks, your best chances to see them are on night drives or night walks, or to go as early in the morning as you can for a chance to spot them before they’ve gone off to sleep.
Just note that nocturnal animals can be pretty tricky to see in most national parks given the hours that you are allowed to do a game drive. Getting good photos of them can be very difficult given they are often spotted at night.
We recommend trying to start your game drives as early as the park will allow. This will give you a better chance of seeing more wildlife, and also getting better images of that wildlife.
Another reason to avoid the middle of the day is that as the air heats up it gets more hazy. Think of the heat shimmer you see on a hot day. This is a real issue when shooting during hotter days and can negatively impact your images.
The haze will result in less sharp images, especially of further away subjects. In addition, as the day progresses, there will often be more dust in the air from vehicles driving around, which also reduces the clarity in the air.
Of course, I appreciate that I am talking about ideals, and it isn’t always possible to pick the ideal time. Sometimes you will be out in the middle of the day. In these situations, try to get as close as possible to your subject, which will let you avoid more of the heat haze. Where possible, shoot your subject so the sun is behind you rather than behind your subject.
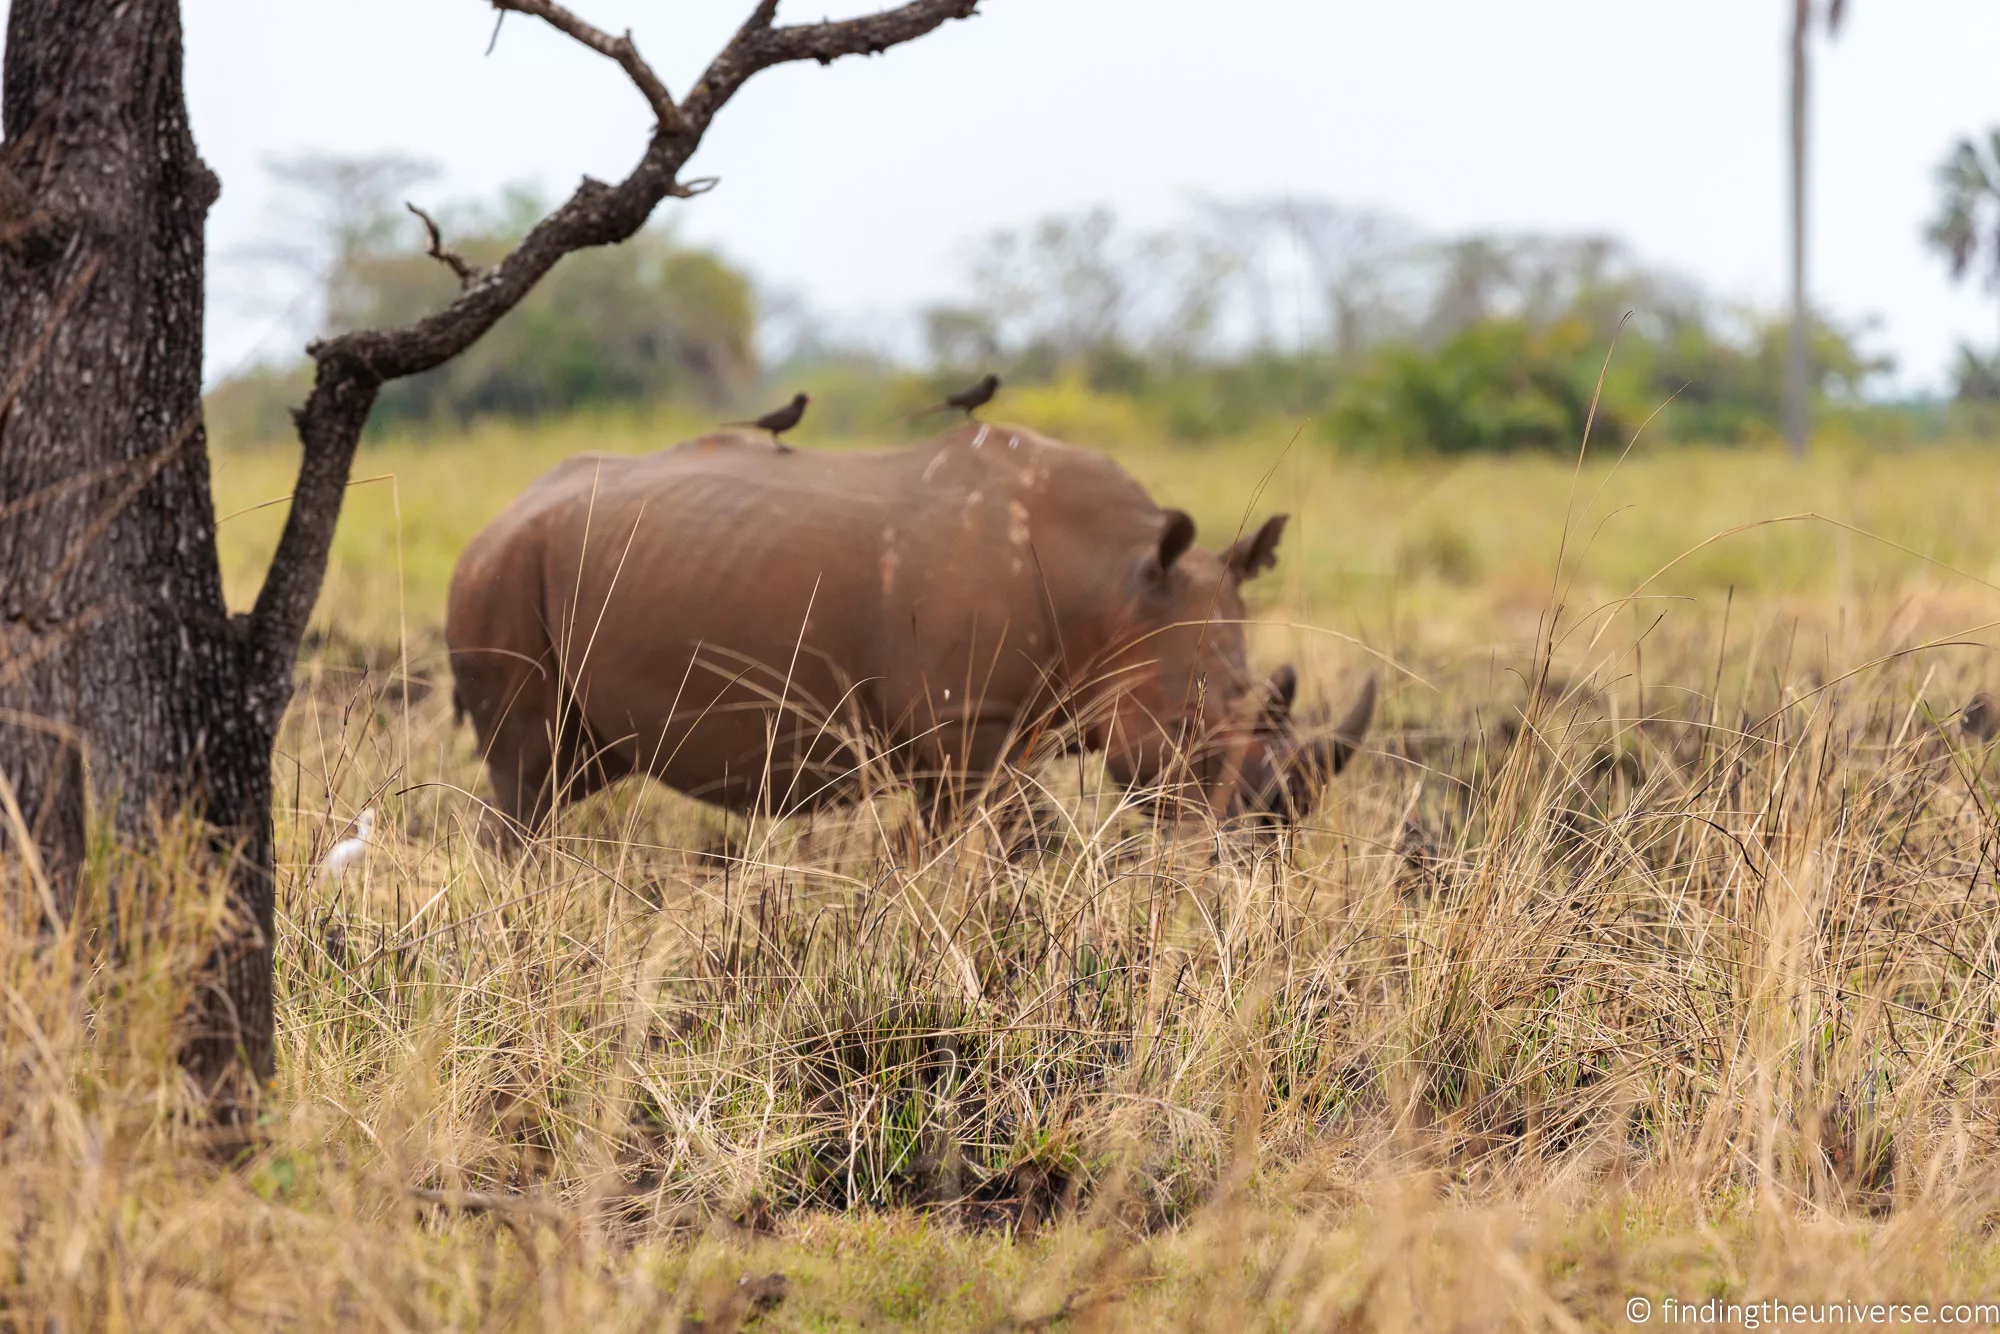
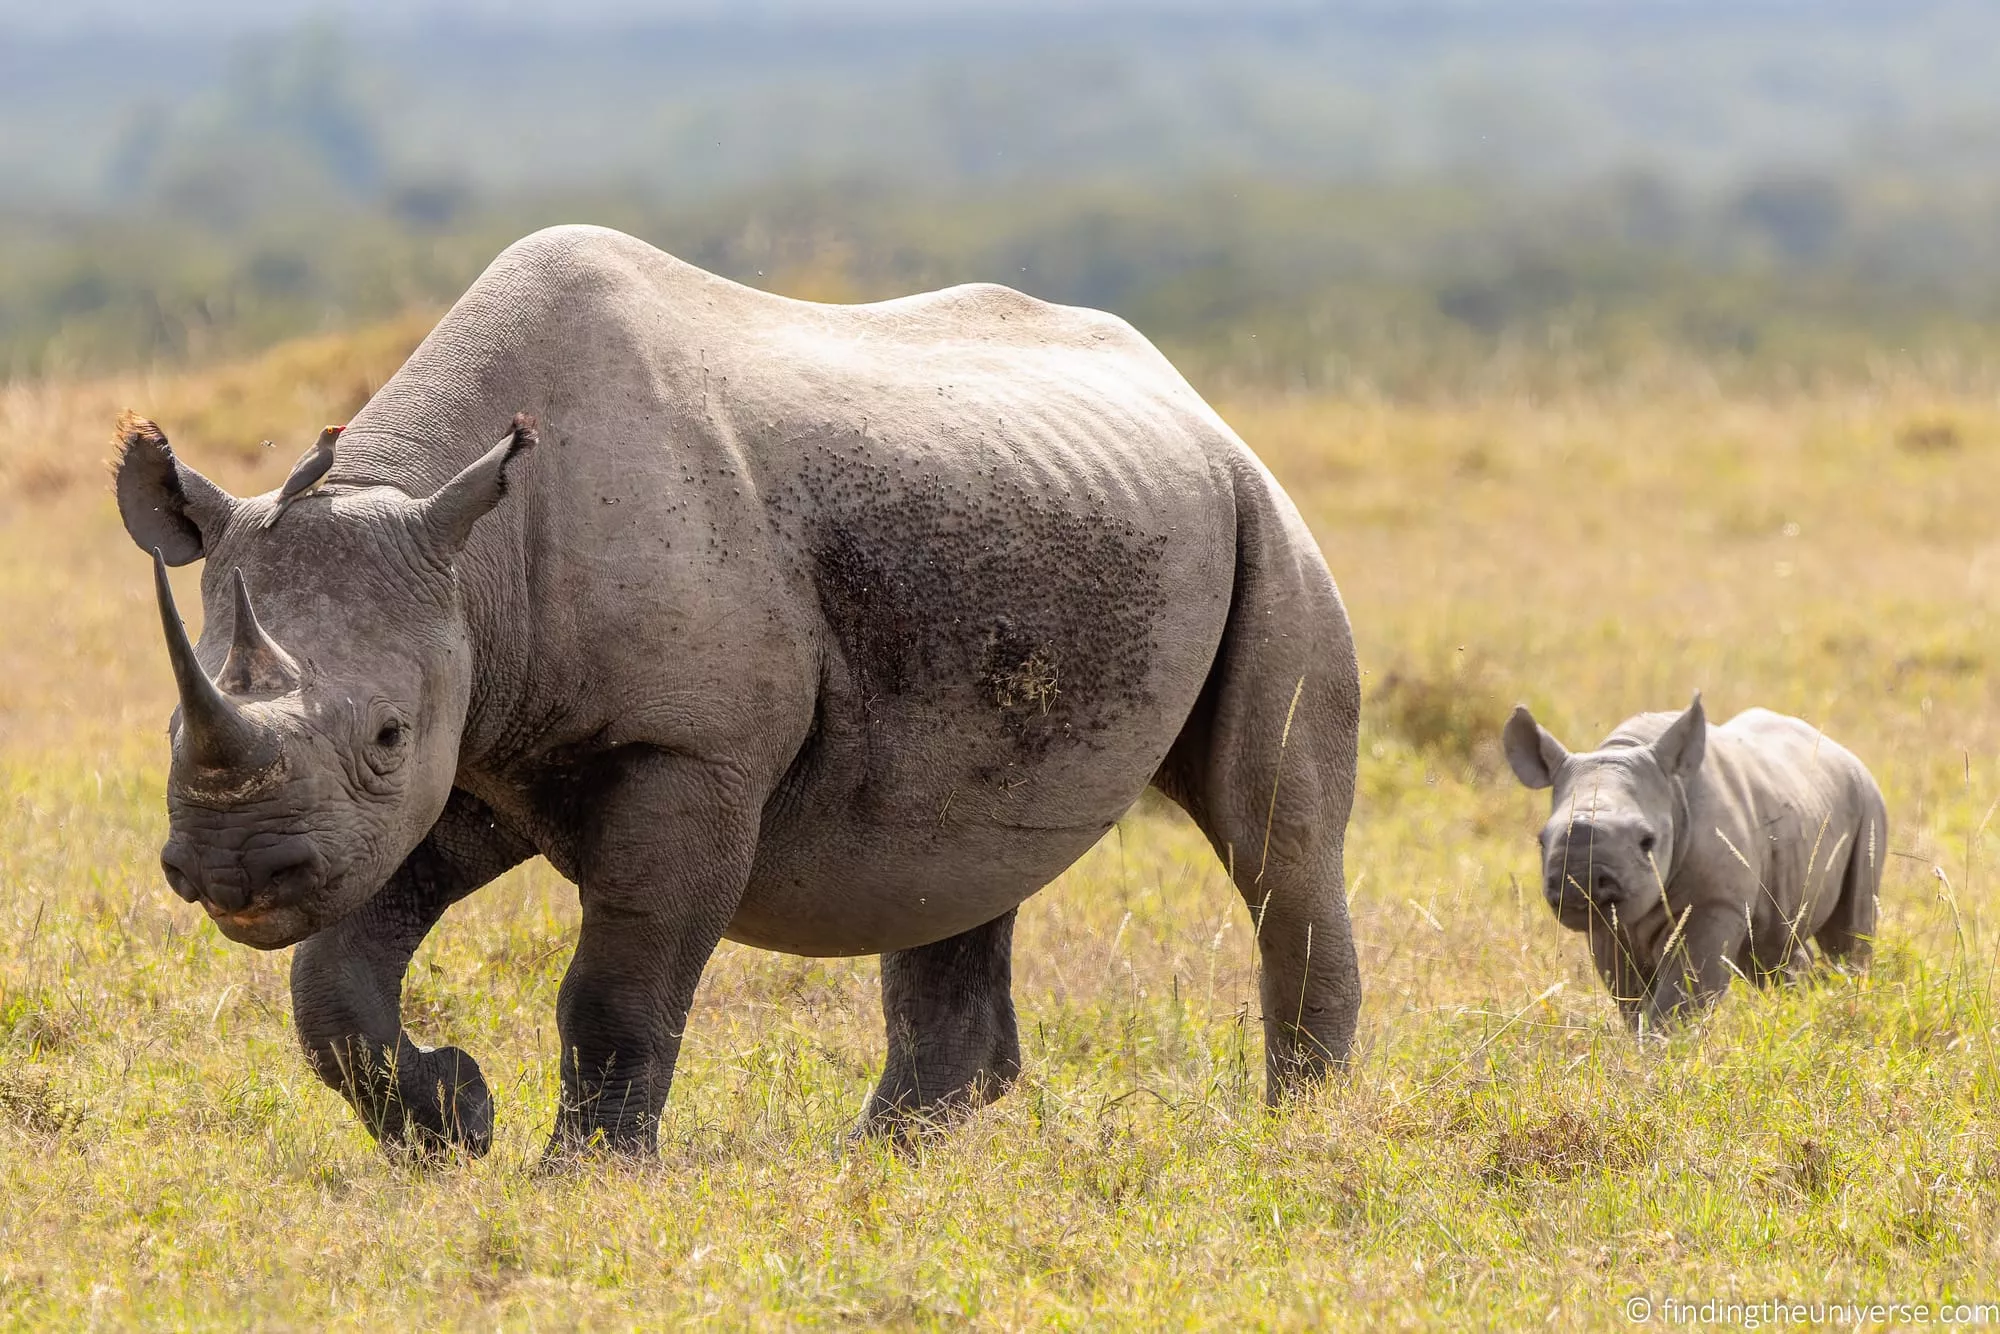
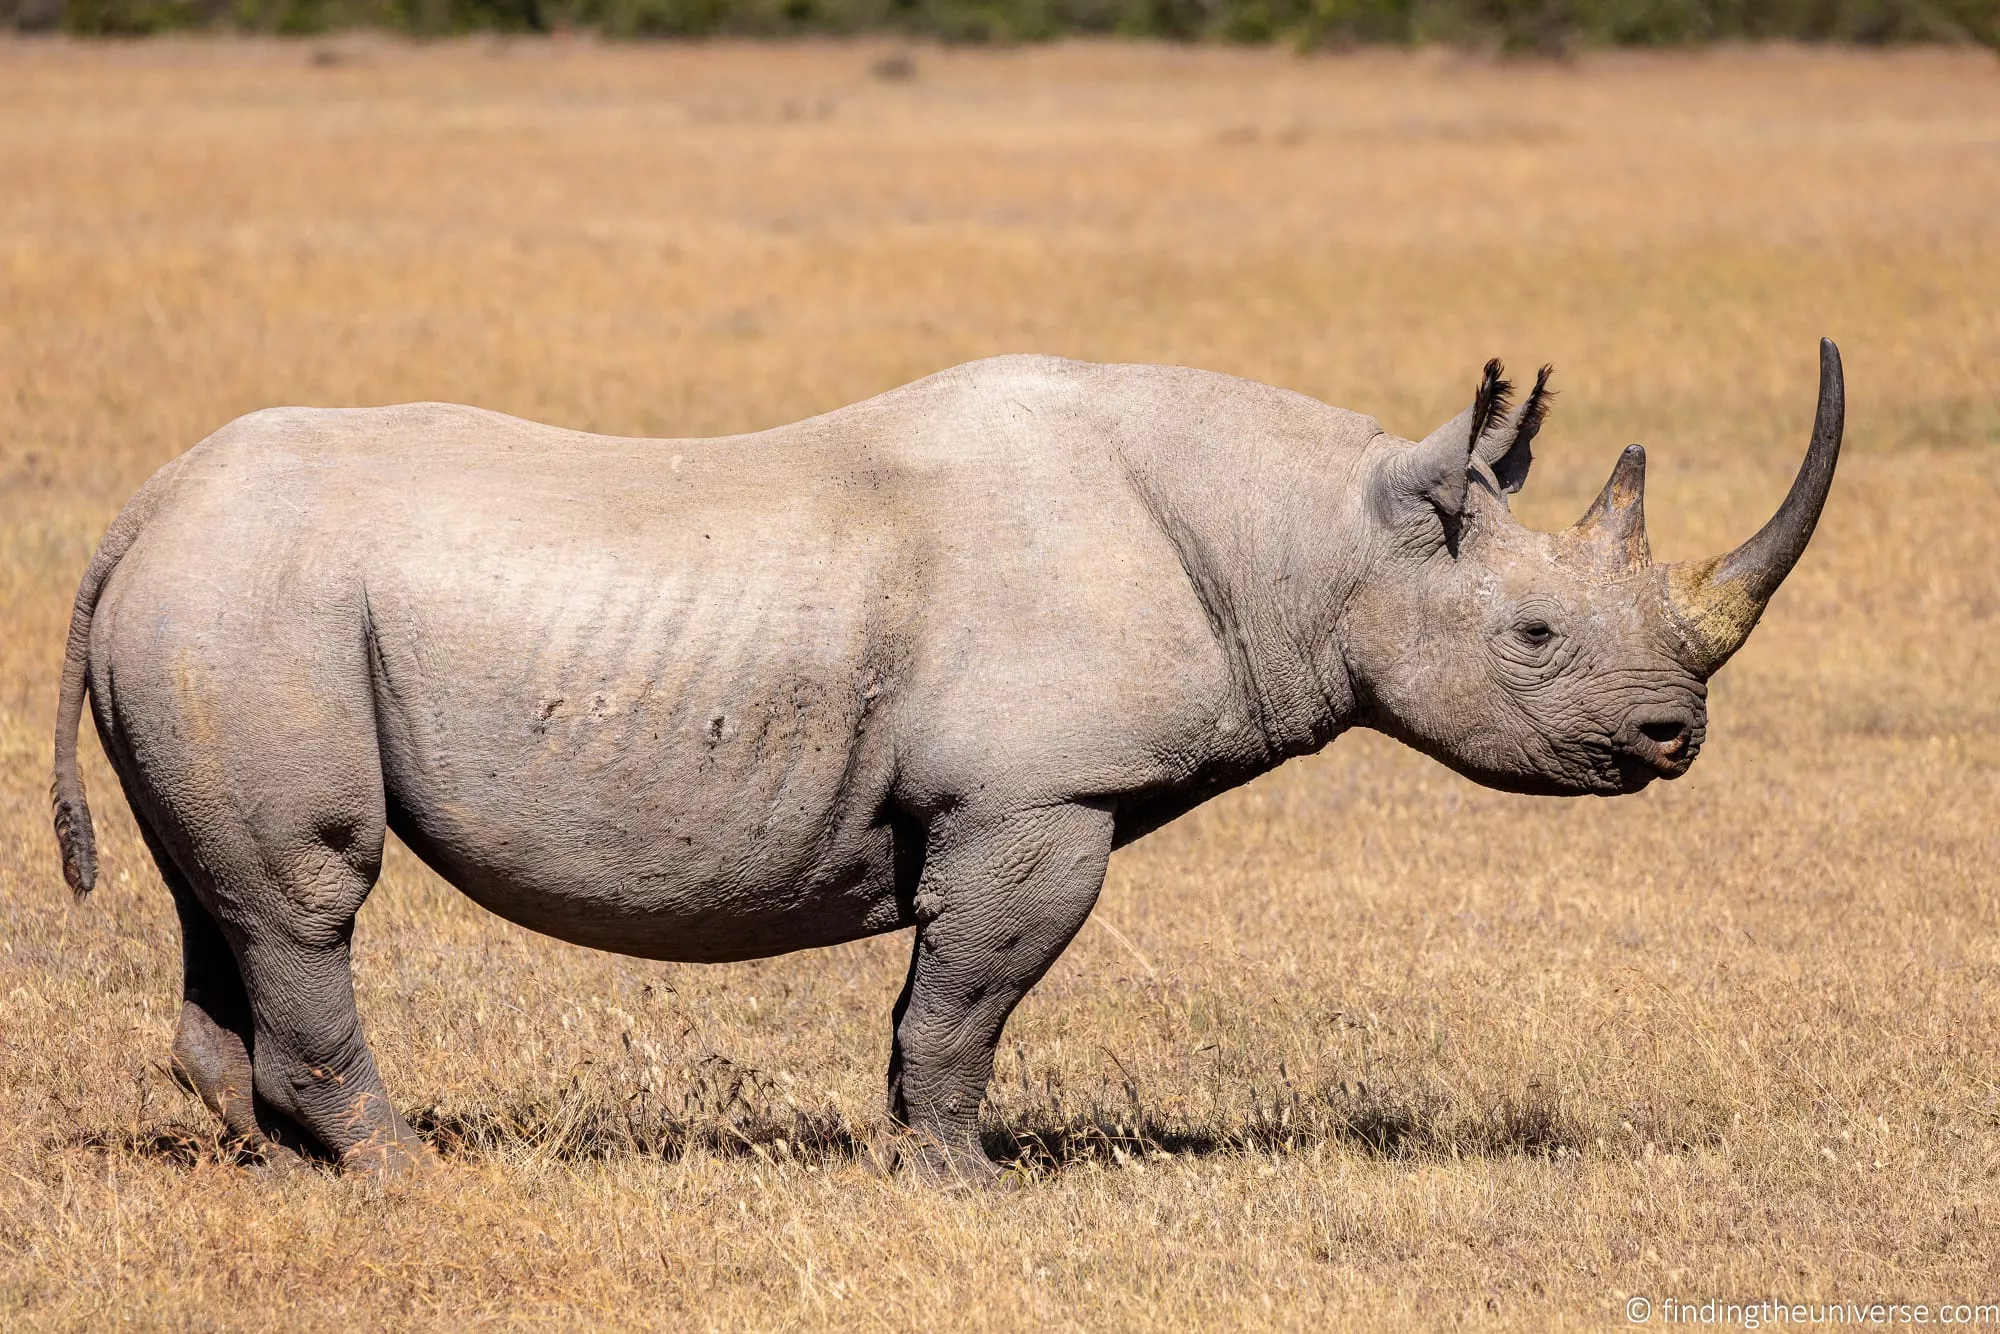
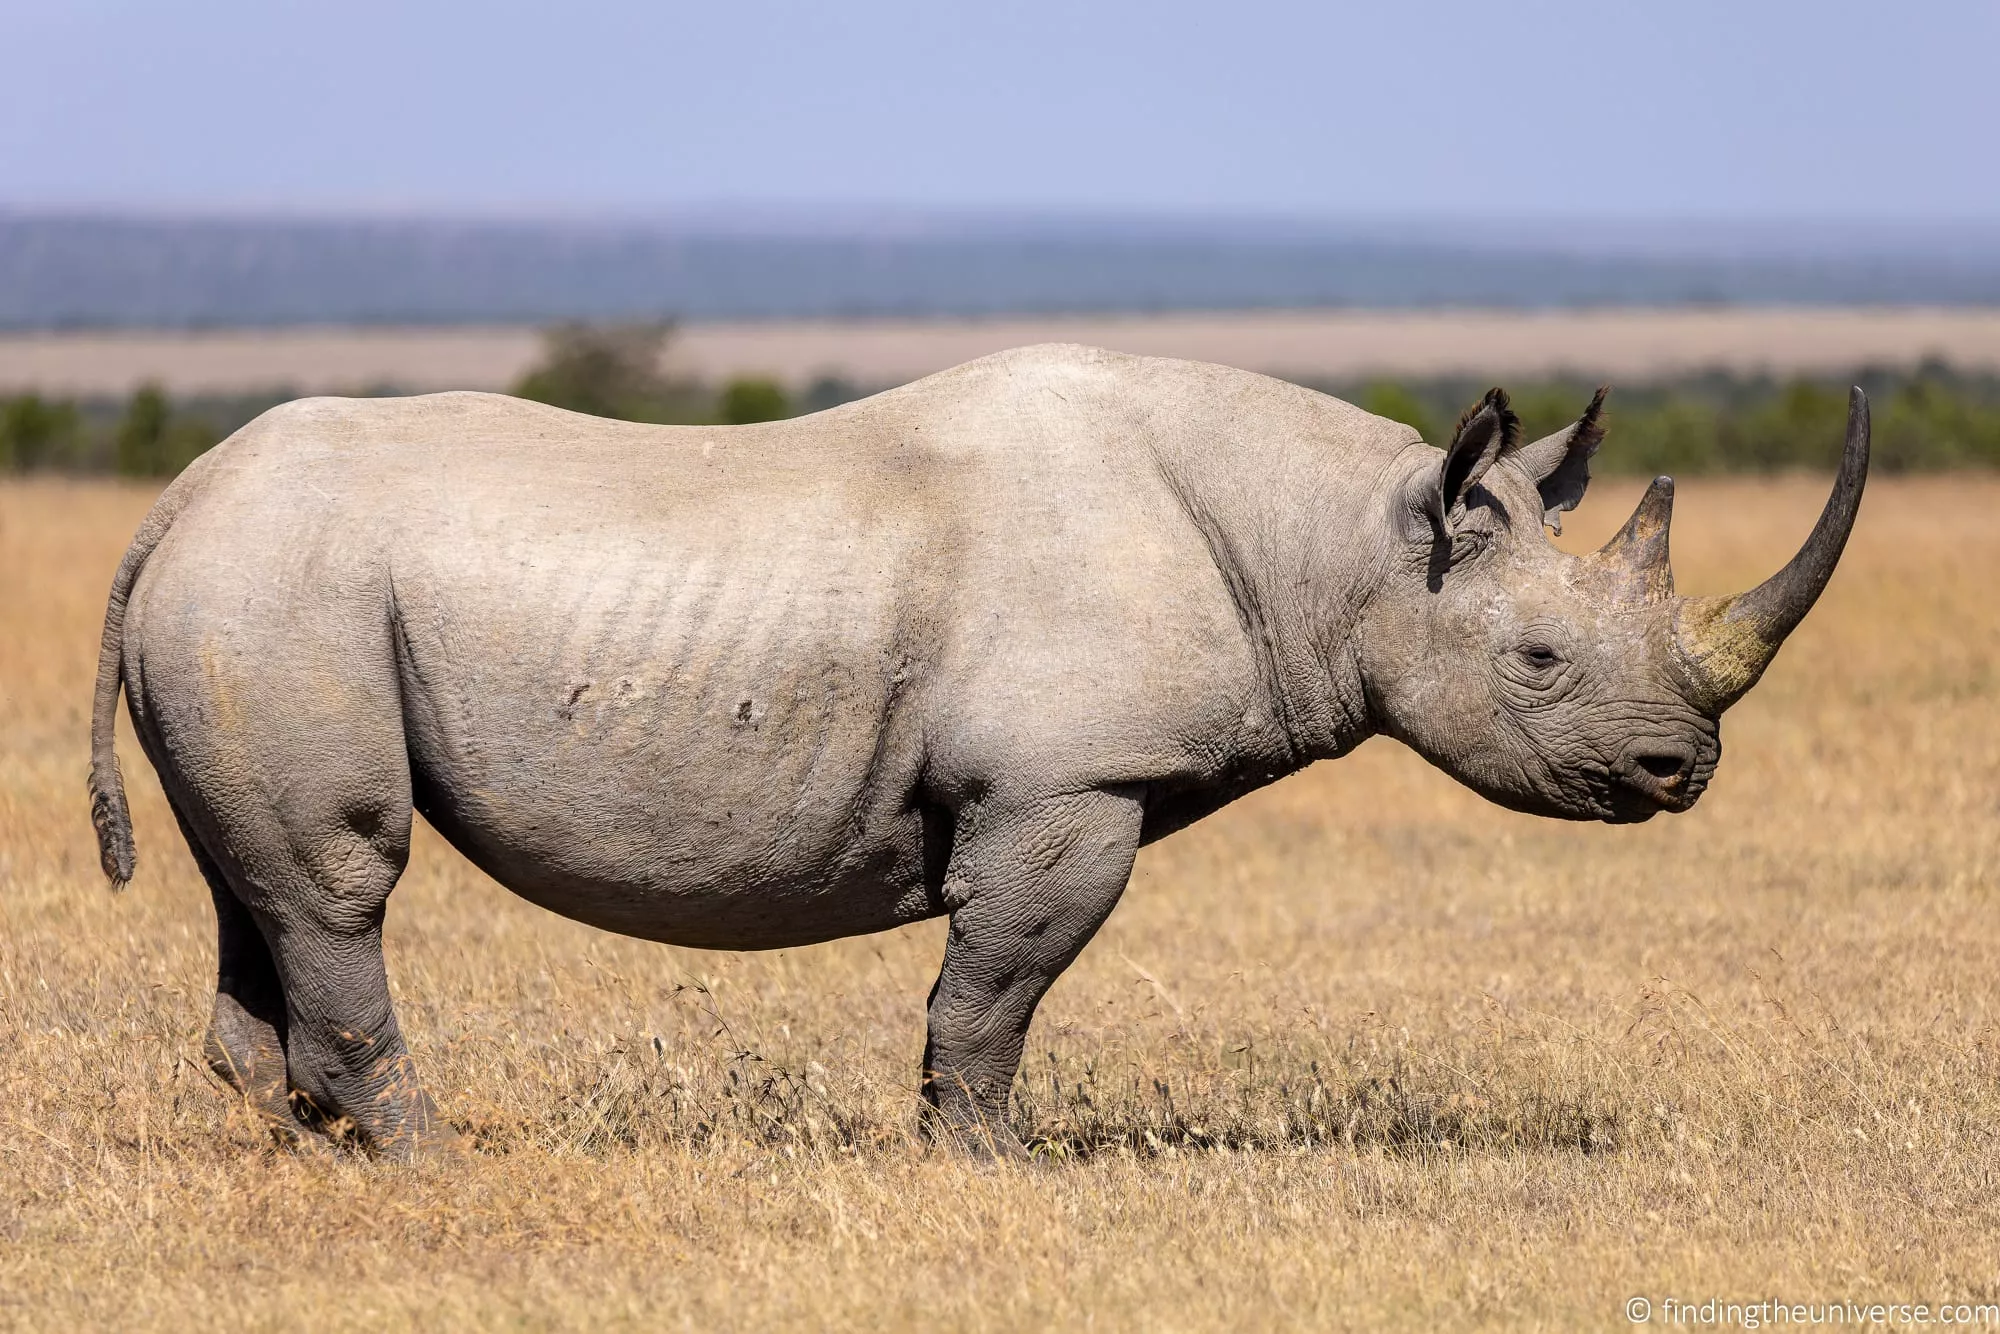
The two images below are of the same black rhino mother and calf in Kenya. Both were shot in the middle of the day. In the first shot, the pair were quite far away and there was quite a lot of heat haze, meaning the shot ended up not being as sharp as I would have liked.

In the second shot, the pair moved much closer to us and the light was slightly improved, so there is some depth from the light and dark. It’s still not the ideal setup, but it’s definitely improved compared to the flat and slightly hazy look of the first shot.
See more on heat haze in photography here, including more tips for identifying and avoiding it.
This brings me on to my next tip for getting great photos on safari.
Be Patient
Any wildlife photographer will likely tell you that their most useful skill is patience. When doing landscape photography, I’m used to waiting for the right light, but wildlife photography takes the need for patience to a whole new level.
Wild animals tend not to move to our schedules. They go where they want, when they want. Being patient and quiet can reap huge rewards for photographing them in their natural habitat.
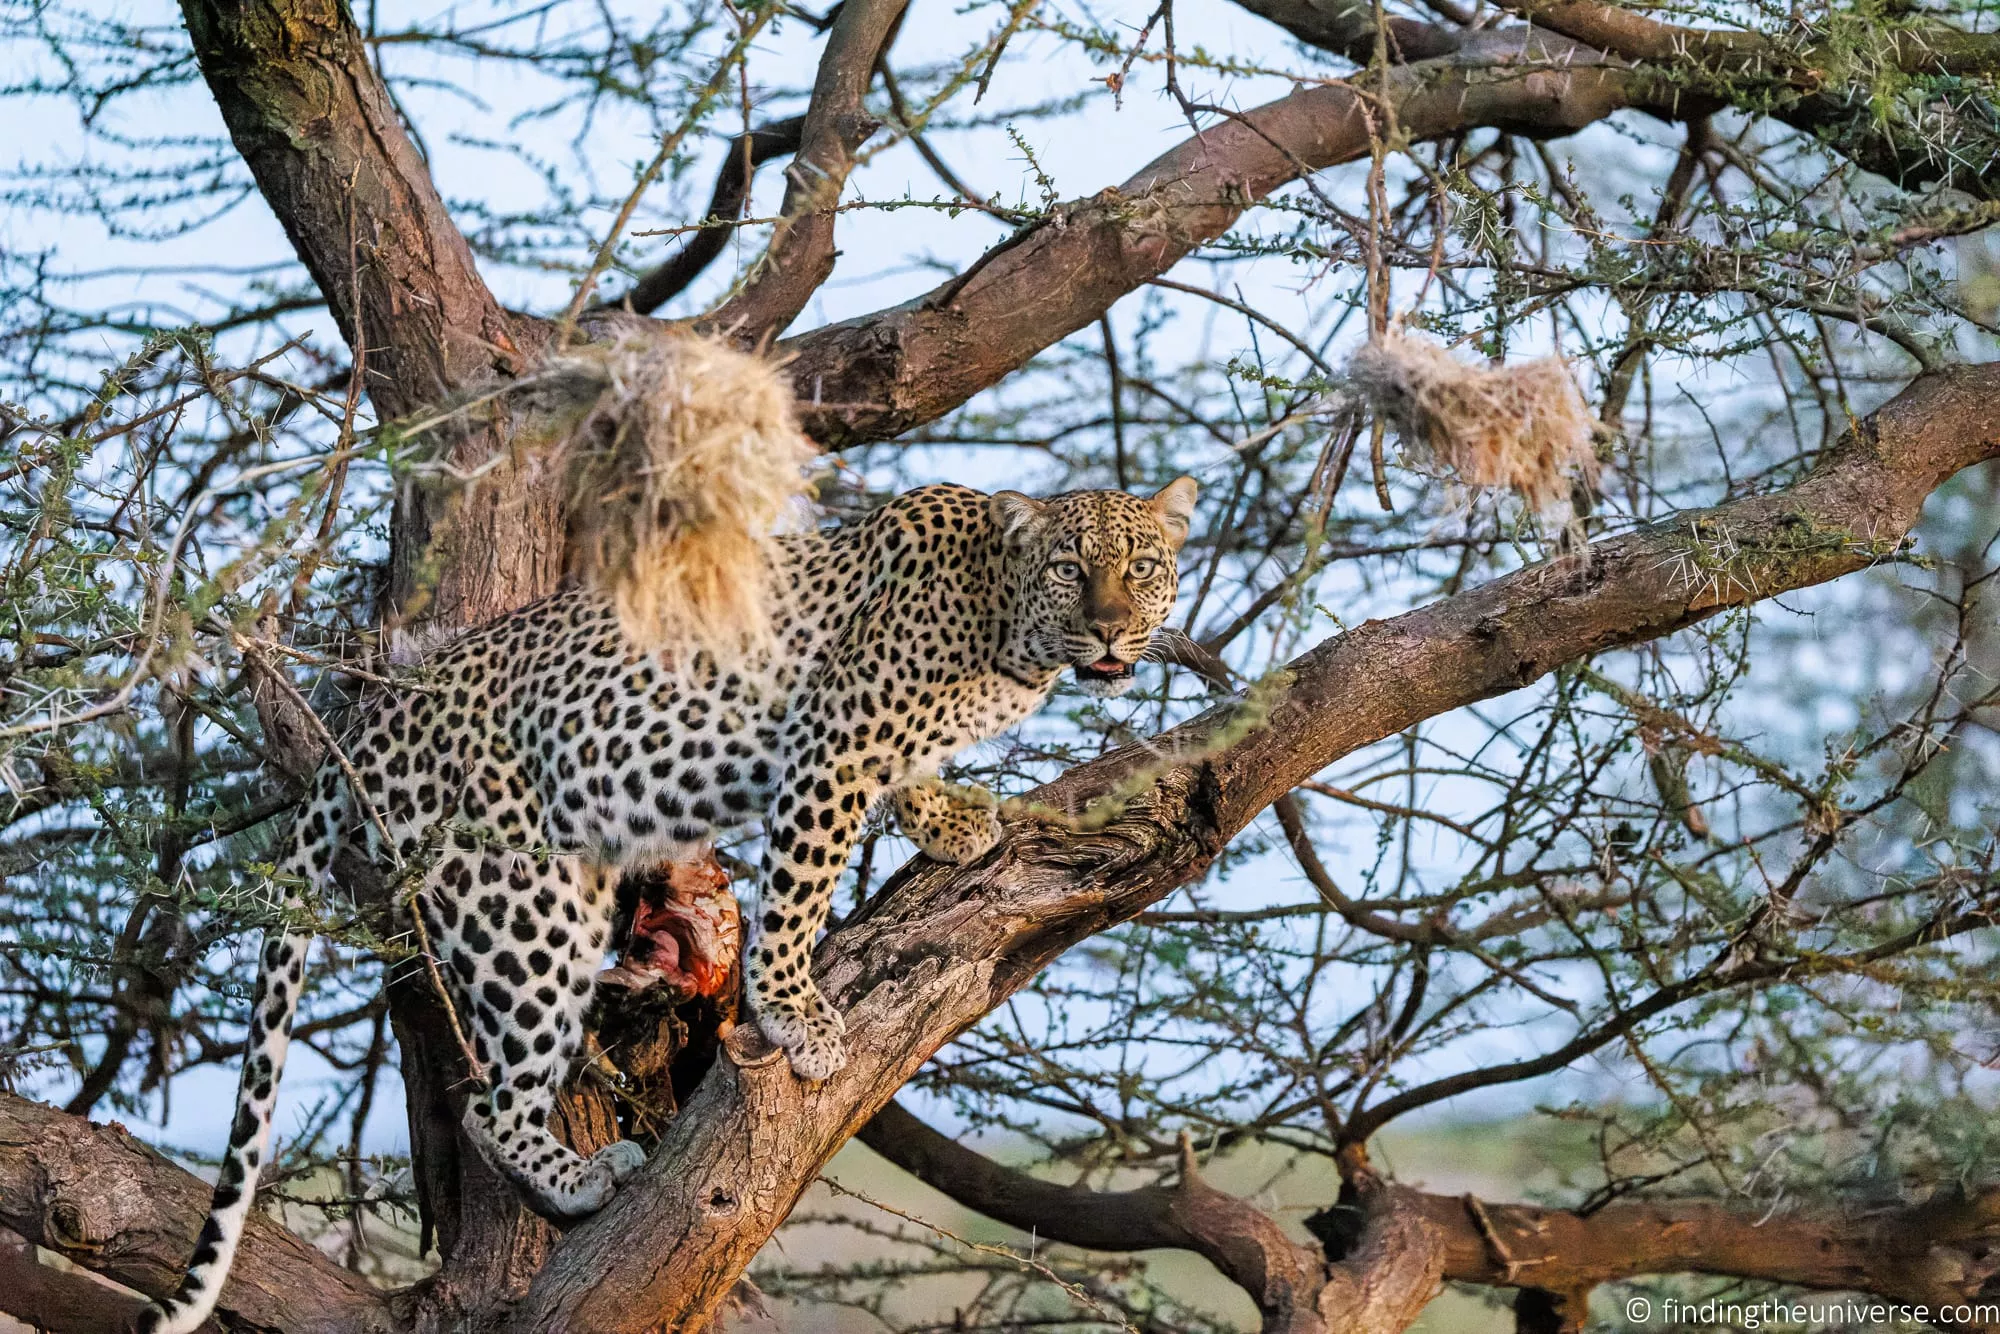
An example is this leopard in a tree. When we arrived, it was asleep by its kill. However, we waited for around an hour and it decided to get up, eat more of its kill, descend from the tree, and wander off. All these moments provided better photography opportunities than the initial one, and just required patience.
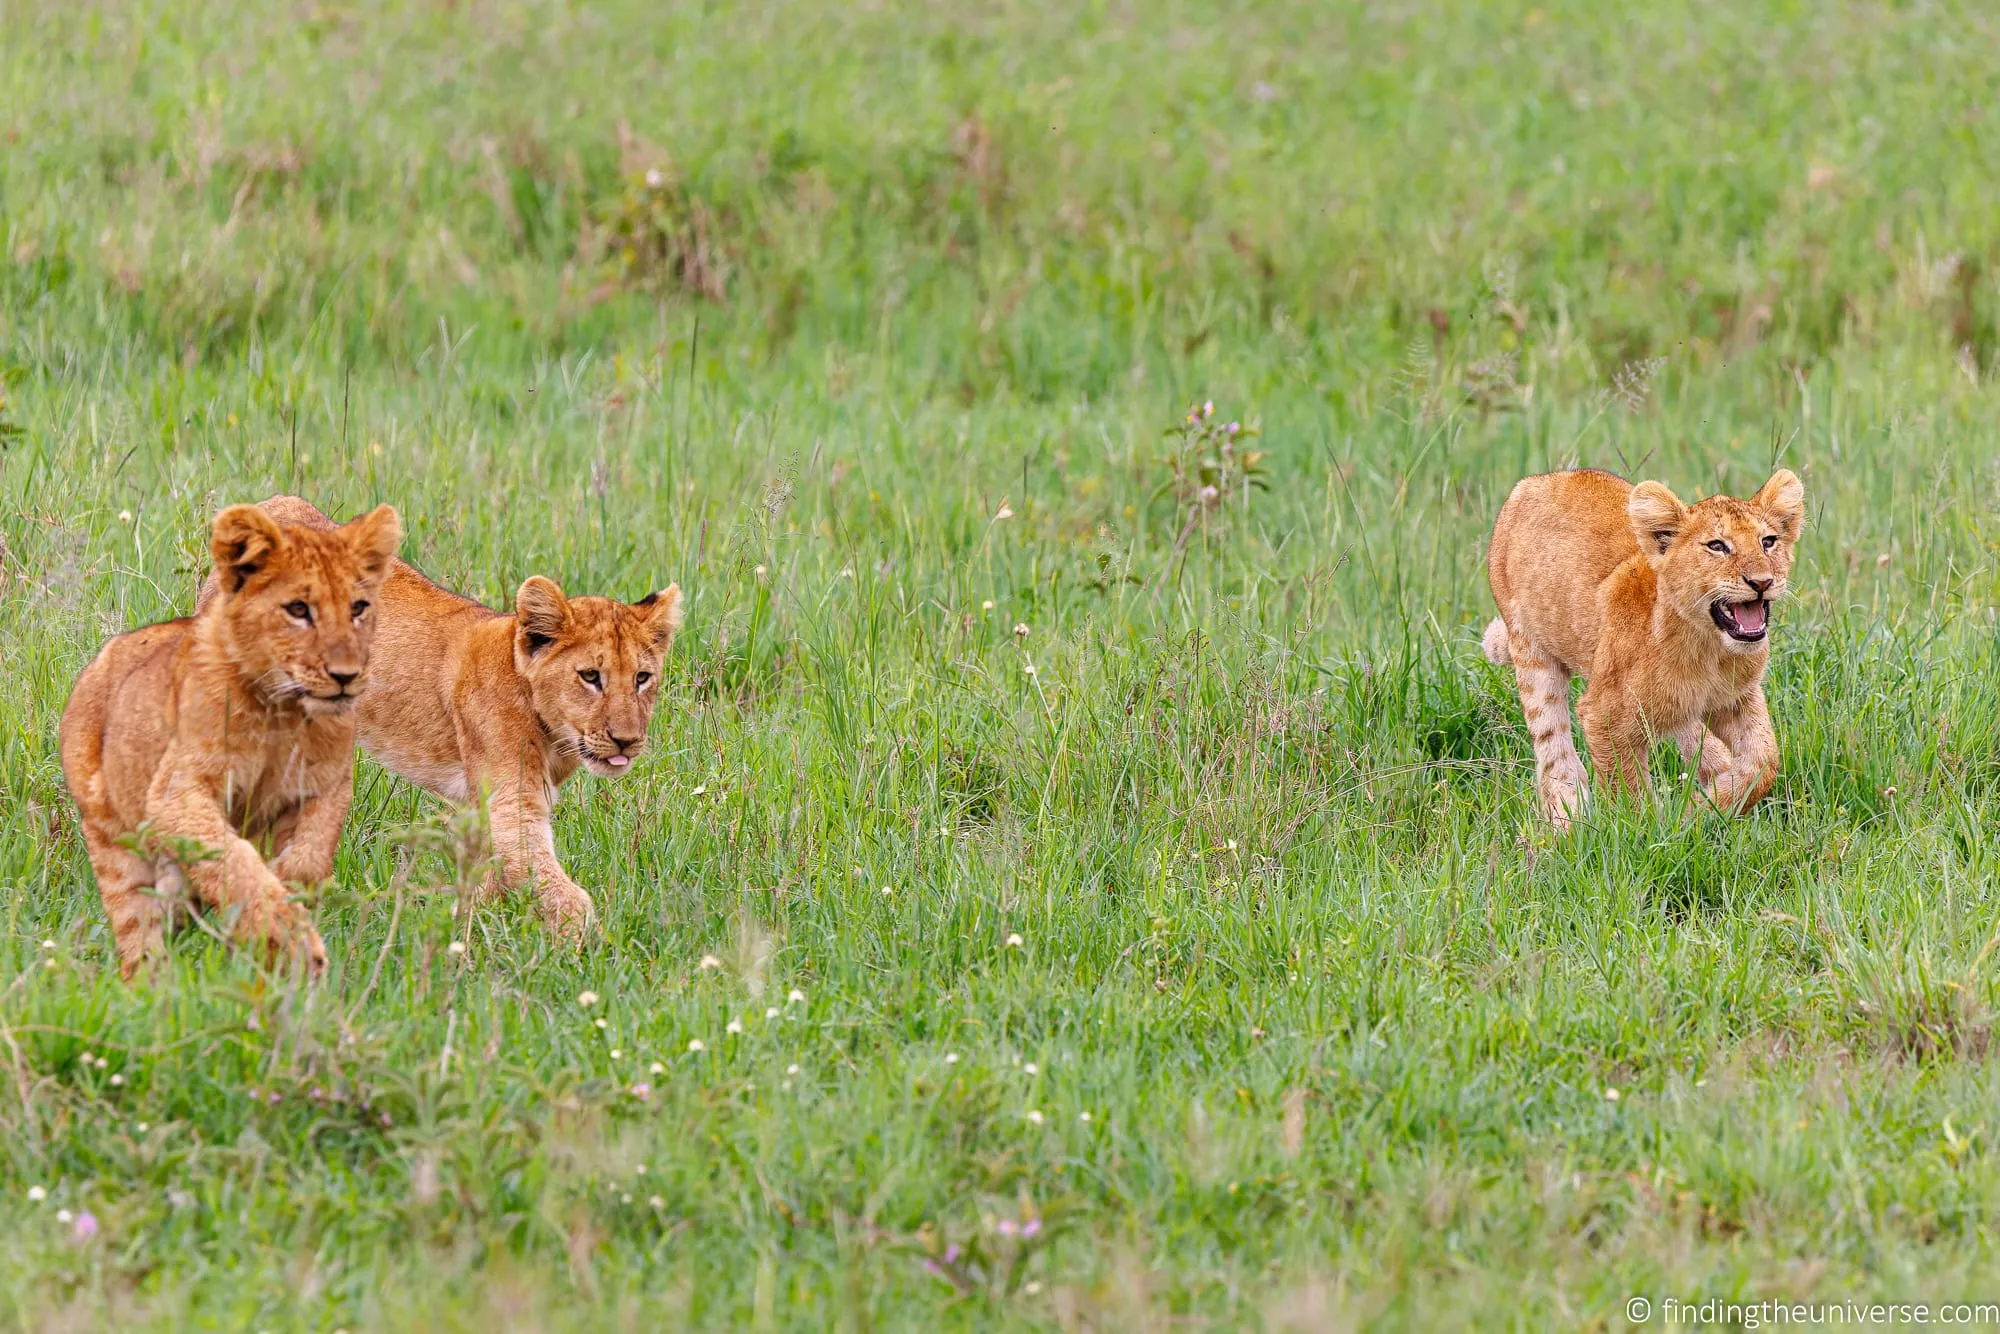
Another example would be a group of lion cubs we encountered in Tanzania. There were eight of them playing near the road, and as we watched, two of them climbed up a tree. Shortly afterwards, one of their mothers returned, and we were rewarded by the sight of baby lions bounding across the grass to be reunited.
This is a story I could repeat many times over across our wildlife encounters, but the overall message should be clear. Try to remember that a safari game drive is not an exercise in getting somewhere.
When you find an animal or bird you want to see, you will probably be rewarded if you spend some time just sitting and watching it rather than rushing on to try to find something else.
Be Specific About What You Want with your Guide
If you are doing a safari with a driver and/or guide, then being able to communicate about your goals and what you want to see is really important. It’s also important for you to listen to your driver or guide for feedback and understand what is realistic based on their expertise. Doing this as early in the trip as possible is best.
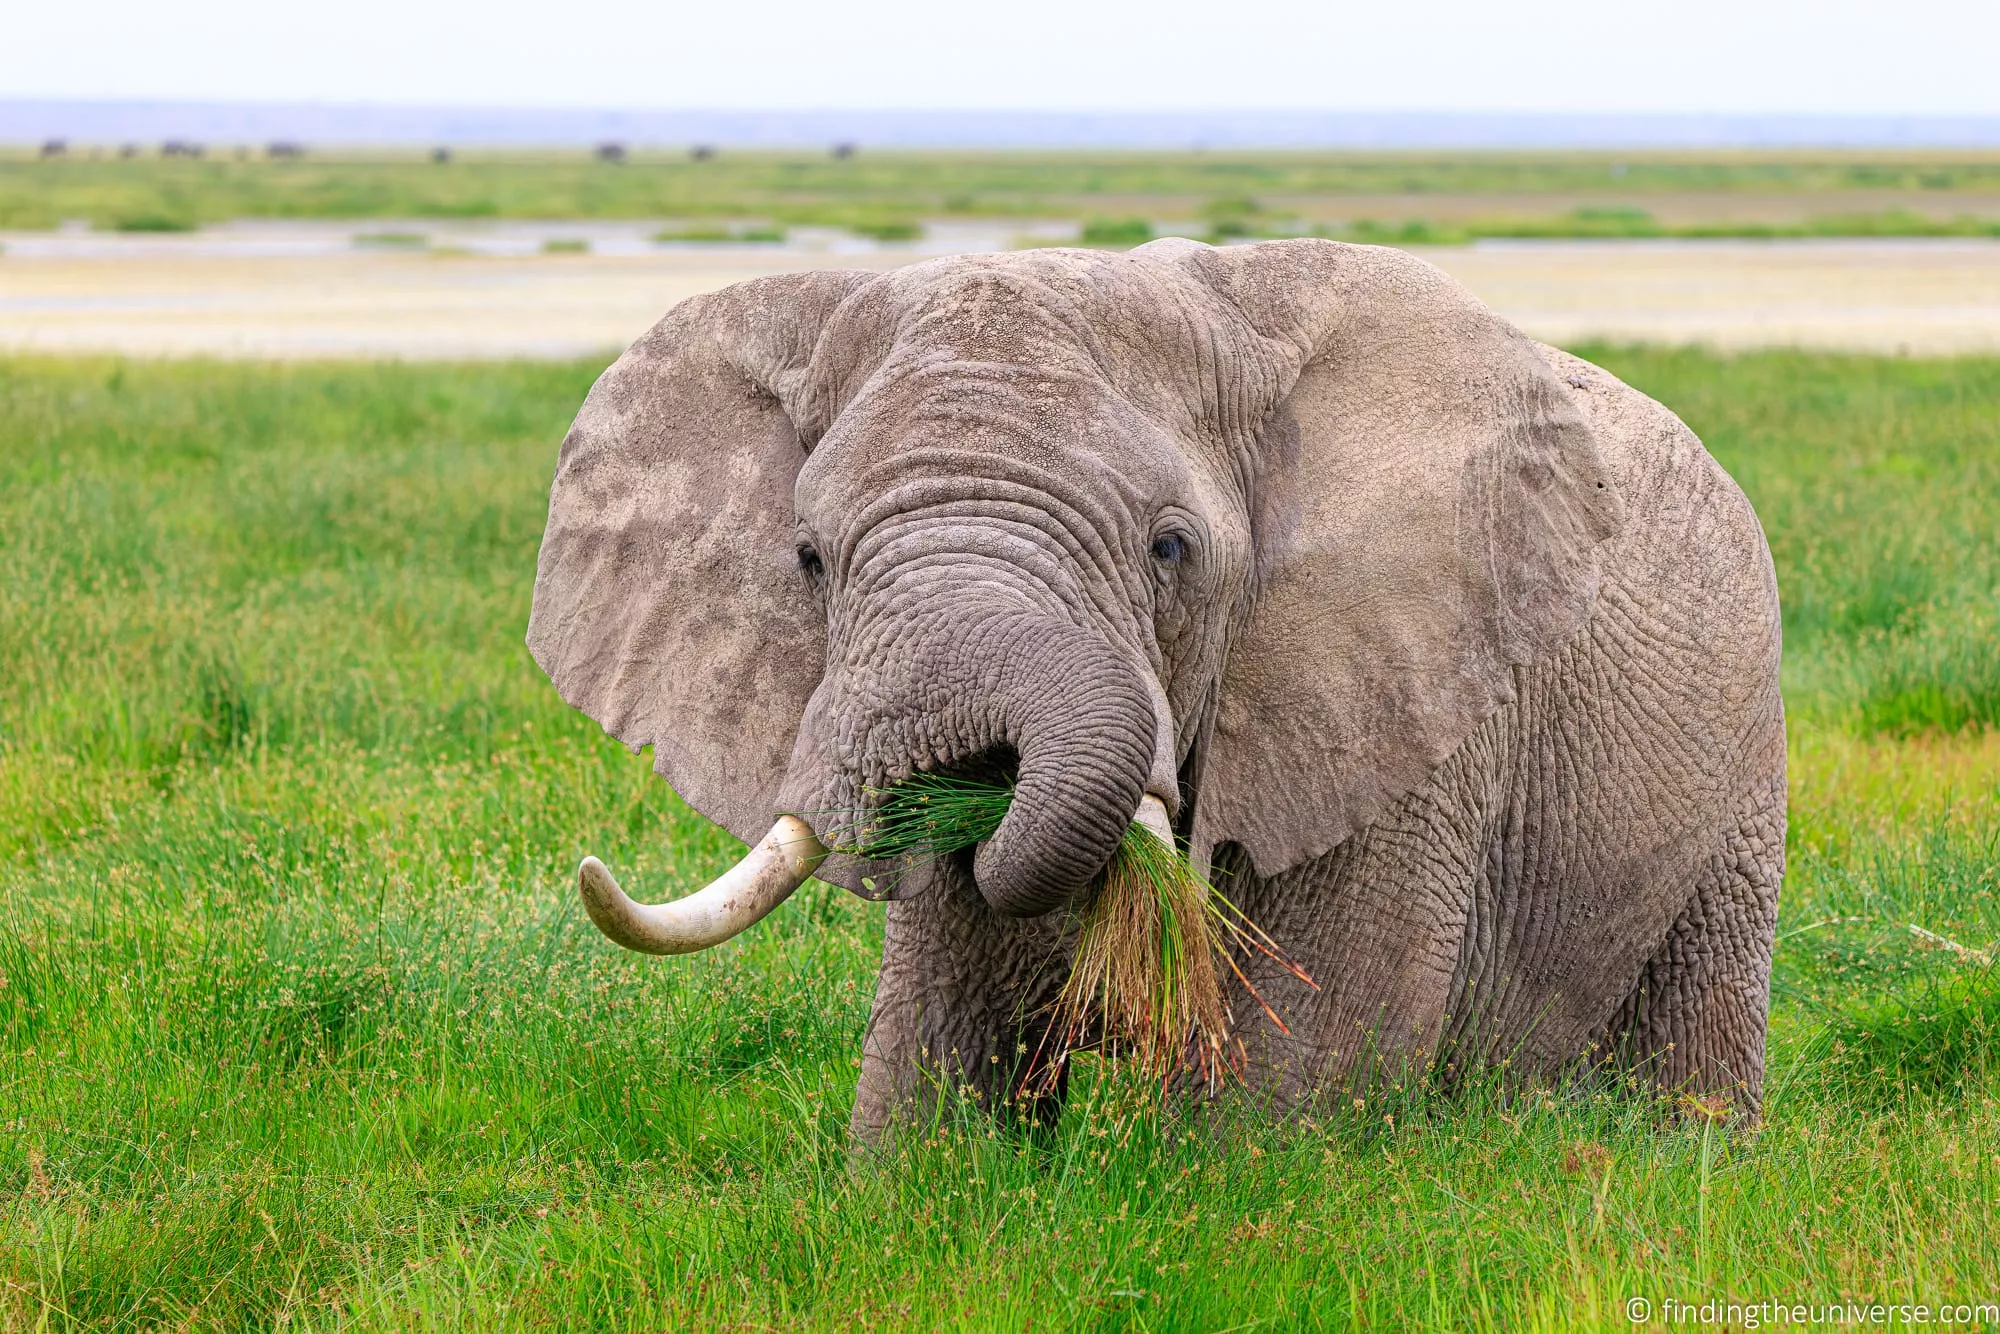
If there’s a certain shot or composition that you want, it’s a good idea to let your guide know so you have a better chance of getting it. Whilst there’s never a guarantee of seeing any wildlife on safari, if you specify that you want a shot of an elephant bathing for example, then your guide should have an idea of the best places to get that shot on your trip.
If you aren’t clear on your interests, then you’ll be on more of a general safari and taken on the common safari drive circuits within the parks. Guides will almost always drive you to see things like lions or cheetahs if spotted, even without asking. However, if you’d rather photograph elephants, eagles, or zebras, then you need to speak up so that your guide knows what your wildlife priorities are for the trip.
Whilst you will still likely get great photo opportunities (your guide is there to take you to see wildlife after all!), it might not be exactly the shot you want. So being specific will definitely help improve your chances of getting the shots you have in mind.
Another thing we discussed with our guide from the beginning was to have signals about stopping and when to leave after stopping for a wildlife sighting. So we asked our guide to always check we wanted to leave an animal, or we’d tell him, or he’d give us a heads up if we needed to leave.
This helped make sure we felt we had enough time to get the photos we wanted, and it also meant we were prepared for any sudden jerks from stopping and starting the vehicle.
Communicate with your Fellow Travelers
If you are travelling solo, then you will of course have a lot of autonomy in where you go and what you see on your trip. If you have a driver or guide, then the two of you can set times and itineraries each day and be in sync about your wildlife spotting goals.
But if, like most safari goers, you are travelling with a partner, your family, friends, or as part of a group safari with other travellers, then you will likely have to be willing to compromise at times.
Common things you will likely need to decide on together will be what time to leave, how long to spend on game drives, whether to eat a hot lunch or a picnic lunch, and how long to spend watching each animal.
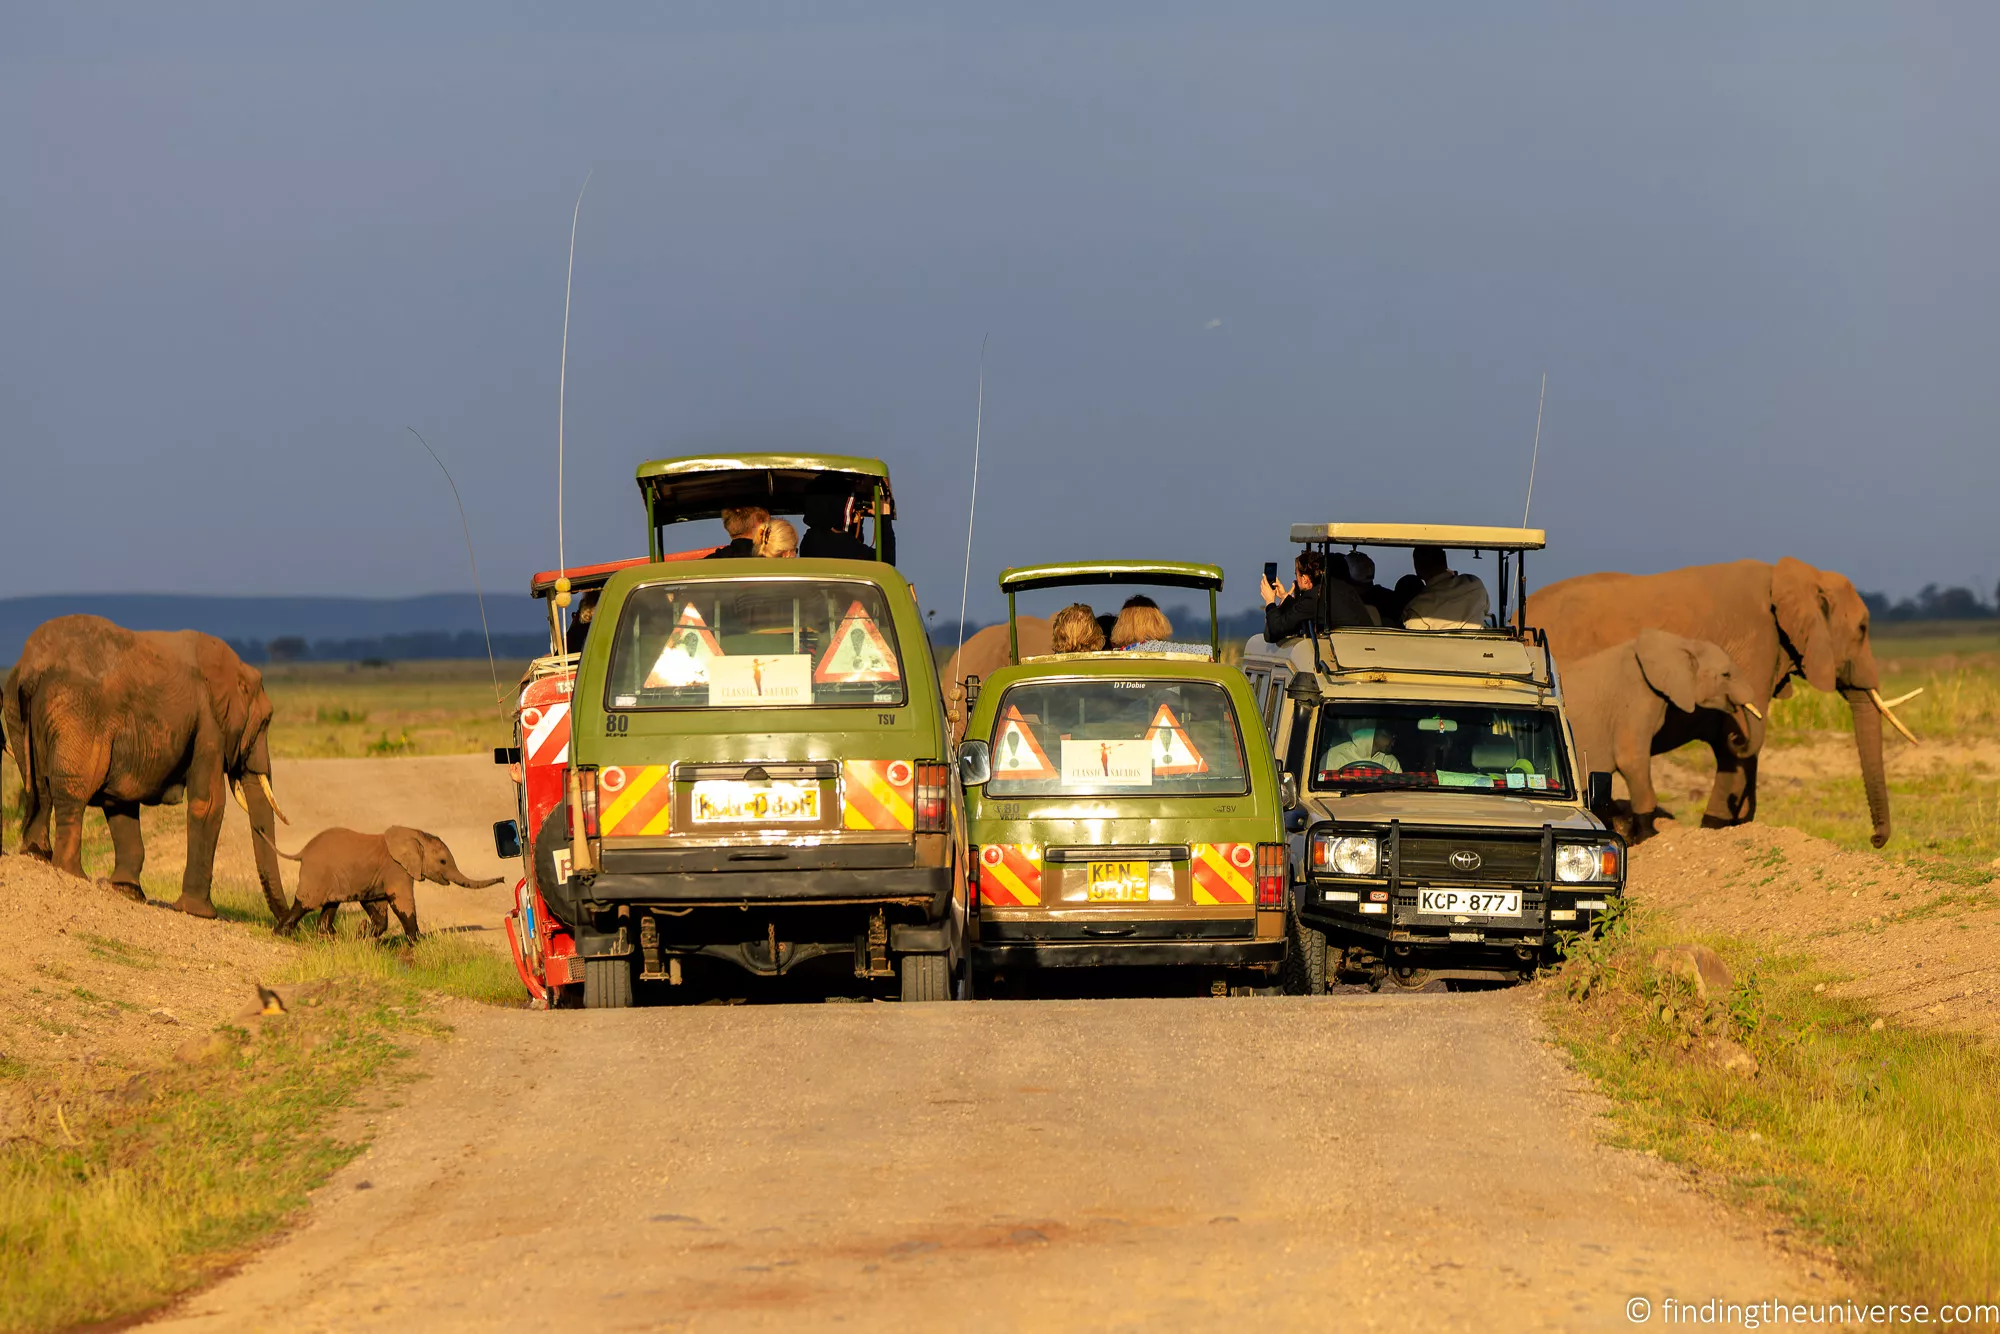
This can also affect your ability to get the photos you want in terms of timing and views from the vehicle. With just one or two people in a vehicle, it is generally easy to find a good view, but once you have four or more people, it often becomes difficult for everyone to have a great view all at the same time, especially if an animal is not in an open area.
Generally, in these circumstances everyone will politely take turns and give each other a bit of time and space to view the animal and take photos. But this does mean you will need to compromise and will sometimes miss the “best” view.
However, group safaris by far offer better value for money compared to a private safari. Just note that they do come with some compromises.
I definitely recommend travelling with family or friends if that is an option, as sharing these experiences is probably worth more than taking a good photo. But it is worth talking about everyone’s goals and travel style before booking your trip to make sure everyone is likely to have a good time.
Keep Your Eyes Open
When you are on safari, the chances are that you will have a guide. Your guide will normally know what sort of wildlife you are likely to see in the areas you’re visiting, and they will of course be looking out for it as you drive or walk around.
However, the thing about wildlife is that you never know what you are going to see. And the more eyes that are looking, the higher your chance of spotting something. Your guide can’t look everywhere at once, and if they are driving, they are going to be at least a little distracted by operating the vehicle and keeping you safe.
On our most recent safari, we would try to maximise what we could all see while on a game drive. So, generally our guide was seated in front in the driver’s seat, Jess would sit on the opposite side of the vehicle from the driver, and I would stand at the back and scan for a different viewpoint. This way we were looking in many directions and had a better chance of spotting things. Although our guide was by far much better at spotting wildlife than we were, we still occasionally made some great spots that he had missed.
In my opinion, a safari should definitely not be a passive experience where you sit back and wait for something interesting to be pointed out to you. However, I’ve been surprised by the number of vehicles full of bored-looking people who seemed to be spending more time on their phones or talking to one another than looking outside. They seem to simply wait for their driver to stop and point something out, take a photo, and then go back to their phones.
If you actively participate and spend your time searching for wildlife as well, you’re going to improve your chances of sightings and find more photo opportunities. You’re also going to learn a lot more about the natural environment around you. And you’re going to enjoy your trip a whole lot more!

Consider the Composition
As with any kind of photography, composition is key. Composition refers to how you place the various elements in your shot to create the final image.
It can be easy to get caught up in the moment when you see something exciting, and just to start shooting in an effort to get something. This excitement is very understandable!
However, if you are able to calm yourself down a bit and spend a fraction of time composing your shot with a little more care, you will likely get better results.
There are a range of general composition rules in this post that you can read about, so I won’t rehash them here. The main things I’d suggest keeping in mind are the following.
- Check what’s actually in the frame. When framing your shot, glance around the whole frame to see what is and isn’t in it. For example, it can be very easy to frame an animal’s head but accidentally crop out part of their body or a tail. Whilst this might be the composition you’re after, it might also end up looking a bit odd. Sometimes, zooming out a fraction so the whole animal is in the frame gives a better result.
- Look for eye contact. One of my favourite wildlife poses is when the animal is looking directly into the camera, so it appears to be staring straight at the viewer. This is not always easy as animals tend to look all over the place, so here again, burst mode and patience can be your friends.
- Think about where the animal sits in the frame. When shooting from a vehicle, especially from the pop-up roof, we can often end up above the animal. Animals usually look better shot from eye level, so repositioning yourself to an open window lower down in the vehicle can give you a stronger shot, depending on the distance to the subject.
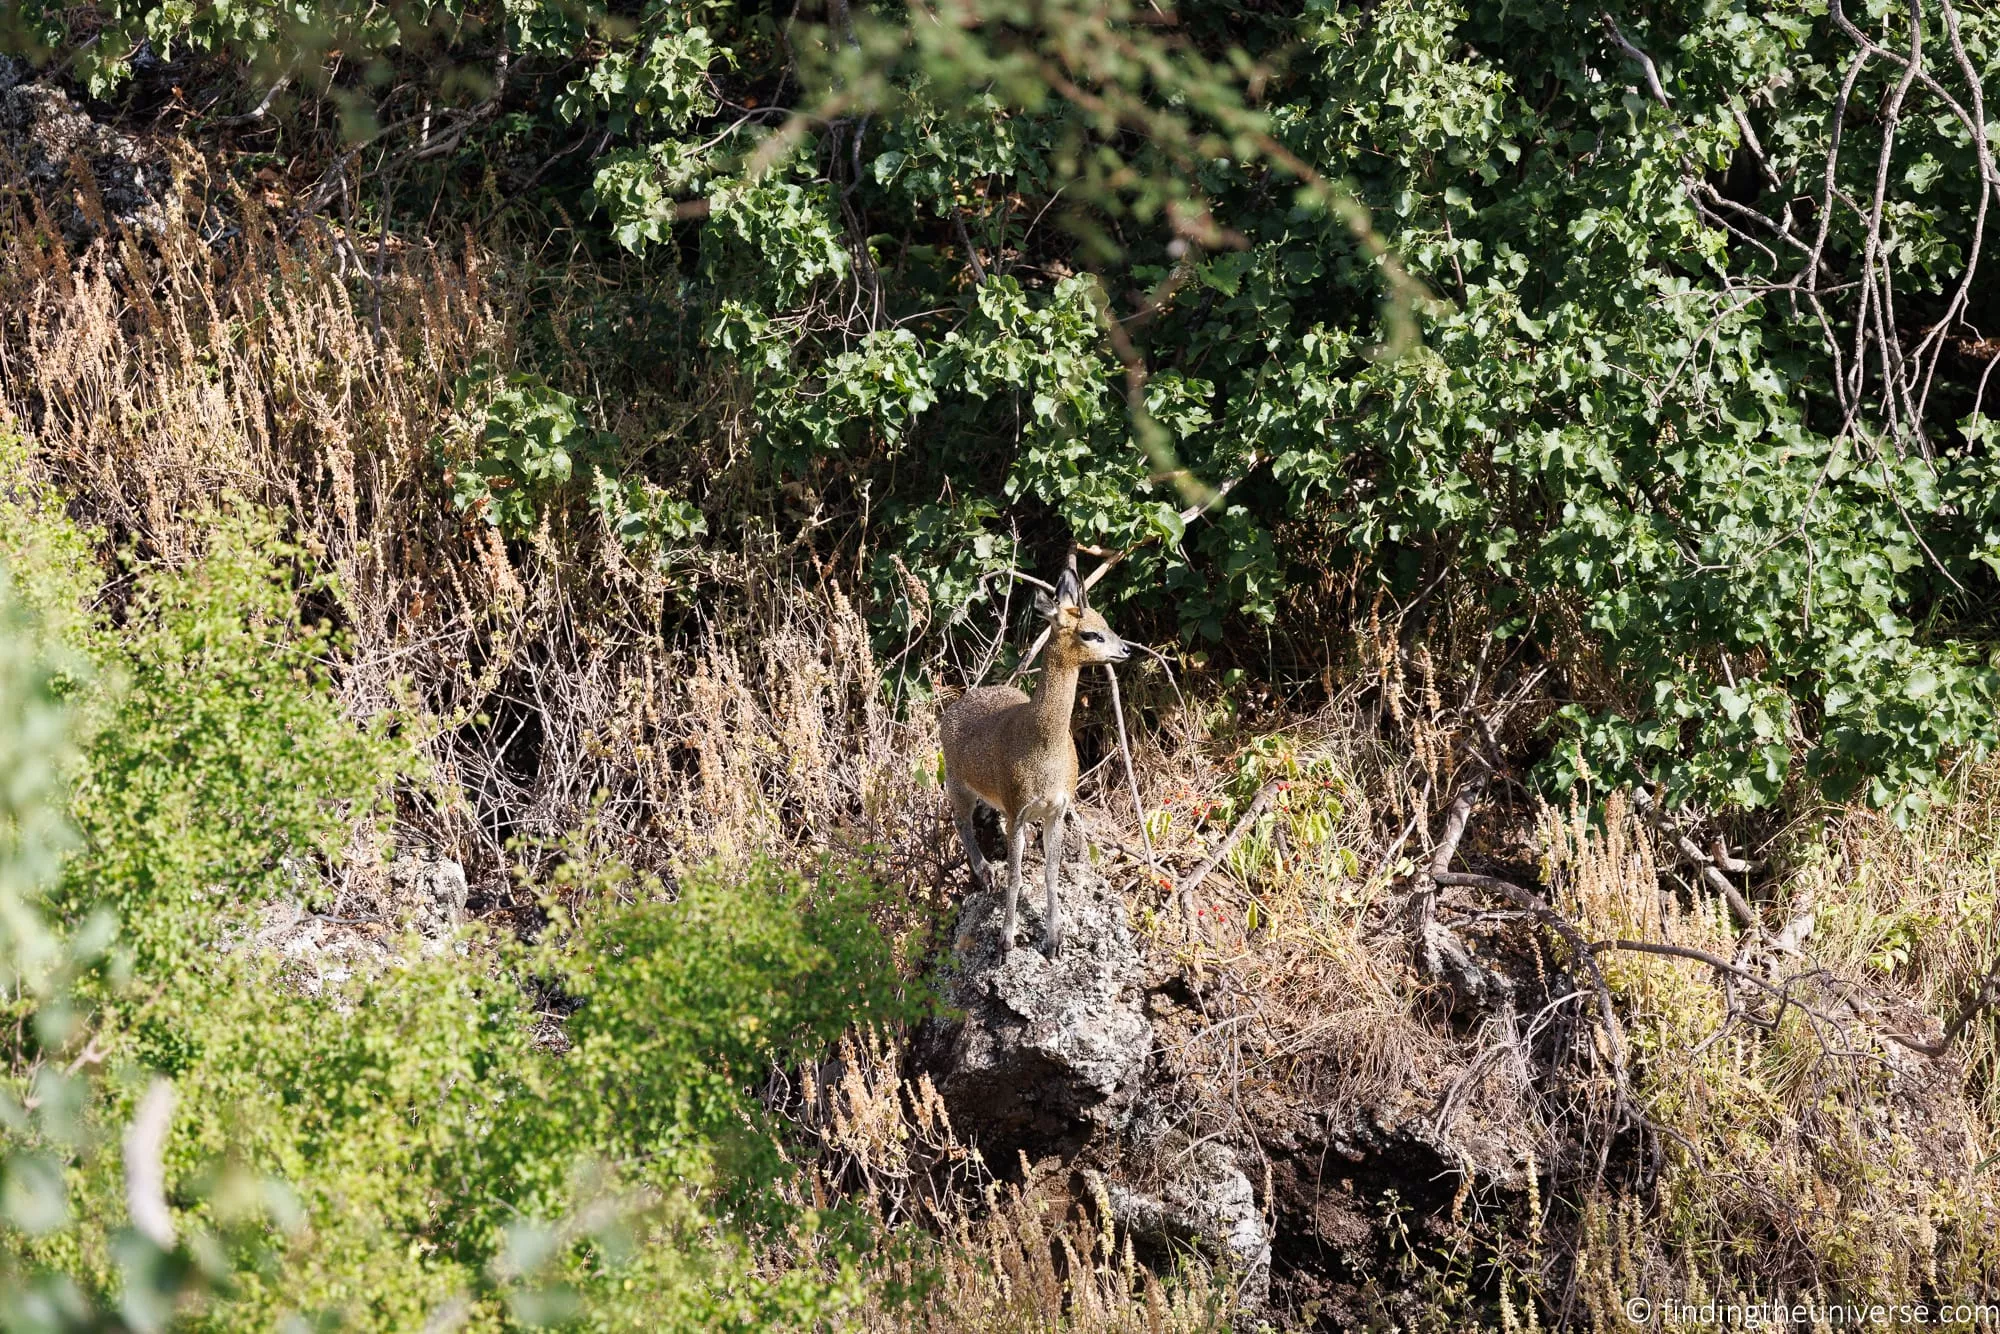
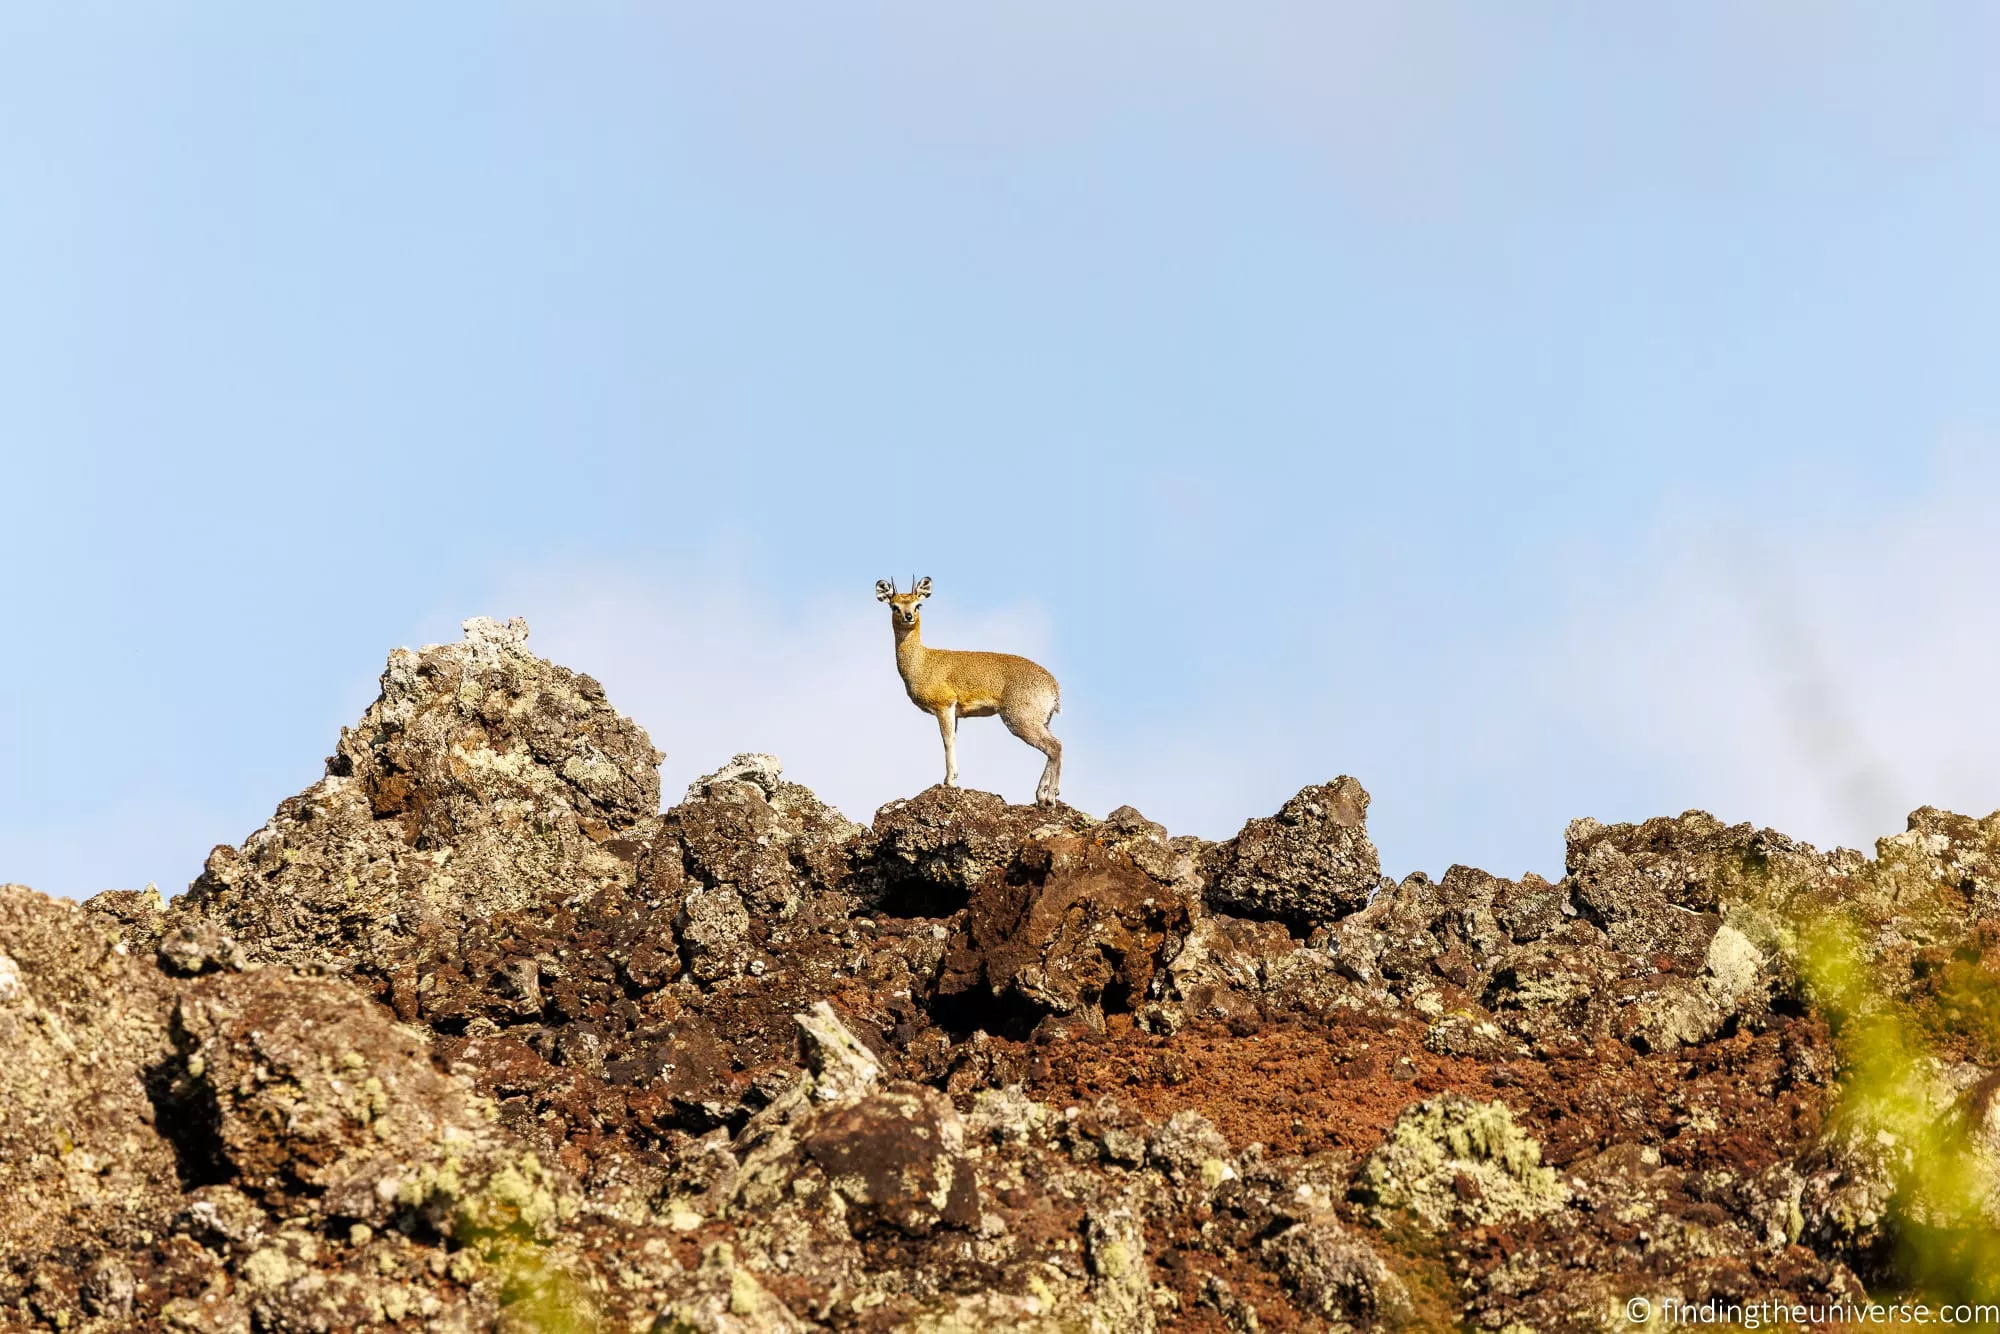
- Mind the background and skyline. When putting your shot together, don’t forget to consider what’s behind your subject. A deer against a brown rock face or tree won’t stand out as well as one against a clean skyline. It’s not always possible to reposition, but if there’s the chance to wait for a better background, or move the vehicle, take it.
Here are a couple of shots to illustrate my points above.
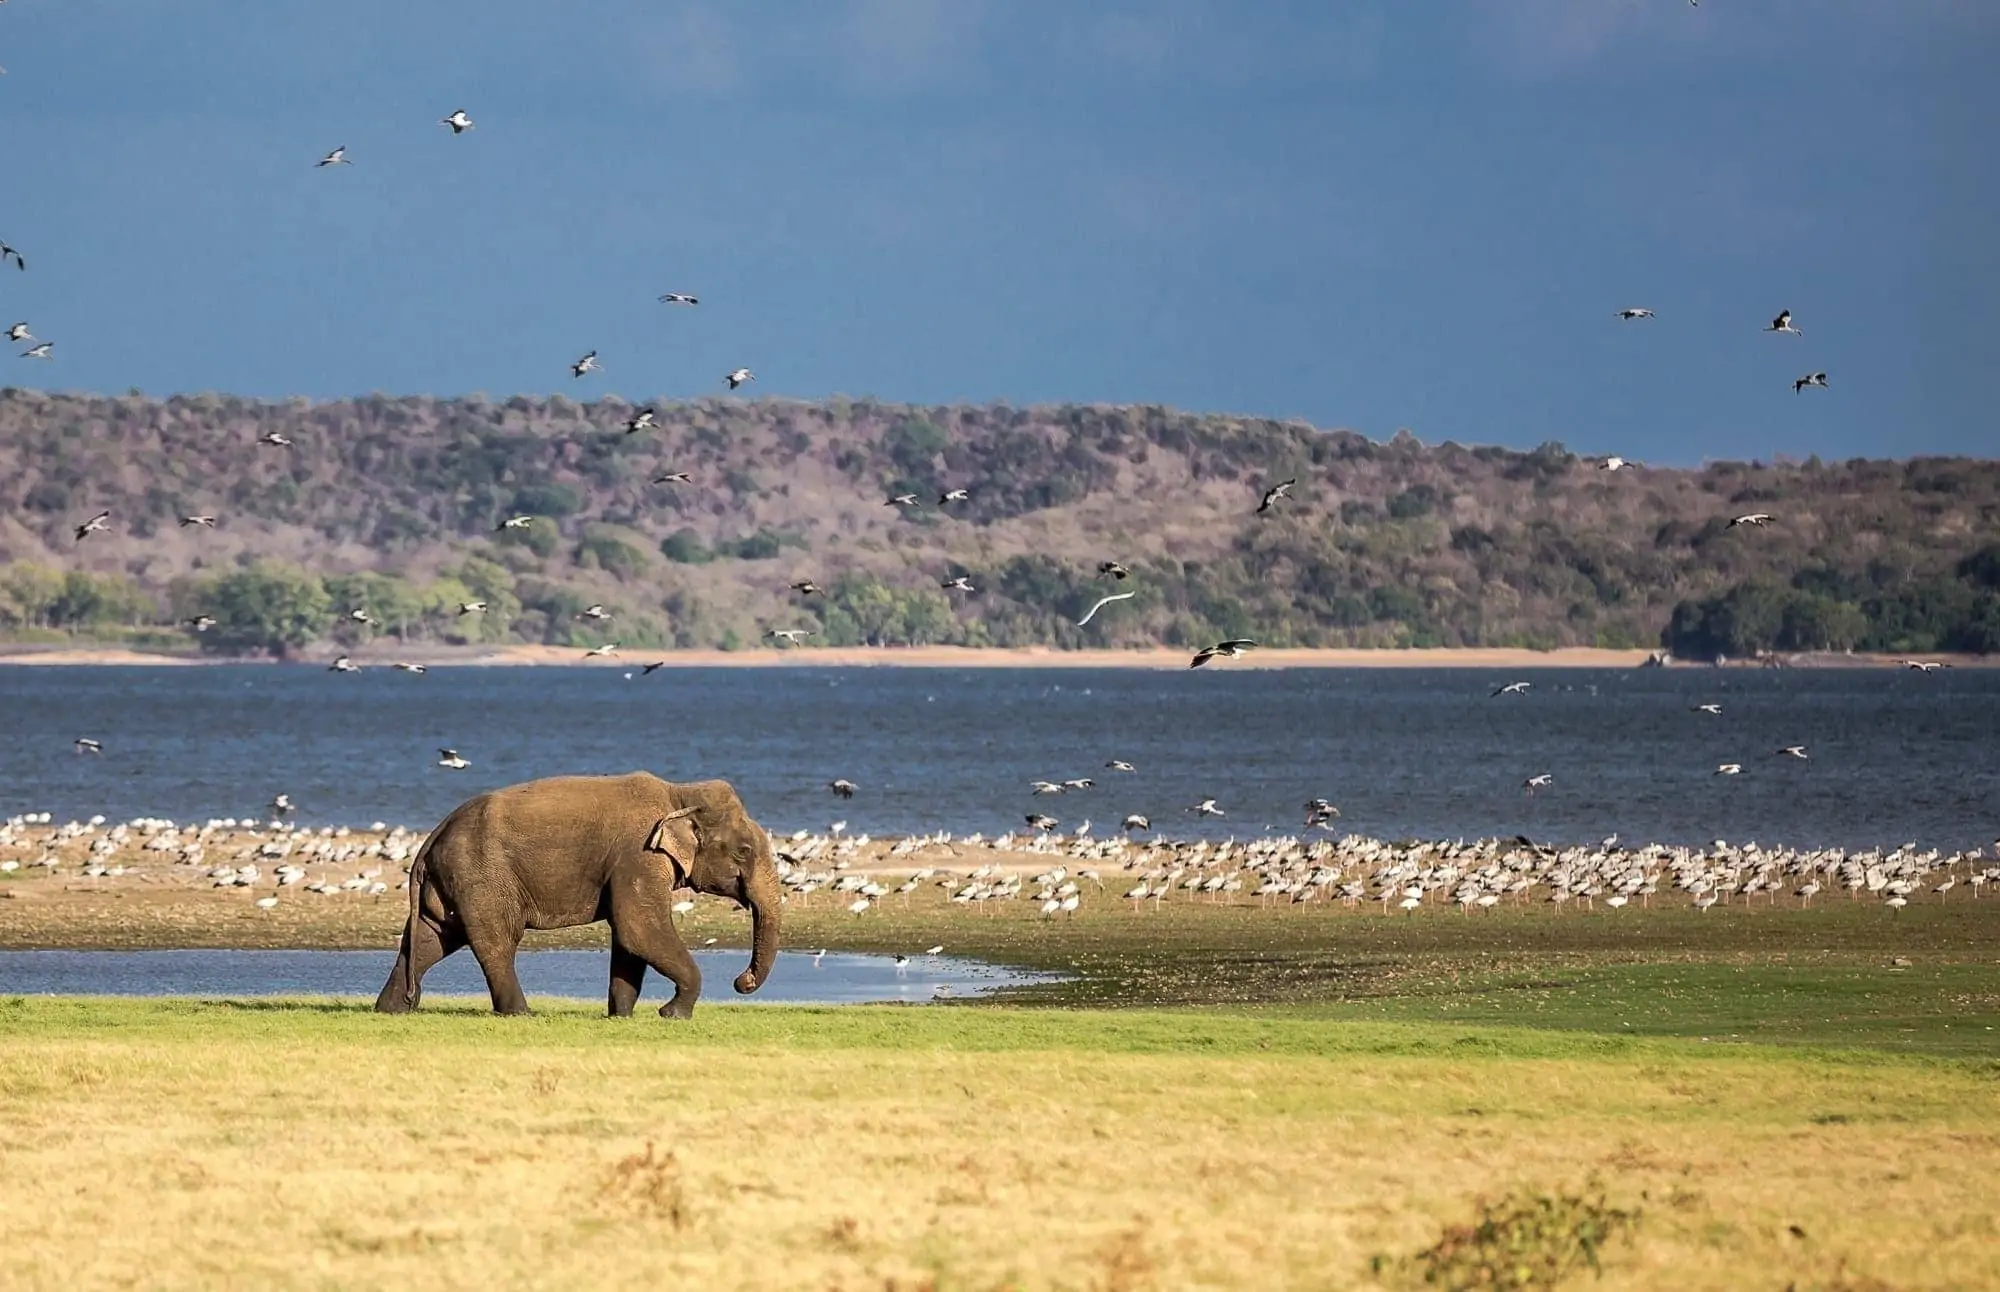
Don’t Forget the Landscapes
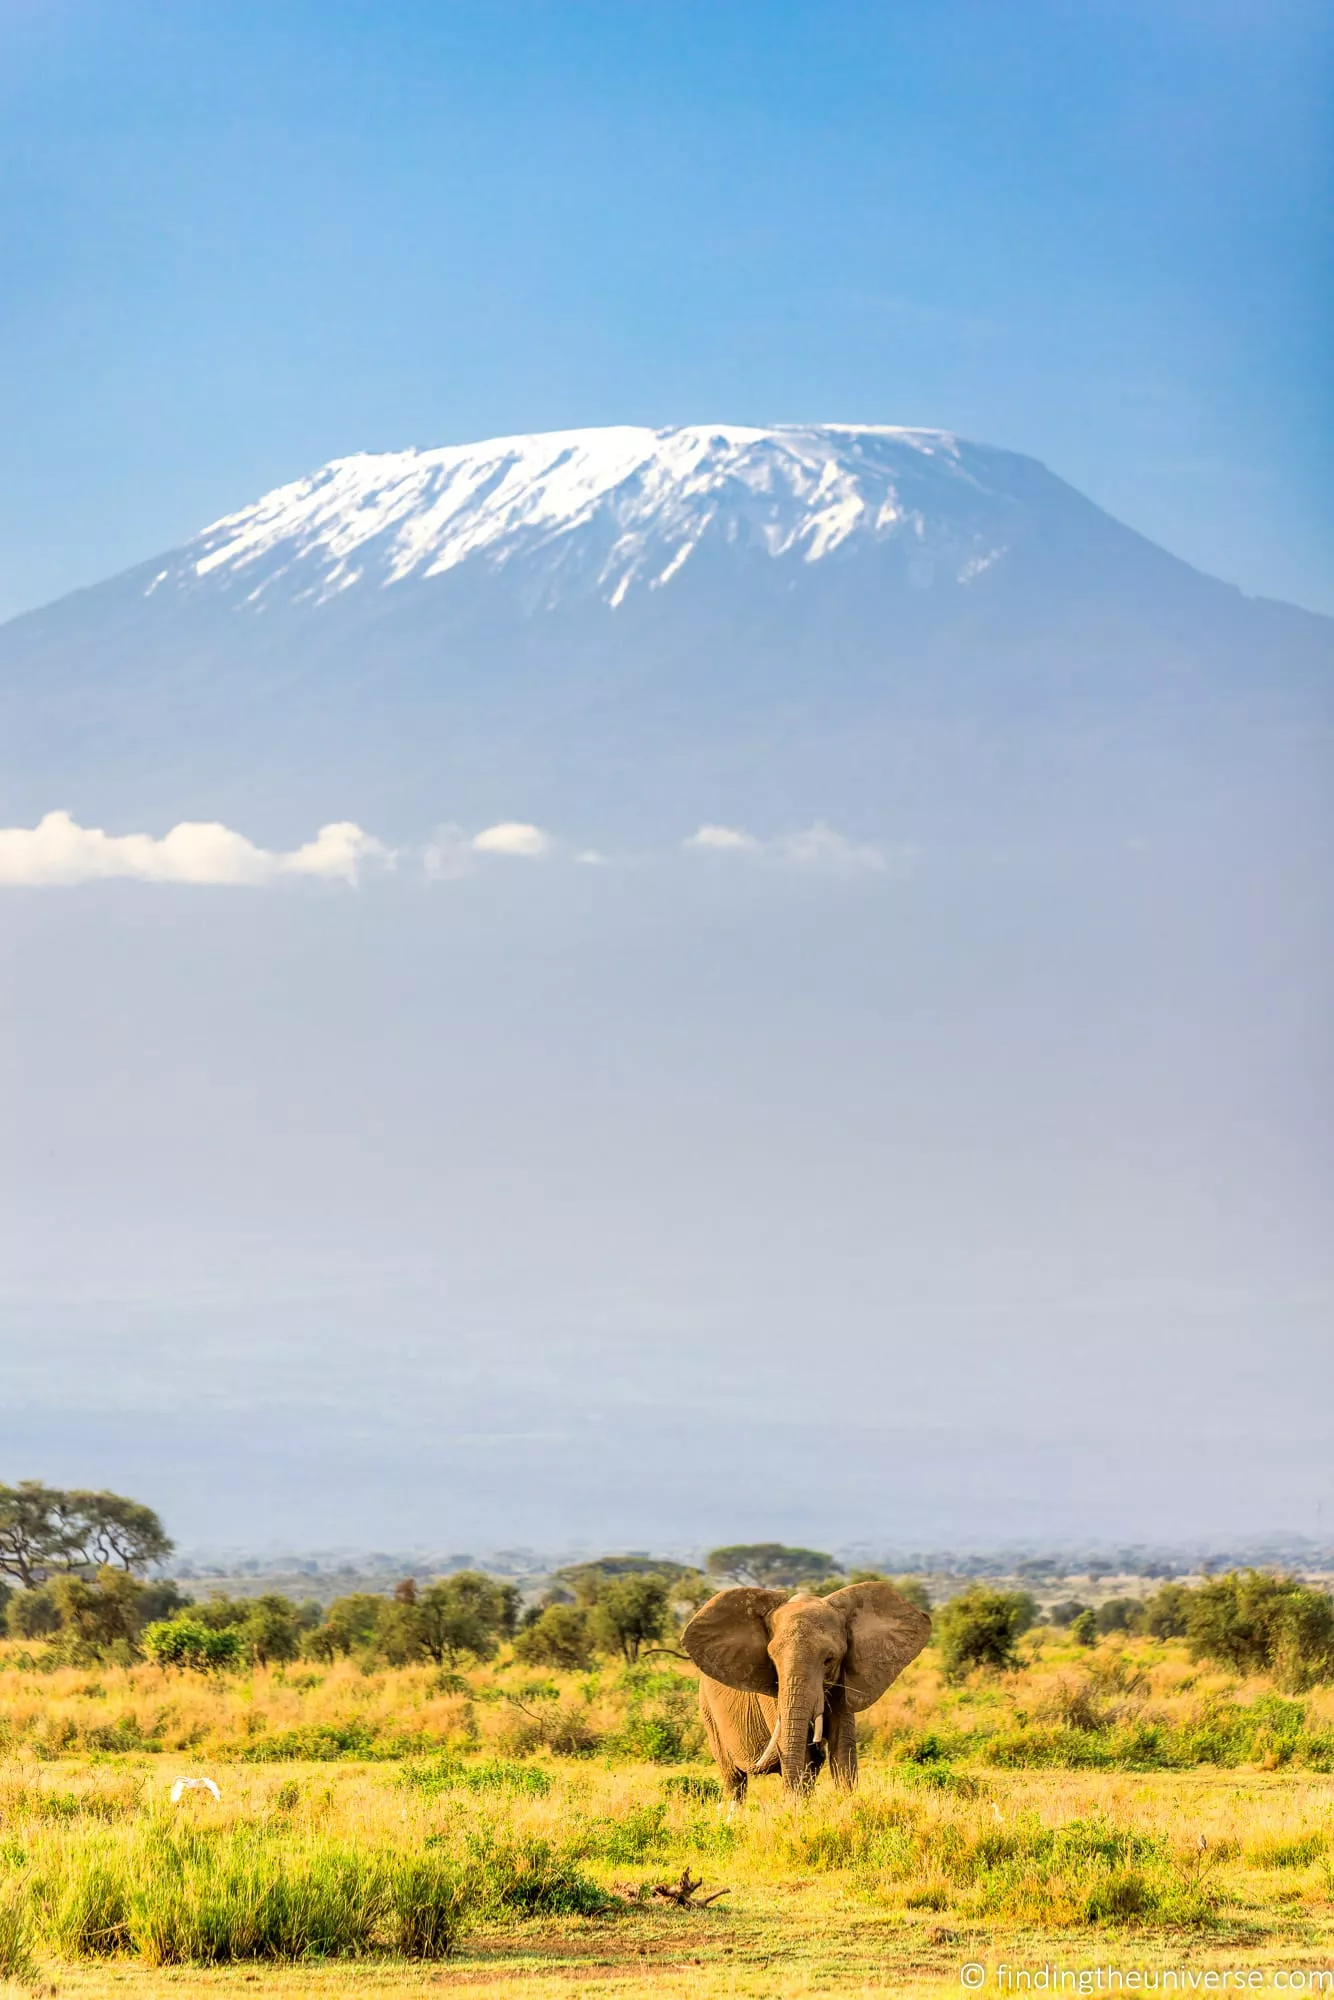
One of the main reasons people go on safari is to see the incredible wildlife of an area. However, it’s also very likely that you are going to be passing through some amazing natural landscapes.
Whilst it can be easy to get a bit single-minded about the animals we’re photographing, it’s important to step back and capture the landscapes as well as the wildlife.
If nothing else, this will serve as a reminder in the future of where you were when you got the shots, and the lovely scenery you witnessed. Capturing the wildlife with the landscape is also a good option, as it gives some depth and scale to your compositions.
Consider Doing Boat and Walking Safaris
Whilst most safaris are done from a 4×4 vehicle, there are other options depending on where you are travelling.
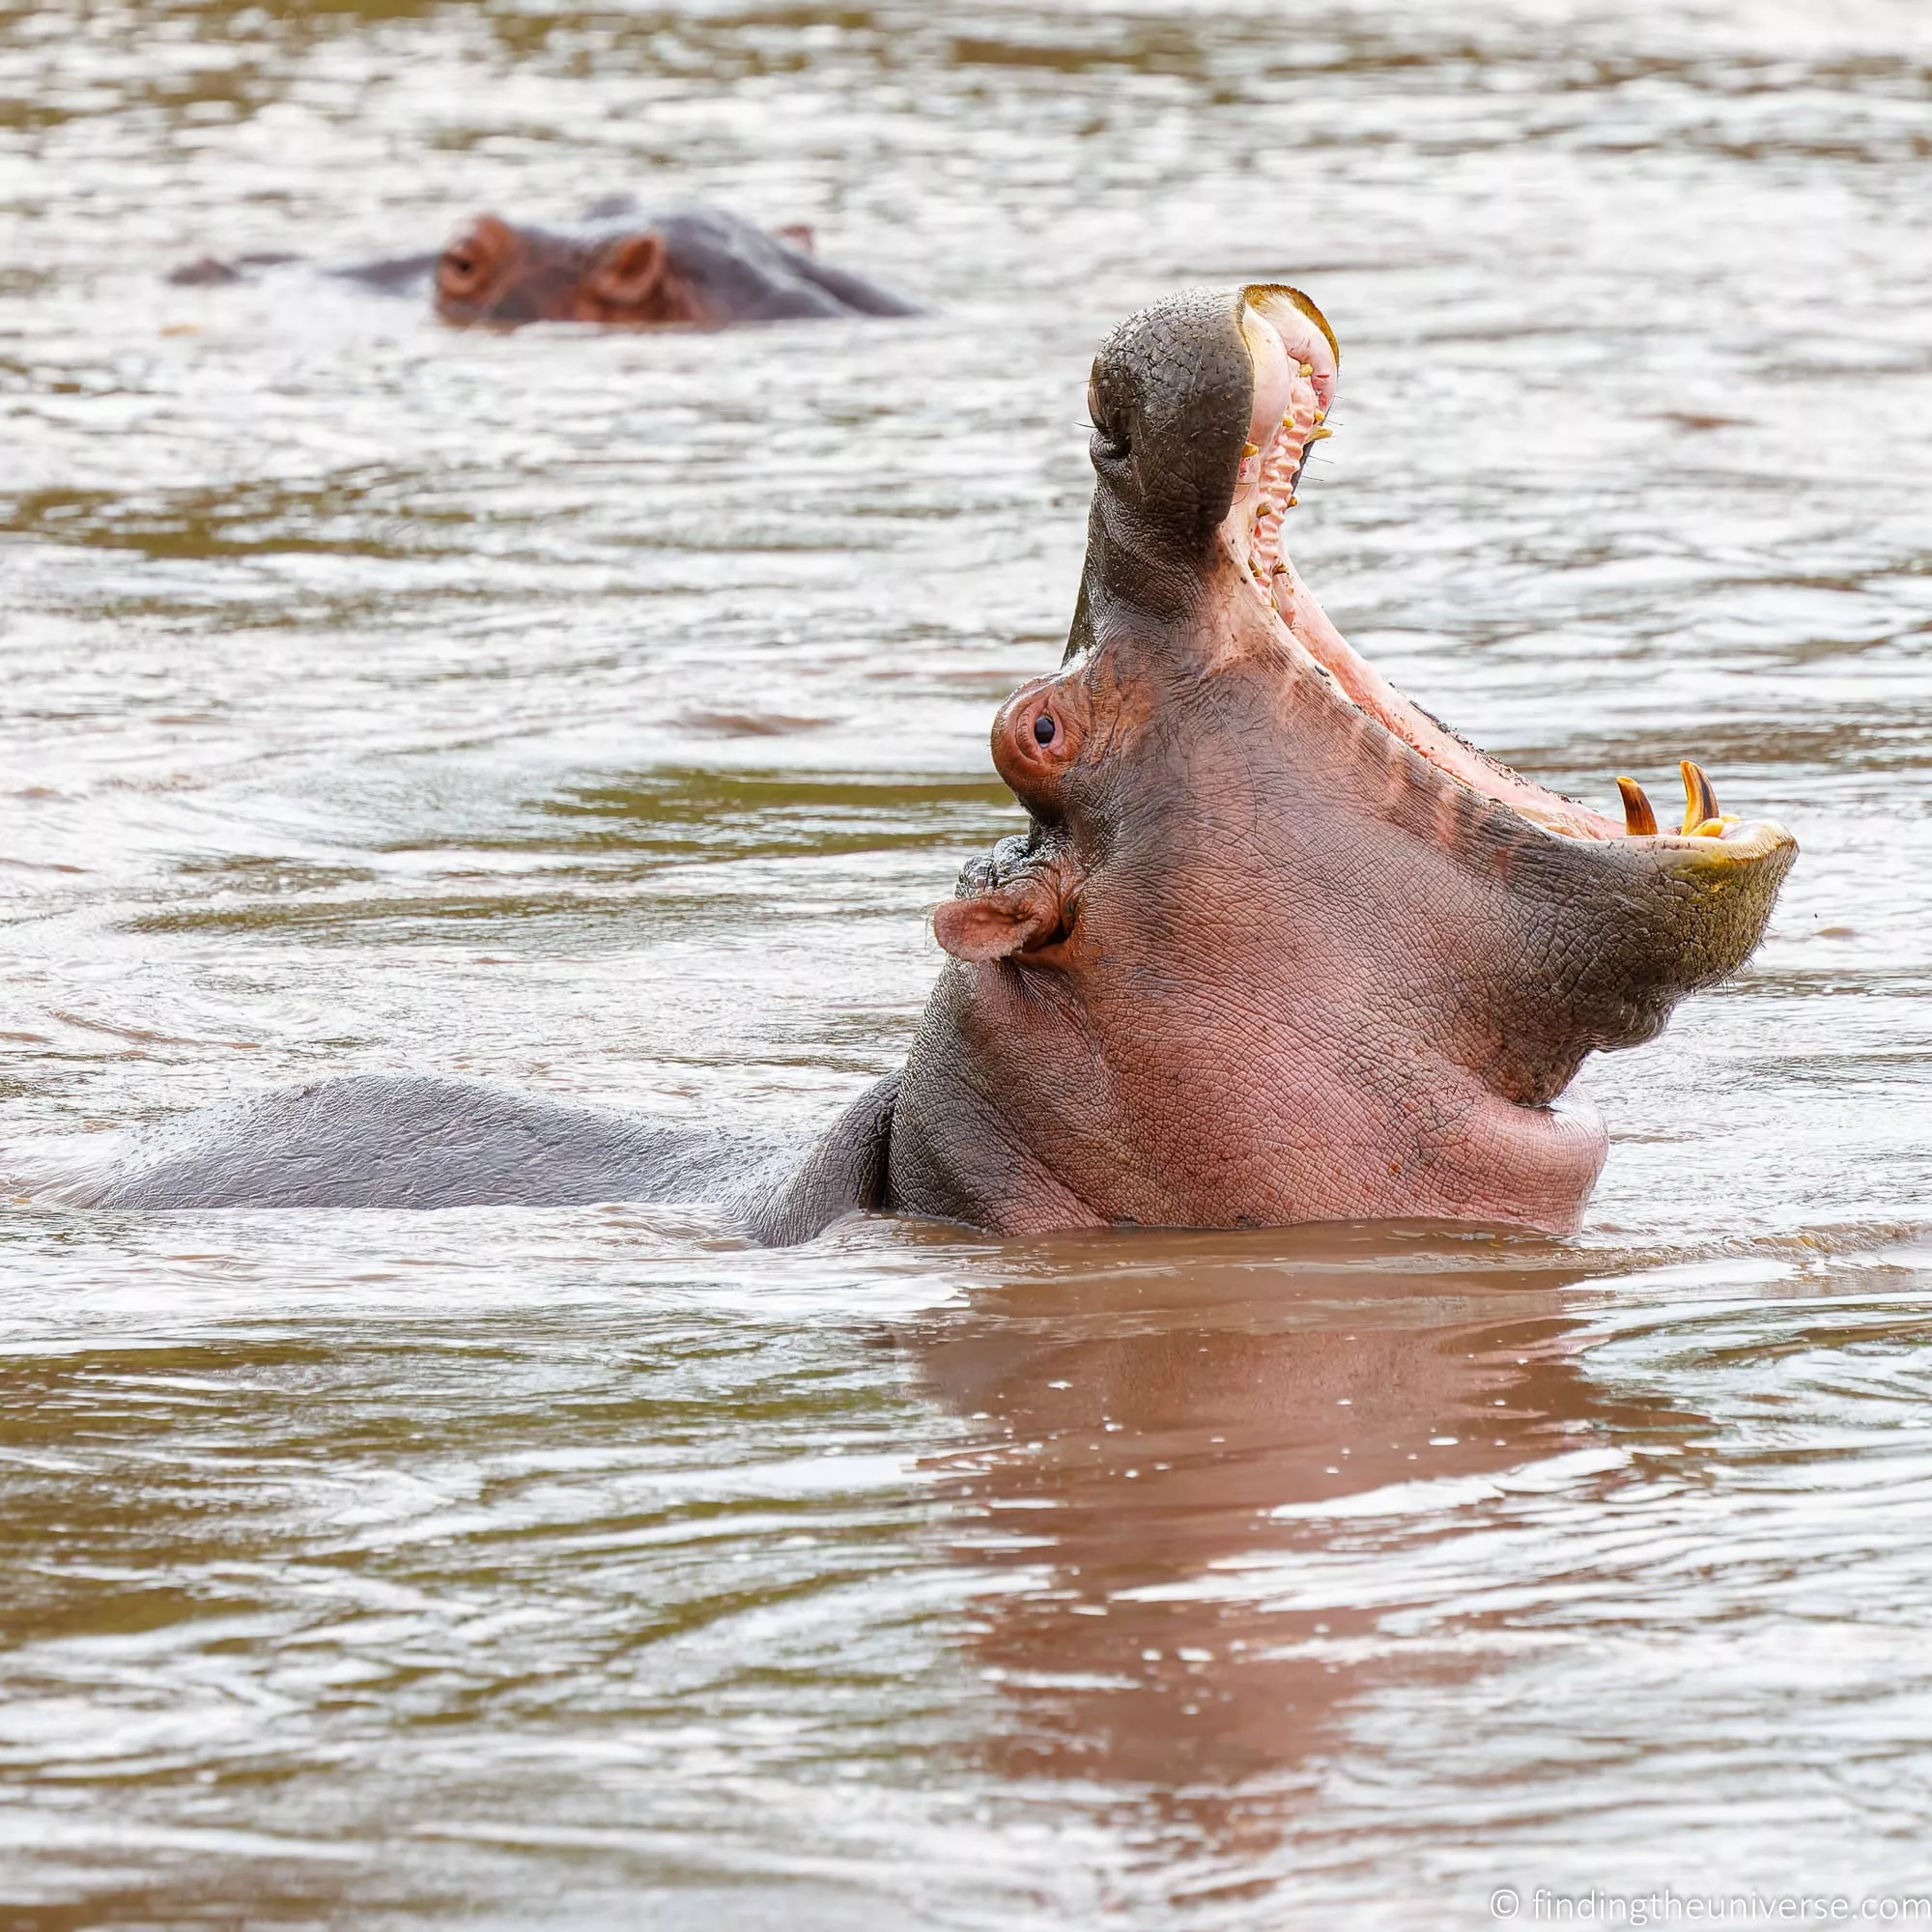
For example, in some locations you might be able to do a walking safari or a boat-based safari. These will give you some variety as well as the opportunity to see different wildlife.
For instance, if you are interested in birds and small creatures (like dung beetles or lizards), then walking safaris are often going to be better for getting close to them. Boat safaris are obviously going to be the best way to get closer to aquatic wildlife.
Of course, this isn’t always going to be possible depending on where you travel, but we definitely recommend signing up for at least a couple of these experiences if you have the option.
Photographing Primates on Forest Treks
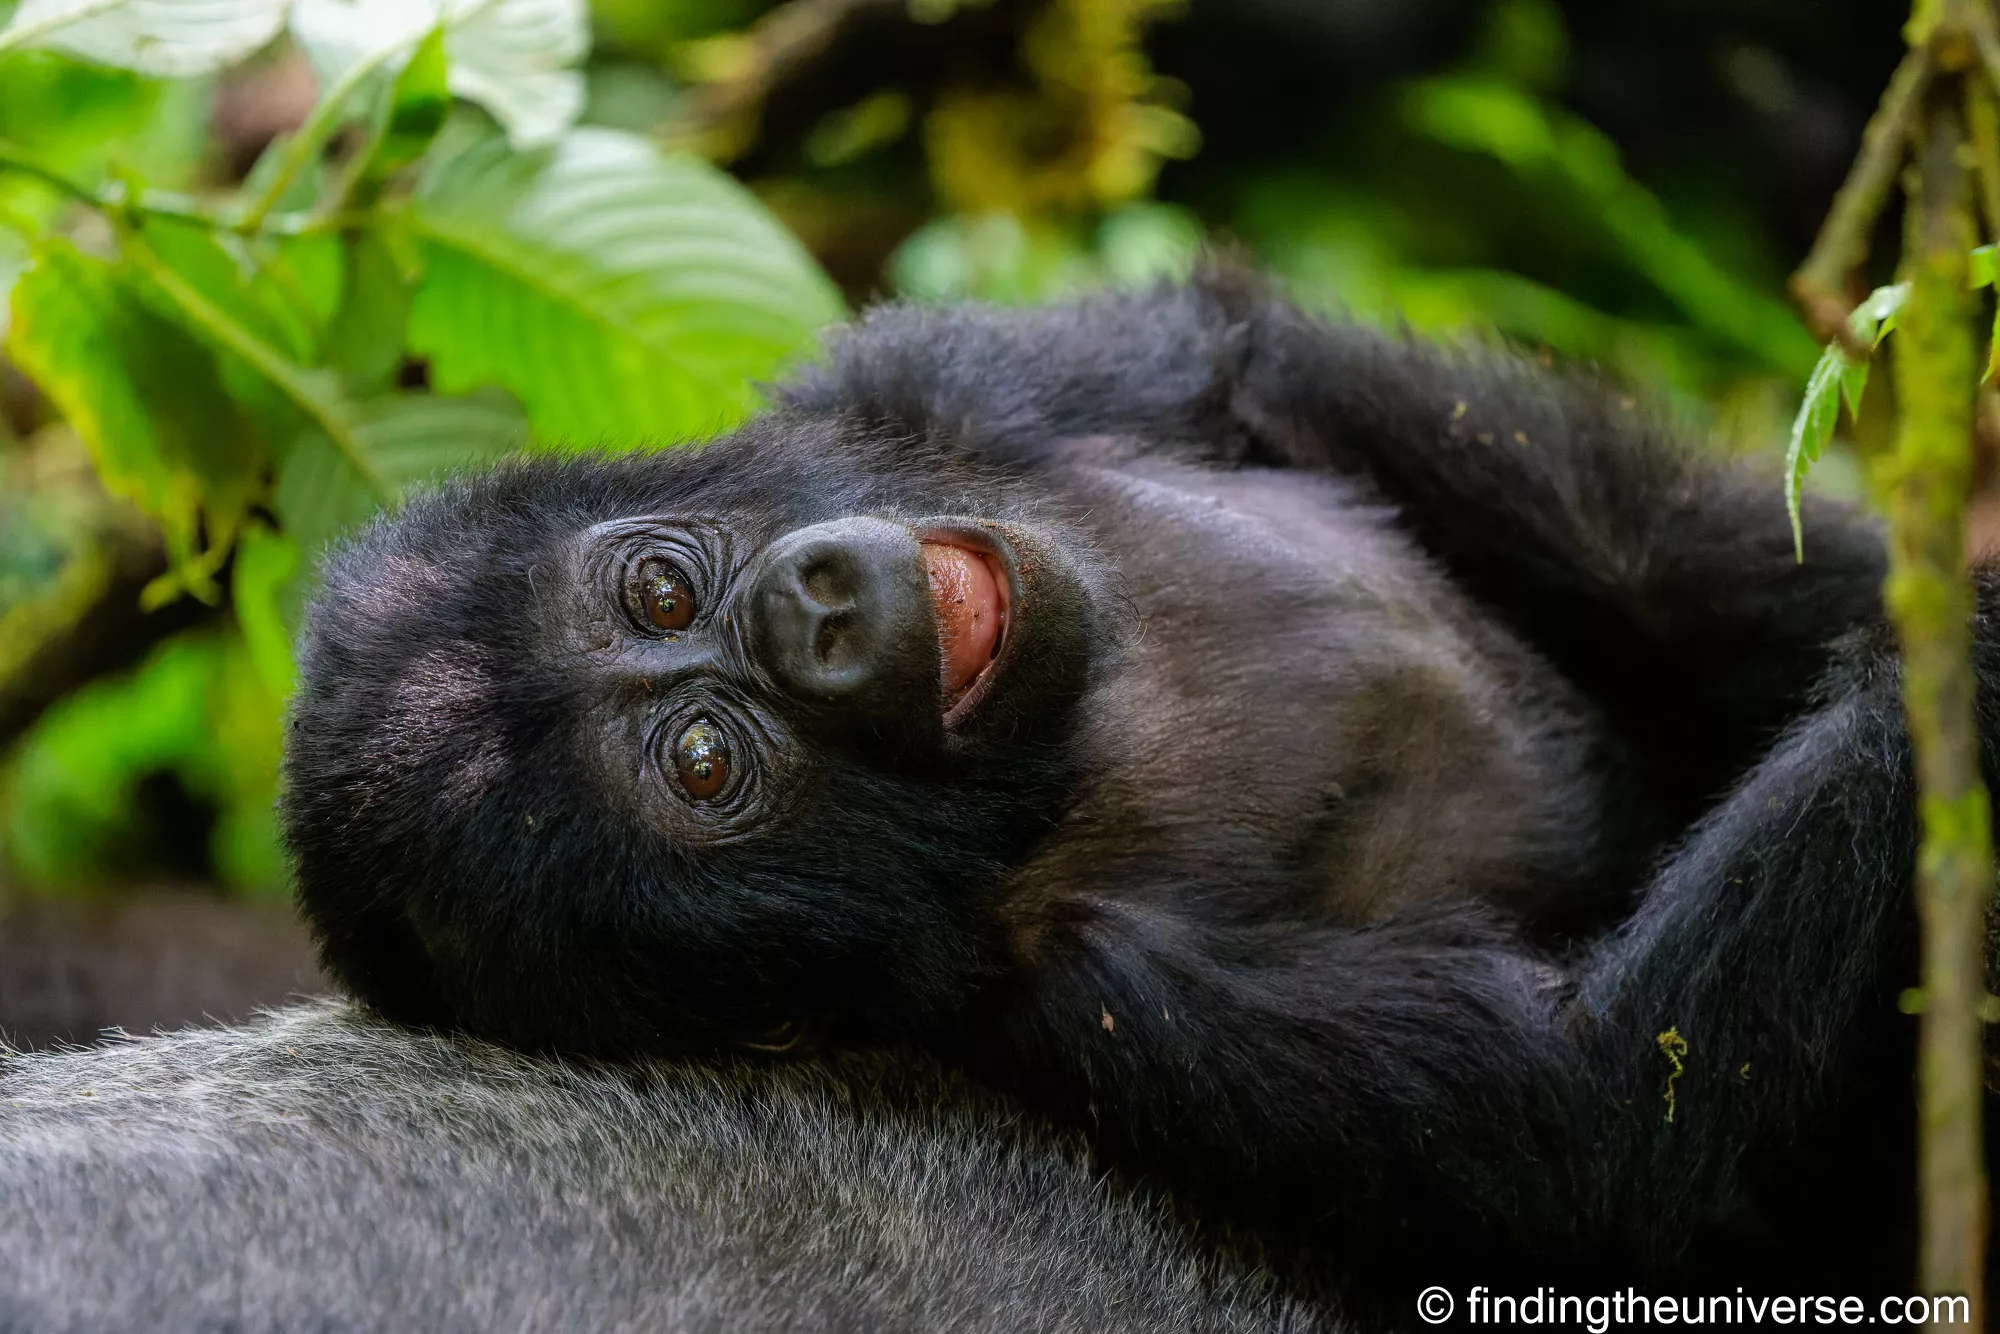
Some of the most memorable wildlife encounters we’ve had weren’t from a vehicle at all, but on foot in the forest, tracking gorillas and chimpanzees in Uganda. Photographing primates on a forest trek is a very different challenge to open-plains safari, and it’s worth preparing for separately.
The biggest issue is light. Rainforest canopy blocks a lot of it, so even in the middle of the day you’ll be shooting in deep shade. There’s no room to set up a tripod, no time to fuss with settings, and flash is generally not allowed (and would disturb the animals anyway). This means you need to be comfortable shooting at high ISO values. Most of my gorilla and chimp shots were taken at ISO 6,400 to 12,800, with the aperture wide open and the shutter speed as low as I dared, often around 1/125th to 1/250th of a second.
Because your shutter speed will be low, technique matters. Brace against a tree, tuck your elbows in, and take a burst of frames so you have the best chance of one being sharp. Continuous autofocus with eye or face detection is a huge help here, as the animals move constantly and the low light makes manual focus difficult. Accept that some frames will be soft, and that a slightly noisy shot of a silverback meeting your eye is worth far more than a technically perfect empty frame.
It’s also worth remembering the enjoy-yourself rule here more than anywhere. Your permit gives you a strictly limited amount of time with the animals, so don’t spend all of it behind the viewfinder.
We have detailed guides to gorilla trekking in Uganda and chimpanzee trekking in Uganda, both of which cover the experience in much more detail.
What We’ve Learned About Safari Photography
Over many game drives we’ve made just about every mistake going, so here are the ones worth saving you from.
The first is not using enough shutter speed. Almost every soft wildlife shot I see, and plenty of my own early ones, comes down to a shutter speed that was too slow for a moving animal or a heavy lens. When in doubt, push it higher.
The second is spending too long looking at the back of the camera. It’s tempting to check every frame, but the good moment is usually still unfolding in front of you while you’re staring at the screen. Take the shot, glance once, then keep watching.
The third is leaving too much empty space around a distant animal and planning to crop it in later. A heavy crop throws away detail and makes noise worse, so it’s always better to get the reach right in camera if you can.
The last one is simply rushing. Some of our best sightings came from the animal we almost drove straight past, and then gave ten quiet minutes to instead. A game drive rewards patience far more than mileage.
After the Drive: Editing and Enjoying the Experience
The photography doesn’t end when you get back to the lodge. What you do with your RAW files afterwards, and how you balance shooting with simply being present, both matter more than people expect.
Learn to Edit Your Photos
Photography involves a number of skills. The first two are in the field when you’re getting the shot, and require you to know how to compose a great photo and how to use your camera.
The third skill is photo editing. Photo editing is where you can get the most from the images you have captured. This doesn’t have to take a long time, and even minor edits can make a big difference to an image.
Judicious cropping, adjustment of shadows and highlights, and tweaks to saturation can all add up to really improve an image. On safari specifically, noise reduction is a skill worth learning, as so many of your best shots will be taken at high ISO values in low light. Modern noise reduction tools, especially the AI-based ones, can rescue a shot you might otherwise have written off.
Of course, you can go a lot further with photo editing software. But as a starting point, loading up one of our favourite photo editors and learning how to use it can really help you get the most from your shots. For dealing with grainy high-ISO wildlife shots, our guide to the best noise reduction software is also worth a read.
To show just how much difference editing can make, here’s a before and after of that same leopard shot from the very start of this guide, the frame I took on the R5 at ISO 10,000 in the pre-dawn light.
The first image is straight out of the camera. At ISO 10,000 there’s a fair bit of noise, and the pre-dawn light left everything looking washed out and flat.
For the edit, I first ran the file through DxO PureRAW, which does an excellent job of cleaning up high-ISO noise while keeping detail. I then tweaked the colours to counter that washed-out light, warming things up and bringing the leopard back to a more realistic tone so he stands out from the background a little more. It’s not a dramatic, heavy-handed edit, just a few targeted adjustments, but you can see how much of a difference they make to the final result.
Enjoy Yourself!
This might seem a bit counterintuitive in a guide to getting great photos on safari, but it’s important to remember. When on safari, it can be easy to become caught up in the need to capture every moment with our cameras, and not to miss a shot.
Whilst of course I want you to get those amazing shots, don’t forget that you came on safari also to witness wildlife in its natural habitat. So don’t forget to step back from the camera every now and again and just take it all in. A safari is an incredible experience, and you definitely want to try to enjoy it rather than being stressed over getting every shot on your memory card.
On our recent trip, Jess generally only took photos when animals came close. Otherwise, she was content just watching them, either with a pair of binoculars (I definitely recommend packing a good pair) or with her naked eyes. She said she got much more enjoyment from just watching them than when she was trying hard to get a good photo, as she had on prior trips.
We highly recommend just sitting back and letting some moments simply happen without reaching for the camera. I find you can often learn a lot more about animals if you just sit and watch them sometimes. Not every moment needs to be photographed!
Safari Photography FAQ
Here are answers to some of the questions I’m most often asked about photographing wildlife on safari.
What are the best camera settings for safari photography?
For most wildlife, start with continuous autofocus (called AI Servo on Canon or AF-C on Sony and Nikon), your drive mode set to high-speed burst, and Auto ISO with a minimum shutter speed of 1/1600th of a second.
That combination handles the majority of situations, freezing movement and keeping a moving animal in focus while letting the camera raise the ISO as needed. For stationary animals in good light you can drop the shutter speed and ISO, and for low light at dawn and dusk you’ll need to accept much higher ISO values. The cheat-sheet table earlier in this guide breaks down my starting settings for each common scenario.
What focal length lens do I need for safari?
For wildlife, you’ll want at least 400mm of reach, and more is better. A 100-400mm zoom is the sweet spot for most people, giving you flexibility for everything from a nearby elephant to a distant big cat.
If you’re shooting smaller subjects like birds, or animals that keep their distance like rhinos, you’ll appreciate every millimetre of extra reach. A wider lens is useful too, for landscapes and for animals that come close to the vehicle, but if you can only bring one lens for safari, make it a long telephoto zoom.
Do I need a tripod on safari?
No, and I’d leave it at home. A photography bean bag is far more useful, because you’ll almost always be shooting from a vehicle where there’s no room to set up a tripod.
A bean bag rests over the window edge or on the pop-up roof and gives you a stable platform to steady a heavy lens on. It’s light, packs flat, and you can fill it with dried beans at your destination. For the rare walking or boat safari, bracing against a solid surface does the job.
Can I get good safari photos with a smartphone?
You can get nice memories and wide scene-setting shots, but a smartphone will struggle with the distant wildlife that makes up most of a safari. The short focal length means animals will appear tiny in the frame unless they come very close.
The latest phones with periscope zoom lenses do better than older models, and they’re great for landscapes, vehicles, and animals right beside you. But if wildlife photography is a priority for your trip, even an inexpensive bridge camera will get you dramatically closer to the action.
When is the best light for safari photography?
The couple of hours after sunrise and the couple of hours before sunset. This is when the light is soft and warm, and, just as importantly, when the animals are most active.
The middle of the day brings harsh overhead light, heat haze that softens distant shots, and dust in the air, and most animals rest in the shade during the hottest hours. Starting your game drives as early as the park allows gives you the best light and the best sightings in one go.
Further Reading
That’s it for my guide to getting better photos on safari! If you found this useful, you might enjoy some of my other photography content. Here are some articles to get you started.
- We have a guide to the best safari camera, to help you choose the right gear for you and your budget. We also have a guide to photography bean bags for safari you might consider checking out.
- We have detailed overviews of gorilla trekking in Uganda as well as chimpanzee trekking in Uganda, both of which are an incredible experience.
- We have a detailed guide to what to pack for safari, to help ensure you bring the right gear for your trip. Jess and I also travel with the pocket guides to the Mammals of East Africa and Birds of East Africa for identifying what we spot.
- I have a guide to my favourite photo editing applications, as well as the best alternatives to Lightroom.
- Wildlife photography can often result in noisy images. See my guide to the best noise reduction software for some ideas on how to get the best out of your photos even when they might be a bit noisy.
- We have a guide to how to use a compact camera, how to use a DSLR camera, and how to use a mirrorless camera. We also have a guide to how a DSLR works.
- Knowing how to compose a great photo is a key photography skill. See our guide to composition in photography for lots of tips on this subject.
- We have a guide to what depth of field is and when you would want to use it.
- We are big fans of getting the most out of your digital photo files, and to do that you’ll need to shoot in RAW. See our guide to RAW in photography to understand what RAW is, and why you should switch to it as soon as you can if your camera supports it.
- You’re going to need something to run your photo editing software on. See our guide to the best laptops for photo editing for some tips on what to look for.
- If you’re looking for more advice on specific tips for different scenarios, we also have you covered. See our guides to Northern Lights photography, long exposure photography, fireworks photography, tips for taking photos of stars, and cold weather photography.
- Colour accuracy is important for photography. See our guide to monitor calibration to ensure your screen is set up correctly.
- If you’re looking for a great gift for a photography loving friend or family member (or yourself!), take a look at our photography gift guide.
- If you’re in the market for a new camera, we have a detailed guide to the best travel cameras, as well as specific guides for the best cameras for hiking and backpacking, the best compact camera, best bridge camera, best mirrorless camera and best DSLR camera. We also have a guide to the best camera lenses.
- If you want a camera or lens but the prices are a bit high, see our guide to where to buy used cameras and camera gear for some budget saving options.
- We have a guide to why you need a tripod, a guide to choosing a travel tripod, and a round-up of our favourite travel tripods.
Looking to Improve Your Photography?
If you found this post helpful, and you want to improve your photography overall, you might want to check out my online travel photography course.
Since launching the course in 2016, I’ve already helped over 2,000 students learn how to take better photos. The course covers pretty much everything you need to know, from the basics of how a camera works, through to composition, light, and photo editing.
It also covers more advanced topics, including astrophotography, long exposure photography, flash photography, and HDR photography.
You get feedback from me as you progress, access to webinars, interviews, and videos, as well as exclusive membership of a Facebook group where you can get feedback on your work and take part in regular challenges.
It’s available for an amazing one-off price for lifetime access, and I think you should check it out. You can do so by clicking here.
And that’s it! I’d love to hear your thoughts on wildlife photography on safari, and I’m happy to answer any questions you have. Just pop them in the comments below and I’ll get back to you as soon as I can.
Towab Muhammad Yusuf says
Zebras is looking awesome, so natural looking
Laurence Norah says
Thanks Towab!
D. Hernandez says
Hello Laurence,
Thanks for these wonderful photography tips and advice! I am not much of a photographer but found these tips very useful and will be keeping this page bookmarked to read again before my safari. My wife and I have a 2-week trip planned to South Africa in in the fall and about a week of that will be spent on safari.
I was given a Canon EOS Rebel T7 DSLR camera (used but barely used) last year but without any lenses. So my question for you would be what lens would you recommend I invest in if I was to choose to take just one for this trip? I would also of course want to use it around home and for taking photos of family events and future trips, but the main focus for now is getting some decent wildlife photos on our safari in South Africa. Would like to purchase it soon so can start practicing (as you recommend) now!
Thanks for all your time & help!
D
Laurence Norah says
Hi D,
I’m glad you found the post helpful and I am sure you will have an amazing trip! So if you are looking at just one lens then you will want a lens that can go from quite wide to quite zoomed in. A lens like this is known as a walk around lens. I would probably recommend either the Tamron 18-400 f/3.5-6.3 or the Tamron 16-300 f/3.5-6.3. These would both give you the versatility you would want in terms of range, from wide to zoomed in. The 16-300 gives you a slightly lighter lens that can take slightly wider angle shots, whilst the 18-400 is a bit heavier but you get more reach.
It is worth noting that of course if you zoom in at 100% and peer at the images produced by these lenses they won’t compare to a high-end lens costing thousands of dollars. However I think that for standard size prints and general use they are a good option at a reasonable price point.
Let me know if you need any further input, I’m happy to help. Otherwise, have a fantastic trip!
Laurence